 Skip to content
That moment you discover standing water on your hardwood floors is a gut-wrenching one. Whether it’s a burst pipe flooding your kitchen in a classic Littleton bungalow or a dishwasher that gave up the ghost in your Highlands Ranch home, your first moves are absolutely critical. For any homeowner facing this stressful situation, knowing the steps for professional water damage floor repair in Littleton is the key to saving your investment. This guide, featuring insights from our team at J.R. Hardwood, will walk you through the process, including the benefits of our advanced UV-cure system for hardwood floor refinishing.
Your First Steps For Water Damage Floor Repair in Littleton
Panic is a natural reaction, but you have to act fast. The initial 24-48 hours are everything when it comes to saving your floors. Swift, smart action can be the difference between a successful restoration and a full-blown, wallet-draining replacement.
This isn’t about just throwing down a few towels and hoping for the best. A proper emergency response sets the stage for a successful water damage floor repair, and it all starts with focusing on safety, documentation, and getting that water gone—fast.
Prioritize Safety Above All
Before you even think about wading in, stop and assess the scene for electrical hazards. Water and electricity are a dangerous mix, and submerged outlets or power strips can turn your floor into a serious threat.
- Kill the Power: If water is anywhere near outlets or appliances, head straight for your breaker box. Shut off the power to that entire area of the house. Don’t even think about touching an electrical device while you’re standing in water.
- Find the Source: Next, you need to stop the flow. If it’s an appliance, there’s likely a specific shutoff valve nearby. For a burst pipe, you may need to shut off your home’s main water supply. Learning about identifying hidden leaks in your home can be a lifesaver in these moments.
Document Everything for Insurance
Once the area is safe, pull out your smartphone. Before you move a single piece of furniture or mop up one drop of water, start taking photos and videos of everything.
Pro Tip: Get wide shots showing the full scope of the mess, then zoom in for close-ups of the damage to the floors, baseboards, and any soaked furniture. This visual proof is pure gold when you file your insurance claim.
Don’t underestimate how common—and expensive—this problem is. Water damage incidents happen to roughly 14,000 people in the U.S. every single day, with the average insurance claim payout hovering around $11,605. With about 1 in 60 insured homes filing a water damage claim each year, being ready with solid proof is non-negotiable.
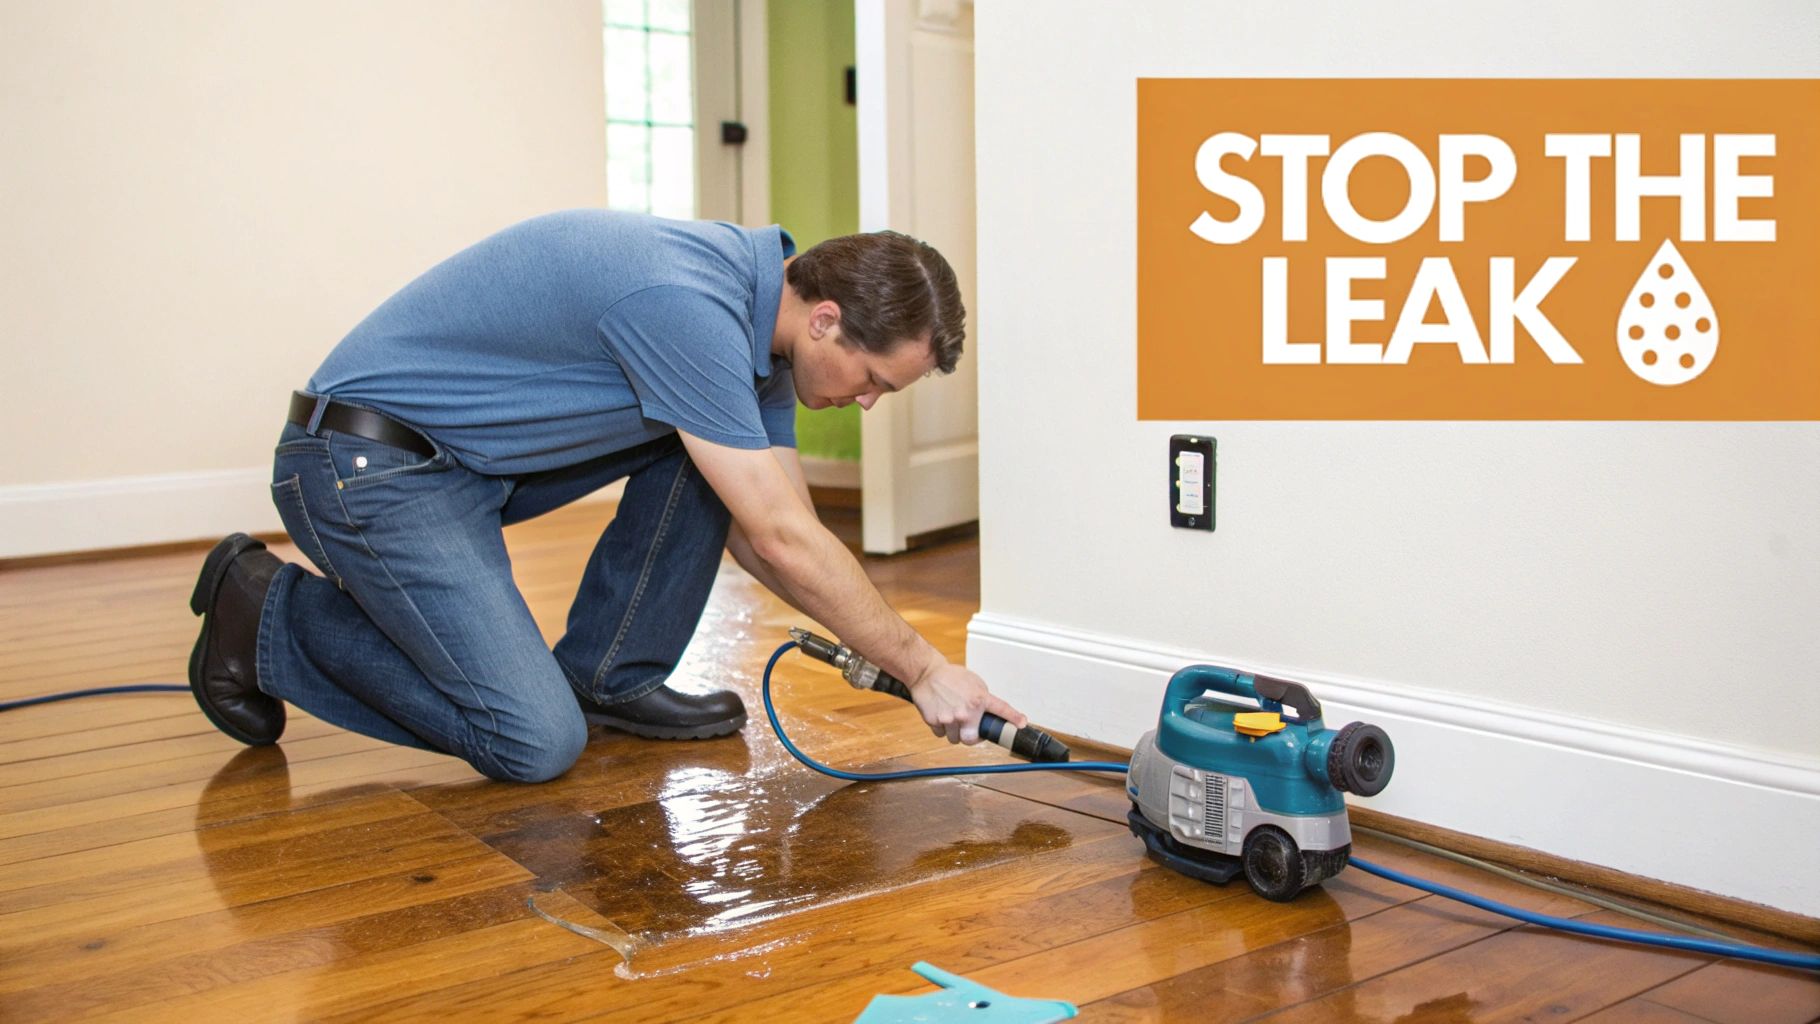
Begin Removing Standing Water
With the area secured and documented, it’s go-time. Your main goal now is to get the bulk of that water off the floorboards before it has a chance to seep deeper into the wood, the subfloor, and behind your walls.
- Break out the Wet-Dry Vac: This is your MVP. A shop-style wet-dry vacuum is the fastest, most effective way to suck up large amounts of standing water.
- Mop and Towel Backup: Once the vacuum has done the heavy lifting, switch to mops and super-absorbent towels to get the rest. Keep a separate bucket for wringing them out so you’re not just pushing dirty water around.
- Clear the Area: Get all furniture, area rugs, and other belongings out of the room. A saturated rug will trap moisture against the wood, fast-tracking the damage and creating a perfect breeding ground for mildew.
Even after all the visible water is gone, your wood and subfloor are still soaked. This is where the real danger lies. Hidden moisture leads to cupping, warping, and the potential for nasty mold growth. You can see just how serious it can get by reading our guide on what to do when you find black mold on your hardwood floor.
At this point, calling in a professional for a water damage floor repair assessment isn’t just a good idea—it’s essential to make sure the structure is dried out completely and restored the right way.
How To Assess The Extent Of Hardwood Floor Water Damage in Littleton
Alright, so you’ve stopped the leak and mopped up the standing water. That’s a huge first step, but the real investigation starts now. Figuring out just how bad the damage is—and I mean really figuring it out—is what sets the stage for a successful repair. This isn’t just about what you can see on the surface; it’s about understanding what’s happening deep inside the wood.
For homeowners from Littleton to Highlands Ranch, getting a professional assessment is always the smartest move for a crystal-clear picture of your Littleton water damage floor repair needs. But knowing what to look for yourself helps you understand what the pros are seeing and why they’re making certain recommendations for hardwood floor refinishing.
Look For The Telltale Signs Of Wood Damage
Visible water is only part of the story. The real damage shows up later, as the wood starts reacting to all that moisture it soaked up. You’ll need to get down on your hands and knees, shining a light across the floor at a low angle to spot the subtle changes.
Here’s what to look for:
- Cupping: This is the most common sign we see. When a wood plank sucks up water, it swells. Since the bottom of the plank usually gets wetter than the top, the edges curl upward. This creates a concave or “cupped” shape you can see and feel.
- Crowning: This is the exact opposite of cupping. It happens when the top of the board holds more moisture than the bottom, causing the center of the plank to bulge up. We often see crowning when a floor was sanded and refinished while it was still wet underneath—a classic DIY mistake.
- Buckling: This is the most dramatic and severe reaction. Buckling is when the floorboards actually lift completely off the subfloor, creating a big wave or hump. It’s a dead giveaway that the wood has absorbed so much water and expanded so aggressively that it has nowhere else to go but up.
These signs tell a detailed story about the water’s journey through your floor. Understanding what causes these specific shapes is the first step in a proper diagnosis. If you’re curious about other common culprits, you can learn more about what damages hardwood floors.
Not All Water Is Created Equal
Here’s something most homeowners don’t realize: the source of the water matters. A lot. In the restoration world, we classify water into different categories based on contamination levels, which dictates the entire repair process and highlights potential health risks.
Restoration pros use a three-category system. Category 1 is “clean water” from a broken supply line. But Categories 2 and 3 involve “grey” or “black” water with serious contaminants, which almost always means the affected boards have to be replaced due to health hazards.
A leak from a clean pipe under the sink (Category 1) is one thing. A backup from a dishwasher drain (Category 2) or, even worse, a sewage overflow (Category 3), is a whole different ballgame. The higher the category number, the more aggressive we have to be with removal and sanitation to make your home safe again.
Surface Annoyance vs. Deep-Down Saturation
The last piece of the puzzle is figuring out how deep that water really went. This is the critical distinction that determines whether you’re looking at a relatively simple repair or a full-blown replacement job.
Surface Damage:
If you caught a small, clean-water spill right away, the damage might just be in the top layer of finish. You might notice a faint white stain or a dull spot where the sheen is gone. In these lucky cases, a professional screen and recoat is often all it takes to restore the floor’s protective layer and make it look great again.
Deep Saturation:
This is what happens when water sits for hours or seeps down between the planks. It soaks into the core of the wood and, just as importantly, into the subfloor below. This is where you see serious cupping and buckling. A simple recoat won’t touch this kind of problem. The fix here involves intensive professional drying, followed by a full sand and refinish at a minimum. More often than not, it also means replacing the most damaged boards to prevent bigger problems down the road.
Trying to refinish a floor without a proper assessment first is a recipe for disaster—you’ll just end up trapping moisture, which is an open invitation for mold and rot.
The Professional Drying Process Explained For Littleton Homes
Once the standing water is gone, it’s easy to breathe a sigh of relief and think the worst is over. A lot of homeowners figure a few fans and an open window will do the trick from here. Honestly, this is one of the biggest—and most costly—mistakes we see in water damage floor repair.
Letting your floors just “air dry” is a recipe for disaster. It traps moisture deep inside the wood and, more importantly, the subfloor. This hidden moisture leads to permanent warping, rot, and the kind of mold growth you definitely don’t want in your home.
Professional hardwood floor drying isn’t just about pointing fans at the floor; it’s a science. It’s a controlled, systematic process we use to pull moisture out from every single layer of your flooring system, not just what you can see on the surface. Skipping this step is like putting a band-aid on a broken arm—it ignores the real problem and guarantees you’ll be dealing with much bigger issues later on.
This infographic shows exactly what happens when floors aren’t dried correctly. It starts with surface issues but quickly gets worse.
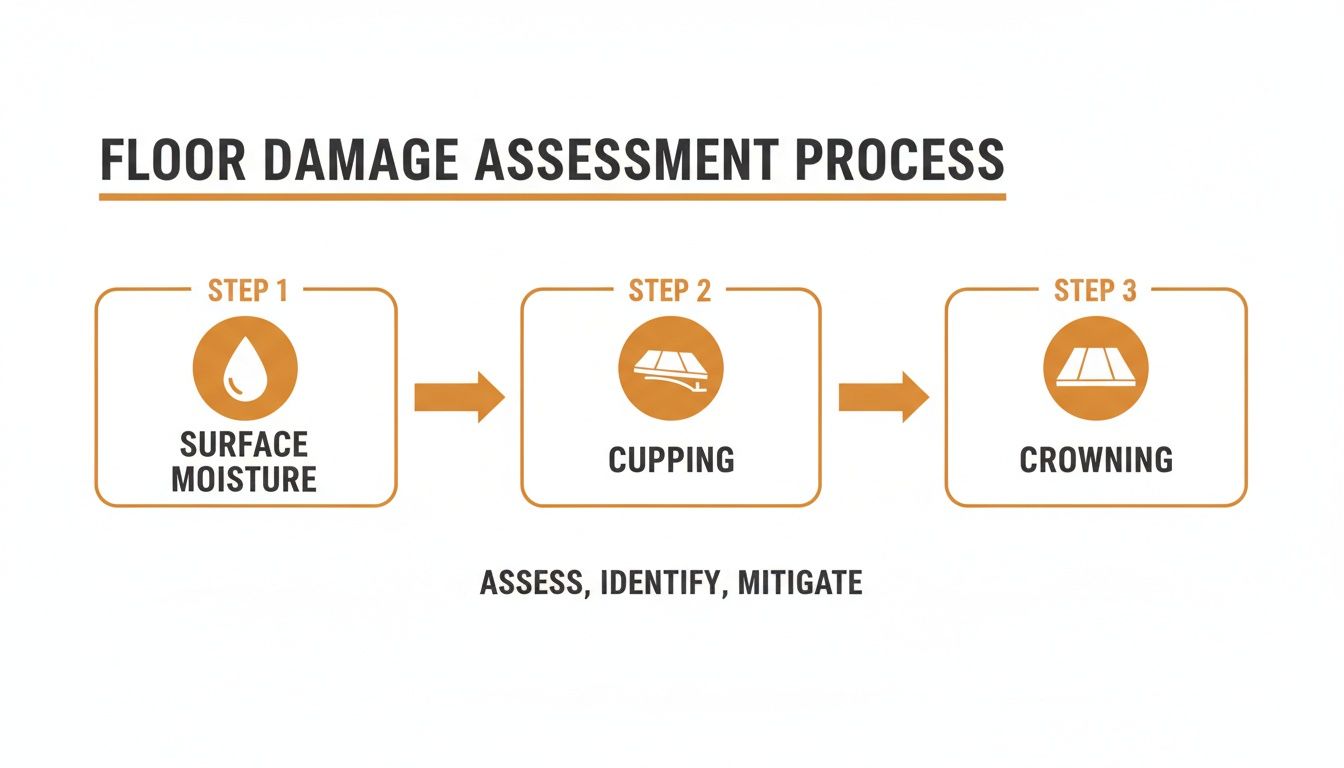
As you can see, what looks like a simple surface problem quickly turns into cupping and crowning. Those are tell-tale signs that moisture has soaked deep into the core of the wood.
The Tools Of The Trade
To get that deep-down moisture out, we bring in an arsenal of specialized equipment that you just can’t replicate with stuff from the hardware store. These tools work in harmony to create a powerful drying vortex, actively pulling moisture from materials that might even feel dry to the touch.
- High-Velocity Air Movers: These are not your average box fans. We place these industrial-grade turbines strategically to create a powerful, circulating airflow right across the floor’s surface. This constant movement breaks up the humid, saturated air sitting just above the wood, which dramatically speeds up evaporation.
- Low-Grain Refrigerant (LGR) Dehumidifiers: This is the real MVP of the operation. As the air movers lift moisture from the floor, these powerful dehumidifiers aggressively rip that water vapor out of the air. They’re light-years beyond a standard home unit, capable of removing gallons of water from the atmosphere every day and dropping the humidity to a level that forces moisture to escape from the wood.
- Injectidry Floor Drying Mat Systems: When floors are heavily saturated, we bring out the heavy artillery. These mat systems are laid directly on the hardwood and hooked up to a high-pressure vacuum. This creates a negative pressure zone that literally sucks water vapor up through the seams of the planks and even from the subfloor below.
Why DIY Drying Fails
We see it all the time: a homeowner rents a couple of fans and a dehumidifier, thinking they’ve got it covered. Unfortunately, that approach often does more harm than good. Without professional moisture meters to track what’s happening inside the wood, you’re just guessing.
Key Takeaway: Drying too fast is just as bad as drying too slow. Uncontrolled drying can cause the wood to shrink and crack, a problem we call “secondary damage.” It’s a balancing act—we have to remove moisture quickly enough to prevent mold, but slowly and evenly enough to keep the wood itself from being destroyed in the process.
We constantly monitor the moisture content in both the wood and the air, adjusting our equipment to ensure a controlled, complete dry-down. This scientific approach is the only way to guarantee your Littleton-area home is truly dry, structurally sound, and safe from long-term damage. If you want to dive deeper into the science, you can learn more in this in-depth guide to floor restoration.
Only when we can confirm that the wood, subfloor, and surrounding materials are back to their normal moisture levels can we even think about starting repairs. Rushing this critical step will undermine any repair work that follows, wasting both your time and your money.
Refinish or Replace? Your Littleton Water Damage Floor Repair Path
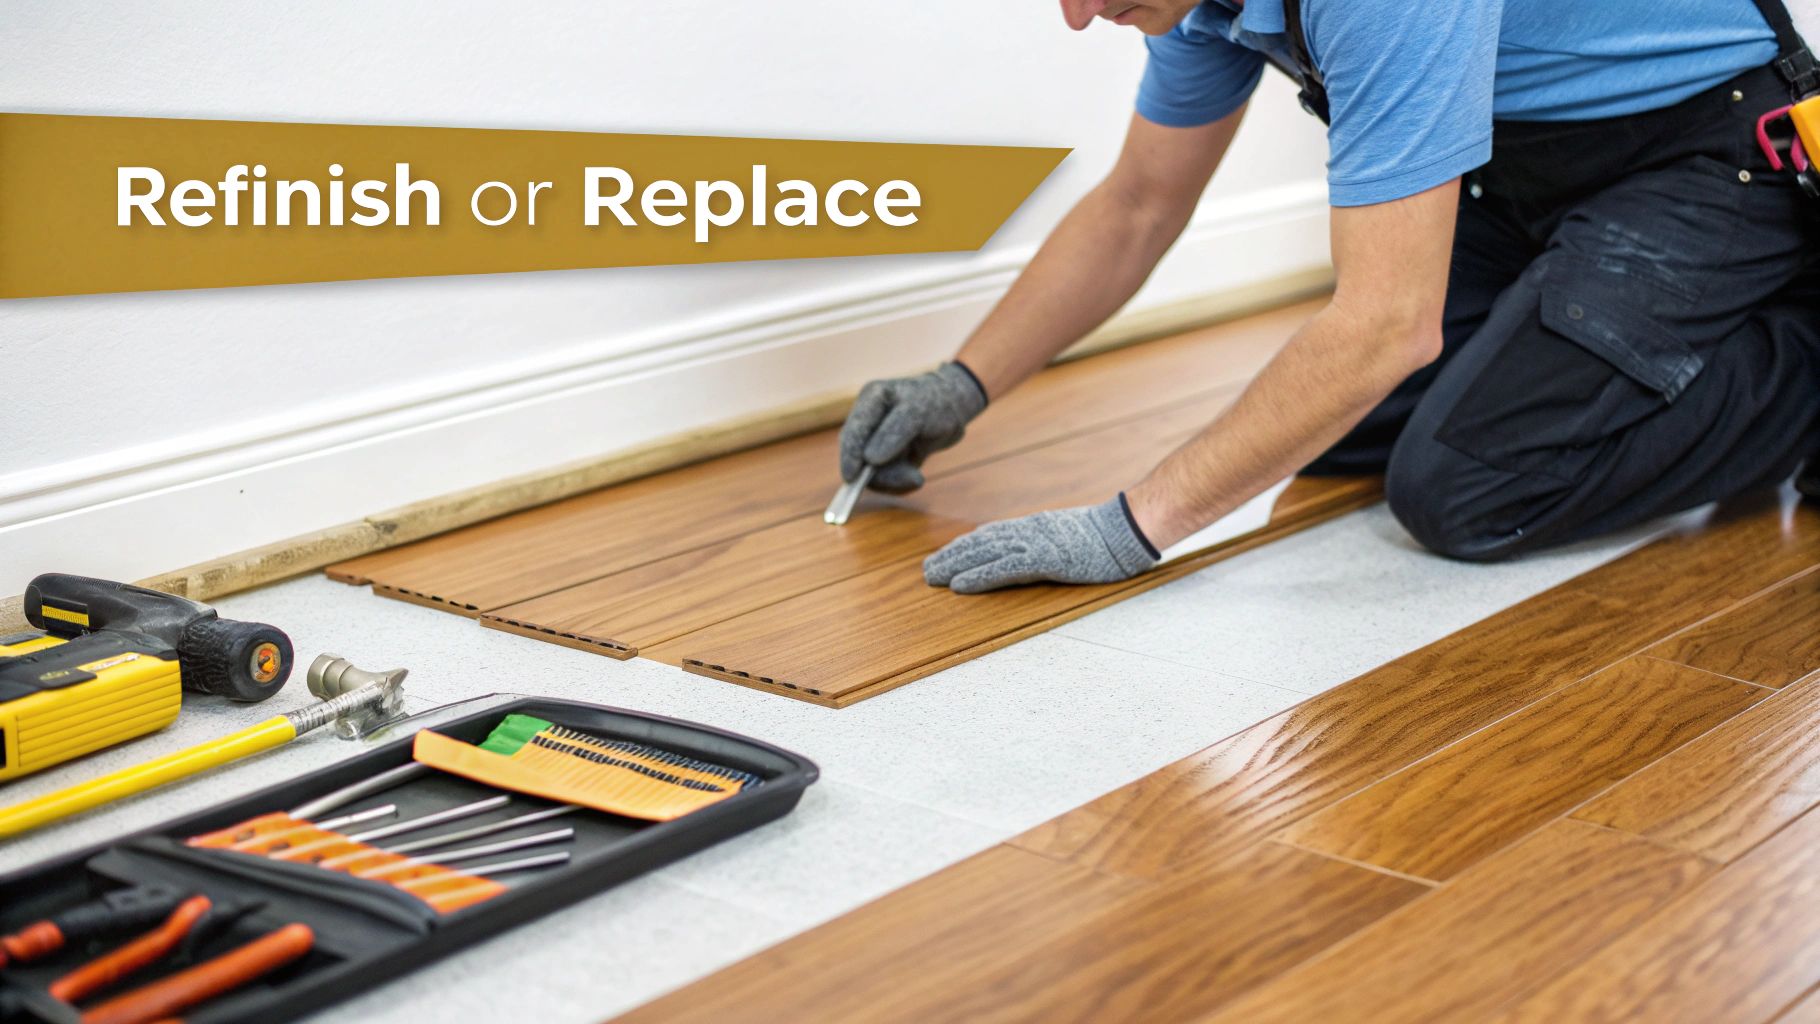
Alright, the drying equipment is gone, and a moisture meter has given your floors the all-clear. Now comes the big decision in your water damage floor repair journey: Can we save what’s there with a refinish, or do some boards need to be replaced entirely? This choice will determine the path for your Littleton hardwood floor refinishing project.
Honestly, the answer depends entirely on how bad the damage is. For lighter issues, refinishing can work miracles. But when the damage runs deep, replacing the affected boards is the only move that guarantees the long-term health and beauty of your floor.
When Refinishing Is the Right Call
If you caught the leak quickly and the damage is mostly cosmetic—think surface stains, light cupping, or minor scratches—a full sand and refinish is often the perfect fix. This isn’t just about covering things up; it’s about erasing the damage completely.
Our crew uses a dust-free sanding system that takes off the entire top layer of compromised wood and old finish. This is the crucial first step. It gets rid of stains and levels out the subtle warping that water can cause, creating a perfectly clean slate.
Once we’re down to the bare wood, it’s time for the new finish. This is where modern tech really shines. Our Diamond Traffic Plus UV-Cure system, for instance, isn’t your grandpa’s polyurethane. It’s an instant shield. While old-school finishes take days to cure, our UV-cure system hardens the finish immediately, giving you incredible durability from the moment we pack up our tools.
- Best For: Light water stains, minor cupping, and surface-level discoloration.
- Process: Dustless sanding to strip the damaged layer, then applying a tough, protective finish.
- Advantage: We restore the entire floor to a uniform, like-new look, and you can walk on it the same day with our UV-Cure system.
The Art of Replacing and Lacing-In New Boards
Sometimes, sanding just won’t cut it. If planks are seriously warped, buckled, cracked, or were soaked in contaminated water, they have to come out. This isn’t a simple patch job, though. It’s a meticulous craft we call “lacing in.”
Instead of just cutting out a neat square and dropping in a new piece, we carefully remove the damaged boards by staggering the cuts. Then, we weave—or “lace”—new boards into the existing floor. This technique is key to avoiding ugly, obvious straight lines and making the repair blend in seamlessly.
We had a project in a Littleton home where a slow fridge leak had badly warped a patch of their red oak floor. We sourced new red oak with a matching grain pattern, laced it into the surrounding floor, then sanded and refinished the whole room. You honestly couldn’t tell the old from the new. The result was flawless.
Trying to figure out which path to take can be tricky, and it’s natural to wonder what you can handle yourself. For a deeper dive, check out our guide on DIY vs. professional hardwood floor refinishing.
Expert Insight: The secret to a perfect board replacement is the match. We don’t just find the same wood species and stain. We obsess over the details—grain pattern, plank width, even the wood’s age—to make sure the new boards are indistinguishable from the originals.
To help you visualize the choice, here’s a quick comparison of the two main repair options for water-damaged hardwood.
Water Damage Floor Repair Options: Refinishing vs. Replacement
| Factor | Hardwood Refinishing | Board Replacement & Integration |
|---|---|---|
| Best For | Surface-level damage: minor stains, light cupping, finish discoloration. | Structural damage: deep warping, buckling, cracks, contaminated wood. |
| Process | The entire floor is sanded down to bare wood and a new finish is applied. | Damaged boards are surgically removed and new, matching boards are laced in. The whole area is then sanded and finished for a seamless blend. |
| Outcome | A uniform, brand-new look across the entire floor. | A structurally sound floor where the repair is virtually invisible. |
| Cost | Generally more cost-effective for widespread, minor damage. | Higher initial cost due to the detailed labor and materials, but necessary for severe damage. |
Ultimately, both paths lead to a beautiful, restored floor. The right one for you simply depends on what the water left behind.
Making a Smart Choice for the Future
Homeowners are more aware than ever of water damage risks, and it’s changing the flooring industry. While everyone loves classic hardwood, materials like engineered wood and luxury vinyl are becoming popular for basements and kitchens because they stand up to moisture so much better. You can see the trend in market analysis like this one, which shows consumers are actively seeking water-resistant options.
When you’re replacing boards, it’s a good moment to ask if a different material might be a smarter long-term investment for that specific spot. But for preserving the timeless character of your home, nothing beats a professionally done water damage floor repair on your original hardwood.
How To Prevent Future Water Damage To Your Littleton Hardwood
After pouring your time, money, and sanity into a professional water damage floor repair, the last thing you want is a sequel. Protecting that beautiful, restored floor now becomes priority number one. The good news? With a few smart habits and proactive choices, you can build a solid defense against future water woes in your Littleton home.
This isn’t about living in fear of every spilled glass of water; it’s about being prepared. A simple, consistent maintenance routine can catch small problems before they balloon into full-blown disasters, safeguarding the beauty and integrity of your hardwood for years to come.
It’s a smart move, especially when you consider how much homeowners are investing in their floors. The flooring market is projected to skyrocket from USD 463.13 billion to a whopping USD 646.7 billion by 2034. That’s a massive investment worth protecting. You can read more about it in this detailed industry forecast.
Create A Proactive Maintenance Plan
Prevention really just boils down to paying attention. By keeping an eye on your home’s environment and the usual high-risk spots, you stay ahead of the game.
- Keep Humidity Stable: Colorado’s climate is famously dry, but that doesn’t stop indoor humidity from swinging wildly. Grab a simple hygrometer and aim to keep your home’s humidity between 35% and 55%. This sweet spot prevents the wood from shrinking, cracking, or becoming extra thirsty—which would make any spill much worse.
- Use Protective Mats the Right Way: Place high-quality, breathable mats at every entryway to catch snow, slush, and rain before it gets tracked inside. Inside the house, put waterproof trays under pet bowls and mats in front of the kitchen sink and dishwasher. Those are the sneaky culprits behind most small, persistent leaks.
Upgrade Your Home’s Defenses
Beyond your daily routine, a few small upgrades can be your secret weapon, stopping water damage before it even has a chance to start. Think of these as your 24/7 watchdogs.
Expert Tip: Never, ever use rubber-backed or other non-breathable mats directly on your hardwood. They’re notorious for trapping moisture, which can ruin the finish and lead to ugly discoloration. Always pick mats that let your floors breathe.
One of the smartest and cheapest investments you can make is a set of leak detectors. These little battery-powered sensors can be tucked away behind toilets, under sinks, and next to your water heater or washing machine. The second they sense moisture, they scream—giving you that critical head start to shut off the water and stop a small leak from turning into a major flood.
The Power Of A Water-Resistant Finish
Your final, and maybe most important, line of defense is the finish on your floors. While traditional polyurethane offers decent protection, modern technology gives us a much tougher barrier against moisture.
When we handle a water damage floor repair, we often recommend upgrading the finish. Our UV-cure systems, for example, are a total game-changer. Unlike old-school finishes that have to soak in and take days to harden, our UV-cure system technology creates an instant, non-porous shield right on top of the wood.
This incredibly tough, cross-linked layer gives you a much bigger window of time to wipe up spills before moisture even thinks about penetrating the wood grain. It’s the ultimate way to protect your investment and ensure your beautifully restored floors can handle the reality of a busy home. For more strategies, check out our complete guide on how to protect hardwood floors.
Answering Your Questions About Littleton Water Damage Floor Repair
When your floor is underwater, your head is probably swimming with questions. It’s a stressful situation, and we get calls from homeowners all over the Littleton area who are worried, confused, and just need some straight answers. Here are a few of the most common questions we hear about water damage floor repair and the practical advice you need for your hardwood floor refinishing journey.
How Long Does The Entire Water Damage Repair Process Take?
The honest answer? It really depends on how bad the damage is. The first phase—professional drying—is the most critical and usually takes between 3 to 5 days. This part is non-negotiable. We have to be 100% certain that every bit of moisture is gone from the wood and, just as importantly, the subfloor before we can even think about repairs.
Once we get the all-clear, the actual repair work can take another 2 to 5 days. This might mean sanding and refinishing the whole floor or meticulously replacing just the damaged boards.
But here’s where things get a lot better for you. We use an advanced UV-Cure system finish that cures in seconds, not days. This means there’s no waiting around. You can walk on your beautifully restored floors and move your furniture back into place the very same day we finish the job. It’s a game-changer for reducing the disruption to your life.
Will My Homeowners Insurance Cover This Repair?
This is almost always the first question on a homeowner’s mind, and for good reason. Before anything else, you need to know where you stand financially. For a great deep dive into what policies typically cover, this guide on Does Homeowners Insurance Cover Water Damage? is a fantastic resource.
Generally, standard policies are designed to cover sudden and accidental events, like a burst pipe or a faulty washing machine hose. What they usually don’t cover is damage from slow, long-term leaks or flooding that comes from outside your home.
Important: Your first move should be calling your insurance agent. Before you touch anything, grab your phone and take tons of photos and videos to document the damage. We’ll provide the professional assessment and detailed, itemized quote your insurance company needs to process your claim quickly and fairly.
Can I Just Dry Out A Small Water Spill Myself?
If you spill a glass of water and wipe it up within a few seconds, you’re probably fine. But for anything more—a pet accident that went unnoticed for a bit or a slow leak from a planter—getting a professional opinion is the smartest move.
Water is incredibly sneaky. It can easily seep down between the planks and soak into the subfloor, creating a hidden pocket of moisture you’ll never see. That trapped dampness is the perfect breeding ground for mold and can cause the wood to rot from underneath. Professional water damage floor repair in Littleton guarantees that every layer of your flooring system is bone-dry, protecting your home’s structure from much bigger, more expensive problems later on.
What Are The Signs Of Mold Growing Under My Floor?
That persistent, musty, or earthy smell you can’t quite pinpoint? That’s the number one red flag for hidden mold. Don’t just hope it goes away.
You might also notice a few other subtle clues:
- Dark Stains: Keep an eye out for any dark spots or discoloration on the wood that weren’t there before the water damage.
- Spongy Feeling: If an area of your floor feels soft or springy when you walk on it—even if the surface looks dry—that’s a serious warning sign.
If you suspect mold, it’s critical to hit the pause button on any repair plans. We use sensitive moisture meters to find hidden damp spots and can guide you on the proper, safe steps for mold remediation before any restoration work begins.
Homeowners in Littleton trust J.R. Hardwood Floor Refinishing & Cleaning to restore the natural beauty of their hardwood floors with our dust-free sanding system and advanced UV-curable finishes. Unlike traditional methods, our UV technology cures instantly, so you can move furniture back the same day with no lingering odor or downtime. Choose the perfect refinishing service to match your needs and home traffic. Our dust-free process ensures a clean, beautiful finish every time.
📞 Phone: 720-327-1127
🌐 Website: jrhardwoodfloorrefinishingandcleaning.com
📍 Service Area: Littleton, Highlands Ranch, Centennial, Englewood, and the surrounding Denver Metro area.
▶️ YouTube: https://www.youtube.com/channel/UCLaTAi6KxwT-g8QCKqKTQ8Q?sub_confirmation=1