 Skip to content
Before you can fix an uneven hardwood floor, you’ve got to play detective. The solution might be as simple as sanding down a high spot, or it could involve a more serious structural repair. But you can't know which path to take until you figure out what's causing the problem in the first place. For homeowners in Parker dealing with these issues, understanding the cause is the first step toward a lasting solution with professional Parker hardwood floor refinishing and our advanced UV-Cure System.
Diagnosing Your Uneven Hardwood Floors
That subtle dip you feel under your sock? The way a dropped pen always rolls to the exact same spot in the room? Your floor is trying to tell you something. An uneven hardwood floor is more than just a quirky feature; it’s a clear sign that something underneath needs a closer look.
For homeowners here in Parker, figuring out the root cause is the key to choosing the right fix. It will tell you if you're looking at a weekend DIY project or if it's time to call in a pro for Parker hardwood floor refinishing.
Your floors give you clues. Learning to read them will help you understand what’s really going on.
Common Signs of Unevenness
Most of the time, an uneven floor shows up in one of three ways: cupping, crowning, or gapping. Each one points to a different kind of stress on the wood.
- Cupping: This is when the edges of a floorboard are higher than the center, creating a U-shape. It’s almost always caused by a moisture imbalance—think more moisture under the board than on top of it.
- Crowning: The opposite of cupping. The middle of the board is puffed up, higher than the edges. This is a classic sign of a floor that was sanded while it was still cupped and holding moisture. Once the wood finally dries out, that compressed center pops back up.
- Gapping: While some small, seasonal gaps are perfectly normal, large or permanent gaps can signal a bigger issue. It could be anything from extreme dryness to a shoddy installation or even a shifting subfloor. We cover this in-depth in our article on what to do with hardwood floor gaps between boards.
Simple Diagnostic Tools and Techniques
You don’t need a truck full of tools to get started. A couple of simple items from the garage can tell you a whole lot.
Your best friend for this job is a long, perfectly straight edge. A 4-foot or 6-foot carpenter's level is ideal, but a metal straightedge or even a straight piece of 2×4 lumber will work in a pinch.
Lay your straightedge across different spots on the floor. See any daylight peeking through underneath? That’s a low spot, or a dip. Does the straightedge rock back and forth like a seesaw? You’ve found a high spot, or a hump.
Grab a pencil or some chalk and mark out these problem areas. This quick visual map will help you see if you’re dealing with a few isolated bumps or a widespread, systemic issue across the entire room.
For example, a single dip in the middle of a room might point to a sagging floor joist, something we see in some of the beautiful older Parker homes around the Pinery neighborhood. On the other hand, if the entire floor slopes from one wall to the other, that could signal a more serious foundation issue that needs attention.
Once you know what you’re up against, you can make a plan. For surface-level problems like moderate cupping or crowning, a professional sanding and refinishing is often the perfect fix. Our Parker hardwood floor refinishing, paired with our advanced UV-cure system, can plane the surface perfectly flat, erasing those imperfections and giving you a smooth, beautiful floor again.
Uncovering the Root Cause of Your Uneven Floors
So you’ve noticed it—the slight dip in the hallway, the board that feels higher than its neighbor, or the new gaps showing up. Before you can even think about a fix, you have to figure out why it’s happening. Just slapping a patch on an uneven floor without finding the source is a recipe for frustration.
Here in Colorado, we see a few common culprits time and time again. Let's dig in and find out what’s really going on beneath your feet.
The Impact of Moisture and Humidity
Wood is alive. It breathes, expanding when it’s humid and shrinking when it’s dry. And in the Parker area, our wild humidity swings—from bone-dry winters to wetter summer days—put a ton of stress on hardwood floors. This is almost always where our investigation starts.
- Excessive Moisture Below: Got a damp crawlspace or a slow, sneaky leak under the subfloor? The bottoms of your floorboards will drink up that moisture, causing them to expand. This forces the edges of the boards to curl up, creating a tell-tale washboard effect we call cupping.
- Excessive Moisture Above: On the flip side, things like over-zealous mopping, big spills, or even just really high indoor humidity can soak the tops of the boards. The surface of the wood swells, pushing the center of the board up into a little hump, a problem known as crowning.
We run into this all the time in older homes, like the beautiful bungalows around Washington Park in nearby Denver, where old crawlspaces aren't perfectly sealed against the seasons. It's the perfect setup for cupped floors to develop over the years. Our Parker hardwood floor refinishing with a UV-Cure System can often correct this.
This little chart is a great way to visualize what’s happening with your floorboards.
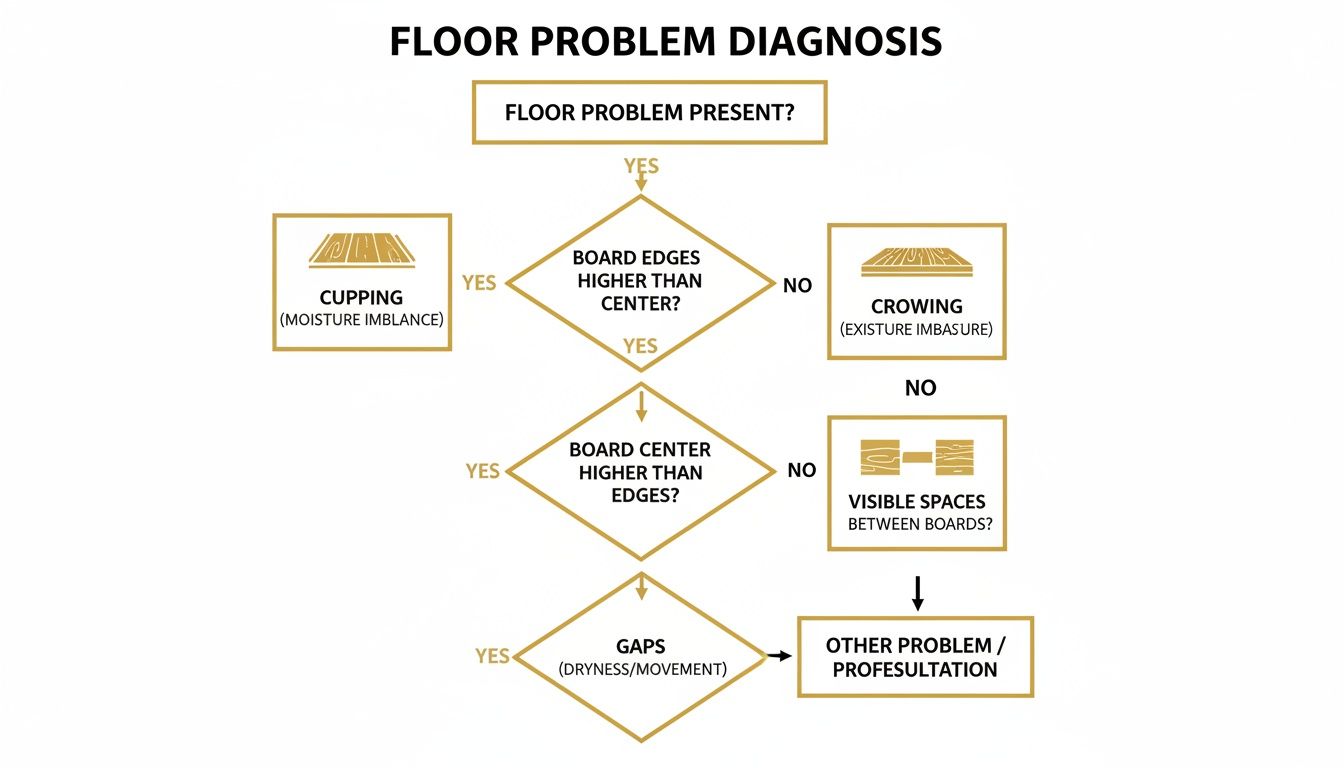
As you can see, whether the edges are high or the center is high gives you a direct clue about where the moisture problem is coming from.
Structural Shifts and Foundation Issues
Sometimes, the floorboards are just innocent bystanders. The real issue is with the structure holding them up. Every house settles, but when it’s uneven or significant, it can throw your whole floor out of whack.
Here are the usual suspects we look for:
- Sagging Floor Joists: Over decades, those big wooden beams under your floor can get tired and start to sag, especially in rooms with long, open spans. This creates that classic dip or "soft spot" right in the middle of a room.
- Foundation Movement: Colorado’s infamous expansive clay soil is no joke. It swells and shrinks with moisture, which can cause parts of your home's foundation to shift, sink, or even heave upwards. You'll feel this as sloped, uneven floors across a whole section of the house.
- Improper Support: A previous owner's ambitious renovation might be the cause. If someone took out a load-bearing wall without adding the right support beam, the floor above will eventually start to sag under the weight.
If you're seeing major slopes or dips across multiple rooms, it might be more than just a flooring issue. Deeper problems could be at play, and understanding the scope of fixing structural defects like concrete cancer is key to a permanent solution.
Installation Missteps
It’s heartbreaking, but even a brand-new hardwood floor can go wrong if the installation wasn't done right from day one. The number one mistake we see? Rushing the acclimation process.
Wood flooring needs to hang out inside your home for several days—sometimes even a week—to get used to your home’s unique temperature and humidity. If an installer skips this and nails it down right away, the wood will expand and contract after it's already installed. This inevitably leads to ugly buckling, cupping, or gapping. We dive deeper into this in our guide on what causes hardwood floors to buckle.
By taking a hard look at moisture, your home’s structure, and how the floor was installed, you can get a much clearer picture of the problem. This is what empowers you to choose the right fix—whether it's a simple board replacement or a more involved structural repair.
DIY Fixes for Minor Hardwood Floor Problems
So, you’ve done a little detective work and found the unevenness is just a few pesky spots here and there. Great! If you’re a homeowner who isn't afraid to get your hands dirty, some of these minor bumps and dips are totally manageable as a weekend project.
Not every little imperfection calls for a full professional teardown. Sometimes, all you need is a targeted, surgical fix to get your floor feeling smooth and looking good again. But remember, the most important tool in any DIYer's kit is knowing when to put the tools down and call a pro.
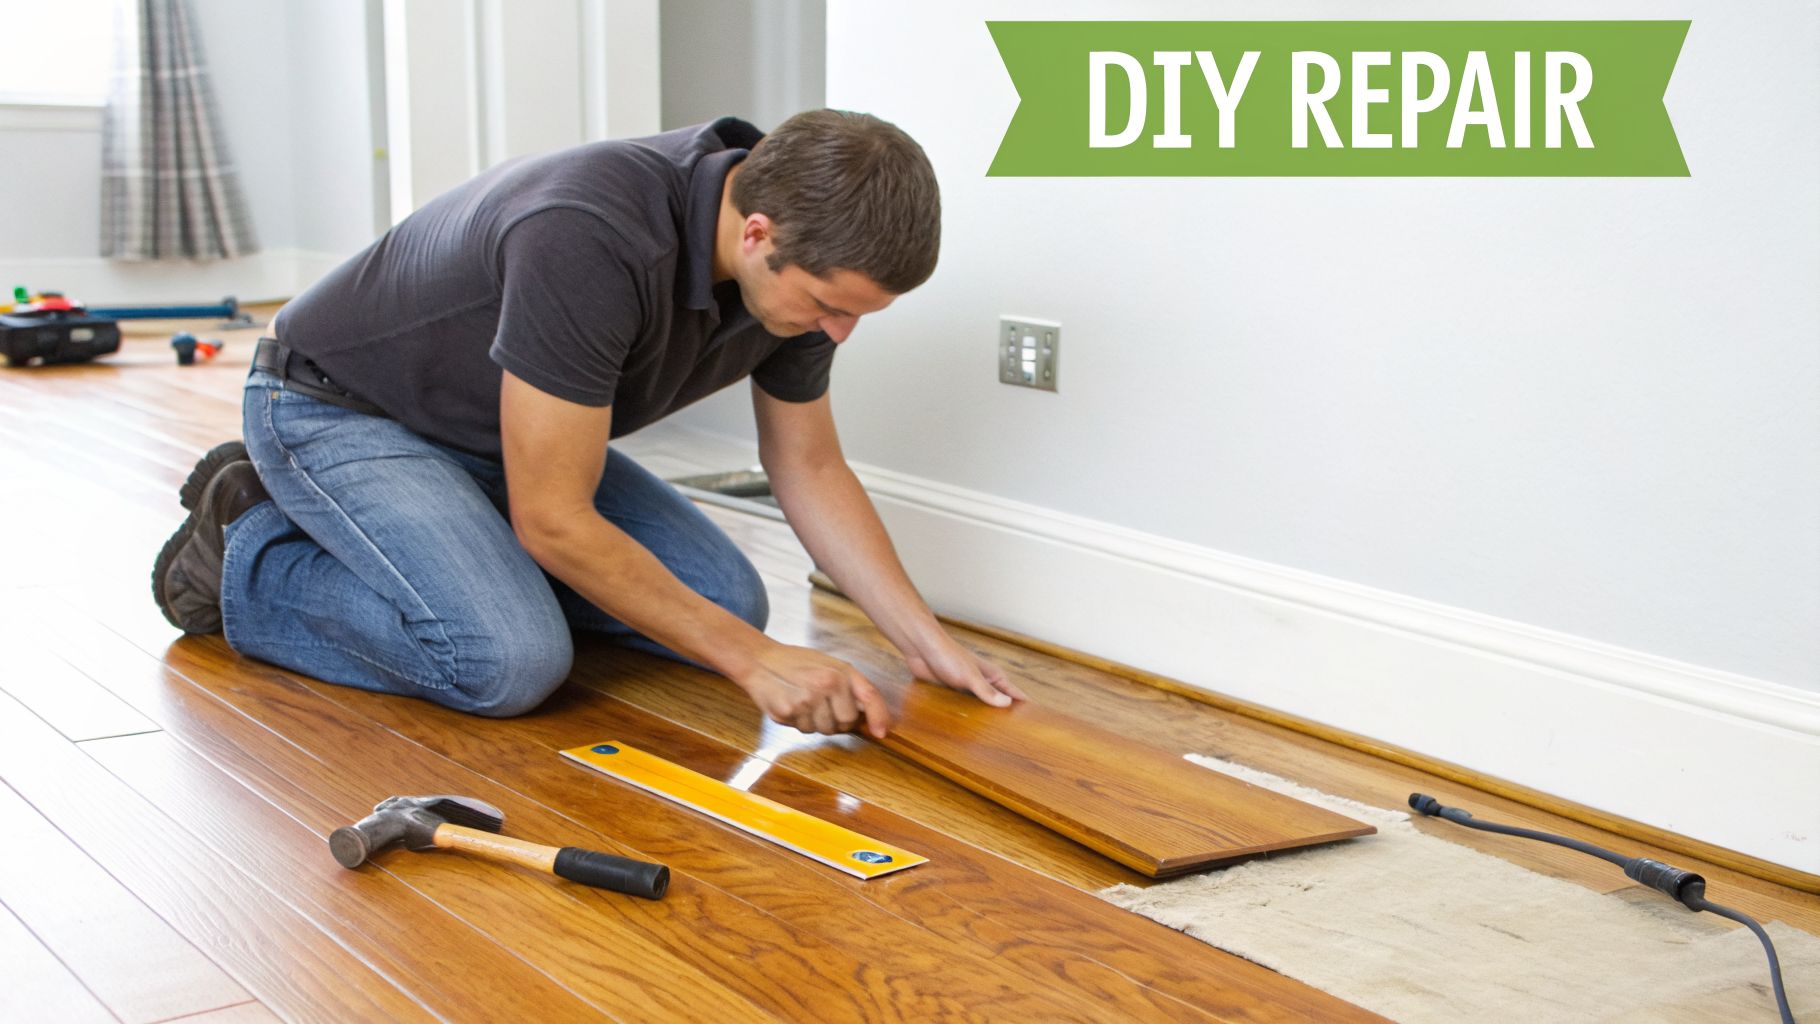
Replacing a Single Warped Board
Got one board that's cupped, cracked, or just plain beyond saving? Swapping it out can make a world of difference. Think of it as minor surgery for your floor—it takes patience and a steady hand, but it's doable.
Here’s what you’ll need:
- Circular saw with a sharp blade
- Drill and a few different bits
- Hammer and a sharp chisel
- Good quality wood glue
- A new floorboard (make sure it's acclimated!)
- Safety glasses and gloves
The goal is to carefully cut out the bad board without damaging the good ones next to it. Start by drilling holes in the four corners to give yourself some relief points. Next, set your circular saw blade to the thickness of the flooring and make two long, parallel cuts down the board, staying about a half-inch from each edge. Then, use your chisel to carefully pop out the center piece, which should make it easy to remove the two side pieces.
With the old board gone, you’ll need to prep the new one. The bottom lip of the groove on the new board has to go—chisel it off carefully so it can slot into place. Run a bead of wood glue on the tongues of the neighboring boards, tap the new board in, and then place something heavy on it while the glue sets.
When to Call a Pro: If you're looking at more than two or three bad boards, or if the neighboring planks start splintering as you work, stop. It's a clear sign of a bigger problem. A professional can handle the repair seamlessly or recommend a full hardwood floor sanding and refinishing if the damage is widespread.
Spot-Sanding for Minor High Spots
For those little high spots—like a slightly crowned board or a seam that’s pushed up—spot-sanding can bring it level without having to refinish the entire room. This trick works best for small, isolated issues.
You can use a sharp hand scraper or grab a random orbital sander with medium-grit sandpaper (somewhere around 80-grit). The key is to feather out the edges as you sand, blending the spot into the surrounding floor. You don't want to accidentally create a new dip. Once it's flat, the tricky part is matching the stain and finish, which can be tough to get just right.
Using Wood Filler for Small Gaps
Tiny, stable gaps or old nail holes can often be fixed with a high-quality, stainable wood filler. Just make sure you pick one that’s a good match for your wood species. Use a putty knife to press the filler deep into the gap, then smooth it over the top.
Let it dry completely, then sand it perfectly flush with the floor. This is a cosmetic fix, not a structural one. It’s not the right solution for bigger gaps that tend to expand and contract with the seasons.
A Critical Reminder: These DIY repairs are for small, isolated problems. If your floor feels like a gentle roller coaster or you’ve marked dozens of trouble spots, you’re dealing with a systemic issue. Trying to fix a widespread problem on your own often makes things worse and costs more in the long run. For that kind of unevenness, professional Parker hardwood floor refinishing—especially with our instant UV-cure system—is the only way to get a guaranteed flat, durable, and beautiful floor.
Professional Methods for Leveling Hardwood Floors
While a DIY fix can patch up a board or two, what do you do when the entire floor has gentle waves or a noticeable slope? When you're dealing with widespread cupping, crowning, or a floor that feels like a roller coaster, it's time to call in a professional. Trust me, trying to sand a seriously uneven floor yourself can turn a correctable issue into a costly replacement.
At J.R. Hardwood, we’ve seen it all—from the subtle ripples in historic Parker farmhouses to the more dramatic sags in older homes. We don't just treat the surface; we diagnose the root cause to deliver a solution that’s truly flat, durable, and beautiful. Our Parker hardwood floor refinishing services, including our UV-Cure System, are designed for just these situations.
Dust-Free Sanding: The Ultimate Surface Correction
For floors that look like a washboard from moderate cupping or crowning, professional sanding is your best bet. This isn't just spot-sanding a high board; it's a meticulous process that reshapes the entire surface of your floor.
Our dust-free sanding and refinishing service is the cornerstone of how we level uneven hardwood. We bring in powerful, precision equipment to methodically plane down the high spots and bring the low spots up to meet them. This removes the old, worn finish and creates a perfectly flat canvas for a new one.
- Erases Cupping and Crowning: By shaving off just enough wood, we eliminate that wavy, "puffed up" look from warped boards.
- Fixes Minor Height Gaps: The process smooths the joints between every board for a seamless, uniform surface.
- Creates a Flawless Foundation: A perfectly flat floor is the secret to a professional finish that adheres properly and looks spectacular. You can learn more about our sanding and refinishing process to see how we transform floors.
Going Deeper: Fixing Structural Problems
Sometimes, the problem isn’t the hardwood itself but the structure underneath. In those cases, sanding the floor is like putting a fresh coat of paint on a crumbling wall—it looks good for a minute, but it doesn't solve the real issue. A true professional always investigates the subfloor and joists first.
If we suspect a deeper problem, here’s how we tackle it:
Shimming From Below
Got a basement or a crawlspace? Perfect. This gives us access to fix dips and sags from underneath. We carefully insert thin, tapered wood shims on top of the floor joists right under the low spots. This physically lifts the subfloor and the hardwood above it, bringing everything back to level without ever touching your finished floor.
Sistering Joists
When a floor joist is sagging from age, water damage, or just wasn't built to handle the load, it needs serious reinforcement. We fix this by "sistering" the joist—bolting a new, straight joist directly alongside the old, tired one. This adds critical support, straightens out the floor above, and prevents future sagging. It's a common and necessary fix for homes in places like Castle Rock, where ground settling can take a toll over the years.
The demand for skilled flooring pros is on the rise. A National Wood Flooring Association (NWFA) survey found over 39% of contractors expect wood flooring sales to climb, but finding skilled installers remains a challenge. This makes it more important than ever to partner with an established, reputable company you can trust. You can explore more industry insights from the NWFA.
Solutions for Floating and Glue-Down Floors
Floating floors like engineered wood or LVP and glue-down installations are a different beast entirely. For these, the subfloor has to be almost perfectly flat before the first plank is ever laid.
Before we install these types of floors, we meticulously check the subfloor. If we find any dips, we pour a self-leveling compound. This liquid underlayment flows into all the low spots and dries to a perfectly smooth, level surface. It creates an ideal foundation, ensuring the new floor lies flat without any hollow spots or bouncy areas.
When the problem is beyond a simple DIY fix, it's crucial to bring in a professional who understands the full scope of floor correction. Choosing the right service can make all the difference between a temporary patch and a long-term solution.
Comparing Professional Floor Correction Methods
| Service | Best For | Process | Outcome |
|---|---|---|---|
| Dust-Free Sanding & Refinishing | Moderate cupping, crowning, surface scratches, and minor height differences. | The top layer of wood is sanded down to create a new, flat surface, then refinished. | A perfectly smooth, level, and visually new floor without structural changes. |
| Shimming Joists | Localized sags and dips in floors with crawlspace or basement access. | Thin wood shims are inserted between the joist and subfloor from below to lift low spots. | A targeted, non-invasive way to level a specific area without disturbing the floor above. |
| Sistering Joists | Significant structural sagging due to weak, damaged, or undersized joists. | A new joist is bolted alongside the old, sagging one to provide new, robust support. | A permanently reinforced and straightened floor structure, preventing future sagging. |
| Self-Leveling Compound | Preparing an uneven concrete or wood subfloor for a new floating or glue-down floor. | A liquid compound is poured over the subfloor, which self-levels and hardens into a flat surface. | An ideal, perfectly flat foundation that ensures the new flooring performs correctly. |
Each of these methods solves a different type of problem. A thorough inspection from an expert is the only way to know for sure which approach your floor truly needs.
The Finishing Touch: Our UV-Cure System
After we've made your floor perfectly flat, the final step is a durable, beautiful finish. This is where our UV-cure system really shines, especially as part of our professional Parker hardwood floor refinishing. While traditional finishes can take days to cure, our advanced UV finish hardens instantly under a special light.
What does that mean for you? You can walk on your floors and move furniture back the very same day. For a busy family, that’s a game-changer. Plus, it provides unmatched durability against scratches and scuffs, making it the perfect final touch for high-traffic homes.
Keep Your Floors Flat for Good: Long-Lasting Prevention Tips
After you’ve invested in getting your floors perfectly flat and beautiful again, the last thing you want is for those pesky bumps and dips to creep back. Honestly, the best repair is the one you never have to make. A little proactive care goes a long way in protecting your hardwood, creating a stable environment where it can thrive for decades.
Think of us as your long-term partner in floor care. By adopting just a few simple habits, homeowners from Parker to Aurora and Littleton can lock in that fresh, new-floor feel and stop future problems before they even start.
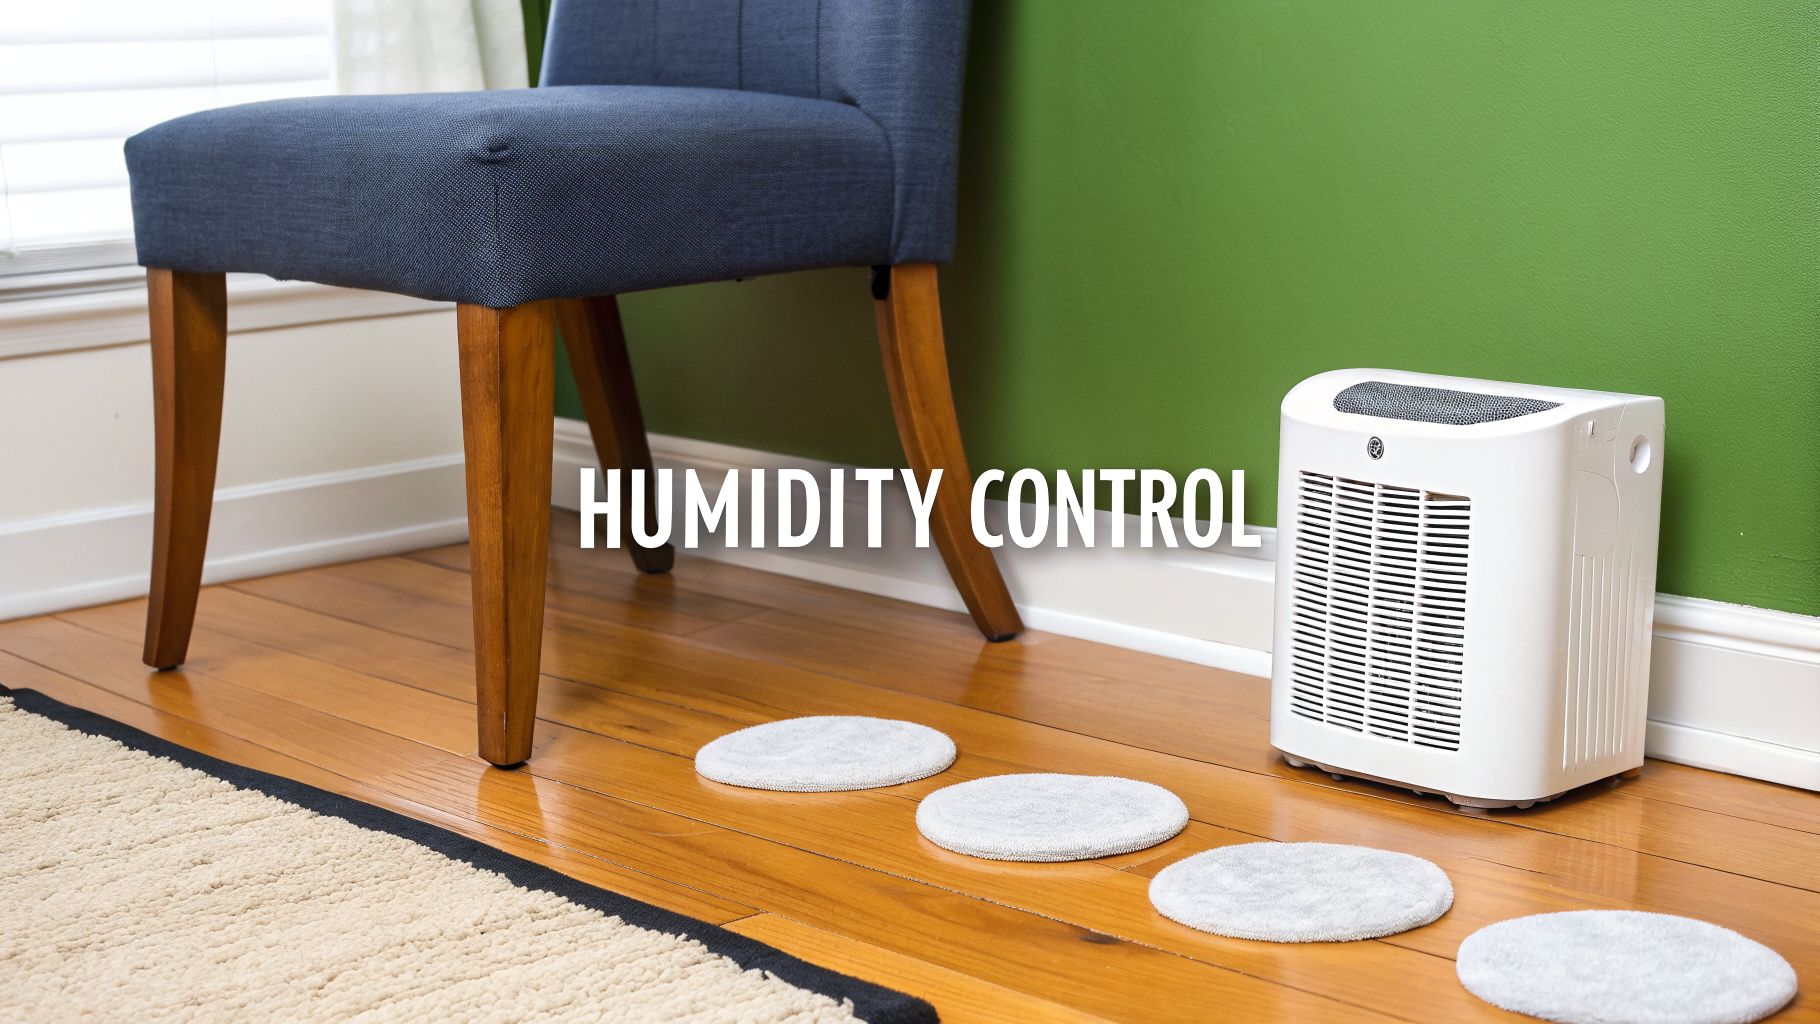
Master Your Home's Moisture Levels
Here in Colorado, with our wild climate swings, moisture is the number one enemy of flat, stable hardwood. Wood is a natural material—it breathes. It swells when it’s humid and shrinks when it’s dry. All that movement is what causes cupping, crowning, and gaps to appear.
Your mission is to keep your indoor environment consistent. Here’s how:
- Run a Dehumidifier: During our muggy summer months, a dehumidifier is your best friend. It pulls excess moisture from the air, stopping your floorboards from swelling up.
- Use a Humidifier in Winter: When the furnace is cranking and the air gets bone-dry, a humidifier adds that necessary moisture back. This prevents the wood from shrinking and creating unsightly gaps between boards.
- Aim for the Sweet Spot: The happy place for hardwood is an indoor humidity level between 35% and 55%. Grab a cheap digital hygrometer to keep an eye on your home’s levels and adjust as you go.
Seriously, this one simple act—balancing your home's humidity—is the single most effective thing you can do to prevent uneven floors. It keeps the wood stable, reduces stress on the joints, and keeps your floors looking their best all year.
Clean Smart to Protect Your Finish
That protective finish on your hardwood is its armor. If you use the wrong cleaning methods, you’ll slowly wear it down, leaving the raw wood exposed to moisture and scratches. It’s a fast track to damage.
Put down the soaking wet mop, steam cleaner, and harsh all-purpose chemicals. These products strip the finish and force water into the seams between boards, causing all sorts of problems down the road.
Instead, stick with what the pros know works:
- Use a pH-Neutral Cleaner: Always choose a cleaning product made specifically for hardwood floors.
- Damp Mopping Only: Lightly mist the cleaner onto a microfiber mop pad—never spray it directly on the floor. Your mop should be just damp enough to clean without leaving behind any puddles or standing moisture.
- Schedule a Professional Deep Clean: Services like our hardwood clean and buff are designed to safely lift away deep-seated grime and restore that protective sheen, all without the aggressive sanding of a full refinish.
The Little Things That Make a Big Difference
Small, consistent habits can have a massive impact on keeping your floor flat and beautiful for the long haul.
First, get some felt furniture pads and stick them on the bottom of all your chair legs, tables, and sofas. It’s a cheap and easy fix that prevents heavy furniture from creating dents and pressure points that cause uneven wear over time.
Next, place high-quality mats at all your entryways. They’ll trap the grit, dirt, and moisture that would otherwise get tracked across your floors, slowly grinding away at that protective finish.
Protecting your investment is just smart homeownership. The global demand for high-quality flooring is huge, and the U.S. floor coverings industry is expecting sales to climb again in early 2026. You can even see the full market analysis from Construction HQ. What this trend really shows is how much homeowners value maintaining their properties. By taking these simple preventative steps, you’re not just saving yourself a headache—you’re actively preserving your home’s value.
Got Questions About Your Uneven Floors? We've Got Answers.
When you're staring at a wavy or uneven hardwood floor, a million questions can run through your mind. It’s easy to feel overwhelmed trying to figure out the cause, the right fix, and what it’s all going to cost. As the go-to experts for Parker hardwood floor refinishing, we’ve heard it all.
We've put together answers to the most common questions we get from homeowners just like you. Our goal is simple: to give you the clear, straightforward advice you need to feel confident about your next move.
Can I Just Sand a Wavy Floor Flat?
This is a great question. Sanding and refinishing is an incredible tool for fixing surface-level problems. If you're dealing with minor to moderate cupping, crowning, or boards that are just slightly off-level, our professional Parker hardwood floor refinishing can work wonders, creating a perfectly smooth surface.
But—and this is a big but—if your floor has deep, rolling waves, sanding is only a band-aid. That kind of unevenness almost always points to bigger issues with your subfloor or the floor joists underneath. In these situations, just sanding the top won't solve the problem for good. We always dig deeper to find the root cause, which might mean some structural repairs are needed before we even think about refinishing with our UV-Cure System.
What's the Cost to Fix an Uneven Hardwood Floor?
The honest answer? It truly depends. The cost to level out a hardwood floor can vary dramatically because the fix is tied directly to the source of the problem.
Here’s a ballpark idea to help you budget:
- A light refresh with a hardwood screen and recoat can start around $2.50 per square foot.
- Our professional wood floor cleaning starts at $1.50 per square foot.
- A full, dust-free sanding and refinishing job—which does a fantastic job of leveling the surface—typically falls in the $4.20 to $5.50 per square foot range. The final price depends on the finish you pick, like our Gold, Platinum, or Diamond options.
- If we find structural problems, like needing to shore up joists or deal with foundation issues, the cost is quoted on a case-by-case basis after a thorough inspection.
We're all about transparency. That’s why we offer free, detailed quotes, so you know exactly what to expect without any surprises.
Should I Bother Fixing It, or Just Replace the Whole Floor?
In almost every situation we encounter, refinishing is the smarter, more sustainable, and more cost-effective choice. You would be amazed at what a professional refinishing can accomplish. We can erase years of warping, deep scratches, and discoloration, making the floor look brand new for a fraction of what total replacement would cost.
We reserve replacement for only the most extreme scenarios—think widespread, catastrophic water damage, severe rot, a major pest infestation, or a complete structural failure. We recently salvaged a historic red oak floor in a beautiful Highlands Ranch home that the owner was convinced was a total loss. The results were stunning and proved just how powerful professional restoration can be.
How Long Will My Home Be Disrupted While You Fix the Floor?
The timeline depends entirely on the game plan. Traditional refinishing methods can easily take a room out of commission for several days. You have to wait for each coat of finish to dry and then cure, which means no walking on it and no furniture.
This is exactly why our advanced UV-cure system is such a game-changer. The final topcoat is cured instantly with a special UV light. That means you can walk on your floors and move all your furniture back in the very same day we pack up. This technology is the heart of our Parker hardwood floor refinishing service with a UV-Cure System and an absolute lifesaver for busy families who can't put their lives on hold for a week.
Homeowners in Parker trust J.R. Hardwood Floor Refinishing & Cleaning to restore the natural beauty of their hardwood floors with our dust-free sanding system and advanced UV-curable finishes. Unlike traditional methods, our UV technology cures instantly, so you can move furniture back the same day with no lingering odor or downtime. Choose the perfect refinishing service to match your needs and home traffic. Our dust-free process ensures a clean, beautiful finish every time.
📞 Phone: 720-327-1127
🌐 Website: jrhardwoodfloorrefinishingandcleaning.com
📍 Service Area: Parker, Denver, Aurora, Castle Rock, Highlands Ranch, Littleton, and surrounding towns.
📺 YouTube: https://www.youtube.com/channel/UCLaTAi6KxwT-g8QCKqKTQ8Q?sub_confirmation=1