 Skip to content
Ever look down at your hardwood floors and notice something… off? If the edges of your floorboards seem to be curling up, leaving the centers looking sunken, you're seeing what we in the business call "cupping." It's a classic sign that your floors are dealing with a moisture imbalance. For homeowners in Parker seeking hardwood floor refinishing, understanding this issue is the first step.
Before you even think about sanding them flat, take a deep breath. The absolute first step is to find and eliminate the source of that excess moisture. Trust me, jumping the gun and sanding a damp floor is one of the most expensive mistakes you can make—it can wreck your wood for good. Our advanced UV-Cure System can restore floors, but only after the underlying problem is solved.
What Is Causing Your Hardwood Floors to Cup
Your hardwood floors are alive, in a way. Wood is a natural material that breathes, soaking up and releasing moisture from its surroundings. Cupping happens when the bottom of a floorboard absorbs more moisture than the top. This makes the wood fibers on the underside swell up, pushing the edges of the board upward in that telltale cupped shape.
This isn’t some random fluke; it’s your floor sending out an S.O.S. And you're not alone—moisture-related problems are a huge headache for homeowners. In fact, the National Wood Flooring Association (NWFA) reported that these issues were behind over 40% of all hardwood floor complaints in the U.S. between 2015 and 2020. Getting to the bottom of the why is the only way to a real fix.
Common Moisture Sources in Parker Homes
Here in Parker, we see some wild seasonal swings, from bone-dry winters to humid summer afternoons. But cupping is rarely caused by just the air humidity. The real problem is usually a more direct, hidden source of moisture coming from below the floor. This is a common issue we see in the ranch-style homes around the Pinery neighborhood.
Here are the usual suspects we find when performing hardwood floor refinishing in Parker:
- Damp Basements or Crawl Spaces: This is the big one. A poorly ventilated crawl space is like a sauna for the underside of your floors. Moisture from the ground gets trapped and has nowhere to go but up.
- Subfloor Moisture Issues: If you have a concrete subfloor that wasn't sealed properly before the wood went down, it can slowly wick moisture vapor right into your floorboards.
- Minor Leaks: Think of that slow, sneaky drip from a dishwasher, ice maker line, or a pipe hidden in the wall. It can quietly saturate the subfloor and cause widespread cupping over time.
- Improper Acclimation: Wood floors need time to get used to your home’s specific climate before they're installed. If they were rushed in, they’re far more likely to cup as they try to adjust. You can learn more about this vital step in our hardwood floor installation guide.
To help you get started, here's a quick cheat sheet for figuring out what might be going on.
| Quick Guide to Diagnosing Cupped Floors |
| :— | :— | :— |
| Symptom | Most Likely Cause | Your First Action |
| Cupping is widespread across a large area | High humidity from a damp basement or crawl space | Get a hygrometer to measure the humidity below your floor. Aim for 30-50%. |
| Cupping is localized near an appliance | A slow leak from a dishwasher, fridge, or sink | Check all water lines and connections for drips. Place a dry paper towel underneath to check. |
| Cupping appeared a few months after installation | Improper acclimation or a wet subfloor | Test the moisture content of the wood and the subfloor with a moisture meter. |
| Cupping is worst during humid summer months | Poor ventilation and high ambient humidity | Run a dehumidifier in the basement or crawl space to stabilize the environment. |
This table should give you a solid starting point. The key is to match the symptom to the likely cause and take that first, crucial step.
Why Sanding Too Soon Is a Big Mistake
When homeowners see those wavy, cupped boards, the first instinct is often to call a sander to flatten everything out. This is the absolute worst thing you can do while the wood is still holding onto that excess moisture.
Think about it: if you sand the raised edges down so they're level with the sunken center, you're removing a lot of wood. Once you’ve fixed the moisture problem and the boards finally dry out, they'll try to return to their natural flat shape. The center will rise back up, but the edges you sanded down will now be lower. This creates the opposite problem, called "crowning," and crowning is permanent damage that’s much harder, if not impossible, to fix correctly.
The golden rule for fixing cupped floors is to address the moisture first, then allow the wood to dry completely. Only after the floors have stabilized should you consider professional Parker hardwood floor refinishing with our advanced UV-Cure System if the cupping persists.
Playing Detective to Find the Moisture Source
Before you can even think about fixing those cupped floors, you have to put on your detective hat. Why? Because simply sanding down the cupped boards without finding the root cause is like putting a band-aid on a leaky pipe—it’s a temporary fix that guarantees the problem will come right back, costing you more time, money, and frustration down the line.
The single most important tool for this job is a good moisture meter. This isn't a step where you can guess. The meter gives you hard data, telling you exactly what’s going on with the moisture content in your floorboards and, just as importantly, the subfloor underneath. I’ve seen countless homeowners in Parker shocked by the numbers, which is why getting accurate readings is non-negotiable for any hardwood floor refinishing project.
This little guide breaks down the whole diagnostic process into three straightforward steps.
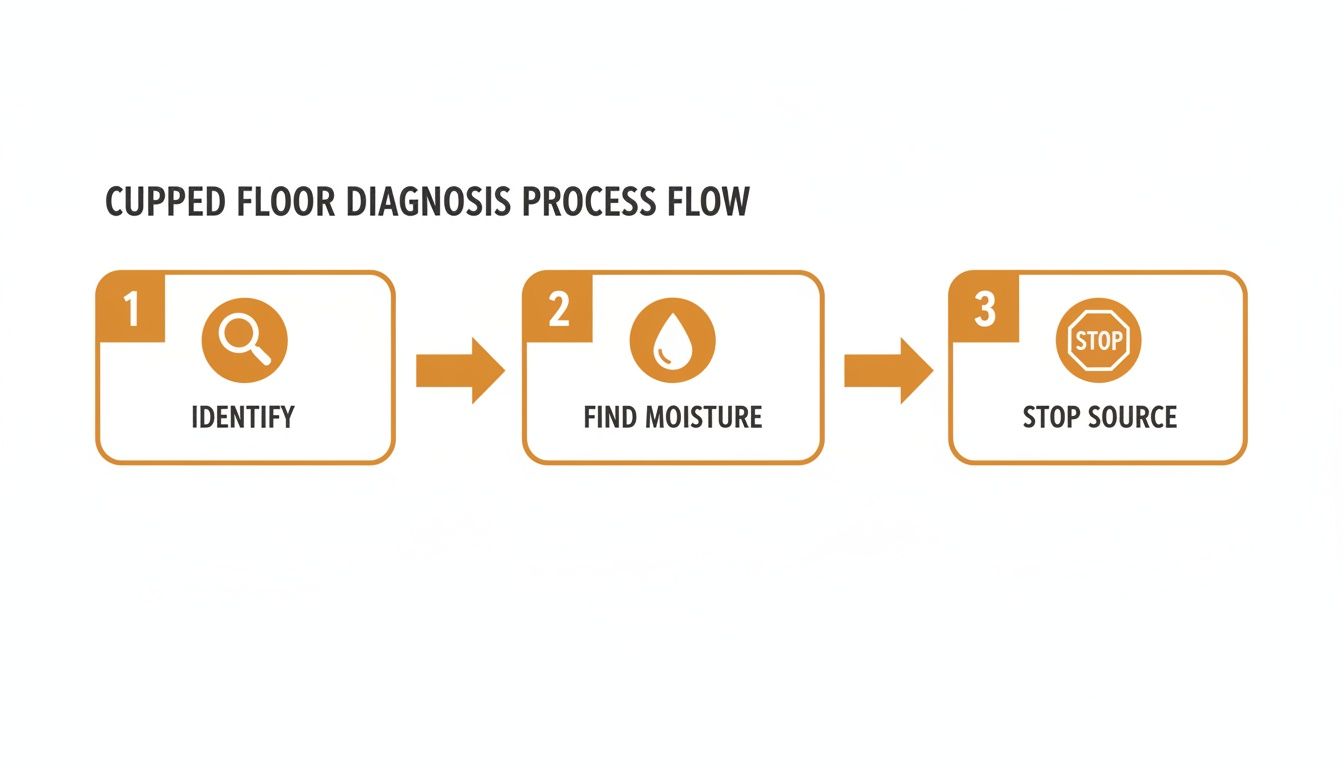
As you can see, noticing the cupping is just step one. The real work is finding that moisture and stopping it at its source. Only then can you start thinking about repairs with services like our UV-Cure System.
Uncovering Hidden Moisture Culprits in Parker Homes
Sure, a burst pipe is obvious, but most cupping comes from slow, sneaky moisture that homeowners never even see. In all our years doing hardwood floor refinishing across Parker, we’ve seen it all. From brand-new builds in Stonegate to older ranches, the usual suspects are often the same.
Here are the hidden sources we find most often:
- Poorly Ventilated Crawl Spaces: This is, without a doubt, the number one cause we run into. A damp, sealed-up crawl space acts like a terrarium right under your house, pushing humidity straight up into your floorboards.
- Appliance Condensation: Your dishwasher, the ice maker line for your fridge, or even an HVAC unit can create slow drips. It might not look like much, but over months, it can create a serious localized cupping problem.
- Moisture from Concrete Slabs: If your home is on a slab, moisture vapor can travel right through the concrete and into your wood floors, especially if a proper vapor barrier wasn't installed in the first place.
- Bad Drainage Outside: Clogged gutters or landscaping that slopes back toward your foundation will saturate the ground, raising the humidity in your basement or crawl space.
Just a couple of years back, we got a call from a family in a gorgeous home over in the Pradera community. They were at their wit's end with their cupped red oak floors and were convinced it had to be a hidden leak. After we went through with our moisture meters, we found the real problem: their recently encapsulated crawl space had no dehumidifier. It was trapping all the humid air and forcing it right into the wood above.
That scenario is a perfect example of why you can't skip the diagnosis. If we had just sanded their floors flat, the problem would have been back within a year.
How to Actually Find the Source
Okay, time to start the investigation. Grab your moisture meter and begin checking the area where the cupping is worst, then work your way out from there. You’ll want to take readings every few feet on the hardwood itself and, if you can get to it, the subfloor in your basement or crawl space.
You're looking for a pattern. Are the readings highest near the kitchen? Check behind the dishwasher and the fridge's water line. Are they spiking along an exterior wall? Go outside and look at your gutters and how the ground slopes. If the readings are high pretty much everywhere, you're likely dealing with a bigger environmental issue, like high ambient humidity.
Once you have that data, you’ll know exactly what to do next. The fix might be as simple as cleaning out a downspout or as involved as installing a dehumidifier and vapor barrier in the crawl space.
Whatever the solution is, it must happen before you do anything else. Once the source is gone, you can finally start the process of letting your floors dry out and return to normal. This patient, methodical approach is the only way to get a permanent fix for cupped hardwood floors.
Letting Your Floors Heal: The Acclimation Process
Okay, so you’ve found the pesky leak or tamed the humidity monster causing your floors to cup. Fantastic! Your first instinct might be to call a pro for hardwood floor refinishing and demand they start sanding immediately.
Hold on. Take a deep breath.
The most important—and often the hardest—step is to simply wait. Acting too quickly is one of the biggest mistakes we see in Parker, and it can cause irreversible damage. Now, it's all about patience and letting your hardwood floors heal on their own through a process called acclimation.
This healing period allows the wood to slowly release its excess moisture. In many cases, the boards will return to their original flat shape all by themselves. If you sand prematurely while the edges are still swollen, you risk creating "crowning"—where the center of the board becomes permanently higher than the edges. Trust me, that's a much bigger headache to fix and a common issue when homeowners rush the process before calling for a professional UV-Cure System application.
Creating the Ideal Drying Environment
To give your floors the best chance to recover, you need to play Mother Nature and create the perfect drying environment. The goal here is slow and steady. Rushing the process with high heat or other aggressive tactics will only stress the wood fibers.
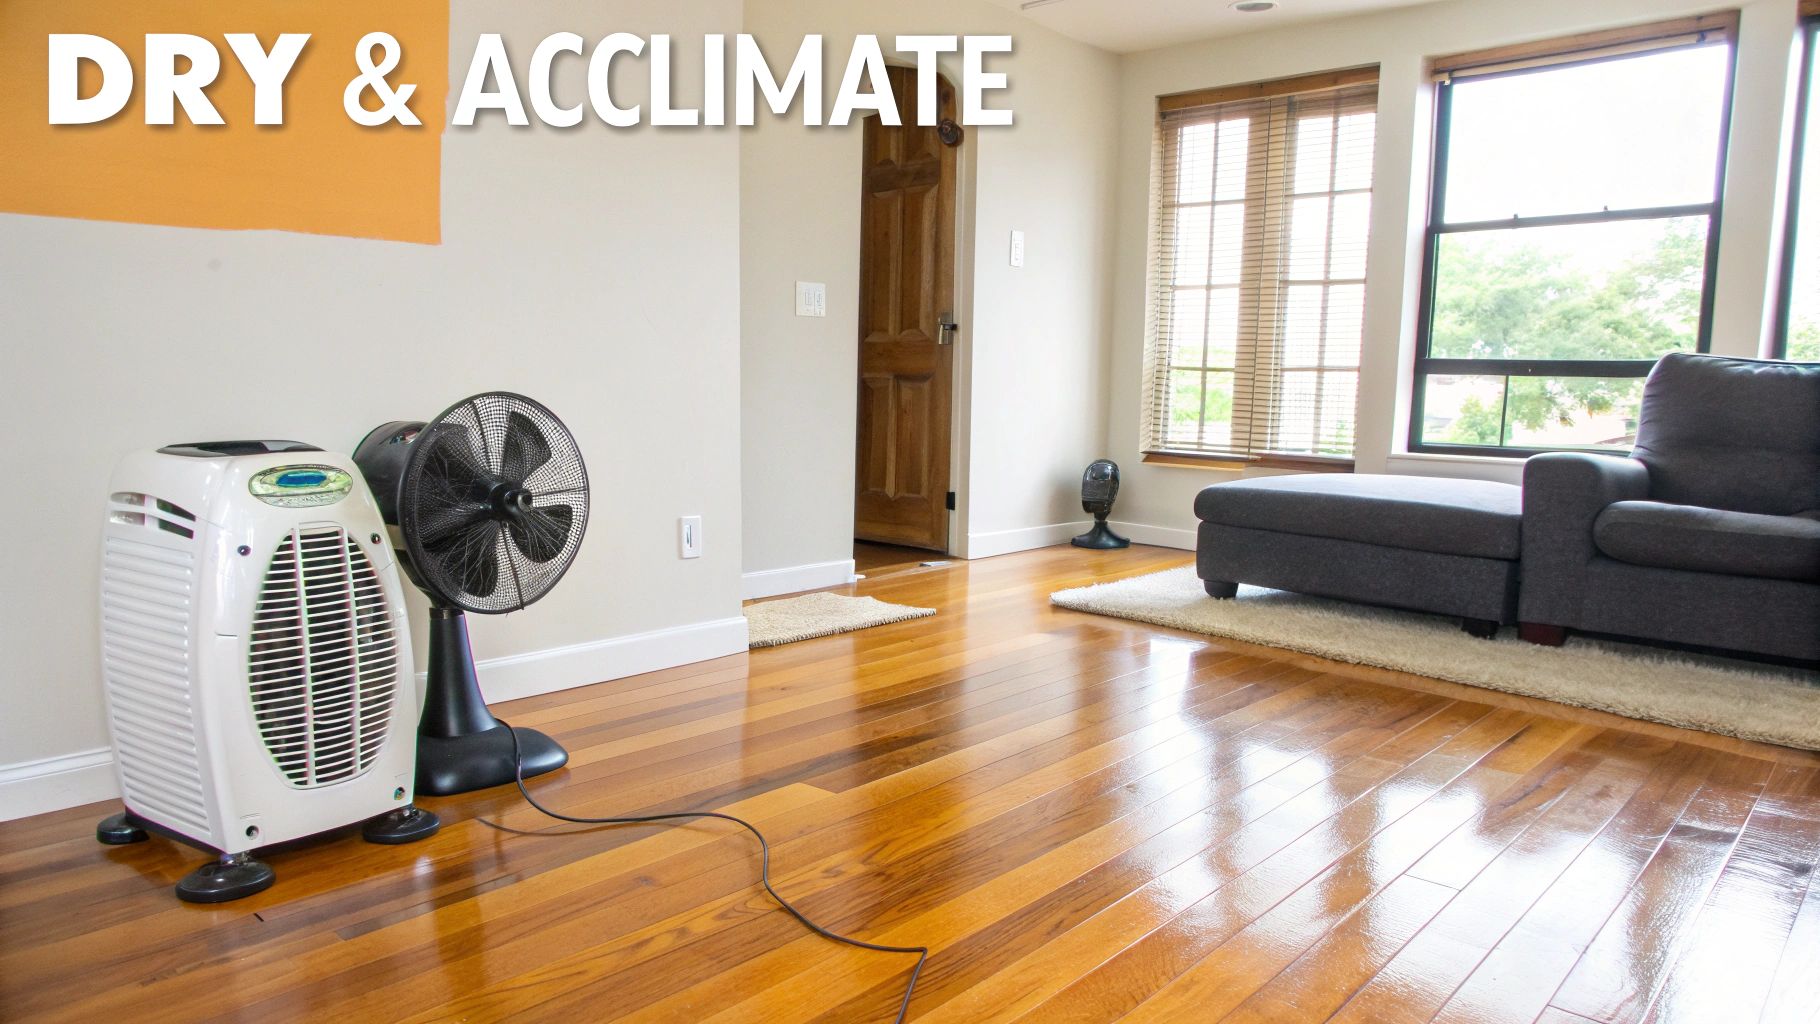
Your main tools for this stage are surprisingly simple but incredibly effective:
- Dehumidifiers: These are your workhorses, especially in basements or crawl spaces. They pull excess moisture right out of the air, which encourages the wood to let go of the water it's been holding.
- Fans: Simple box fans or oscillating fans are perfect. You want to keep air circulating gently but constantly across the floor's surface. This airflow acts like a tiny shuttle, whisking away evaporating moisture so damp spots don't linger.
- Consistent Temperature: Try to keep your thermostat stable. Big temperature swings cause wood to expand and contract, which gets in the way of the natural flattening process.
By combining these three things, you create a balanced atmosphere that lets your floors relax and return to normal without any drastic measures.
So, How Long Does Acclimation Take?
This is the million-dollar question, and the honest answer is: it depends. The drying time can vary wildly based on the type of wood you have, how severe the cupping is, and how long the moisture problem went unnoticed.
Patience is a virtue, especially with hardwood. The acclimation process isn't measured in hours or days; it's often measured in weeks, months, or even an entire change of seasons. It's a slow dance between your floor and its environment.
As a general rule, be prepared for the process to take anywhere from a few weeks to several months. If your Parker home saw cupping during a humid summer, it might honestly take until the dry winter air rolls in for the floors to fully stabilize.
Why This is Just Like a New Installation
Proper acclimation is also a non-negotiable step for brand-new flooring. Before professionals perform a hardwood floor installation, they let the new wood sit inside the home for several days to get used to the unique temperature and humidity levels. Skipping this is a leading cause of flooring failure right out of the gate.
Giving your cupped floors time to re-acclimate is just as critical. Believe it or not, historical data shows that since the 1980s, a whopping 35% of cupping cases worldwide were tied to improper acclimation during the initial installation. The fix always starts with controlling the climate. By maintaining a relative humidity of 40-50% and using fans and dehumidifiers for 2-4 weeks, you can allow 75% of minor cupping cases to flatten out naturally. This patient approach is always best for the long-term health of your wood and often saves you the cost and hassle of a full sand-and-refinish job.
When Professional Sanding Is the Right Solution
So, you’ve done everything right. You played detective, found the moisture source, and gave your floors weeks—maybe even months—to dry out and settle down. But what happens when the cupping just… stays? If those board edges are still curled long after the moisture is gone, it means the wood has “taken a set.” This is a permanent shift in the wood’s cellular structure, and unfortunately, no amount of waiting is going to flatten it out.
This is the exact moment to put down the DIY tools and call in a pro. Trying to sand a permanently cupped floor with a rented drum sander from the local hardware store almost always ends in disaster. You’re far more likely to end up with chatter marks, ugly divots, and an uneven surface that looks much worse than the original cupping. For Parker homes with floors in this state, professional Parker hardwood floor refinishing is the only reliable way forward.
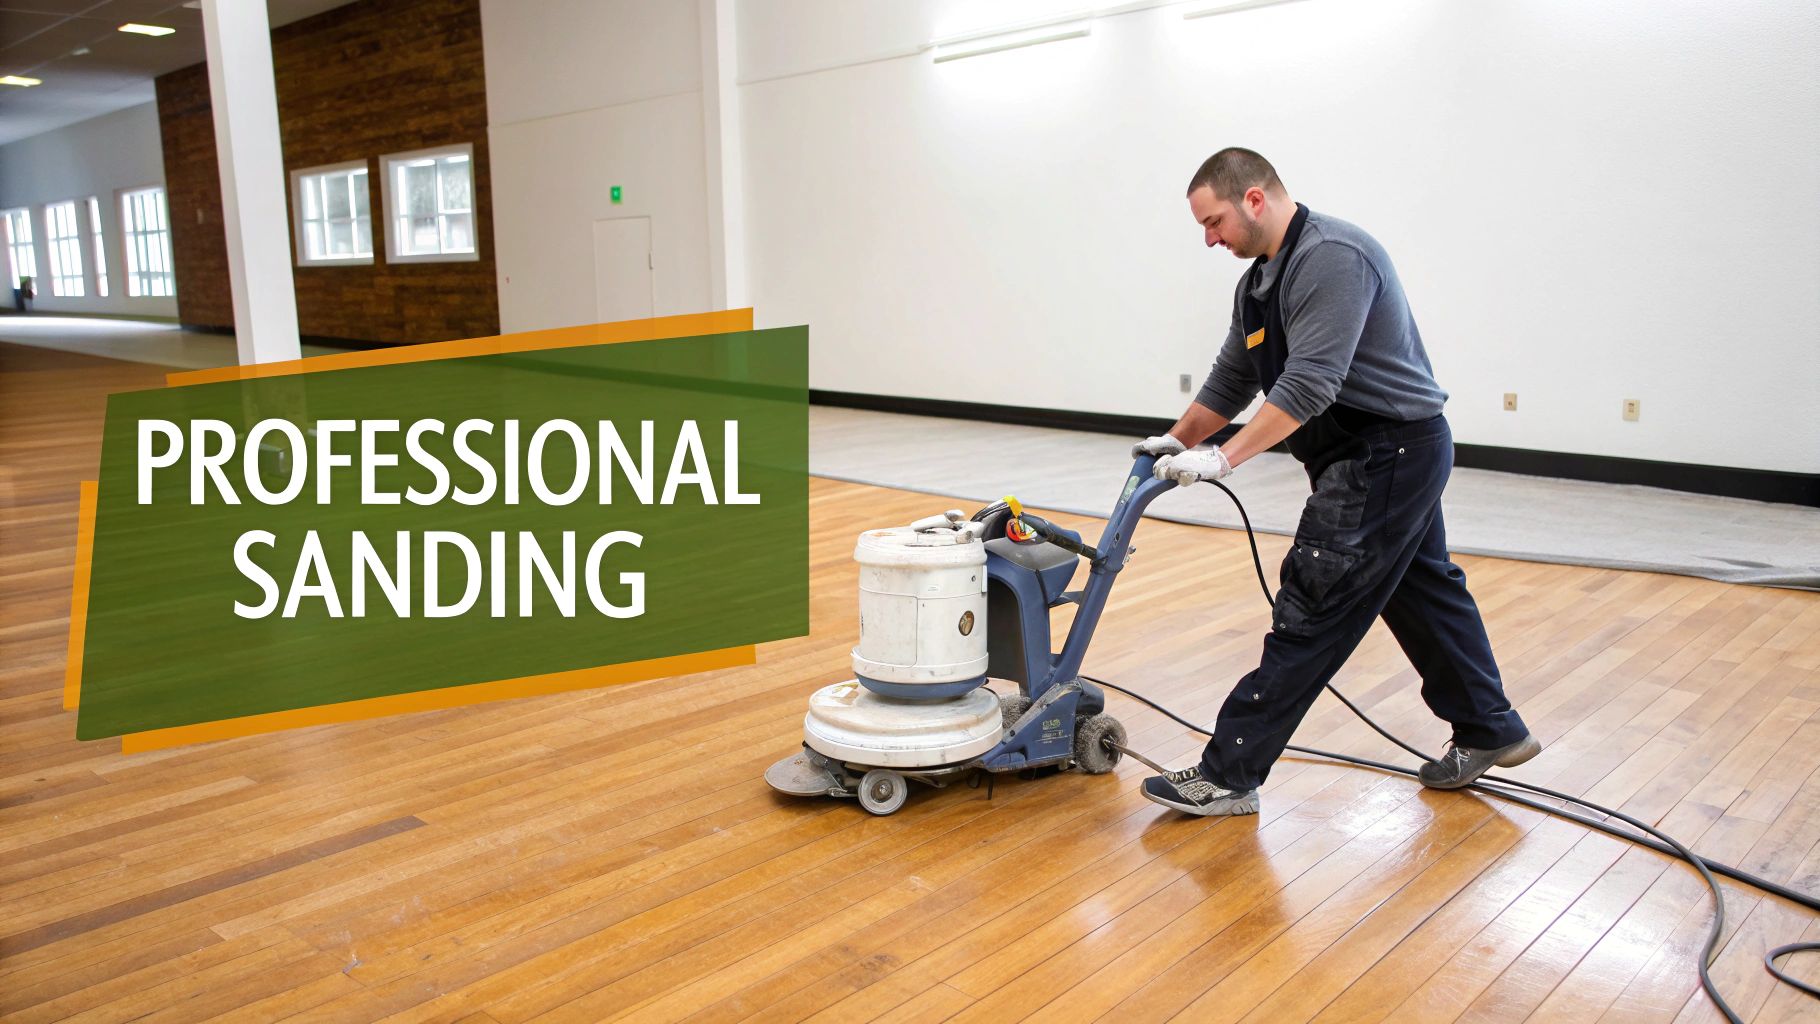
Our Dust-Free Sanding Process for a Flawless Finish
When a floor has taken a set, the only fix is to carefully and precisely sand down the raised wood along the edges of each board until the entire floor is perfectly flat again. This is a delicate operation that requires powerful, specialized equipment and a skilled hand—a rented DIY sander just doesn't have the precision or muscle for the job.
Our whole approach to hardwood full sanding & refinishing is built around a state-of-the-art dust-free sanding system. Here’s how we transform your permanently cupped floors without turning your house into a mess:
- Contained and Clean: Our commercial-grade sanders are hooked up to high-powered vacuums that capture over 99% of the wood dust before it ever gets a chance to go airborne. That means no thick layer of dust coating your furniture, walls, and air vents—a common nightmare with old-school sanding methods.
- Precision Leveling: We use a multi-stage sanding process, starting with aggressive grits to flatten the cupping and moving to progressively finer grits. This methodical technique doesn't just flatten the boards; it erases old scratches, dents, and discoloration, leaving a raw, pristine surface ready for a fresh start.
- Expert Technique: Our technicians know the nuances of different wood species, from the tough red oak common in older Parker neighborhoods to softer maples. This expertise ensures we remove only the absolute minimum amount of wood necessary to get the floor flat, preserving its lifespan.
If you’re curious about the nitty-gritty, you can explore the complete sanding and refinishing steps for floors we follow to guarantee flawless results every time.
The UV-Cure System: A Modern Solution for Parker Homes
Once your floors are sanded perfectly flat, they need protection. This is where we bring in our game-changing UV-Cure System, an advanced finishing technology that makes traditional methods feel ancient. While old-school polyurethane finishes can take days to cure and fill your home with harsh fumes, our UV finish is in a completely different league.
The difference between UV-cure and traditional finishes is night and day. Once the finish is applied, we roll a special UV light over the floor, and it cures instantly. You can walk on it and move your furniture back the very same day. No waiting, no toxic smells, and no staying in a hotel.
It's also incredibly tough—far more resistant to scratches and chemicals than finishes that have to air-dry for a week. For busy Parker homeowners, getting a completely restored floor without the downtime and chemical headache is a huge win. It’s the smartest way to permanently fix cupping and protect your investment for years to come.
Long-Term Strategies to Prevent Future Cupping
So, you’ve wrestled those cupped floors back into shape, and they look fantastic. Awesome. Now, the real mission begins: making sure you never have to do that again. This is a critical part of any successful Parker hardwood floor refinishing project.
Protecting your investment is all about playing the long game, especially with Colorado's wild seasonal swings. It boils down to smart, proactive moisture management with an eye on maintaining the finish applied by our UV-Cure System.
The single most powerful tool in your arsenal is a simple digital hygrometer. Seriously. This little gadget measures the relative humidity (RH) in your home, and it’s a total game-changer. Stick one on each level of your house, and you can keep a close eye on your indoor climate, heading off problems before they even start. The magic number? You want to keep your home's RH between 35% and 55% all year round.
Mastering Your Home's Environment
Colorado's climate is a unique beast. The bone-dry winters make wood shrink, while the humid summer months cause it to expand. Taming that constant push and pull is the secret to keeping your floors flat and happy.
Here’s how you create that stable, floor-friendly environment:
- Run a Humidifier in the Winter: When the furnace kicks on, it sucks all the moisture out of the air. A whole-home or even a portable humidifier puts that essential moisture back, stopping your floorboards from shrinking and creating unsightly gaps.
- Use a Dehumidifier in the Summer: This is non-negotiable, especially if you have a basement or crawl space. A good dehumidifier will pull that excess moisture from the air before it can get to the underside of your floors—the primary culprit behind cupping.
- Keep the Air Moving: Good ventilation is your friend. Run exhaust fans in bathrooms and the kitchen to get steam and humidity outside. Also, make sure your attic and crawl spaces are properly ventilated to prevent moisture from getting trapped.
Nailing these climate control basics creates a stable equilibrium. Your hardwood can finally relax without the stress of constantly swelling and shrinking.
Fortifying Your Home's Defenses
Beyond managing the air, you have to tackle moisture at its source. For most homes, that means the basement and crawl space. They are the superhighways for the kind of moisture that makes floors cup.
One of the most effective long-term fixes is crawl space encapsulation. Vented crawl spaces are notorious moisture traps. In fact, research shows that in these areas, wood moisture levels can shoot past 19%, triggering cupping in up to 70% of homes during the summer.
Encapsulating the space—which involves installing a heavy-duty 20-mil vapor barrier over the dirt floor and up the walls—can slash moisture intrusion by a whopping 75%. It effectively seals off the ground moisture, stabilizing the floors above.
Think of a vapor barrier as your floor's best bodyguard. It’s a tough, impermeable shield that physically stops water vapor from creeping up through the subfloor and into your hardwood. It breaks the cupping cycle right at the source.
Smart Cleaning and Professional Maintenance
Believe it or not, how you clean your floors plays a huge part in their long-term health. The number one rule: never use a steam mop or a sopping wet mop on hardwood. Ever. That excess water will seep between the boards and wreck both the wood and the finish.
Instead, stick to a microfiber mop that’s just lightly spritzed with a pH-neutral cleaner made specifically for hardwood.
For deeper, ongoing care, our professional hardwood clean and buff service is a fantastic maintenance step. It safely gets rid of built-up grime and minor scuffs without the disruption of sanding, all while refreshing the protective finish. This kind of periodic pro cleaning keeps your floor’s defenses strong. Another option for floors with built-up old treatments is our wax removal service.
Your Top Questions About Cupped Floors, Answered
When you notice those tell-tale waves in your hardwood, a million questions pop into your head. Don't worry, we've heard them all. Here are the straightforward answers we give Parker homeowners every day when they're trying to figure out what to do next with their hardwood floor refinishing needs.
Can Cupped Hardwood Floors Fix Themselves?
Sometimes, yes! But it all hinges on the "why." If the cupping is pretty mild and you’ve managed to hunt down and stop the moisture source, the wood can often relax and flatten back out on its own. It's a process called acclimation, and it's a test of patience, good airflow, and keeping your indoor humidity stable—ideally between 35% and 55%.
The catch? If the wood was wet for too long, it can "take a set," which is just a technical way of saying the cupped shape is now permanent. In that case, the floors have given up on fixing themselves and will need a professional hand to get them level again.
Is Sanding the Only Way to Fix Cupped Floors?
Nope, and it's definitely not the first step. The absolute most important thing to do first is to solve the moisture problem. Sanding a floor that's still holding extra water is a recipe for disaster—it will likely lead to "crowning," the opposite of cupping, and cause permanent damage.
If the boards flatten out completely after drying, you might just need a professional hardwood clean and buff or a screen and recoat to freshen up the finish. Sanding only comes into play when the floors have dried out completely but stayed cupped. That’s when our dust-free sanding is the right tool for the job, as it physically re-levels the surface of the wood.
How Long Does It Take for Floors to Un-Cup?
This is the classic "how long is a piece of string?" question. The timeline for floors to flatten out can be all over the map. It really depends on a few things:
- How bad is the cupping? Minor waves might chill out in a few weeks.
- What kind of wood is it? Denser woods like hickory hang onto moisture longer than softer woods like pine.
- What's the environment like? A dry, well-ventilated space is your best friend here and will speed things up.
- What time of year is it? We've seen floors take a full change of seasons—from a humid Colorado summer to a dry winter—to finally stabilize.
The key takeaway is to be patient. We're talking weeks or months, not days.
Expert Tip: Don't rush to judgment. A moisture meter is your best tool for tracking the wood's drying progress. You can only make a clear call on whether the cupping is permanent once the moisture content has returned to a normal, stable level.
Will My Cupped Floors Ever Look Normal Again?
Absolutely. When the right steps are followed, even floors that look like a washboard can be restored to a beautiful, flat, and uniform surface. The secret is in the sequence: find and kill the moisture source, let the wood dry out completely, and then call in the pros for sanding and refinishing if it's still needed.
A professional Parker hardwood floor refinishing service, especially when finished with something like a durable, instantly-hardened UV-Cure System, doesn't just fix the cupping—it can make your floors look even better than they did before. For a deeper look into how the restoration process works, check out our comprehensive answers to common questions about the hardwood floor refinishing industry.
Can I Prevent My Floors from Cupping Again?
Yes, and you absolutely should! Prevention is always the best long-term strategy. The most powerful way to stop cupping before it starts is to maintain a stable environment inside your home, all year round. That means:
- Keeping an eye on your home's humidity and keeping it between 35-55%.
- Running dehumidifiers in basements and crawl spaces, especially during wetter months.
- Making sure your gutters and landscaping drain water away from your foundation.
- Cleaning up spills and leaks the moment you see them.
- Using the right cleaning methods—never flood your floors with water.
If you can control the moisture, you can stop cupping in its tracks and protect your beautiful floors for years to come.
Homeowners in Parker trust J.R. Hardwood Floor Refinishing & Cleaning to restore the natural beauty of their hardwood floors with our dust-free sanding system and advanced UV-curable finishes. Unlike traditional methods, our UV technology cures instantly, so you can move furniture back the same day with no lingering odor or downtime. Choose the perfect refinishing service to match your needs and home traffic. Our dust-free process ensures a clean, beautiful finish every time.
📞 Phone: 720-327-1127
🌐 Website: jrhardwoodfloorrefinishingandcleaning.com
📍 Service Area: Parker, Lone Tree, Castle Rock, Centennial, Highlands Ranch, and surrounding areas.
📺 YouTube: See Our Work in Action!