 Skip to content
That unsettling feeling when you walk across your hardwood and feel a sudden hump or wave underfoot? It’s a homeowner's nightmare. For residents in Parker, fixing buckled hardwood floors always starts with one crucial first step: finding and killing the source of the excess moisture. This isn’t a mystery you can ignore—it’s almost always a problem of water or extreme humidity causing the wood to swell, expand, and lift. When you need professional hardwood floor refinishing in Parker, our advanced UV-Cure System ensures a fast, durable solution. Once you’ve got the moisture under control, you can start thinking about the fix, which can be anything from simple drying to a full-on board replacement and refinishing job.
Why Your Hardwood Floors Are Buckling in Parker
Discovering buckled hardwood is a common headache for homeowners here in Parker, Colorado. Our dramatic seasonal shifts, from humid summer thunderstorms to the bone-dry air of winter heating, create a tough environment for natural wood, especially in neighborhoods from Canterberry Crossing to The Pinery.
Wood is hygroscopic, which is just a fancy way of saying it acts like a sponge. It soaks up and releases moisture from the air around it. When your hardwood planks absorb too much moisture too fast, they swell. With nowhere else to go, this expansion forces the boards to mash against each other and pop up from the subfloor, creating that dreaded buckle.
The main culprit is always excess moisture, which can sneak in from a few different places:
- Sudden Water Events: Think a burst pipe from the dishwasher, a leaky refrigerator ice maker line, or an overflowing sink. These can absolutely saturate your floors in minutes.
- High Ambient Humidity: Poorly ventilated basements or crawl spaces, especially in some of Parker's older neighborhoods, can create a constant high-humidity zone that slowly damages the floors from below.
- Improper Acclimation: If new flooring isn't allowed to sit in your home and get used to the environment for several days before installation, it's a ticking time bomb for movement.
- Subfloor Moisture: Concrete subfloors that haven't fully cured or are missing a proper vapor barrier will wick moisture right up into the wood.
Cupping vs. Buckling: What's the Difference?
It’s really important to know if you're dealing with cupping or buckling. They're related, but they tell different stories about what's happening to your floor.
Cupping is when the edges of a board are higher than its center, creating a shallow, concave "cup" shape. Think of this as an early warning sign of a moisture imbalance, usually coming from underneath.
Buckling is a much more severe reaction where an entire board or a whole section of flooring lifts significantly off the subfloor. While both are caused by moisture, buckling signals a serious and immediate problem that needs attention now.
If you spot cupping, it's a great time to investigate before it gets worse. You can find more info in our detailed guide on how to fix cupped hardwood floors.
Your Immediate Action Plan
If you find buckled floors, time is absolutely of the essence. What you do in the first hour can make a huge difference in the long-term damage.
- Find and Stop the Water Source: This is priority number one. Shut off the water to that leaking appliance or pipe immediately. In the event of a major flood, knowing what to do immediately after a pipe burst is critical.
- Remove Standing Water: Grab towels, a wet-dry vac, or mops and get every last drop of surface water up.
- Create Airflow: Get fans and a dehumidifier aimed directly at the affected area. The goal is to slowly and evenly reduce the moisture in the wood and the air. Whatever you do, don't blast it with direct heat—that's a surefire way to make the wood crack.
Moisture damage is a widespread issue, and here in communities like Parker and across the Denver metro area, our climate shifts make homes a higher risk. For many, once the moisture is handled, the ultimate solution involves professional hardwood floor refinishing in Parker. This is especially true when using advanced techniques like our UV-Cure System, which can restore your floors and protect your investment for years to come.
So You Want to Fix Minor Floor Buckling Yourself? A Practical Guide
If you've caught the problem early and the buckling is just a slight lift, you might be able to tackle it yourself. For homeowners in areas like Parker's Stonegate neighborhood, a DIY approach can work—but only if you’re patient and, most importantly, you fix the root cause first. This is where expert hardwood floor refinishing in Parker and our UV-Cure System can make all the difference.
Let me be crystal clear: before you even think about touching the floor, you have to be 100% certain the source of the moisture is gone. Fixed. Eliminated. If you haven't repaired that leaky dishwasher hose or sorted out the humidity in your basement, anything you do to the floor is just a temporary patch. The problem will come right back.
The Essential DIY Toolkit
You don't need a professional's entire truck of tools for a minor fix, but a few items are non-negotiable if you want to do this right. The goal here is simple: dry the wood slowly and safely.
- A Quality Moisture Meter: This is your most critical tool. It's the only way to know what's really happening inside the wood planks and to tell you when the floor is truly stable again.
- Dehumidifiers: Renting or buying a good dehumidifier is key. It’s a workhorse that will pull all that excess moisture out of the air and, by extension, the wood.
- High-Volume Fans: A few box fans or industrial air movers will create the airflow you need across the floor. This is what speeds up evaporation.
- Heavy, Flat Weights: Think concrete blocks, full paint cans, or even stacks of heavy textbooks. Just make sure to wrap them in a soft towel or cloth first—you don't want to scratch the finish while you're trying to save the floor.
This simple three-step process is the foundation for any successful floor repair.
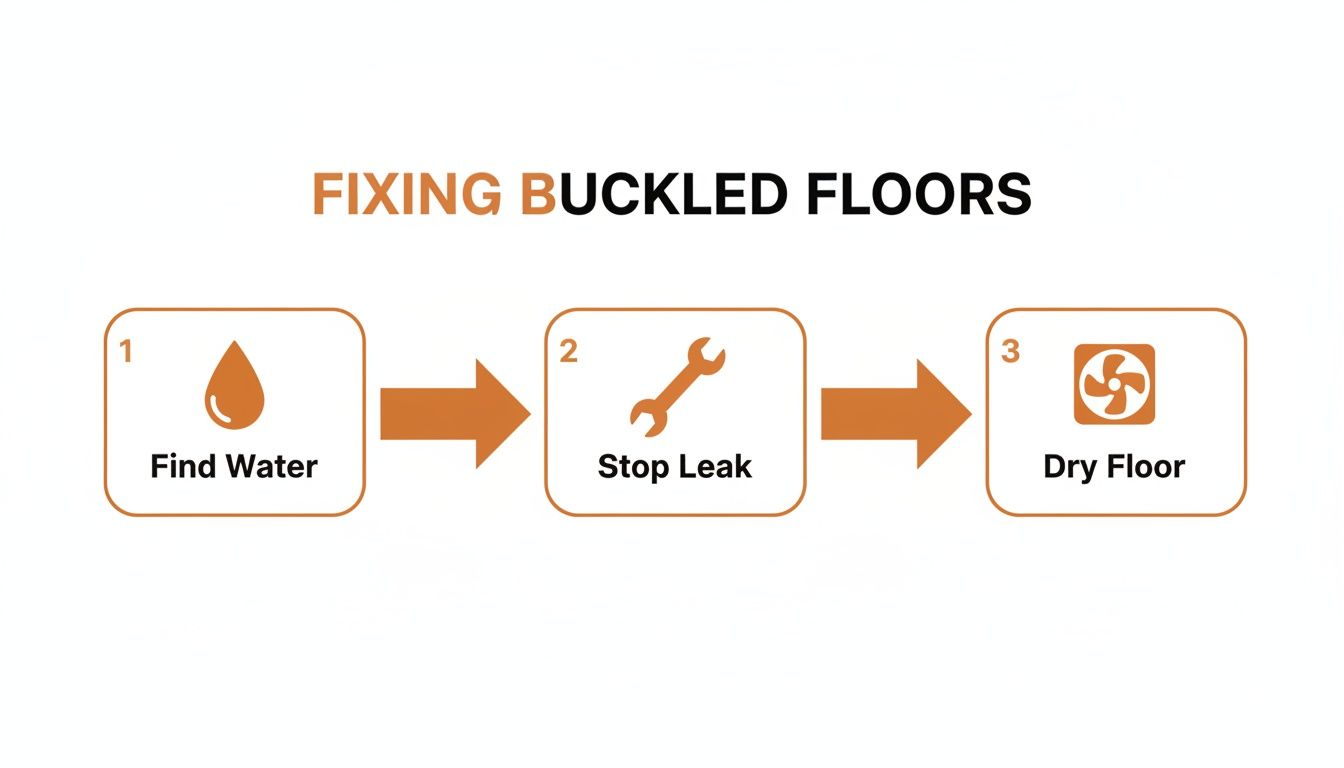
As the visual shows, it's always about finding the water, stopping it, and then—and only then—starting to dry everything out.
The Drying and Flattening Process
Once your tools are in place, the real work begins: waiting. Your job is to gently coax the wood into releasing its moisture so it can settle back down. If you rush this part, you risk cracking the boards or warping them permanently.
Start by setting up your fans to circulate air across the buckled spot. Get the dehumidifier running in the room and leave it on continuously. This one-two punch creates the perfect environment to draw moisture out of the planks.
Pro Tip: Whatever you do, do not point a space heater or heat gun at the floor. Blasting it with direct heat forces the moisture out way too fast. This can shrink and crack the wood fibers, causing damage that can't be undone. Slow and steady wins this race.
As the drying starts, you can place your towel-wrapped weights on top of the raised boards. Distribute the weight as evenly as you can across the entire buckled section. This gentle, consistent pressure helps persuade the planks to lie flat as they dry out.
To keep things organized, here's a quick checklist to guide you through the process.
DIY Buckling Repair Checklist
This table breaks down the key phases and actions for tackling minor hardwood buckling on your own. Following these steps in order is crucial for a successful repair.
| Phase | Action Required | Pro Tip |
|---|---|---|
| Investigation | Find and completely stop the source of the moisture. | Check under sinks, behind appliances, and along exterior walls first. |
| Preparation | Set up dehumidifiers and high-volume fans to circulate dry air. | Create a "drying tent" with plastic sheeting for very localized spots to focus the airflow. |
| Flattening | Place towel-wrapped heavy weights evenly across the buckled boards. | Use multiple smaller weights rather than one giant one for more even pressure. |
| Monitoring | Use a moisture meter daily to track moisture content in the wood. | Test an unaffected board to get your baseline "dry" reading. |
| Patience | Continue the process until the buckled boards are within 2-4% of the dry boards. | Don't rush it! This can take days or even weeks. |
| Assessment | Once dry and flat, remove equipment and observe for a few days. | Check for any remaining haze on the finish or gaps between boards. |
With this checklist, you can methodically work through the problem without missing a critical step.
How to Track Your Progress
Your moisture meter is your best friend here. Every day, take a reading from a part of the floor that was never wet—this is your baseline, your target number. Then, take a few readings from different spots on the buckled planks.
You're waiting for the moisture content in the affected boards to get back to within 2-4% of the dry boards. This can take a few days or, in more serious cases, a few weeks. Don't get discouraged; patience is everything.
Once the meter tells you the wood is dry and the boards look flat, you can remove the weights and fans. Keep an eye on the area for another few days to make sure it stays down. If the boards are flat but the finish looks a little cloudy or damaged, a professional screen and recoat might be all you need. If the damage is worse, you can learn about the full process and how to refinish hardwood floors in our detailed guide.
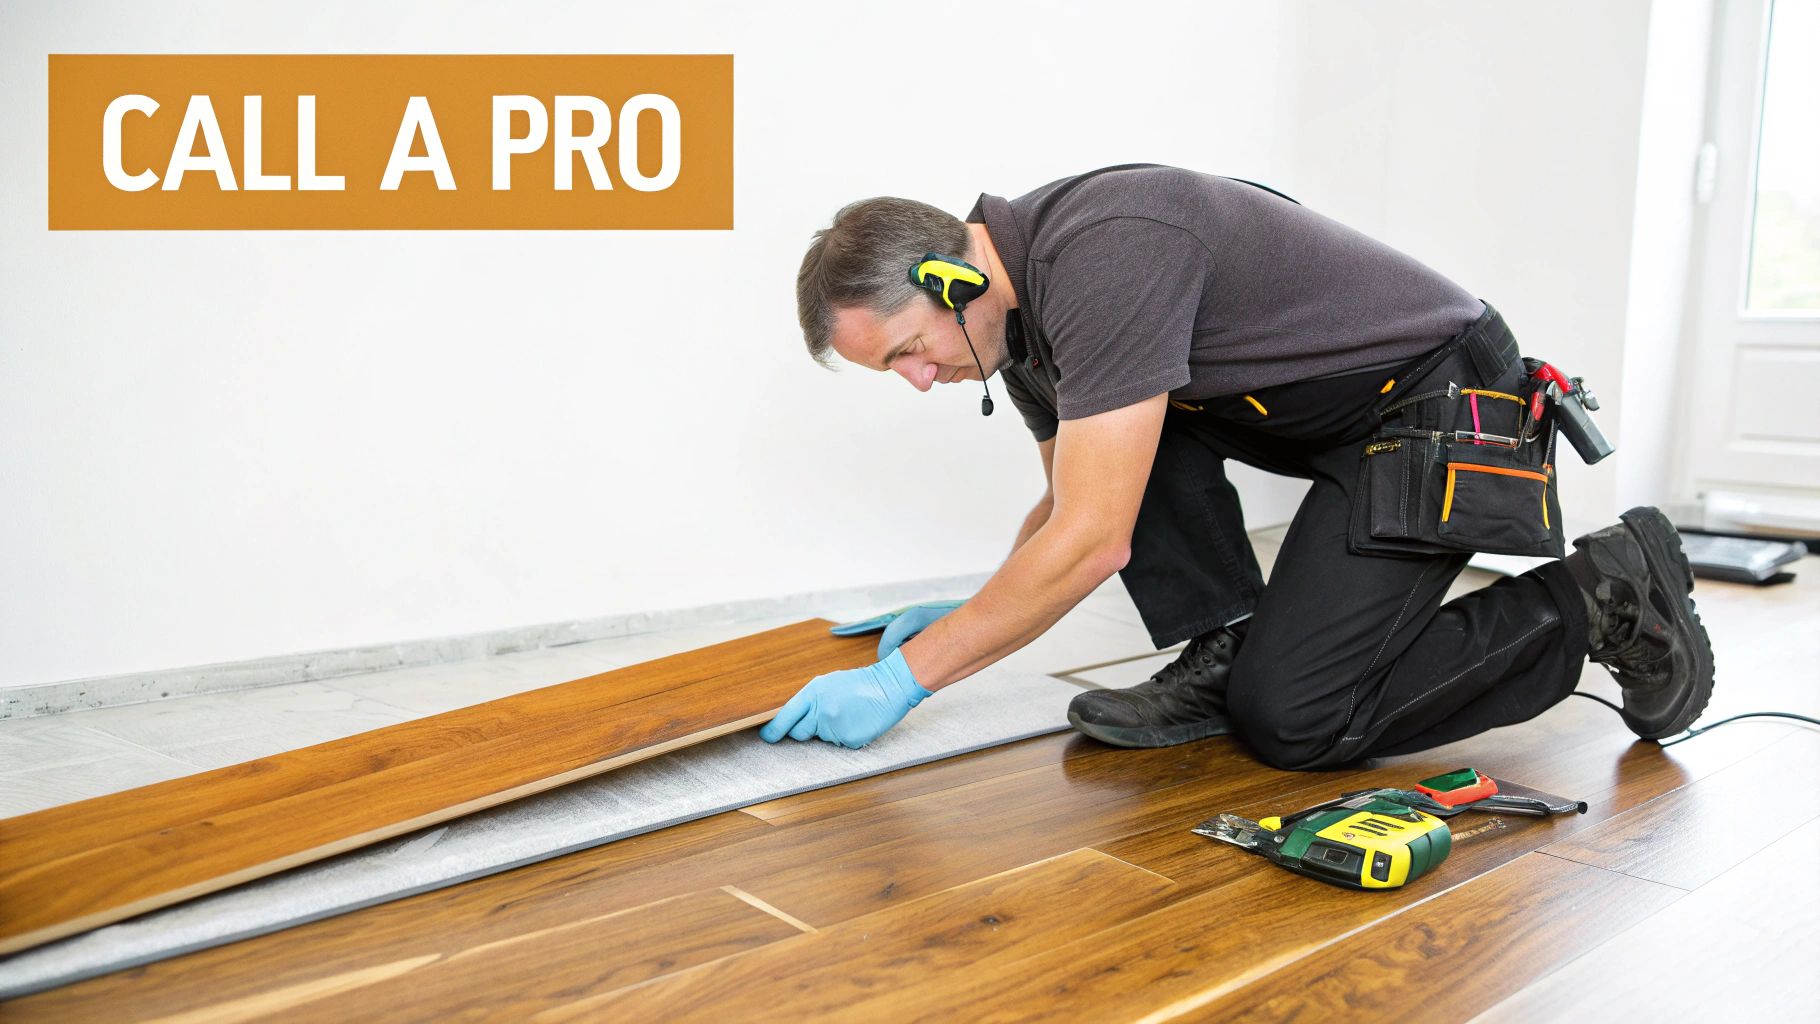
But what if the boards are dry but still raised, split, or warped? That's a sign the wood has been permanently damaged. At this point, the DIY fix is off the table. It's time to call in a professional for board replacement and hardwood floor refinishing in Parker. We can even use our instant UV-Cure System to get your floor back in action with maximum durability and minimal downtime.
When to Call a Pro for Board Replacement and Refinishing
Sometimes, just drying out your buckled hardwood isn't going to cut it. While a little patience can work wonders for minor moisture issues, severe or prolonged water exposure can permanently wreck the wood fibers. You’re left with planks that are just plain warped for good. This is when professional hardwood floor refinishing in Parker becomes essential.
So, you've done everything by the book—you found and fixed the leak, you brought in the fans and dehumidifiers, and you waited. But the boards are still lifted, cracked, or discolored. That’s your floor telling you the damage is beyond a simple DIY fix. This is the point where ignoring the problem can lead to bigger headaches like subfloor rot or even mold. It's time to call in a professional.
Signs You Need Professional Board Replacement and a UV-Cure System
You have to know when to admit the wood itself has given up. No amount of weight or wishful thinking will flatten a plank that’s been fundamentally compromised. Here are the tell-tale signs that replacing boards is the only real solution:
- The Warp Won't Go Away: After you've thoroughly dried the area (and checked it with a moisture meter), the boards are still cupped or buckled.
- Splitting and Cracking: The wood has split along the grain or cracked on the surface from the stress of swelling and shrinking.
- A Peeling Finish: You can see the topcoat flaking, peeling, or turning a milky-white color. That means moisture got trapped underneath.
- Permanent Gaps: As the wood dried, it shrank unevenly, leaving ugly gaps between the planks that aren't closing up.
- That "Spongy" Feeling: When you walk on the damaged spot, it feels soft or bouncy. This is a huge red flag for subfloor damage.
If you’re seeing any of these issues in your Parker home, it’s time for a professional assessment.
Our Professional Repair and Refinishing Process
When you call us, we don’t just slap a patch on it. Our process is meticulous, designed to make the repair totally invisible and leave your entire floor looking flawless and unified. We start by surgically removing only the damaged planks, taking extreme care not to harm the good boards surrounding them.
Next up is the most critical part: finding the perfect wood match. We don't just grab any old oak plank. We pinpoint the exact species, grade, and even the cut of your existing floor to find replacement boards that are a perfect twin. This obsession with detail is what separates a decent repair from a truly seamless one.
Once we have the right wood, we expertly lace the new boards into the existing floor. But our job is far from over. A patch of brand-new, unfinished wood sitting in an older, finished floor sticks out like a sore thumb.
This is exactly why we insist on refinishing the entire room. It’s not an upsell; it’s the only way to guarantee the new and old boards accept the stain and finish identically, creating a single, beautiful surface.
This is where our specialized services for hardwood floor refinishing in Parker come into play. We use a dust-free sanding system to take the old finish off every single board—new and old—creating a perfectly uniform canvas. You can get a closer look at what that involves by checking out our guide to full sanding and refinishing.
After sanding, we apply your chosen stain and finish. For homeowners who need maximum durability with zero downtime, our UV-Cure System is a total game-changer. This technology uses ultraviolet light to cure the finish instantly, hardening it to its toughest state in mere seconds. No waiting for days, no lingering chemical smells, and no tiptoeing around. You get an incredibly tough, gorgeous floor that’s ready for furniture and foot traffic the very same day. The repair completely disappears, restoring the beauty and value of your Parker home’s hardwood floors.
Repair Costs: Buckling Fixes vs. Full Floor Replacement
When you're staring at a buckled hardwood floor, one of the first things that probably pops into your head is, "How much is this going to cost me?" It's a valid question, and the answer can swing wildly depending on how bad the damage is and which path you take for your hardwood floor refinishing in Parker.
For homeowners here in Parker, it really comes down to weighing the cost of a strategic repair against the massive expense of tearing everything out and starting over. Let’s break it down.
Sometimes, you get lucky. A minor, localized buckle that's caught early might just cost you the time and rental fee for a good dehumidifier. But once you need to call in the pros, the numbers start to climb. The decision usually boils down to one simple question: can we save the original floor? In my experience, the answer is almost always a resounding yes.
Comparing Your Financial Options
Let's get real about the numbers. It’s crucial to understand how a smart repair and refinish stacks up against the nuclear option of a full replacement.
- Spot Repairs & Board Replacement: If the damage is contained to just a small area, we can perform surgical-style board replacements. This is always going to be way more affordable than a full tear-out.
- Repair Plus Refinishing: This is our most common—and most cost-effective—solution for significant buckling. After we replace the warped boards, a complete hardwood floor refinishing service with our UV-Cure System ensures everything looks seamless and uniform again. Our Gold Traffic Plus package, for example, adds incredible scratch resistance for a beautiful, long-lasting result.
- Full Floor Replacement: Honestly, this is the last resort. It means ripping out all the old wood, prepping the subfloor, and installing a brand-new floor. The cost for materials and labor is in a completely different league.
The cost difference is dramatic. Spot repairs for smaller affected areas might run you $500-$2,000. On the other hand, a full floor replacement can easily soar past $10,000-$25,000, depending on the square footage and the type of wood you choose. And don't forget the impact on your home's value—obvious buckling can be a major red flag for potential buyers.
A Real-World Parker Case Study
We recently helped a family in the Idyllwilde community right here in Parker. They had a slow leak from their refrigerator's water line that caused a pretty gnarly buckle in their beautiful red oak kitchen floor. They were convinced they'd have to replace the flooring throughout their entire open-concept main level.
Instead of that costly nightmare, we took a much more targeted approach. Our crew carefully removed only the warped planks, sourced perfectly matching red oak, and expertly laced the new boards in. From there, we did our signature dust-free sanding across the entire level and applied our Gold Traffic Plus finish. The result? You couldn't tell there was ever a repair. The whole floor looked brand new, and we saved them thousands of dollars compared to the replacement quote they'd received.
A targeted repair combined with a professional refinishing service almost always provides a better return on investment than a full floor replacement. It preserves the original character of your home while restoring the floor to its former glory.
If the buckling was caused by a major water event like a burst pipe, dealing with your insurance company becomes a huge piece of the financial puzzle. When you're facing that kind of significant water damage, knowing how you're fighting for a fair water damage claim settlement is absolutely essential to covering the repair costs.
Ultimately, making a smart financial choice starts with getting an expert opinion. We can walk you through the specific costs for your situation. You can also explore our detailed guide on floor refinishing costs per square foot to get a clearer picture of the investment involved in bringing your floors back to life.
Proactive Maintenance to Prevent Future Floor Buckling
After going through the stress and cost of repairs, the last thing any Parker homeowner wants is a repeat performance. Let's be honest, the best way to deal with buckled hardwood is to make sure it never happens again. This isn't just about cleaning; it’s about creating a stable environment where your beautiful floors can thrive for decades. The right hardwood floor refinishing in Parker and a powerful UV-Cure System can provide a protective layer, but daily habits matter most.
Think of this as your long-term playbook—your best defense, tailored specifically for the challenges of our Colorado climate.
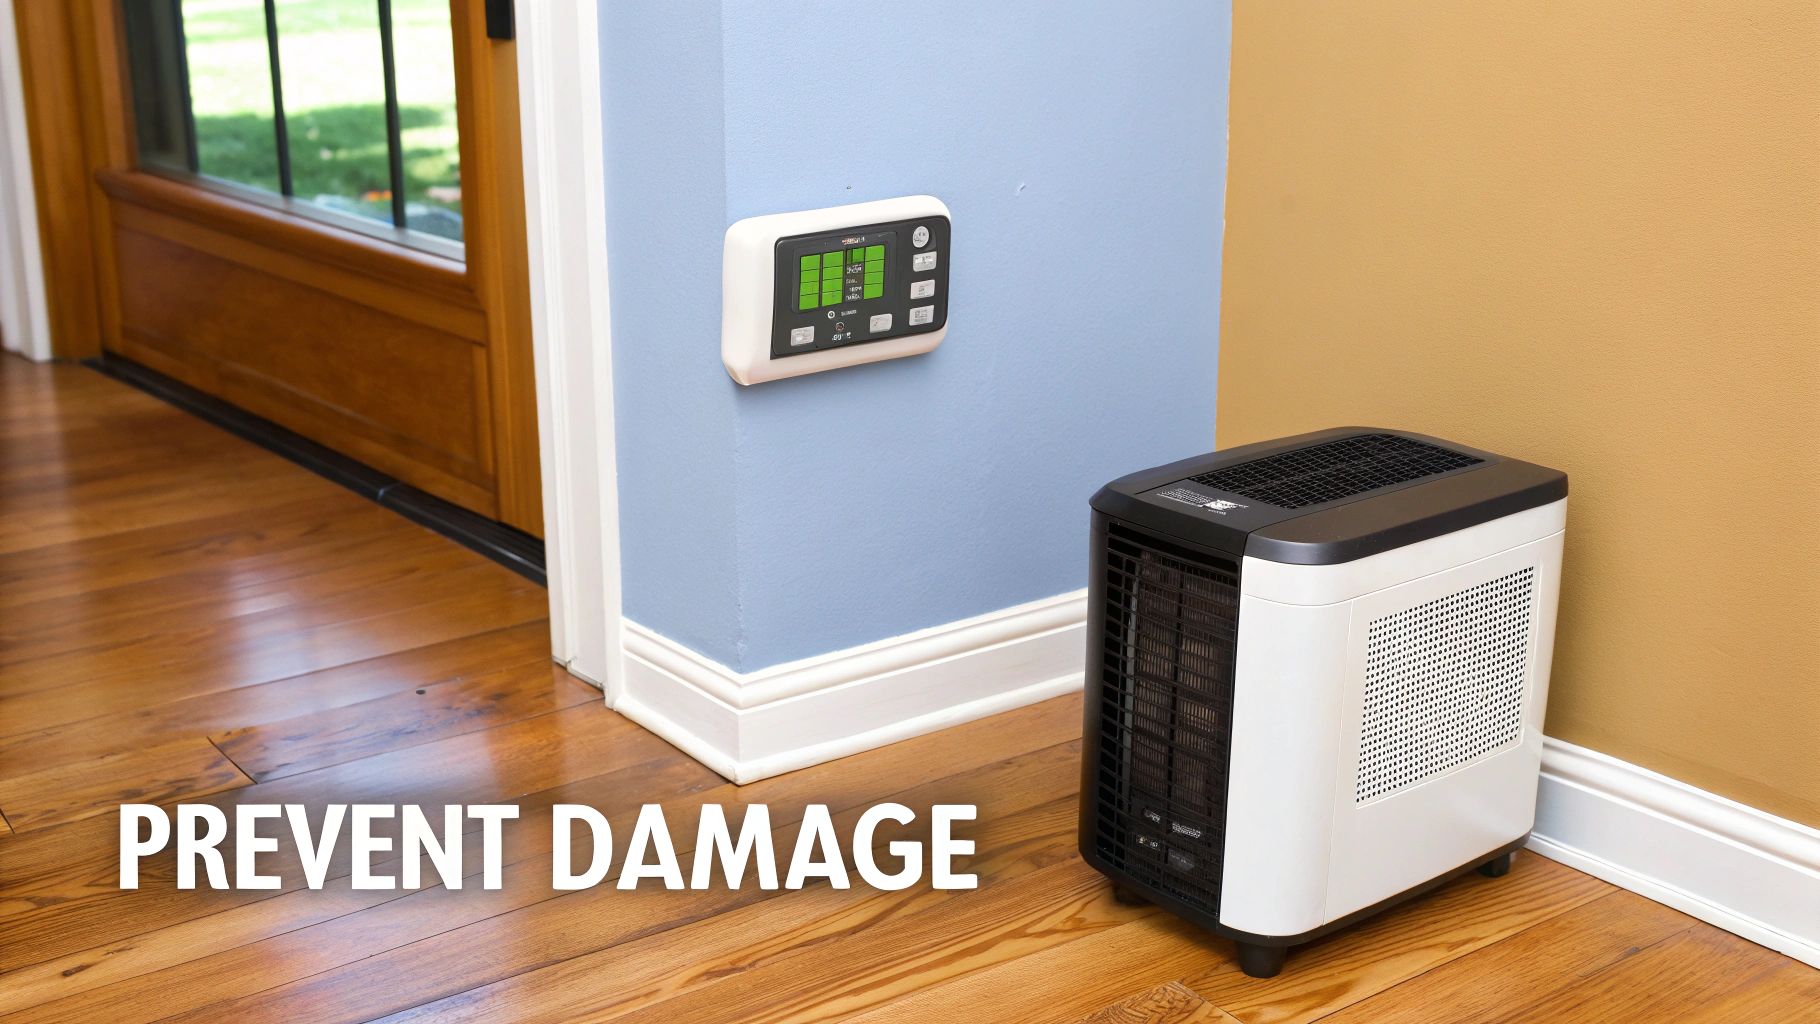
Master Your Home's Indoor Climate
Here in Colorado, we swing from bone-dry winter air that keeps the furnace humming to humid summer monsoons. That fluctuation is the number one enemy of hardwood. Wood floors are happiest when the indoor relative humidity stays consistent.
Your goal? Maintain an indoor humidity level between 35% and 55% all year round. That’s the sweet spot that keeps the wood’s natural tendency to expand and contract in check.
- During Dry Winters: A whole-home humidifier tied into your HVAC system is the gold standard. If that's not an option, portable units can work wonders in key areas.
- During Humid Summers: A dehumidifier is non-negotiable, especially in basements and crawl spaces. Proper ventilation down there is critical to stop moisture from wicking up into the subfloor and the hardwood above.
Vigilance is Your Best Tool
Water damage doesn't always come from a dramatic flood. More often than not, it’s the slow, sneaky leaks that cause the most trouble over time. Get in the habit of regularly inspecting potential problem areas.
Check behind and under your refrigerator (that ice maker line is a common culprit!), dishwasher, washing machine, and sinks. A tiny, slow drip can saturate a subfloor over weeks, leading to a major buckling event before you even know it's happening.
The rule is simple: if you spill something, clean it up immediately. Don't let water sit. Use a soft, absorbent cloth and make sure the area is completely dry. This simple habit is one of the most powerful preventative measures you can take.
The Critical Role of Proper Installation and Acclimation
Prevention starts before the first board is even laid. If you’re thinking about a new installation, proper wood acclimation is the single most important step—and it's the one that often gets skipped.
Wood planks must be stored inside your home for several days, sometimes longer, before installation. This allows the wood to adjust to your home’s unique temperature and humidity levels. Installing "un-acclimated" wood is just asking for trouble, as it will inevitably swell or shrink dramatically once it settles in.
This is a step our professional installers never, ever compromise on, ensuring a stable, beautiful floor from day one. When you invest in a professional hardwood floor refinishing in Parker, especially one protected by our instant UV-Cure System, you want that foundation to be perfect.
For more tips, you can explore our complete guide on how to protect hardwood floors. By controlling humidity, staying vigilant about leaks, and ensuring proper installation, you’re taking the most important steps to protect your investment and enjoy flawless hardwood floors for years to come.
FAQs on Fixing Buckled Hardwood in Parker
When your floors start to warp, it's natural to have a million questions. As the go-to experts for hardwood floor refinishing in Parker, we've heard them all. Here are the straight-up answers to the questions homeowners like you ask us most, so you can tackle this with confidence.
How long does it take to fix buckled floors?
Honestly, it depends on how bad the buckling is. If it's a minor issue and the wood just needs to dry out, you could be looking at a few days or even a couple of weeks for the planks to relax back into place on their own. But if we're talking about replacing boards and refinishing the floor, the job itself usually takes about three to five days. This is where our advanced UV-Cure System really shines. Forget waiting around for days for the finish to dry. The UV finish cures instantly, which means you can walk on your floors and move your furniture back the very same day we pack up our tools.
Will my homeowners insurance cover buckled floor repair?
That’s the big question, isn't it? The answer really comes down to your specific policy and what caused the buckling in the first place. Insurance is usually on your side for "sudden and accidental" events—think a burst pipe flooding the kitchen or a dishwasher that suddenly springs a leak. Where it gets tricky is with gradual damage. A slow, hidden leak behind a wall or constant high humidity from a damp basement often isn't covered. Your first move should always be to call your insurance agent right away to see where you stand. We can then provide a detailed, professional quote for the repairs that you can submit with your claim to make the process smoother.
Can you match new boards to my old floor?
Absolutely. This is a mix of science and artistry, and it's something we've perfected over the years. Getting a seamless match is a meticulous process. We’re experts at sourcing the exact wood species, grade, and even the specific cut of the wood to ensure the new planks blend right in with your existing floor. This is exactly why we always refinish the entire room after a repair. Our dust-free sanding and refinishing process is the final, critical step. It lets us blend the new and old boards together with a perfectly uniform stain and finish. The result? A flawless repair that’s completely invisible.
Should I replace my whole floor instead of repairing it?
In almost every situation we see, repairing the damaged section and refinishing the entire room is the smartest, most cost-effective choice. Tearing out and replacing an entire hardwood floor is a massive project—it’s expensive, messy, and seriously disruptive. That's usually only necessary if the damage is incredibly widespread or if the subfloor itself has been structurally compromised. Our team will always give you an honest, straight-shooting assessment. Our goal is to save your beautiful, original hardwood floors whenever we can. It preserves your home’s character, maintains its value, and saves you from a huge, unnecessary expense. A targeted repair combined with our professional hardwood floor refinishing in Parker almost always delivers the best possible outcome.
Homeowners in Parker trust J.R. Hardwood Floor Refinishing & Cleaning to restore the natural beauty of their hardwood floors with our dust-free sanding system and advanced UV-curable finishes. Unlike traditional methods, our UV technology cures instantly, so you can move furniture back the same day with no lingering odor or downtime. Choose the perfect refinishing service to match your needs and home traffic. Our dust-free process ensures a clean, beautiful finish every time.
📞 Phone: 720-327-1127
🌐 Website: jrhardwoodfloorrefinishingandcleaning.com
📍 Service Area: Parker, Lone Tree, Castle Rock, Highlands Ranch, and surrounding areas.
Watch Our Work on YouTube!