 Skip to content
Thinking about new hardwood floors for your Colorado home? You've come to the right place. This guide is for every homeowner along the Front Range, from the modern builds in Highlands Ranch to the classic charm of homes in Boulder, who wants that timeless beauty and solid value that only real wood can offer. A proper Colorado hardwood floor installation is a significant upgrade, but getting it right requires expertise, especially in our unique climate.
Getting it right comes down to three things: picking the right wood, trusting the right hands to install it, and sealing it with a finish that can handle our active Colorado lifestyle, like an advanced UV-Cure System. For homeowners in cities like Parker, understanding these choices is key to a lasting investment.
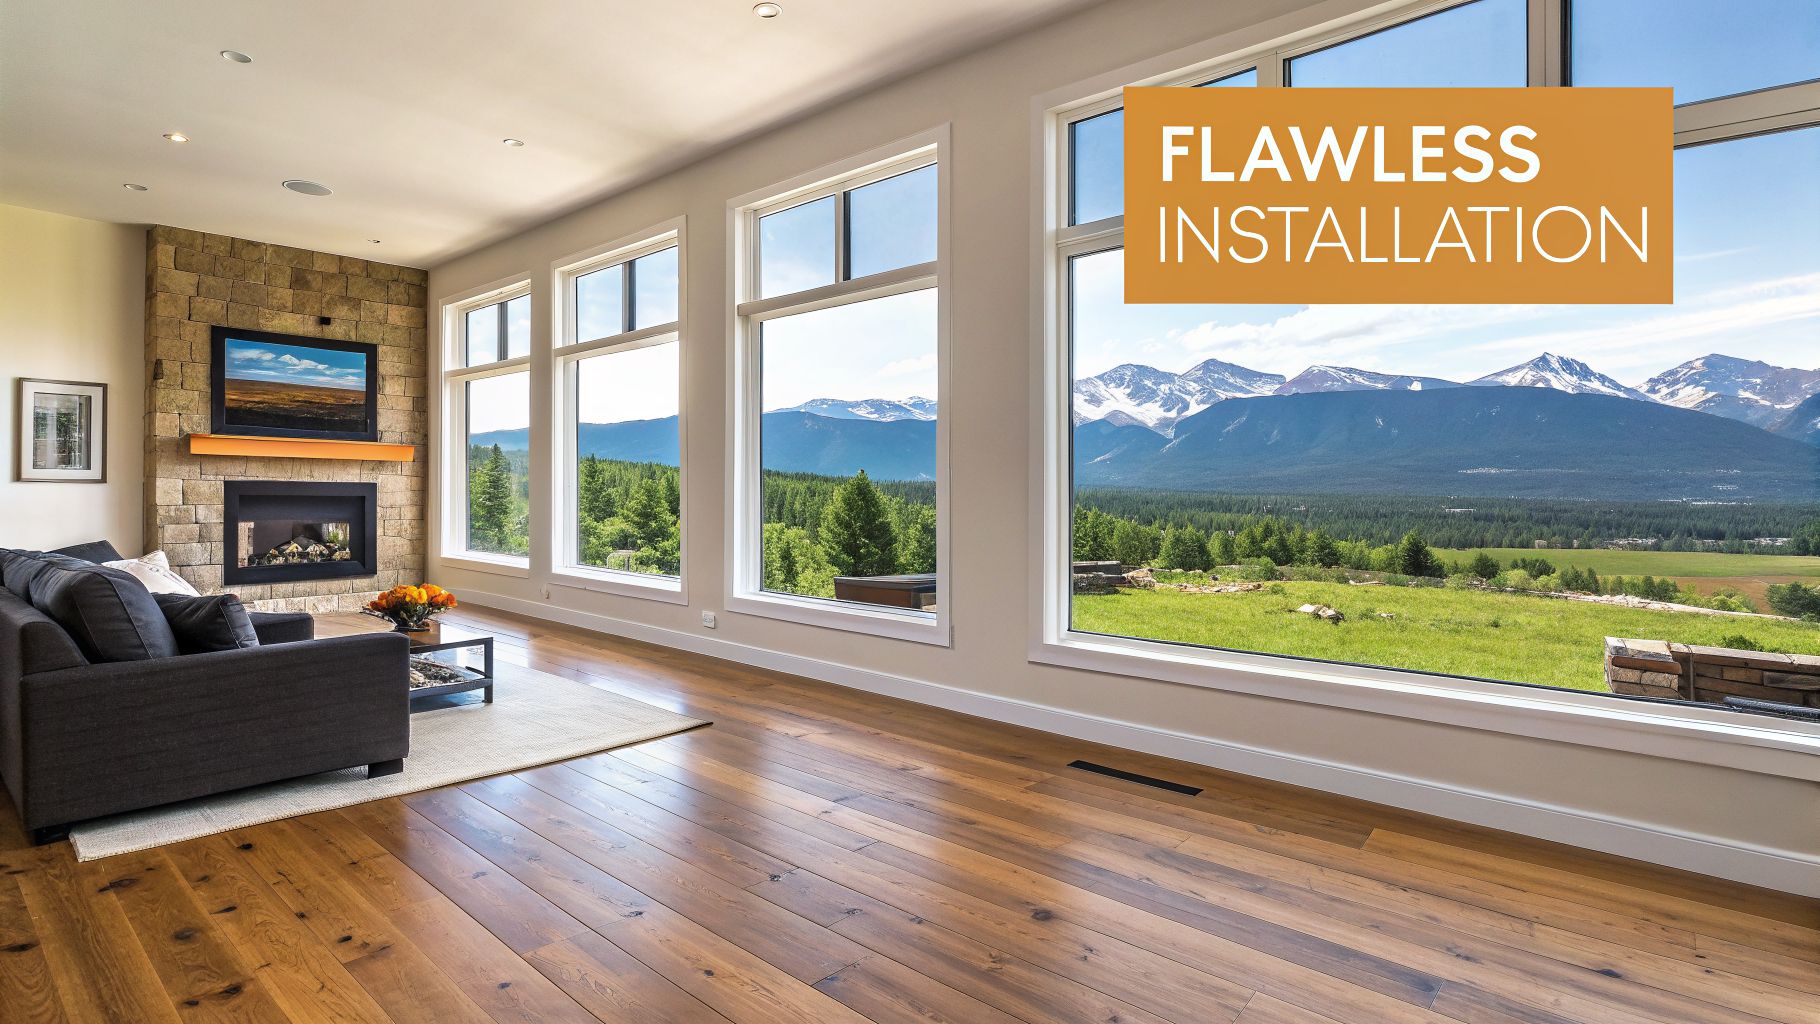
Your Essential Guide to a Flawless Installation
A perfect Colorado hardwood floor installation can completely transform your home. But getting that flawless, magazine-worthy result means making a few smart decisions upfront. Our dry climate and active lives demand floors that are not just beautiful, but built to last from day one. This is especially true whether you're in a modern home in Parker or a historic property in Denver.
This is your roadmap. We’ll walk you through the big choices, from the species of wood you choose to the installation method that makes the most sense for your home and the kind of finish that will stand up to kids, pets, and ski boots.
Success is all in the details. Let’s get into what really matters for your Colorado hardwood floor installation.
Key Decisions for Your Hardwood Floor Installation Project in Colorado
Making the right calls at the start of your project is everything. It doesn’t matter if you're renovating a historic gem in Denver's Wash Park or putting the finishing touches on a new build out in Parker—the fundamentals don't change. You've got to pick the right wood for our climate, use the right technique for your subfloor, and choose a finish that can take a beating, such as an instant UV-Cure System.
And once those beautiful floors are in, protecting them with something as simple as a quality Rug Pad For Wood Tile Floors can make a huge difference in preventing scratches from area rugs.
To help you get your head around the main decision points, we’ve put together this quick-reference table. It breaks down the critical choices you’ll be making.
Key Decisions for Your Colorado Hardwood Floor Installation
| Decision Point | Key Considerations for Colorado Homeowners | Expert Recommendation |
|---|---|---|
| Wood Type and Species | Engineered hardwood handles our dry climate's expansion/contraction better. Solid wood offers more refinishing opportunities. Oak, Hickory, and Maple are all great, durable choices. | For most Colorado homes, engineered hardwood is the superior choice for stability. It just moves less with our drastic humidity swings. We often recommend it for homes in areas like Parker. |
| Installation Method | Your subfloor is the deciding factor. Nail-down is for wooden subfloors. Glue-down or floating methods work over concrete. | Nail-down is the gold standard for solid wood over a plywood subfloor. Engineered gives you more flexibility with glue or floating installations. |
| Finish Type | It’s a battle between cure time, durability, and VOCs. Old-school oil-based finishes vs. modern, fast-curing UV systems. | A UV-cured finish is a game-changer. It’s instantly durable with zero downtime, making it perfect for busy families, pets, and anyone who can't wait days for their floors to be usable. |
| Choosing a Contractor | Look for proven local experience in places like Denver or Parker. They must have proper licensing, insurance, and a portfolio you can see. | Find a pro who specializes in dust-free sanding and modern UV finishes. It's the cleanest, highest-quality approach for a long-lasting result. |
Think of a professional Colorado hardwood floor installation as a direct investment in your home’s value and your own daily enjoyment. When you understand these key pieces, you're in a much better position to team up with a great contractor and get a result you'll be proud of for decades.
For a deeper dive into material choices, you can learn more about our Colorado hardwood flooring options.
Choosing the Best Hardwood for Colorado's Climate
Picking the right wood for your Colorado hardwood floor installation is easily the most important decision you'll make in the entire process. Our state's famously dry air and wild humidity swings—from bone-dry winters to surprise summer monsoons—are notoriously tough on natural wood. A smart choice right at the start is your best defense against frustrating problems like gapping, cupping, and warping down the road.
The secret lies in choosing a wood with excellent dimensional stability. Think of it as a wood's ability to stay put and resist expanding or shrinking when the moisture in the air around it changes. Here in Colorado, that quality isn’t just a nice-to-have; it's absolutely essential for a floor that will last and look beautiful for decades. This is true for every project, from restoring a red oak floor in a Denver bungalow to a new install in Parker.
Solid vs. Engineered Hardwood: A Colorado Perspective
For years, solid hardwood was the only game in town. It's a classic, for sure, but its single-piece construction makes it move a lot in our climate. This is exactly where engineered hardwood comes in, offering a massive advantage for Colorado homeowners.
Engineered hardwood isn't "fake wood" or a cheap substitute. It’s a brilliant piece of construction: a top layer of beautiful, real hardwood bonded to multiple layers of high-quality plywood. These underlying layers are stacked in opposing directions, creating a cross-grain structure that fights against the natural tendency to warp or gap when humidity goes up or down.
This built-in stability makes engineered hardwood our go-to recommendation for most homes along the Front Range, from mountain cabins in Evergreen to modern remodels in Castle Rock. It’s also the perfect solution for installing over concrete subfloors, which are incredibly common in local basements and main-level builds. If you're trying to wrap your head around the options, our guide breaks down the difference between solid and engineered hardwood in much more detail.
The demand for high-quality, real wood floors like engineered planks just keeps climbing. We've seen it firsthand—even as interest rates fluctuate, homeowners are consistently choosing to invest in premium, durable materials that add real value.
Popular Wood Species for Colorado Homes
Beyond how the plank is built, the species of wood you choose plays a huge part in how it holds up to daily life. Some woods are just naturally tougher than others. We measure this resilience using the Janka hardness scale, which is a straightforward rating of a wood's ability to resist dents and wear.
Here are a few popular choices that we know perform exceptionally well in Colorado homes:
- White Oak: A true classic and for good reason. White Oak has a Janka rating of 1360, a tight, beautiful grain, and it’s known for being very stable. Its neutral tones work with almost any design style, perfect for homes in Parker.
- Hickory: If you need something tough, this is it. As one of the hardest domestic woods you can get, Hickory has a powerhouse Janka rating of 1820. It’s perfect for a rustic look with its distinct grain and color variations, and it stands up to incredible wear and tear.
- Red Oak: With a Janka rating of 1290, Red Oak is a reliable performer. We see it all the time in historic Denver homes, where its signature warmth and prominent grain feel right at home. We recently refinished a red oak floor in a historic Parker home, bringing its original character back to life.
The Critical Step of Acclimation
Okay, this part is important. No matter what wood you end up choosing, there is one step that is completely non-negotiable for a successful Colorado hardwood floor installation: acclimation.
Wood is a living, breathing material. It needs time to get used to the unique temperature and humidity inside your house before it gets nailed down. This means bringing the unopened boxes of flooring into your home and letting them just sit for several days—sometimes up to a week or more. This lets the moisture content inside the wood equalize with the environment in your home.
Skipping acclimation is a recipe for disaster. It’s the number one cause of ugly gaps forming between boards in the winter and frustrating buckling or cupping when the summer humidity arrives. Any true professional will insist on this step. It’s the foundation for a floor that stays flat, tight, and beautiful for years to come.
Breaking Down the Professional Installation Process
So, you’ve picked out your dream hardwood. What happens next? A top-notch Colorado hardwood floor installation isn’t just about slapping down planks and calling it a day. It’s a craft, a meticulous three-act play where every step—from prep to finish—is critical for floors that look stunning and last a lifetime.
Knowing what to expect can make the whole experience feel less like a construction zone and more like a home transformation. We’ll walk you through exactly what happens in your home, especially since we use modern tech like dust-free sanding and our instant UV-Cure System to make the process as smooth and painless as possible for our clients in Parker and beyond.
Here’s a bird's-eye view of how a quality installation unfolds.
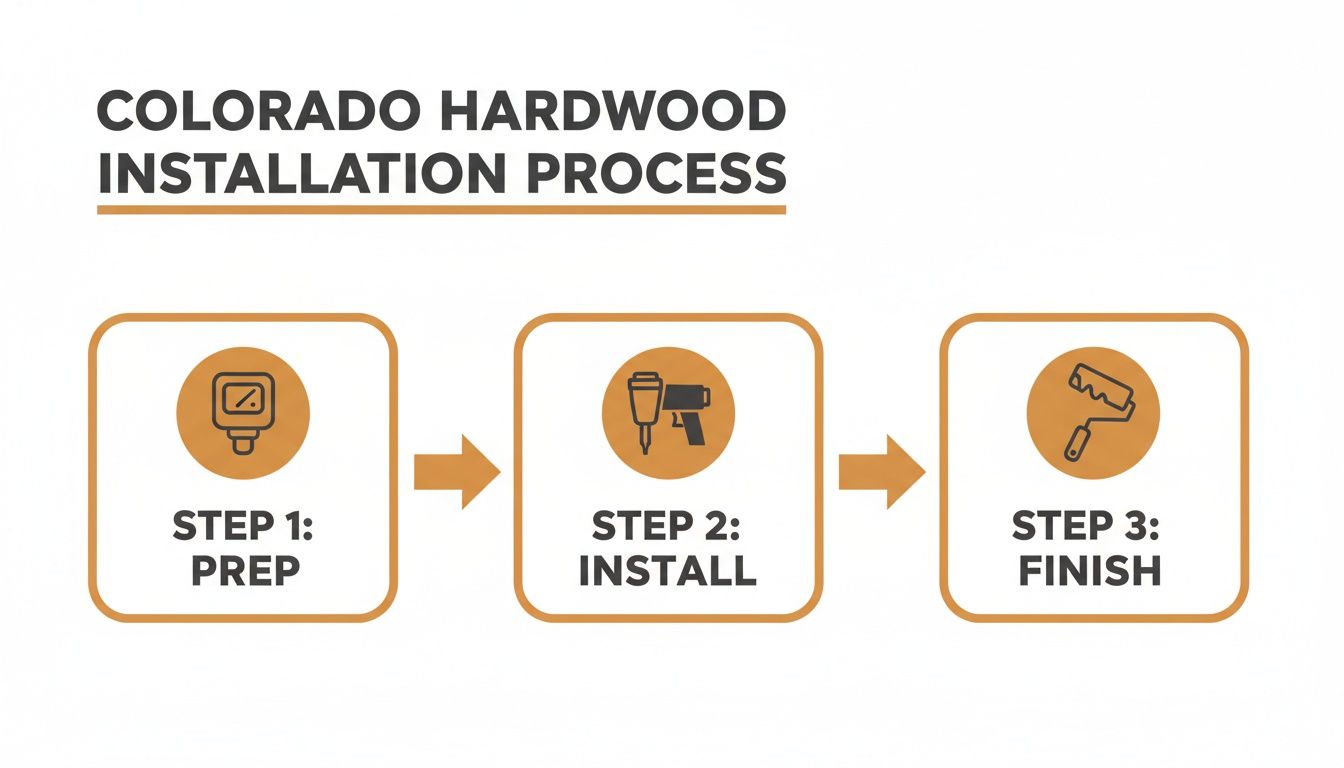
Think of it like building a house—a flawless floor absolutely depends on a solid foundation. Let’s dive into what each stage really looks like.
Stage 1: The All-Important Prep and Acclimation
This is where the magic really begins, and honestly, it’s the most important part of the entire job. Before a single board is laid, our crew gets to work ensuring your home is ready.
- Subfloor Check-Up: We give your subfloor—whether it’s wood or concrete—a full physical. It needs to be clean, perfectly flat, and structurally sound. Any bumps, dips, or weak spots are fixed now to prevent annoying squeaks or gaps down the road.
- Moisture Testing: In Colorado's unique climate, this is non-negotiable. We use professional moisture meters to test both the subfloor and your new hardwood. They need to be in a happy equilibrium to stop the wood from gapping or buckling later.
- Acclimation Time: As we’ve mentioned, your new hardwood will have already arrived to hang out in your home for a few days. This lets the wood get used to your specific temperature and humidity, a crucial step for ensuring its stability for years to come.
Stage 2: The Art of the Install
Once the site is perfectly prepped and the wood is acclimated, it’s go-time. The installation method we use is tailored to your home’s subfloor and the type of hardwood you chose.
- Nail-Down/Staple-Down: This is the classic method, and for good reason. It's the go-to for installing solid hardwood over a wooden subfloor. Each plank is securely fastened, creating a single, rock-solid floor structure.
- Glue-Down: If you have a concrete subfloor, we typically use a powerful, specialized adhesive. This is especially common for engineered hardwood. The glue creates an incredibly strong bond and also doubles as a moisture barrier.
- Floating: Often used for engineered hardwoods, especially in basements. The planks click together and "float" over a thin pad without being attached to the subfloor. It’s fast, effective, and great for spaces where subfloor moisture is a concern.
For example, on a recent project in a Littleton ranch-style home with a concrete slab, we used a glue-down method for engineered white oak. This provided the necessary stability over the concrete while giving the homeowner the classic, beautiful look they wanted. Similarly, for a client in Parker, we successfully restored a red oak floor using our signature refinishing techniques.
Stage 3: Flawless Sanding and High-Tech Finishing
With the wood in place, the final act begins. If you chose unfinished hardwood, this is where we sand the entire surface to a perfectly smooth, level canvas.
Forget about the dust storms you see on TV. We’re serious about a clean job site, which is why we use a powerful dust-free sanding system. This isn't just a shop-vac attached to a sander; it's a commercial-grade system that captures over 98% of airborne dust before it ever has a chance to coat your belongings or get into your vents.
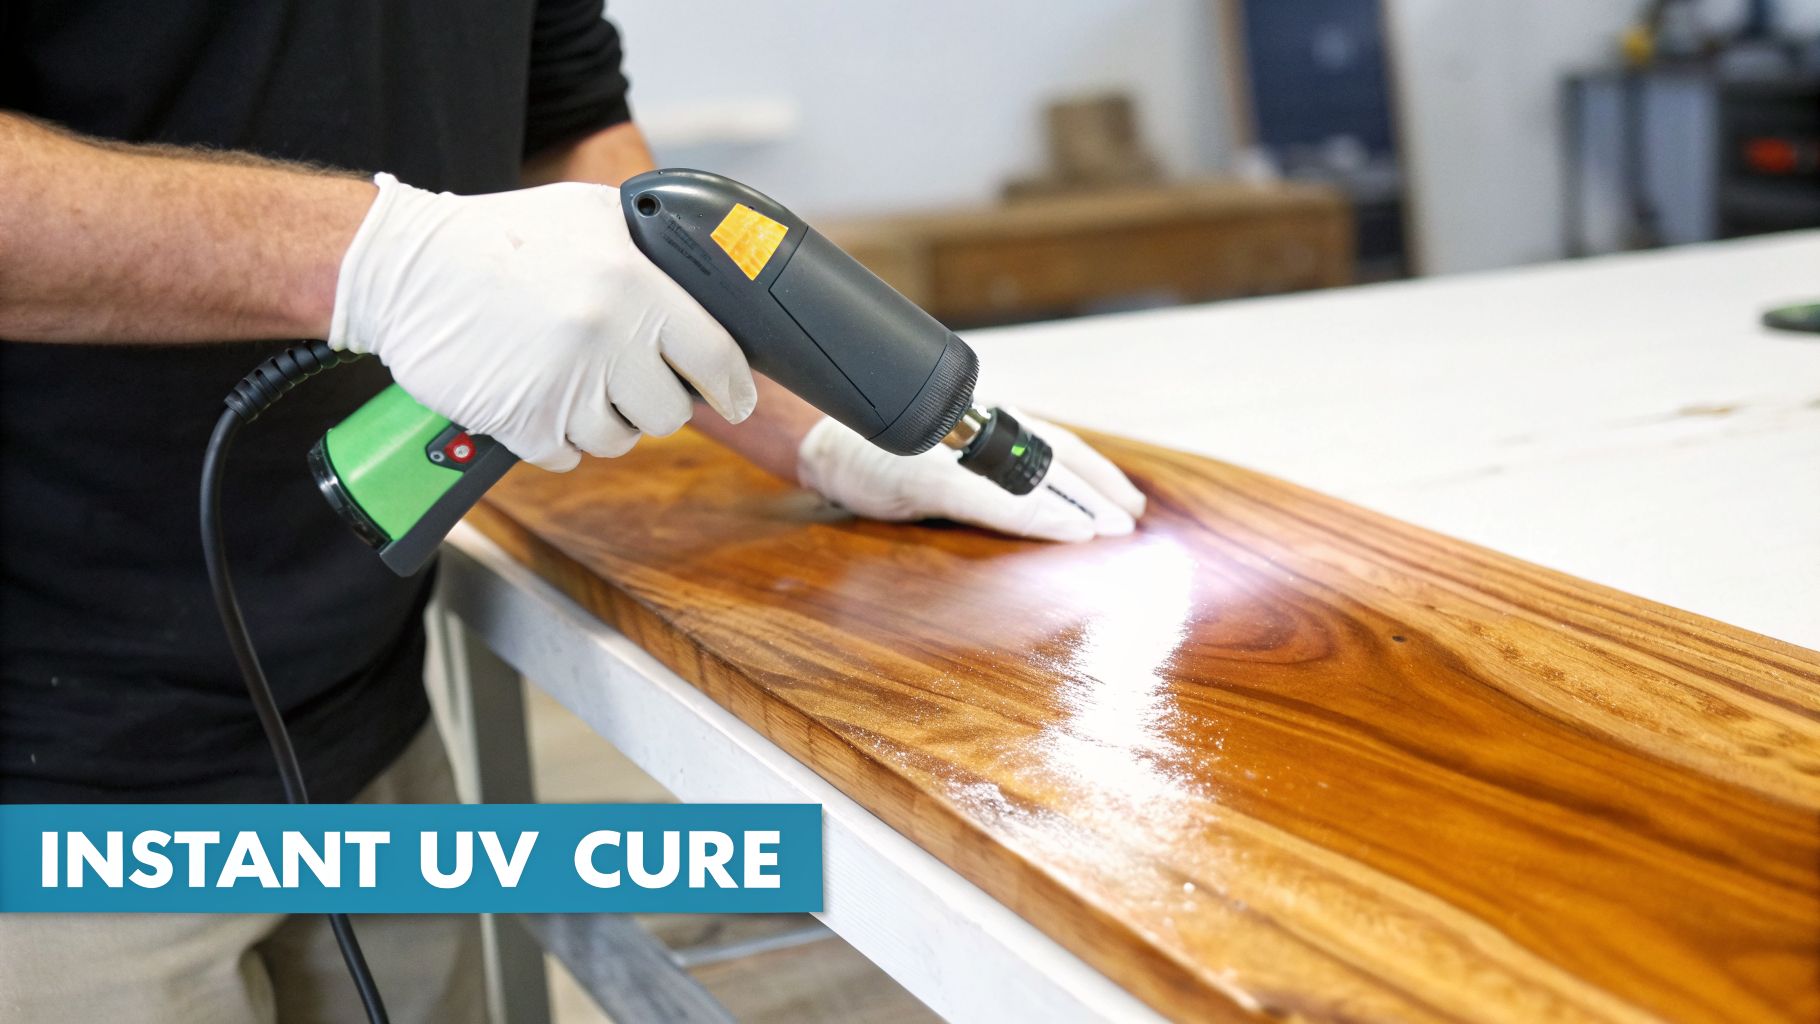
The final touch is applying the finish—the armor that protects your investment. We specialize in our advanced UV-Cure system. After applying the finish, we use a powerful ultraviolet light to cure it instantly. Forget waiting days for the finish to harden and the smelly fumes to disappear. Your floors are 100% cured and ready for furniture the very same day.
It’s the ultimate combination of durability and convenience, allowing you to get your life back to normal immediately. This is the modern, expert Colorado hardwood floor installation experience.
Modern Finishes and the Power of UV Curing
Alright, your stunning new hardwood is down. The grain is perfect, the color is exactly what you imagined… but we’re not done yet. The final step—the finish—is the invisible shield that stands between your beautiful investment and the realities of Colorado life. This is where our UV-Cure System truly shines, providing unmatched protection for your Colorado hardwood floor installation.
Think of the finish as the most important piece of gear for your floors. It's what takes the abuse from ski boots, dog claws, and dropped toys, so the wood underneath doesn't have to. Let’s talk about your options, especially a game-changing technology that we’re really excited about for homes in Parker and across the state.
Comparing Your Finishing Options: UV-Cure vs. Traditional
For years, the choice was pretty straightforward: oil-based or water-based polyurethane. Oil-based finishes give that classic, warm amber look but come with a serious downside: powerful smells and a cure time that can stretch for weeks before you can safely put down rugs.
Water-based finishes were a big step up. They’re clearer, have fewer of those harsh chemical smells (low VOCs), and dry much faster. But here’s the catch most people don’t realize: "dry to the touch" isn't the same as "fully cured." A traditional water-based finish needs 3-7 days to fully harden, and during that time, it's a sitting duck for damage. That week of tiptoeing around is a major pain for any family.
But then, something totally new came along.
The Game-Changer: Instant UV-Cured Finishes
Imagine this: your new floors are installed and finished, and you’re moving your furniture back that very same afternoon. No waiting. No chemical smells. No hotel stays. That’s the reality with an Instant UV-Cure System.
This is some seriously cool tech. We apply the finish and then roll a special ultraviolet light over the floor. The UV light triggers an instant chemical reaction, hardening the finish on the spot.
It's not drying; it's curing. Instead of waiting for solvents to evaporate over days, the UV light instantly forges a super-dense, cross-linked surface. The moment we turn the light off, your floor is ready for anything.
This isn't just about speed, it's about brute strength. A UV-cured finish is up to 40% more resistant to scratches and scuffs than even the best traditional finishes. For a busy Colorado household with kids, big dogs, or lots of foot traffic in towns like Parker, nothing else comes close. Plus, it’s crystal clear and won’t yellow, letting the true, natural beauty of your wood shine through.
Want to geek out on how this amazing technology works? Check out our guide where we answer the top 10 questions about Instant UV-Curable Finishes.
Hardwood Finish Comparison: UV Cure vs. Traditional
Choosing the right finish really boils down to your lifestyle and priorities. To make it simple, here’s a head-to-head comparison of modern UV-cured finishes against the traditional water-based options that have been the standard for years.
| Feature | Instant UV-Cure Finish | Traditional Water-Based Finish |
|---|---|---|
| Cure Time | Instant (ready for full use same day) | 3-7 days for full cure |
| Durability | Exceptional scratch and wear resistance | Good to excellent, but requires gentle use during the cure period |
| VOCs & Odor | Zero to very low VOCs, no lingering smell | Low VOCs, but can have a noticeable odor for several days |
| Appearance | Crystal clear, non-yellowing sheen that highlights wood | Clear, but can sometimes amber slightly or change sheen over time |
| Ideal For | Busy households, homes with pets and kids, immediate use | Standard projects where a few days of downtime is acceptable |
Seeing them side-by-side makes the benefits pretty clear. For homeowners who just can't put their life on hold, the instant cure and superior toughness of a UV finish is a no-brainer.
Matching the Finish to Your Lifestyle
Here at J.R. Hardwood, we’ve put together tiered packages to make sure you get the right protection for your budget and your home. Our top-tier options, the Diamond Traffic Plus ($5.50 per sqft) and Platinum Traffic Plus ($4.80 per sqft) packages, are built around this cutting-edge UV-curing technology. We also offer excellent Gold ($4.50 per sqft) and Silver ($4.20 per sqft) water-based options.
We combine our finishes with nano-wear additives to create the toughest shield possible for your floors. For a high-value Colorado hardwood floor installation, it’s the ultimate peace of mind.
Understanding Hardwood Installation Costs in Colorado
Let's talk numbers. Budgeting for a professional Colorado hardwood floor installation isn’t just about the price tag you see on the wood planks. To plan with confidence, you need the whole story—from labor and materials to all the small but critical details that make up the final cost. This is crucial whether you're in a growing community like Parker or an established Denver neighborhood.
A clear, transparent breakdown is the best way to avoid sticker shock and make a smart investment in your home. Think of it like building a custom home: the final cost is a sum of its parts, and understanding each one puts you firmly in the driver's seat.
Breaking Down the Core Expenses
The total investment for your new floors is really a blend of four key ingredients. Each one is vital for a floor that not only looks incredible but lasts for decades.
Materials: This is the cost of the hardwood itself, priced per square foot. The range is huge—a classic Red Oak will cost less than a super-durable Hickory, and engineered flooring often has a different price point than solid wood.
Labor: This covers the time and skill of the professional installation crew. It’s not just about laying planks; it's about the expertise to make intricate cuts around fireplaces, navigate tricky corners, and guarantee a flawless, tight fit.
Preparation: This is the unglamorous but non-negotiable groundwork. It often includes tearing out and hauling away old flooring (goodbye, 80s carpet!) and meticulously prepping the subfloor. A perfectly flat, clean, and dry subfloor is the foundation for everything that follows.
Finishing: If you opt for unfinished wood, this involves the sanding, staining, and application of protective top coats. Even with prefinished wood, your choices matter. Upgrading to a premium finish with better wear resistance, like those with an Instant UV-Cure System, will affect the overall investment. Our refinishing packages like Diamond Traffic Plus ($5.50 per sqft) and Platinum Traffic Plus ($4.80 per sqft) reflect these quality choices.
For example, a project with a custom herringbone or chevron pattern requires far more complex cuts and significantly more labor than a simple straight-lay installation. That detailed craftsmanship will naturally be reflected in the final price.
How Your Choices Impact the Bottom Line
Every decision you make, from the layout to the finish, shapes the final quote. One of the biggest factors is the complexity of the job. Installing flooring in a simple, empty square room will cost less per square foot than a project that involves navigating multiple closets, tight hallways, curved walls, or custom staircase work.
Your choice of finish also plays a big role. While our Silver and Gold Traffic Plus refinishing packages offer fantastic durability, upgrading to a top-tier Diamond Traffic Plus package—which uses advanced UV-Curing and nano-wear additives—adds to the upfront cost but delivers unmatched long-term scratch resistance. For busy homes in places like Cherry Hills Village or Greenwood Village, that extra durability is worth its weight in gold.
The flooring industry is a huge part of our state’s economy. This shows how much homeowners here value high-quality flooring as a key home improvement. We believe this whole process should be clear and predictable. To get a much more detailed breakdown tailored to your specific project, check out our guide on the average cost to install hardwood floors. Our goal is to give you a transparent, all-inclusive quote so you can move forward with total confidence.
How to Hire the Right Colorado Flooring Contractor
Let’s be honest: picking the right person for your Colorado hardwood floor installation is the single most important decision you’ll make in this entire project. More than the wood species, more than the finish—the quality of the craftsmanship will determine whether you love your floors for decades or face a mountain of costly repairs.
A true professional protects your investment. A bad one can turn your dream floor into a nightmare. This isn’t about finding someone who can just nail boards together. Here in Colorado, you need an expert who gets our unique climate and has experience in local communities like Parker. They should be able to talk confidently about acclimation times in our dry air, subfloor moisture issues, and why some woods thrive at our altitude while others struggle.
Your Vetting Checklist: Finding a Pro in Parker and Beyond
Don't be shy about asking tough questions. A reputable contractor will have solid answers ready to go. Use this list to screen potential partners and separate the genuine pros from the rest.
- Licensing and Insurance: This is 100% non-negotiable. Ask for proof of both general liability insurance and a workers' compensation policy. This is what protects you and your home if an accident happens on your property. No excuses.
- Local Experience & Portfolio: Ask to see their work—specifically, projects like yours. If you have a Parker ranch home, you want to see other ranches they’ve done. If it’s a classic Denver Tudor, ask for similar historic renovations. This proves they have real, relevant experience, like our recent hardwood floor refinishing project on a beautiful oak floor in Parker.
- Specialized Knowledge: Do they invest in their craft? Ask them about dust-free sanding systems or modern finishes like our Instant UV-Cure System. A contractor who adopts better technology is a contractor dedicated to delivering a superior, cleaner, and more durable result.
Reading Between the Lines of a Quote
Once you’ve got a few promising candidates, it’s time to look at their quotes. A professional bid should be way more than a single number scrawled on an invoice.
A proper quote is a roadmap for your entire project. It should break down every single cost: materials, labor, subfloor prep, tear-out and disposal of old flooring, and the specific finish being used. If a quote seems vague or suspiciously low, consider it a major red flag.
The lowest bid is almost never the best value. Unusually cheap offers are a dead giveaway that corners are being cut—maybe they’re skipping the crucial acclimation period, using lower-grade materials, or, worse, not carrying proper insurance.
Finally, always ask about the warranty. A contractor who’s confident in their work will stand behind it with a clear, written warranty covering both their labor and the materials. This is your ultimate peace of mind. For a deeper dive, check out our guide on what to ask when hiring flooring contractors in Denver.
Partnering with the right company ensures your Colorado hardwood floor installation is a seamless, successful investment from day one.
Your Hardwood Floor Installation Questions, Answered (FAQ)
When you’re thinking about new hardwood floors, you’ve got questions. We get it! From Denver bungalows to sprawling homes in Parker, every Colorado hardwood floor installation is unique. We’ve gathered the top questions we hear from Colorado homeowners to give you clear, straightforward answers and help you plan your project with total confidence.
How Long Does a Typical Installation Take?
This is a big one. For a standard, professional installation in an average-sized space (around 500 sq. ft.), you can expect the work to take about 3 to 5 days. That timeline covers tearing out the old floor, prepping the subfloor, laying down the beautiful new hardwood, and then sanding and finishing it to perfection.
But here’s where the timeline can really stretch out: the curing. Traditional finishes need anywhere from 3 to 7 days to fully harden before you can even think about moving furniture back. It’s a huge inconvenience for a busy family.
That’s exactly why we offer our Instant UV-Cure System. This amazing system hardens the floor the very same day we apply it. No waiting, no tiptoeing around. You can move your furniture back in immediately and get back to your life.
Can I Put Hardwood Floors Over My Concrete Slab?
Yes, you absolutely can—but you have to use the right kind of wood. For any installation over a concrete subfloor, engineered hardwood is the only safe and reliable choice. Its layered construction makes it incredibly stable and resistant to the moisture that can travel up from concrete.
We install it using a full-trowel glue-down method, which not only creates a rock-solid bond but also acts as a moisture barrier. We strongly advise against installing solid hardwood directly on concrete here in Colorado; the risk of cupping, gapping, and buckling from moisture is just too high. This is a common situation in many Parker homes.
How Do I Take Care of My New Floors?
Keeping your new floors looking gorgeous for decades is surprisingly simple. It’s all about a little routine care.
- Clean Regularly: Sweep or use a microfiber dust mop often. Grit and dust are the biggest culprits for tiny scratches that dull your finish over time.
- Use the Right Cleaner: Stick to a pH-neutral cleaner made specifically for hardwood. Never use water and vinegar, steam mops, or oil-based soaps like Murphy’s. They can strip the finish and even void your warranty.
- Protect the Surface: Put felt protector pads on the bottom of all furniture legs—no exceptions! Area rugs in high-traffic spots like entryways and hallways are also a great idea.
- Control the Humidity: In Colorado's notoriously dry climate, keeping your indoor humidity between 35% and 55% is non-negotiable. This prevents the wood from shrinking and creating gaps.
Is Professional Installation Really Worth the Money?
Without a single doubt, yes. It might be tempting to DIY and save a few bucks, but installing hardwood is not a forgiving project. A Colorado hardwood floor installation is a major investment in your home, and mistakes can be incredibly expensive and difficult to hide.
A pro brings specialized tools, knows exactly how to prepare the subfloor, and—most importantly—understands how to acclimate the wood to our unique climate. These are the steps that make or break a floor's longevity. A professional handles tricky layouts with ease and ensures a tight, seamless result, all backed by a warranty for total peace of mind. Investing in a professional hardwood floor refinishing or installation with a UV-Cure System in Parker protects your home's value for years to come.
Homeowners in Parker trust J.R. Hardwood Floor Refinishing & Cleaning to restore the natural beauty of their hardwood floors with our dust-free sanding system and advanced UV-curable finishes. Unlike traditional methods, our UV technology cures instantly, so you can move furniture back the same day with no lingering odor or downtime. Choose the perfect refinishing service to match your needs and home traffic. Our dust-free process ensures a clean, beautiful finish every time.
📞 Phone: 720-327-1127
🌐 Website: jrhardwoodfloorrefinishingandcleaning.com
📍 Service Area: Parker, Denver, Aurora, Castle Rock, Highlands Ranch, Littleton, Centennial, Lone Tree, and surrounding Colorado communities.
📺 YouTube: https://www.youtube.com/channel/UCLaTAi6KxwT-g8QCKqKTQ8Q?sub_confirmation=1