 Skip to content
Thinking about bringing the timeless beauty of hardwood floors into your Colorado Springs home? You’ve come to the right place. This isn't just another checklist; it's the inside scoop from years of hands-on experience, a real-world guide to getting a flawless hardwood floor installation in Colorado Springs. We understand the unique demands of local homes, which is why our process often includes expert hardwood floor refinishing and our advanced UV-Cure System to ensure your new floors are protected from day one.
We get it. Installing new floors is a big investment, and here in the Pikes Peak region, it comes with its own unique set of challenges.
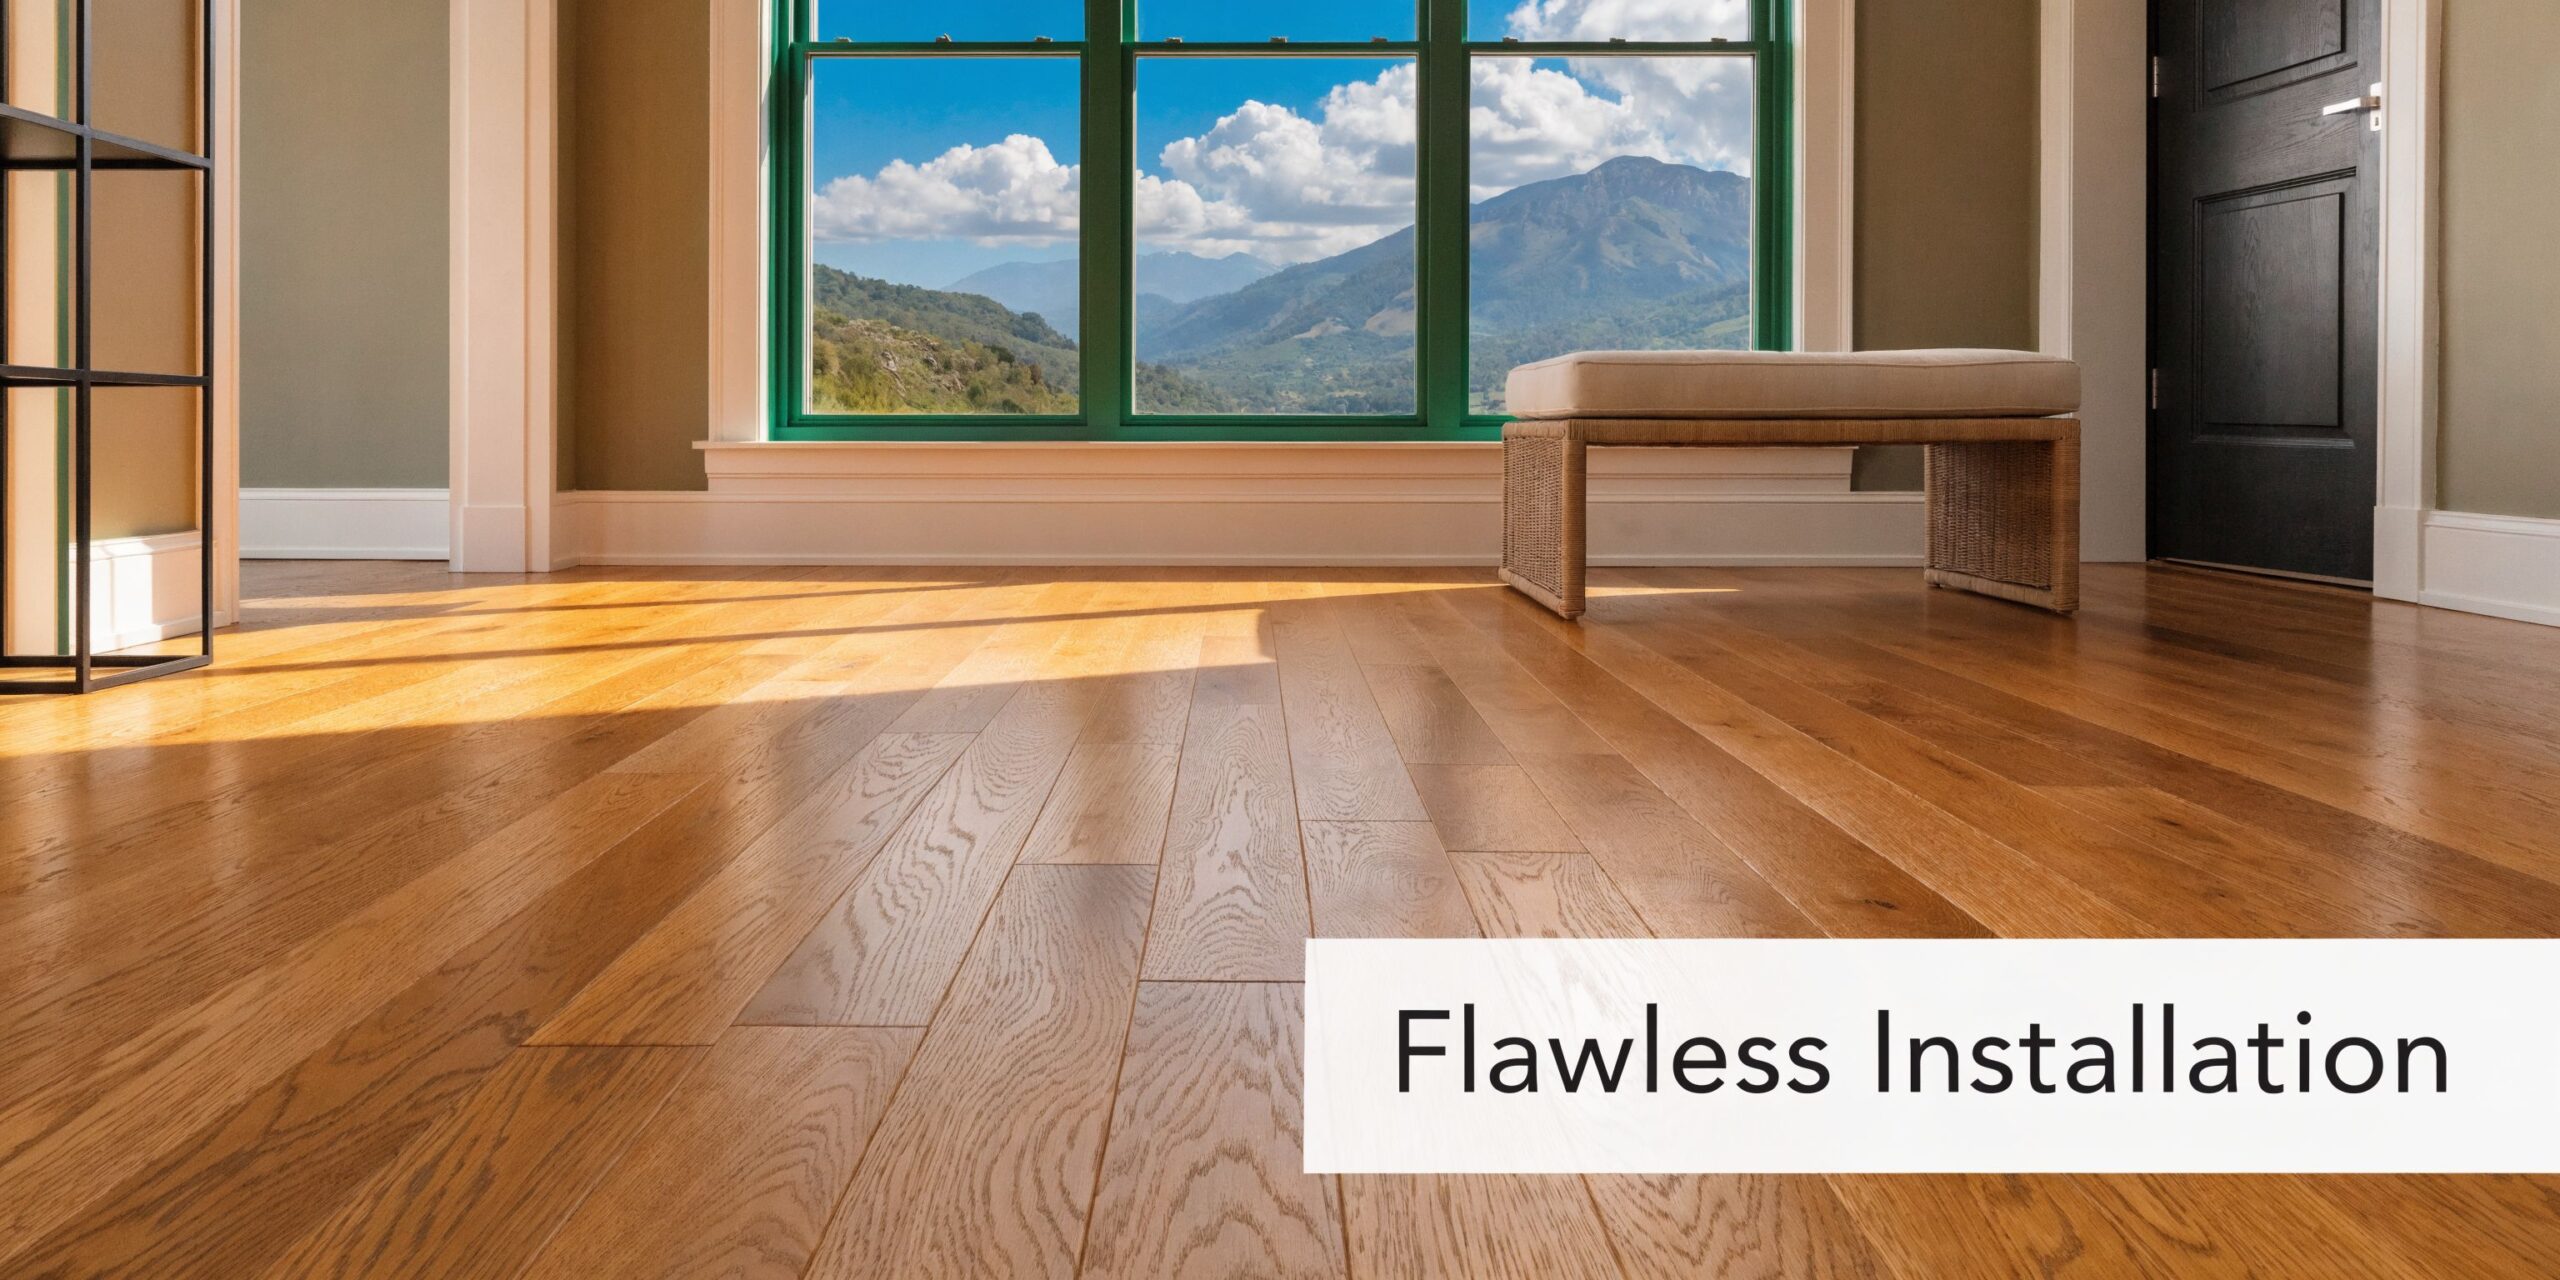
Your Guide To Flawless Hardwood Installation In Colorado Springs
Let's talk about what really matters for your project. From the super-dry air affecting homes in Briargate to preserving the historic charm of a house in the Old North End, every detail counts. Our goal is to arm you with the knowledge to pick the right wood, understand the real costs, and see why a skilled professional using a UV-Cure System is your best bet for floors that will last a lifetime. This is a core part of our expert hardwood floor installation Colorado Springs service.
We also pull back the curtain on modern tech that makes a huge difference, like our UV-Cure System. This isn’t your grandparents’ floor finish; it creates an incredibly tough, walk-on-it-today finish that’s perfect for our busy Colorado lifestyles. It’s a total game-changer, and it’s what we use to protect your gorgeous new floors from day one.
What You're About To Learn
By the time you finish this guide, you’ll be able to talk flooring like a pro. You'll have the confidence to manage your project and ensure the result adds serious value and beauty to your home for decades. We're sharing everything we've learned from countless projects across El Paso County, from full installations to hardwood floor refinishing with our UV-Cure System, to help you get it right.
To get started, here's a quick look at what's involved in a typical project here in the Springs.
Colorado Springs Hardwood Installation At A Glance
| Project Aspect | Typical Range / Timeline | Key Consideration For Colorado Springs |
|---|---|---|
| Project Cost | $12 – $22+ per sq. ft. | Price varies with wood species, plank width, and job complexity. |
| Project Timeline | 4 – 10 days | Acclimation period for the wood can add 3-7 days before work starts. |
| Wood Acclimation | Minimum 3 – 7 days | CRITICAL in our dry climate to prevent gapping and buckling. |
| Best Wood Type | Engineered or Rift/Quarter Sawn | These options offer the best stability against our drastic humidity swings. |
| Finish Durability | 7 – 15 years | High-altitude UV and dry air can be tough; a quality finish is key. |
This table gives you a bird's-eye view, but now it's time to dig into the details that truly make or break a project.
A successful hardwood floor installation isn't just about nailing down boards. It’s about understanding our unique environment and making smart choices from the very beginning. From picking the right materials to finding an installer who truly knows the Pikes Peak region, every step matters.
This guide will walk you through everything you need to know, including:
- Climate is King: How Colorado’s dry air can make or break your new floors and what to do about it.
- Decoding the Costs: A clear breakdown of what actually goes into the price of a professional installation.
- The Installation Play-by-Play: What to expect from the day we show up to the day you're walking on your beautiful new floors.
- Keeping Them Gorgeous: Simple, real-world advice to protect your investment for years to come.
We’ve packed even more local knowledge into our complete guide to flooring in Colorado Springs if you want to dive deeper. Ready to get started? Let's talk wood.
Let's Talk Numbers: The Real Cost of New Hardwood Floors in Colorado Springs
So, you’re dreaming of beautiful new hardwood floors for your Colorado Springs home. That’s exciting! But before you get lost in wood samples, there’s that big, nagging question: What’s this actually going to cost? It’s easy to get fixated on the price of the wood itself, but that’s just one piece of the puzzle. The true cost of hardwood floor installation in Colorado Springs includes materials, prep, labor, and the final protective finish, which is why we often discuss our innovative UV-Cure System and hardwood floor refinishing options right from the start.
The final price tag is a mix of materials, expert labor, and the unique quirks of your home. To budget with confidence and avoid any surprises, you need to know exactly what you’re paying for. Let's break down the true cost so you can read quotes like a pro and make a smart investment that lasts.
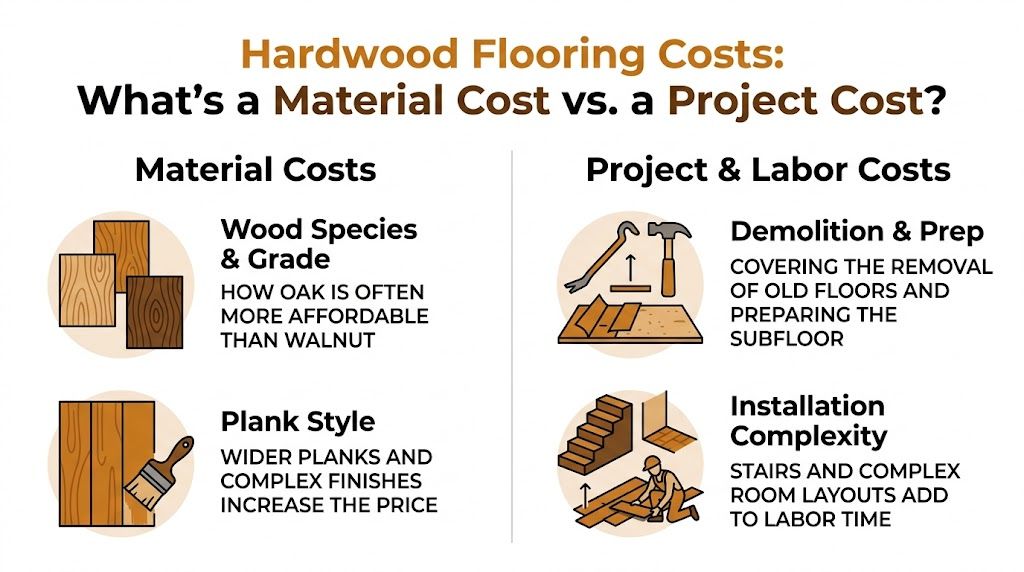
It Starts With The Wood: Your Material Costs
The type of wood you fall in love with is the biggest single factor in your budget. The options are vast, and the price points can vary dramatically.
- Solid vs. Engineered Wood: Solid hardwood is exactly what it sounds like—one solid piece of wood, top to bottom. Engineered wood, on the other hand, has a real hardwood layer on top of a super-stable plywood core. Solid wood often costs more upfront, but engineered is a fantastic, often more budget-friendly choice, especially for tricky areas like basements.
- Wood Species: Your classic Red Oak is going to be more affordable than a premium, exotic wood like Brazilian Cherry or a character-rich species like Walnut. Durability is also part of the price—harder woods might cost a bit more but will stand up better to daily life.
- Plank Width and Finish: Those gorgeous, wide planks you see all over design shows? They are definitely in style but usually cost more per square foot than traditional, narrower strips. Pre-finished planks can also have a higher material cost, but they save a ton of time (and mess) during installation.
Beyond the Planks: Labor and Prep Work Costs
This is where a true professional earns their keep. The cost of labor and proper preparation is what separates a floor that looks good for a year from one that looks beautiful for decades. Don't skim this part of the budget! We've seen it all, from restoring a worn red oak floor in a historic downtown property to a complete installation in a new build.
For homeowners here in the Pikes Peak region, you can expect the cost to install new hardwood flooring to fall somewhere between $7.78 and $16.72 per square foot. That price covers both the materials and the skilled labor to put it all together. To put that in perspective, a typical 1,000-square-foot project often lands around $8,000.
Now, things like tearing out old carpet, getting the subfloor perfectly level, or working around the tricky angles in an older Colorado Springs home can add 20-30% to the labor cost. Why? Because it requires more time, more precision, and more custom cuts.
The Bottom Line: That "per-square-foot" price you see is just a starting point. Always, always make sure your quote includes demolition, subfloor prep, and any layout complexities. These aren't optional add-ons; they're essential for an installation that won't buckle, squeak, or fail down the road.
Here are a few other services that factor into the final price:
- Demo and Disposal: This means tearing out and hauling away your old flooring, whether it’s carpet, tile, or ancient laminate.
- Subfloor Preparation: This is non-negotiable. Your subfloor has to be perfectly flat, clean, and solid before a single plank goes down. This might involve grinding concrete, pouring leveling compounds, or replacing damaged plywood.
- Complex Layouts and Stairs: Installing hardwood on a staircase, in a room shaped like anything but a perfect box, or creating a pattern like herringbone takes serious skill and time—and the labor cost will reflect that.
Once you understand all these moving parts, you can compare quotes from different installers much more effectively. A super-low bid might look tempting, but it often means they're cutting corners on prep work—a shortcut that will cost you way more in repairs later. If you're trying to weigh your options, our guide on the average cost to install hardwood floors is a great place to get more detail.
Choosing The Right Hardwood For Colorado's Unique Climate
Think picking a hardwood floor is just about finding the right color and style? Think again. Here in Colorado, our beautiful but demanding climate has the final say on how your floors will look and last. A successful hardwood floor installation in Colorado Springs requires deep knowledge of how local conditions affect wood, which is why our approach combines careful material selection with expert hardwood floor refinishing techniques and our cutting-edge UV-Cure System.
Those dramatic swings in humidity—from damp spring showers to our bone-dry winters—can make wood expand and contract like an accordion. If you get this choice wrong, you’re setting yourself up for headaches like gaps, cupping, or even buckling.
Let's walk through the best options for our unique Front Range environment.
Solid vs. Engineered Hardwood: A Colorado Springs Comparison
Your first big decision is between solid and engineered hardwood. They both give you that timeless, real-wood beauty, but they couldn't be more different in how they behave in our climate.
Solid Hardwood
This is the classic choice, what your grandparents probably had. It’s milled from a single, solid piece of lumber and can be sanded and refinished over and over again, which is fantastic. The downside? It’s much more sensitive to those humidity shifts we talked about.
Engineered Hardwood
This is the modern marvel of the flooring world. It has a real hardwood layer on top, but it's bonded to a core of multiple, cross-laminated plywood layers. This construction gives it incredible stability, making it far less likely to warp, expand, or contract.
For many homeowners in Colorado Springs, engineered hardwood is the safer, more stable choice. Its layered design is a direct answer to our dry air and seasonal humidity swings, giving you peace of mind and fantastic performance—especially for tricky spots like basements.
The Critical Role Of Wood Acclimation
Here’s a non-negotiable rule, no matter which wood you pick: acclimation is mandatory.
This is simply the process of letting the wood planks sit inside your home for several days before we install them. It allows the moisture in the wood to get on the same page as the environment inside your house.
Skipping this step is a recipe for disaster. Wood installed too quickly will inevitably move, leading to ugly gaps in the winter and potential buckling in the summer. A true pro will always insist on a proper acclimation period, usually at least 7-14 days.
This chart helps break down where the money goes on a typical flooring project.
As you can see, the final price tag is a blend of the materials you fall in love with and the expert labor it takes to get the job done right.
Wood Species And Hardness: What Works Best Here?
Once you’ve settled the solid vs. engineered debate, it's time for the fun part: picking a species! This choice affects not just the look but how well your floor will stand up to life. We measure this with the Janka Hardness Scale, which is just a fancy way of rating how resistant a wood is to dents and dings.
Here are a few popular choices that we know do well in Colorado Springs homes:
- White Oak: A super stable and durable classic with a Janka rating around 1360. Its tight grain is perfect for our climate, and it takes stains like a dream, so you can get almost any color you want.
- Hickory: This is one of the toughest domestic woods you can get, with a Janka rating of 1820. It’s the perfect warrior for active homes with kids and pets, but it absolutely must be acclimated properly.
- Maple: Known for its clean, light, and modern look, maple is also impressively hard with a Janka rating of 1450. It’s tough enough for your busiest hallways and kitchens.
The challenge of hardwood flooring installation in Colorado Springs is directly tied to the region's extreme humidity fluctuations. Levels can drop from a comfortable 30-45% in late spring to below 20% in winter, potentially causing solid wood to shrink by as much as 0.2 inches over a 12-foot span. While some sources note that engineered hardwood can mitigate this movement by up to 70%, our team at J.R. Hardwood Floor Refinishing & Cleaning addresses this with expert acclimation protocols and our advanced Instant UV-curable finishes that seal the wood against moisture in hours. You can discover more insights about these unique local challenges and their solutions by exploring data on flooring installation costs in our area.
What to Expect: The Pro Installation Process from Start to Finish
So, you’ve picked out the perfect hardwood and you’re dreaming of the finished product. But what really happens between the time the old floor comes out and you’re sliding across the new one in your socks? It’s more than just laying down planks—it’s a carefully choreographed process. Let’s pull back the curtain and walk you through every step of a professional hardwood floor installation in Colorado Springs, so you know exactly what to expect from our team, including our expert hardwood floor refinishing and instant UV-Cure System.
Phase 1: The All-Important Prep Work
Truth be told, a breathtaking hardwood floor is built on a foundation of meticulous prep work. A flawless finish starts long before the first board is ever laid, and skipping steps here is simply not an option. Our comprehensive services include dust-free sanding, wax removal, and ensuring the subfloor is perfect.
- Clearing the Canvas: First, we'll coordinate with you to get furniture moved safely out of the way. Then, our crew gets to work tearing out the old flooring—whether it’s tired carpet, cracked tile, or a previous generation of hardwood—and making sure it’s disposed of properly.
- The Subfloor Health-Check: This is, without a doubt, the most critical part of the entire job. We treat the subfloor like a doctor examining a patient, looking for any issues that could cause problems down the road. It has to be clean, perfectly flat, and structurally sound.
- Leveling and Cleaning: Even minor imperfections in the subfloor will eventually show up in your beautiful new hardwood as squeaks, gaps, or bouncy spots. We grind down high spots and use a high-quality leveling compound to fill in any dips. Once it’s perfectly flat, we give it a final, thorough cleaning to ensure nothing gets in the way of a perfect installation.
Phase 2: Laying the Floor
With a pristine subfloor ready to go, the real transformation begins. The method we use depends on your chosen wood—solid or engineered—and the type of subfloor in your home.
- Nail-Down/Staple-Down: This is the classic, time-tested method for installing solid hardwood over a wooden subfloor. Each plank is carefully placed and then fastened with specialized nails or staples. The result is an incredibly strong, durable floor that’s truly a part of your home’s structure.
- Glue-Down: If you’ve chosen engineered hardwood or your home has a concrete slab, we use a powerful, flexible adhesive to glue the planks directly to the subfloor. This creates a rock-solid feel underfoot and has the added benefit of dampening sound.
- Floating Floor: Often used with modern engineered planks, this technique is clever and efficient. The boards lock together at the seams and "float" as a single, solid unit over a thin underlayment pad. It’s a great way to work around minor subfloor quirks and speed up installation.
No matter the method, a perfect installation depends on perfect cuts. For those tight seams and clean edges around walls and corners, choosing the right miter saw and knowing how to use it is what separates the amateurs from the pros.
Phase 3: Finishing Touches and the Final Reveal
This is where the magic really happens and the wood's true character comes to life. If you've opted for unfinished hardwood, this final stage is a multi-step process of sanding, staining, and sealing.
Dust-Free Sanding: Forget about the horror stories of dust clouds filling your home. We use a state-of-the-art dust containment system that captures over 98% of the dust before it ever becomes airborne. This not only keeps your home remarkably clean but also gives us a smoother, cleaner surface to work with.
Staining and Sealing: After sanding, we apply your chosen stain color to get the exact look you’ve been dreaming of. Next up is the protective topcoat. While old-school finishes can leave your home smelling for days and require you to tiptoe around for a week, we have a far better solution.
Our Instant UV-Cure finish is a total game-changer for homeowners. We use a portable, high-powered UV light machine to cure the final coat of finish in literal seconds. There's no waiting, no lingering chemical odors, and no downtime. The floor is instantly harder and more durable than any traditionally-cured finish, ready for furniture and regular life the moment we walk out the door. It's the ultimate protection for your new hardwood floor installation in Colorado Springs.
After the final coat is cured, we’ll do a detailed walkthrough with you, making sure every inch of your new floor is perfect. This careful, step-by-step process is our guarantee that you’ll have a stunning floor you'll love for decades.
Why Your Installer Is the Most Important Decision You'll Make
Let's be honest. In a world of home improvement TV and endless YouTube tutorials, the thought of installing your own hardwood floors is tempting. It feels like a smart way to save a few bucks, right? But when it comes to a hardwood floor installation in Colorado Springs, this is one area where trying to cut corners can backfire in a big, expensive way. Our expertise in local conditions, hardwood floor refinishing, and advanced tools like the UV-Cure System makes a professional hire a wise investment.
Your choice of installer is, hands down, the single most critical decision in your entire flooring project. It’s more important than the wood species you pick, the stain color you fall in love with, or even the type of finish. Why? Because a true craftsman is your best defense against the unique challenges our Colorado climate throws at us and the finicky nature of a living material like wood.
The Common Pitfalls of an Amateur Job
A professional installer does so much more than just nail down boards; their real job is preventing problems before they ever start. We see it all the time: floors installed by low-bid or inexperienced crews that start failing almost immediately because they missed the subtle but non-negotiable details.
Some of the most common—and costly—mistakes include:
- Skipping Proper Acclimation: This is the cardinal sin of floor installation. Not letting the wood adjust to your home's unique indoor climate is a guaranteed recipe for gapping, cupping, and buckling down the road.
- Ignoring the Subfloor: Laying beautiful new wood over an uneven, dirty, or improperly prepped subfloor is like building a house on a shaky foundation. It inevitably leads to squeaks, soft spots, and a floor that just feels wrong underfoot.
- Using the Wrong Fasteners: There's a science to fastening. Using the wrong nails or staples, or not using enough of them in the right places, will cause planks to loosen and shift over time.
- Sloppy Cuts and Layout: Bad cuts around doorways, vents, and transitions are a dead giveaway of amateur work. They look cheap and drag down the feel of the entire room.
These aren't just little cosmetic oopsies. A poorly installed floor won't just look bad; it will likely need expensive repairs or even a complete tear-out and replacement far sooner than you ever imagined. Deciding between refinishing and replacing is a common question, and a pro can tell you if a floor is salvageable. Often, our dust-free sanding and advanced finishes can restore floors you thought were a lost cause, saving you thousands over replacement.
How to Spot a True Professional
So, how do you tell the difference between a genuine craftsman and someone who just bought a new nail gun? You have to ask the right questions. A real pro will be ready and willing to give you clear, confident answers.
Think of your installer as your project partner and quality control expert all in one. Their experience is the insurance policy on your investment. Vetting them properly is the single best thing you can do to guarantee a beautiful floor that lasts a lifetime.
Before you even think about hiring someone for your hardwood floor installation in Colorado Springs, make sure you run through this essential checklist:
- Are You Licensed and Insured? This is non-negotiable. It protects you, your home, and the workers from any accidents or liability. If they hesitate, walk away.
- Can I See Your Portfolio and Talk to Your References? A pro is proud of their work. They should be excited to show you photos of recent local projects and let you speak with past clients.
- What’s Your Process for Wood Acclimation and Subfloor Prep? Listen carefully. Their answer will reveal everything about their level of expertise. They should describe a detailed, multi-step plan for both.
- What Kind of Warranty Do You Offer? A company that stands behind its work will offer a clear, written warranty on their labor. This shows they have confidence in their process and their people.
Choosing a reputable, seasoned company like J.R. Hardwood Floor Refinishing & Cleaning is the smartest move you can make to protect your investment. We have a deep, hands-on understanding of our region's climate and how to make wood behave perfectly in it. Don't risk your dream floor on a gamble; trust the experts who guarantee a flawless result from day one.
Maintaining Your New Floors For A Lifetime Of Beauty
Alright, the installation is done, the last tool is packed away, and your stunning new hardwood floors are finally here. So, what’s next? Keeping them looking that good for decades to come. Protecting your investment isn't about complicated chores; it's about building simple, smart habits. Your hardwood floor installation in Colorado Springs is a long-term asset, and proper care, including occasional professional hardwood floor refinishing or using a protective UV-Cure System, ensures its longevity.
Think of it as defending your floors from the daily grind. With a little proactive care, you can easily fend off the scratches, scuffs, and general wear that slowly dull a floor's finish over time.

Your Essential Maintenance Toolkit
The best floor care strategy is a one-two punch: daily defense and smart prevention. Nail these two, and you’ll protect both the finish and the beautiful wood underneath.
Daily & Weekly Defense:
- Sweep or Dust Mop Often: Think of tiny bits of dirt and grit as fine-grit sandpaper. Every time you walk on them, they scratch the finish. A quick daily pass with a microfiber mop is your absolute best friend.
- Vacuum the Right Way: If you prefer to vacuum, make sure it has a bare-floor setting or that you can turn off the beater bar. Those stiff, spinning bristles are notorious for creating fine, hairline scratches.
- Wipe Up Spills Instantly: This one’s a biggie. Water is wood’s natural enemy. Grab a soft, dry cloth and blot up any spills the second they happen to stop moisture from getting a chance to seep in.
Smart Preventative Measures
Honestly, the easiest way to fix damage is to stop it from happening in the first place. A few small adjustments around the house will make a world of difference. Eco-friendly finishes, like our UV-cure options, are not only durable but also better for your indoor air quality.
The best maintenance plan is more than just cleaning. It’s about creating a floor-friendly home that minimizes stress on the wood—a non-negotiable in our dry Colorado climate.
Here are a few tips we tell every single client:
- Felt Pads Are Non-Negotiable: Put high-quality felt pads on the feet of every single piece of furniture. Chairs, tables, couches, entertainment centers—if it touches the floor, it needs a pad. Check them every few months and replace them when they get worn or compressed.
- Use Rugs and Mats Strategically: Place doormats at every entrance to catch the dirt, gravel, and moisture from outside. In high-traffic areas like hallways or in front of the sofa, an area rug absorbs the daily wear and tear.
- Control Your Home's Humidity: Our bone-dry Colorado air is tough on wood, causing it to shrink and create gaps. Keeping your indoor humidity between 35% and 55% with a humidifier is crucial for your floor’s long-term health. For a deeper dive, check out our full guide on how to maintain hardwood floors for more pro tips.
Professional Upkeep For Long-Term Luster
Even with the most diligent care, life happens. That’s where a little professional upkeep comes in. Instead of waiting until your floors look truly beat-up and need a full, disruptive sanding, there's a much smarter option.
A periodic hardwood screen and recoat is the secret weapon for long-term beauty. This process lightly buffs the existing finish to erase minor surface scratches and then applies a fresh topcoat. It brings back that day-one shine and durability without the dust, time, or cost of a full refinish. It’s the single best thing you can do to extend the life of your gorgeous new floors.
Your Hardwood Installation Questions Answered
Thinking about new hardwood floors is exciting, but let’s be honest—it also brings up a ton of questions. From how long your home will be a work zone to which type of wood can handle Colorado's crazy climate, you need straight answers. As the go-to team for hardwood floor installation in Colorado Springs, we’ve heard every question in the book, including those about hardwood floor refinishing and our revolutionary UV-Cure System.
So, let's tackle the big ones head-on, so you can feel 100% confident in your new floors.
How Long Does A Typical Hardwood Installation Take?
For a standard 500-square-foot room, you can typically expect the entire process to take about 3-5 days. It’s not just about laying down planks; it’s a craft that takes a few key steps to get right.
A typical project breaks down like this: day one is for delivering the wood and letting it acclimate, followed by a day or two for the physical installation. The final couple of days are for sanding and applying the finish.
But what if you don’t have days to wait for the finish to dry? That’s where our Instant UV-Cure system changes the game. This modern finish is cured instantly with a UV light, meaning the entire finishing step is done in just one day. You can move your furniture back the moment we leave—no waiting, no hassle.
Is Engineered Hardwood Better Than Solid For Colorado Springs?
This is a fantastic question, and for many homes here in Colorado Springs and along the Front Range, engineered hardwood is an excellent choice. Our climate's wild humidity swings can be tough on solid wood, but engineered wood is built for it. Its cross-laminated construction makes it far more stable and resistant to the gapping and cupping that can plague solid planks.
That’s not to say you can’t have solid hardwood—you absolutely can! With meticulous acclimation and good home humidity control, solid wood can be a beautiful, lifelong investment. The "best" option truly depends on your home. We look at everything—is the room above or below ground? what's your lifestyle like?—to help you pick the perfect wood.
Choosing between solid and engineered wood isn't just a style choice; it's a strategic decision to combat our local climate. A professional assessment is the best way to ensure your floor is built to last.
What Is A UV-Cure Finish And Why Is It Recommended?
A UV-Cure finish is a total game-changer. It’s a super-durable polyurethane that we harden instantly with a special ultraviolet light machine. Think of it like a dentist curing a filling—the second the light hits it, the finish is 100% hardened. The biggest benefit is durability and convenience; UV-cure finishes are significantly harder and more scratch-resistant than traditional air-dried polyurethanes, and you can walk on them and move furniture back immediately.
This is a huge leap forward from old-school finishes that need days or even weeks to fully cure and stop off-gassing. For you, the homeowner, the benefits are impossible to ignore:
- Walk on it Now: The floor is ready for furniture and foot traffic the minute we’re done. No more living in socks and tiptoeing around for a week.
- Seriously Tough: It offers incredible resistance to scratches and wear, making it a lifesaver for homes with pets, kids, and busy lives.
- Breathe Easier: It’s a zero-VOC (Volatile Organic Compound) product. That means no harsh chemical fumes and much better indoor air quality for your family.
How Much Dust Is Created During Sanding And Installation?
The nightmare of finding dust in your cabinets weeks after a renovation is a real fear for many homeowners. But you can put that worry to rest.
We use a top-of-the-line dustless sanding system. Our powerful sanders are hooked up directly to HEPA-filtered vacuums that capture over 98% of airborne dust before it has a chance to escape. It keeps your home dramatically cleaner and helps us create an even smoother, more flawless finish on the wood. For every hardwood floor installation in Colorado Springs we do, a clean job site is non-negotiable.
Homeowners in Colorado Springs trust J.R. Hardwood Floor Refinishing & Cleaning to restore the natural beauty of their hardwood floors with our dust-free sanding system and advanced UV-curable finishes. Unlike traditional methods, our UV technology cures instantly, so you can move furniture back the same day with no lingering odor or downtime. Choose the perfect refinishing service to match your needs and home traffic. Our dust-free process ensures a clean, beautiful finish every time.
📞 Phone: 720-327-1127
🌐 Website: jrhardwoodfloorrefinishingandcleaning.com
📍 Service Area: Colorado Springs, Monument, Castle Rock, and surrounding communities.
📺 YouTube: https://www.youtube.com/channel/UCLaTAi6KxwT-g8QCKqKTQ8Q?sub_confirmation=1