
That first dent in your beautiful hardwood floor always stings a little, doesn't it? Whether it’s from a dropped can in a historic home near O'Brien Park or sliding furniture across the floor in a modern Idyllwilde condo, it feels like a much bigger deal than it usually is. For homeowners in Parker, professional hardwood floor refinishing using our advanced UV-Cure System is the best way to handle these imperfections.
But before you jump to a quick-fix solution you saw online, take a breath. A proper assessment is the absolute key to a successful hardwood floor dent repair. The good news is that most minor dings are just simple compressions, and you can often fix them yourself with the right approach.
How to Assess Dents in Your Parker Hardwood Floor
The secret to a flawless repair isn’t just about the technique you use—it's about starting with an accurate diagnosis. Figuring out the type and severity of the dent will point you to the right solution, saving you a ton of time and preventing you from accidentally making things worse.
This first step is what determines whether a simple steam trick will do the job or if you’re looking at a bigger project that might need a professional touch from a Parker hardwood floor refinishing expert with a UV-Cure System.
This quick decision tree helps visualize that first crucial step: are you dealing with a shallow compression or a deeper gouge?

As the chart shows, the path to a perfect repair starts by figuring out if the wood fibers are just squished down or if they've actually been torn away.
Differentiating Dents from Gouges
The most critical distinction to make right off the bat is whether you have a dent or a gouge.
A dent is what happens when an impact compresses the wood fibers without breaking them. Think of it as a bruise on the wood. A gouge, on the other hand, is when the impact is sharp enough to actually tear or scrape away wood, leaving a void.
- Shallow Compressions: These are the most common and, thankfully, the easiest to fix. The wood fibers are just pushed down. You can usually feel a smooth depression with your finger, and the floor's finish is often still intact.
- Deep Gouges: These are more serious. You’ll see broken, splintered fibers, and the raw wood is probably exposed because the damage broke right through the protective finish.
Pro Tip: Try this simple test. Run your fingernail lightly over the damaged area. If it glides smoothly across an indentation, you’ve likely got a dent. If your nail catches on rough, splintered edges, you’re dealing with a gouge that needs a different, more intensive repair.
Considering Wood Species and Finish
The type of wood you have and its finish also play a huge role in your repair strategy.
Softer woods, like pine, are more susceptible to denting but often respond beautifully to simple steam repairs because the fibers swell back up easily. Harder woods, like the red oak we see in so many classic Parker homes, are more resilient but can be tougher to treat once they do get dented.
The finish is your floor’s first line of defense. An older oil-based finish might allow steam to penetrate and swell the wood fibers back into place. However, a modern, hard polyurethane or aluminum oxide finish can block that moisture, making those simple DIY steam tricks much less effective. If your floors have widespread damage like this, it might be time to look for the 5 signs your hardwood floors need refinishing.
To help you sort this out, here’s a quick-glance table.
Matching the Dent to the Right Repair Method
This table is a handy reference for figuring out what kind of damage you have and the best way to tackle it.
| Dent Type | Description | Best Repair Method | When to Call a Pro |
|---|---|---|---|
| Shallow Impression | A minor compression where the wood fibers are pushed down but not broken. The finish is usually intact. | Steam & Iron Method | If the dent doesn't rise after a couple of tries, or if you're worried about damaging the finish. |
| Deep Dent | A significant compression where the wood is visibly indented but fibers are mostly intact. Finish may be stressed. | Steam or Wood Filler | When the dent is very large, or if the finish has cracked and needs to be touched up professionally. |
| Light Scratch | A surface-level scuff in the finish only; the wood underneath is untouched. | Finish Repair Pen or Recoat | If scratches are widespread across the entire floor, a screen and recoat is a better option. |
| Gouge or Deep Scratch | Wood fibers are torn, scraped, or removed, exposing raw wood. The finish is broken. | Wood Filler & Sanding | If the gouge is large, deep, or if you can't get a perfect color match with filler. |
| Board Damage | A large, deep gouge, significant water damage, or a split/cracked board. | Board Replacement | This is almost always a job for a professional to ensure a seamless fit and finish match. |
Ultimately, choosing the right method comes down to accurately identifying the damage. A small, shallow dent is a perfect weekend DIY project, but a deep gouge might be better left to the experts to ensure a truly invisible repair.
Your Go-To DIY Fix for Minor Dents in Parker
For those small, annoying dents that just seem to appear out of nowhere, you don't always need to call in a pro. Tackling a minor hardwood floor dent repair yourself can be incredibly satisfying, and the best technique relies on a little bit of high school science.
The steam-and-iron method is surprisingly effective for compression dents. It uses targeted moisture and heat to coax the crushed wood fibers back into their original shape. It’s the perfect fix for homeowners in places like Parker or Littleton who want to keep their floors looking sharp between professional hardwood floor refinishing services that use a UV-Cure System.
The Magic of Steam and an Iron
So, what’s happening here? When something heavy drops, it doesn't break the wood fibers—it just squishes them down. By adding a little water and gentle heat, you create steam that gets right into the wood. The compressed fibers soak up that moisture and expand, basically "re-inflating" themselves and erasing the dent.
This trick works best on solid hardwood with shallow dents where the finish is still intact. Softer woods like pine pop back up beautifully, while harder woods like oak might just take a bit more patience.
Your Toolkit for a Flawless Fix
Before you start, grab a few things from around the house. Having everything ready to go makes the whole process smoother and safer.
- A household steam iron: Set it to medium-high heat, like the linen setting. Critically, make sure the steam function on the iron itself is turned off. You'll create the steam with the damp cloth, not the iron.
- A clean, 100% cotton cloth: An old t-shirt or a simple dish towel is perfect. Don't use anything with synthetics, as they can melt under the iron's heat.
- Water: A small bowl is fine. Distilled water is best to avoid leaving mineral deposits, but tap water will work if that’s what you have.
- Fine-grit sandpaper (220-grit): You'll need this to gently knock down any raised wood grain after the repair.
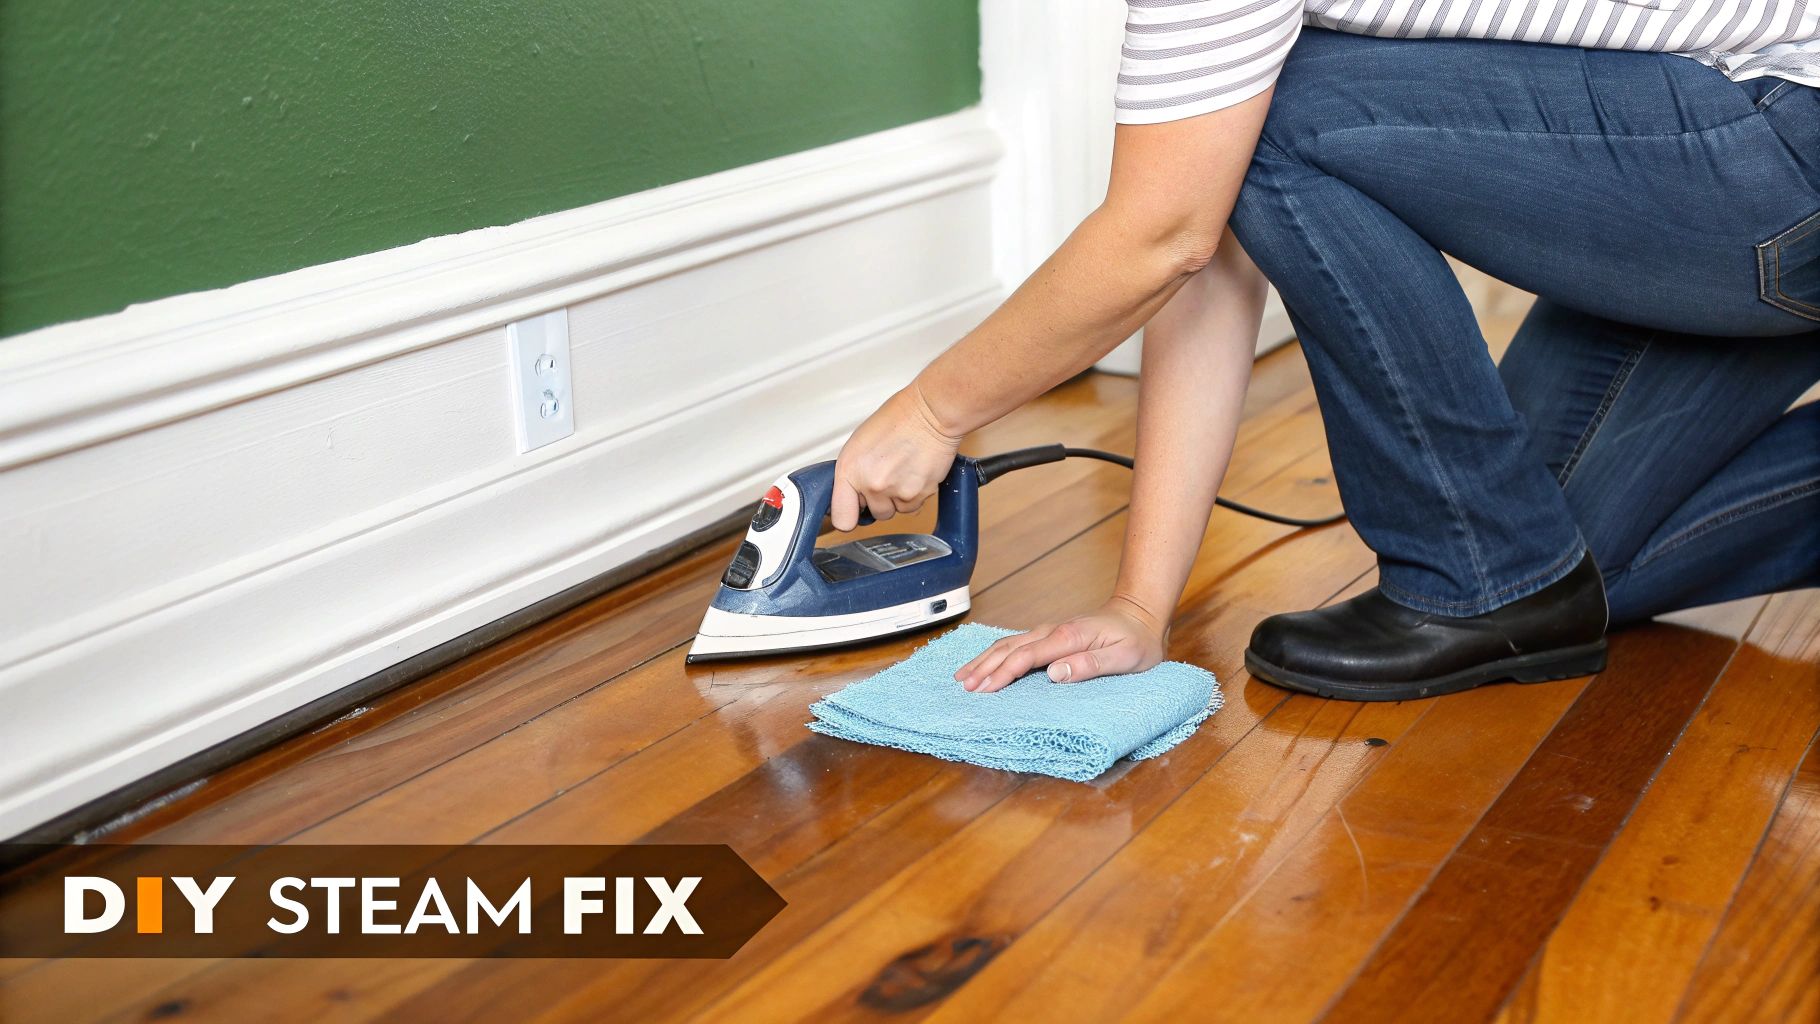
Steaming Dents Out: A Simple Guide
Follow these steps carefully, and you can pull off a great repair without messing up your floor's finish.
First, give the dented area a quick clean to get rid of any dust or grime. Then, put just a few drops of water directly into the dent. Let it sit for a minute or so to really soak in. This is the key to getting those fibers ready to swell.
Now, place your damp—not soaking wet—cotton cloth over the dent. Press the hot iron down and move it in a slow, circular motion for about 10-15 seconds. Whatever you do, don't let the iron sit still. That's how you scorch the wood or burn the finish.
Lift the iron and cloth to see how it’s going. The dent should be noticeably smaller. This usually isn't a one-and-done deal, so be patient. Just repeat the process—dampen the cloth, apply the iron—until the dent is flush with the floor.
Crucial Safety Tip: Never, ever let the hot iron touch the wood directly. The cloth is your shield. Direct contact will leave a permanent burn mark and melt the polyurethane finish, turning a small dent into a huge headache.
Once the dent is gone, let the spot air dry completely for a few hours. Sometimes the process can raise the wood grain just a tiny bit. If that happens, give it a very light sanding with your 220-grit paper, always moving in the direction of the grain. If the repair leaves the area looking a little dull compared to the rest of the floor, you might want to learn when and why to buff your hardwood floors to bring back that uniform shine.
When to Skip the DIY
This method is a lifesaver for small dents, but it's not a cure-all. It's the wrong approach for any dent where the wood fibers are broken or the finish is cracked. Applying steam there can trap moisture under the finish and cause peeling or discoloration.
It's also risky on some engineered hardwoods, as the heat can potentially weaken the adhesive holding the top veneer. For deep gouges, big scratches, or widespread damage, you're going to need a more heavy-duty solution.
Tackling Deep Gouges and Scratches in Parker
When a little steam just won’t cut it for a dent, it’s time to bring out the bigger guns. This is where hardwood floor dent repair gets more involved, moving from a quick fix to a real restoration. We're talking about those deep gouges and nasty scratches where you can actually see the wood fibers have been torn apart. This is a common issue we address with our Parker hardwood floor refinishing services and our UV-Cure System.
Unlike a simple dent where the wood is just compressed, a gouge means wood has been physically scraped away. That kind of damage slices right through the floor's protective finish, leaving the raw wood exposed to dirt and moisture. It calls for a completely different game plan—one focused on filling that void and making the repair disappear.
Using Wood Filler for Deeper Damage
For a deep gouge, your best friend is a high-quality wood filler or putty that’s been color-matched to your floor. This is probably the most critical step. You need a product that matches not just the stain color, but the natural undertones of the wood itself. A filler made for oak will stick out like a sore thumb on a maple floor, and vice-versa.
Applying it takes a bit of finesse.
- Prep the Area: First things first, get in there with a vacuum and clear out any dust, debris, or loose splinters from the gouge. The filler needs a clean surface to bond properly.
- Apply the Filler: Grab a small, flexible putty knife and press the filler firmly into the gouge. You want to make sure you’re not leaving any air pockets behind.
- Overfill It Slightly: Always mound the filler just a little bit above the floor’s surface. Wood fillers shrink as they dry, so that extra bit ensures you won't end up with a sunken-in patch later on.
We recently worked on a gorgeous, refinishing oak project in a Parker home that had collected a few deep gouges over the decades. By carefully picking a stainable filler and overfilling it just right, we were able to sand it down to a perfectly invisible repair before locking it in with our UV-Cure System.
Sanding and Blending for a Seamless Finish
Once the filler has completely cured—which can take anywhere from a few hours to a full day depending on the brand—it’s time to sand it flush. Honestly, this is where a lot of DIY repairs go off the rails.
Use a fine-grit sandpaper (220-grit is a great choice) wrapped around a small sanding block. That block is non-negotiable; it keeps the sanding surface flat and stops you from accidentally creating a dip or a "halo" effect around the patch. Sand gently, focusing only on the filled spot until it’s perfectly level with the surrounding floor. Feather the edges lightly to help everything blend together.
For a deeper look at handling less severe surface damage, check out our guide on how to fix scratched floors before you jump into these more intensive repairs.
When Board Replacement is the Only Answer
Sometimes, a gouge is just too deep or too long for wood filler to handle. A badly split board or significant water damage often means the only real solution is to replace the board entirely. This is an advanced hardwood floor dent repair technique that requires some serious precision and the right tools.
The process involves carefully cutting out the damaged plank without touching the boards next to it, prepping the subfloor, and then cutting a new board to fit perfectly. The final—and toughest—part is staining and finishing that new board to flawlessly match the color, grain, and sheen of the rest of the floor, which has aged over time.
This level of work is almost always a job for the pros. A skilled team not only makes sure the new board is structurally sound but has the experience to make the repair virtually disappear. Our crews use dustless sanding equipment to integrate the new board perfectly, ensuring the final finish is uniform and flawless across the entire floor.
When To Call A Professional For Floor Repair in Parker
Those DIY tricks with an iron or some wood filler are fantastic for a stray compression dent here and there. But every seasoned pro knows there’s a tipping point—a moment where continuing down the DIY path can do more harm than good. A botched repair often looks worse than the original dent and can cost a whole lot more to fix properly.
Knowing when to call for professional Parker hardwood floor refinishing with a UV-Cure System is the smartest thing you can do to protect your investment. Some jobs just demand the precision, specialized equipment, and years of experience that only a true craftsman brings to the table.
Scenarios Demanding Expert Attention
Think of it this way: if your floor's damage goes beyond a simple cosmetic touch-up, it’s probably time to call us. Here are the red flags we see all the time that signal a job is outside the scope of a weekend project.
- Widespread or Numerous Dents: Does your floor look like it survived a hailstorm? If you've got dents scattered across a large area, trying to spot-fix them one by one is a recipe for a patchy, uneven mess. The only way to get a truly uniform, beautiful surface back is with a full, dust-free sanding and refinishing.
- Deep Gouges Exposing Raw Wood: When something heavy has been dragged across the floor, tearing right through the protective finish and stain, you're looking at more than a simple fix. That raw, exposed wood is vulnerable. While a DIY filler might plug the hole, it won't be an invisible repair. We use commercial-grade products and have the touch to perfectly sand, custom-mix stain, and seal the area so it blends seamlessly.
- Damage to Delicate or Exotic Hardwoods: Woods like Brazilian cherry, tigerwood, or even some of the newer engineered varieties can be finicky. They react to heat, moisture, and sanding in unique ways. One wrong move with an iron or an orbital sander can cause permanent discoloration or burn marks. We know how to handle these specific materials correctly.
- Cracked or Split Boards: A board that is physically broken—split down the middle or cracked all the way through—can't be saved with filler or steam. This calls for a floorboard transplant. It’s a surgical process of carefully cutting out the damaged piece and fitting a new one in its place without a trace. Trust me, this is a job best left to the experts.
The Challenge Of An Invisible Repair
Honestly, the hardest part of any hardwood floor dent repair isn't filling the dent; it's matching the color and sheen of a floor that has aged. Sunlight and oxygen naturally change the color of wood and its finish over time, a process we call "ambering." A fresh patch of stain and finish will almost never match a five-year-old floor perfectly without some serious skill.
We recently restored a floor in a Castle Rock home that had extensive pet damage—a combination of deep scratches and gouges. A DIY approach would have left dozens of mismatched spots. Instead, our professional hardwood floor refinishing using dust-free sanding and our advanced UV-Cure System created a flawless, uniform surface that looked brand new.
Achieving that seamless blend requires professional-grade products and an experienced eye. We use special techniques to feather in new finishes, ensuring the repaired spot doesn't stick out like a sore thumb with a different level of glossiness. This is where our instant UV-Cure System is a game-changer. It cures the new finish immediately, locking in the perfect blend without the risk of dust settling or the color shifting as it air-dries.
Making the right call is critical. For a deeper dive, our guide on DIY vs. professional hardwood floor refinishing breaks down the pros and cons even further.
DIY vs Professional Repair: A Cost and Time Analysis
| Factor | DIY Repair | Professional Service (J.R. Hardwood) | Key Consideration |
|---|---|---|---|
| Estimated Cost | $50 – $200+ for tools (sander, filler, stain, finish) | $500 – $3,000+ depending on scope (spot repair vs. full refinish) | DIY costs can escalate quickly with mistakes; professional quotes are all-inclusive. |
| Time Commitment | 4 – 12 hours (plus drying time, which can be days) | 4 hours – 2 days (with instant UV cure, floors are usable immediately) | Your personal time is valuable. How much is a full weekend worth to you? |
| Required Skill | Moderate to high; risk of visible errors (sanding marks, mismatched color) | Expert-level; trained and certified technicians ensure flawless results | Inexperience can lead to permanent damage, like sanding through the veneer. |
| Tools & Materials | Rental equipment, consumer-grade fillers and finishes | Dustless sanding systems, commercial-grade products, UV-curing technology | Professional tools are designed for superior results and minimal household disruption. |
| Potential Risks | Uneven finish, color mismatch, creating a larger problem to fix | Minimal; we are fully licensed and insured for your peace of mind | A botched DIY job often costs more to have professionally corrected later. |
Ultimately, while a small dent can be a satisfying DIY win, significant damage needs a professional touch to protect and enhance your home's value. For those bigger jobs, knowing how to find the best renovation contractor is the first step toward a successful restoration. Choosing the right team ensures your floors aren't just patched up—they're brought back to their original beauty.
Preventing Future Dents and Protecting Your Parker Floors
After you've put in the work to fix a dent, the last thing you want is another one popping up a week later. Honestly, the best strategy for hardwood floor dent repair is simple: don't let them happen in the first place. A few proactive habits can protect your beautiful floors for years, saving you from future headaches and keeping that investment looking sharp. Think of it as easy, ongoing maintenance that pays off big time.
Simple prevention is the most cost-effective way to protect your investment. You can see more on these hardwood flooring market trends at Mordor Intelligence.
Simple Habits for a Dent-Free Home
Protecting your floors doesn’t require a ton of effort—just a few smart moves. Folding these small changes into your daily routine will make a massive difference.
- Felt Pads are Non-Negotiable: This is the single most important thing you can do. Every single piece of furniture that touches your floor—chairs, tables, sofas, you name it—needs high-quality felt pads on its feet. They let furniture glide instead of scrape and help distribute weight to prevent those annoying compression dents.
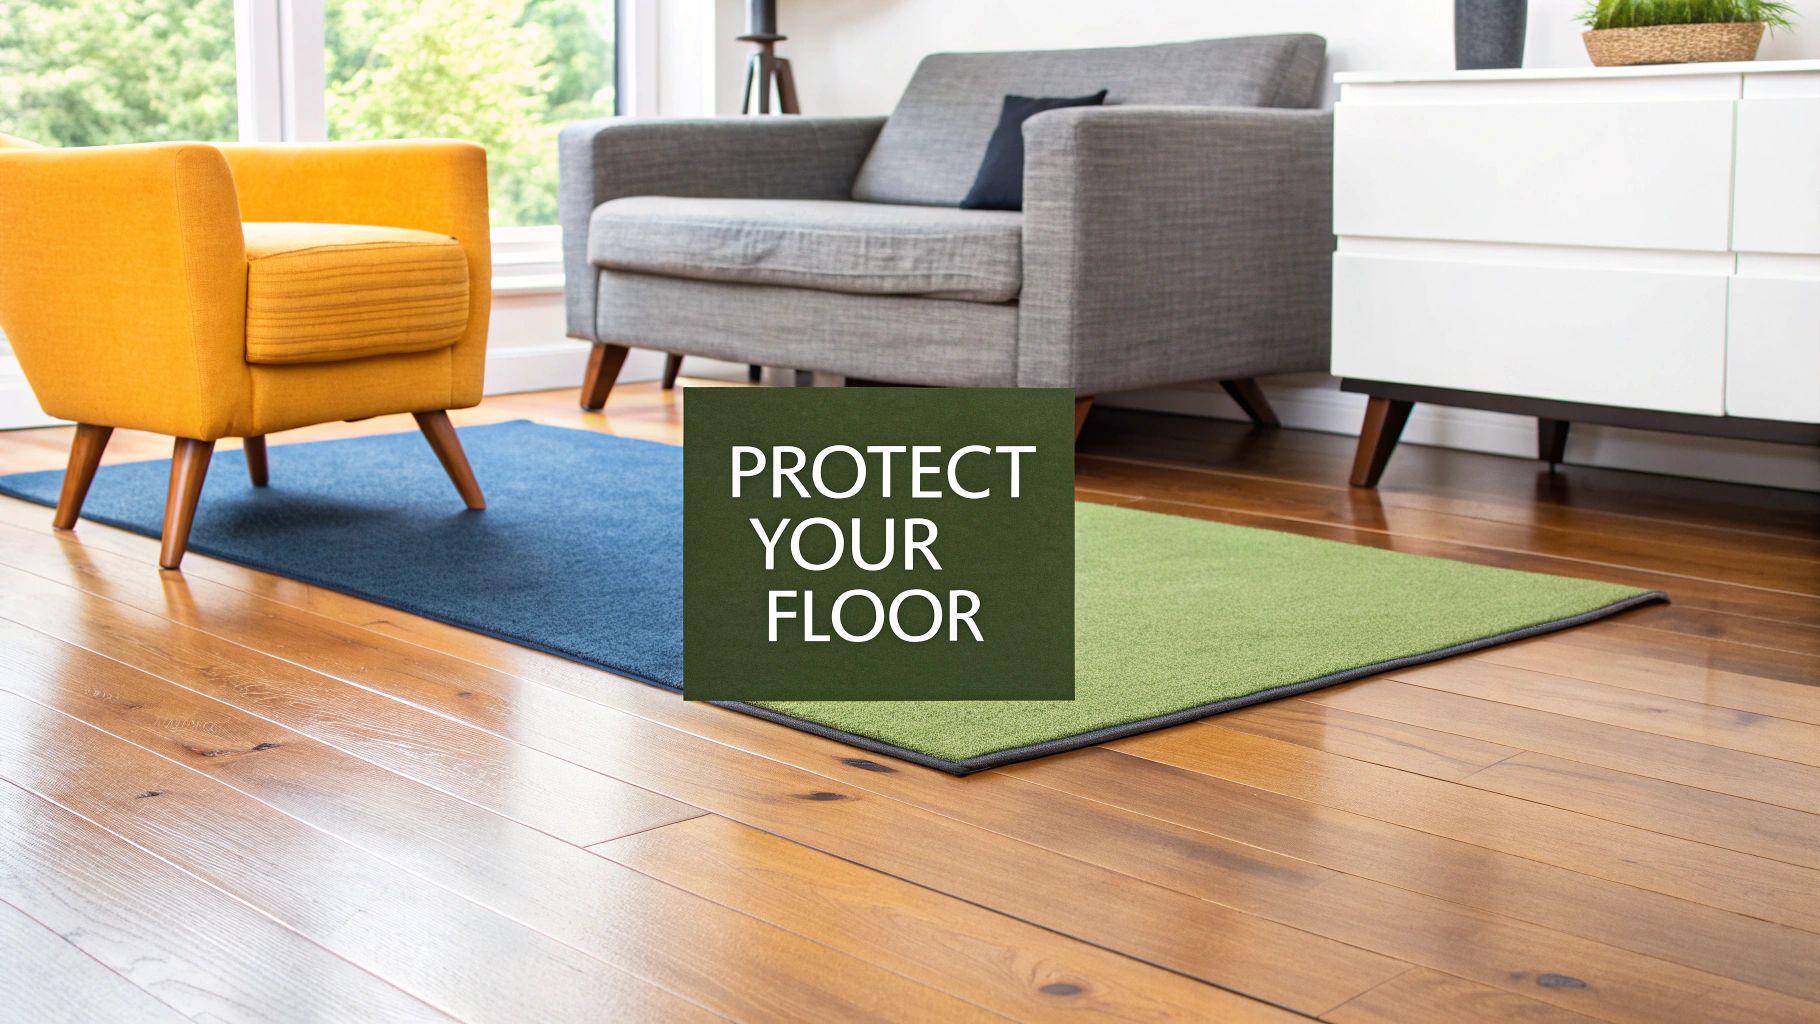
- Embrace Area Rugs and Runners: Think about the high-traffic zones in your home: hallways, entryways, and that spot right in front of the kitchen sink. They take a beating. Well-placed rugs and runners not only add some style but also create a crucial buffer against dropped keys, pet claws, and constant foot traffic.
- Implement a 'No-Heels' Policy: It might sound a little strict, but stilettos can exert hundreds of pounds of pressure per square inch. They're basically tiny hammers tapping away at your wood. Politely asking guests (and family!) to leave sharp heels at the door can save your floor from a constellation of tiny, deep dents that are a real pain to fix.
Expert Insight: Don't just stick the felt pads on and forget them. Check and clean them every few months. They can pick up grit and small debris, which will scratch your finish if you don't wipe them off. A quick swipe keeps them doing their job.
The Power of Protective Finishes
Your floor's finish is its first and best line of defense. While no finish can make wood completely dent-proof, modern technology offers some incredible resilience against the chaos of daily life.
When we do a full Parker hardwood floor refinishing job for a client, we often recommend our premium finishes. Our Diamond Traffic Plus UV-Cure finish, for example, is engineered with nano wear technology that gives it unmatched resistance to both scratches and impacts. It creates a harder, more durable surface that can shrug off many of the minor accidents that would easily dent a floor with an older, standard finish.
This is a game-changer, especially in homes with kids and pets. Having that superior protective layer means you can relax a little more, knowing your floors are better equipped to handle a dropped toy or an excited pup. And when we pair it with our instant UV-Cure System, your floors aren't just tougher—they're ready for real life the very same day we finish the job.
For a more detailed breakdown, you can learn more about how to protect hardwood floors in our dedicated guide. By combining proactive habits with a high-quality finish, you create a powerful defense that keeps your floors looking pristine for the long haul.
Parker Hardwood Floor Dent Repair: Your Questions Answered
Even when you're careful, life happens. A dropped can, a scooted chair—suddenly, there's a dent. If you're staring at a new imperfection in your beautiful hardwood, you probably have a few questions. As the go-to experts for floors across the Parker area, we hear them all. Here are the most common ones, with straight-up answers from our years of hands-on experience.
Can Every Single Dent Be Fixed?
Honestly, while we can dramatically improve almost any dent, completely erasing one depends on the type of damage. Shallow dents—where something heavy simply compressed the wood fibers—are the easiest to fix. A little steam can often coax those fibers to swell right back into place. But a deep gouge is a different beast entirely. We fill that gap with a perfectly color-matched putty and seal it with our UV-Cure System. It'll look fantastic and be nearly invisible, but it's a skillful patch, not a true reversal of the damage. For widespread issues, our Parker hardwood floor refinishing service is the best solution.
Will Steaming a Dent With an Iron Ruin the Finish?
It absolutely can if you’re not careful. Never put a hot iron directly on your floor. You'll risk burning the wood and causing modern finishes like polyurethane to bubble or melt. The right way involves using a damp cloth as a buffer. Stick to medium heat, keep the iron moving, and work in short bursts. This trick works best on older, oil-based finishes. Always test it first in a hidden spot, like a closet.
Should I Fix Just One Dent or Refinish the Whole Floor?
This comes down to the big picture. If you've got one or two dings on an otherwise pristine floor, a spot repair is the smartest move. However, if your floor has dozens of dents and widespread scratches, a full refinish is a much better investment. A full refinish is a complete transformation. Our dust-free sanding system erases every imperfection, and we apply a new, ultra-durable finish with our advanced UV-Cure System, giving you a flawless floor that looks brand new.
How Do You Match the Color and Sheen Perfectly?
Getting a seamless match is where true craftsmanship makes all the difference. We use professional-grade stains and tints, often mixing them by hand on-site to replicate the unique, ambered tone your floor has developed. Matching the sheen is just as crucial. We identify your floor's finish (matte, satin, semi-gloss) and use special blending techniques to feather the new finish into the old one, erasing any visible lines. This is why a professional repair is often invisible, while a DIY patch can stick out.
From minor dents to major restorations, J.R. Hardwood Floor Refinishing & Cleaning has a professional solution for any floor. Learn more about our dust-free sanding and refinishing services and see how we can bring your floors back to their former glory.
Homeowners on Parker trust J.R. Hardwood Floor Refinishing & Cleaning to restore the natural beauty of their hardwood floors with our dust-free sanding system and advanced UV-curable finishes. Unlike traditional methods, our UV technology cures instantly, so you can move furniture back the same day with no lingering odor or downtime. Choose the perfect refinishing service to match your needs and home traffic. Our dust-free process ensures a clean, beautiful finish every time.
📞 Phone: 720-327-1127
🌐 Website: jrhardwoodfloorrefinishingandcleaning.com
📍 Service Area: Parker, Castle Rock, Lone Tree, Centennial, Aurora, and surrounding areas.
🎥 See Our Work: https://www.youtube.com/channel/UCLaTAi6KxwT-g8QCKqKTQ8Q?sub_confirmation=1