 Skip to content
Colorado’s dry air and intense UV rays silently damage hardwood floors, causing finishes to crack and fade faster than in other climates. Property managers and homeowners face unique restoration challenges that require climate-adapted techniques. This guide walks you through every stage of hardwood floor restoration, from preparation through final curing, ensuring durable results tailored to regional conditions.
Table of Contents
- Preparation And Prerequisites
- Step-By-Step Restoration Process
- Finishing And Curing
- Climate Considerations And Finish Selection For Colorado
- Common Mistakes And Troubleshooting
- Expected Results And Timelines
- Safety Considerations And Maintenance
- Restore Your Floors With Professional Help
- Frequently Asked Questions About Hardwood Floor Restoration
Key Takeaways
| Point | Details |
|---|---|
| Preparation | Clear space completely, gather drum sanders and NIOSH respirators, verify minimum 3mm wear layer before starting work. |
| Restoration Process | Execute staged sanding with coarse to fine grits, apply wood filler, stain if desired, then 2-3 protective finish coats. |
| Colorado Climate | Use UV-resistant finishes and flexible formulas to combat sun damage and dry air cracking common in regional conditions. |
| Common Mistakes | Avoid aggressive sanding, inadequate dust control, and rushed curing that compromise finish quality and adhesion. |
| Expected Lifespan | Proper restoration extends floor life 7-10 years with regular maintenance delaying future refinishing needs. |
Preparation and Prerequisites
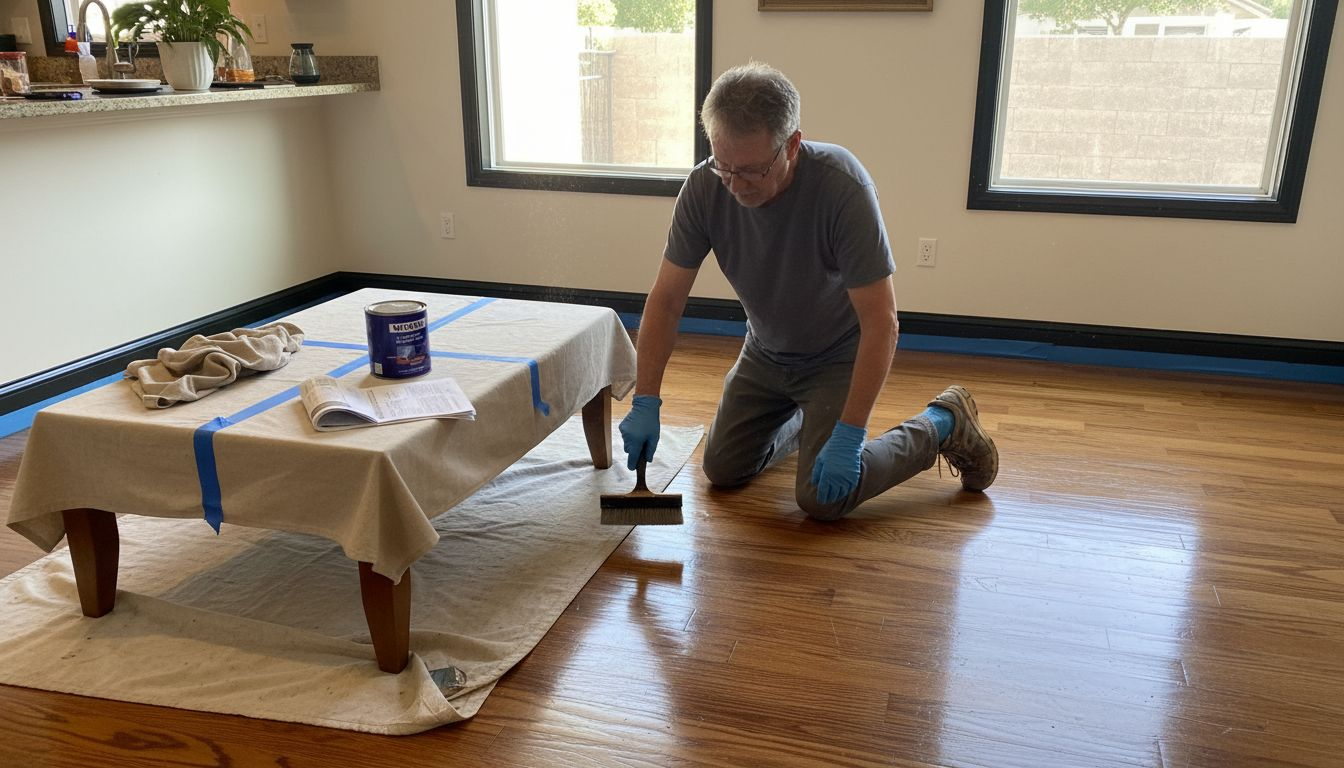
Successful restoration starts before you touch a sander. Remove every piece of furniture and seal adjacent rooms with plastic sheeting to control dust migration. Proper preparation includes removing all furniture, sealing off adjacent areas, and thoroughly cleaning to minimize dust and ensure even sanding results. Inspect your floors closely to confirm they have at least 3mm of wear layer remaining, the minimum thickness required for safe sanding without exposing tongue and groove joints.
Gather essential equipment before starting. You need a drum sander for main areas, an edge sander for perimeters, a powerful vacuum system with HEPA filtration, and finishing tools including brushes or applicators. Safety gear is non-negotiable: invest in a NIOSH-approved respirator rated for fine dust and VOCs, plus ear protection and safety glasses. For Colorado’s detailed hardwood cleaning guide for Colorado floors, consider professional advice on local product availability.
Budget realistically for your project. Costs average $4 to $8 per square foot professionally, with DIY ranging $1 to $3 depending on tools and materials. Rental equipment typically runs $50 to $100 daily, while finishing products add another $30 to $60 per gallon. Factor in sandpaper, wood filler, and disposal fees.
Essential preparation checklist:
- Remove all furniture, area rugs, and wall hangings to prevent dust accumulation
- Seal doorways with plastic sheeting and tape to isolate work zones
- Inspect floor for protruding nails and countersink them below surface level
- Clean thoroughly with vacuum and damp mop to remove loose debris
- Verify adequate ventilation through windows or fans for fume dispersal
- Schedule project during dry weather to maintain optimal humidity levels
Step-by-Step Restoration Process
Restoration follows a precise sequence that builds quality at each stage. Begin with coarse-grit sanding using 36 to 40 grit paper to strip old finish and level surface irregularities. Sanding involves coarse passes to remove old finish and scratches, medium to smooth the surface, and fine sanding to prep for finish application. Move systematically across the room, overlapping passes by several inches to avoid creating visible lines.
Progress through medium grits (60 to 80) to refine the surface, then finish with fine grits (100 to 120) for a smooth base ready for staining or sealing. Between each grit change, vacuum thoroughly and wipe with a tack cloth to remove all dust particles that could mar your finish. Edge sand perimeters carefully, matching the main floor’s grit progression.
Decide between full sanding or screen and recoat based on floor condition. Screen-and-recoat works best for dull finishes without deep scratches, saving time and dust. This lighter approach uses 120 to 150 grit screens to scuff existing finish, creating tooth for new topcoats without removing all previous layers. Full sanding becomes necessary when scratches penetrate through finish to bare wood or when you want to change stain color.
Restoration sequence:
- Complete coarse sanding (36-40 grit) across entire floor surface moving with grain direction
- Vacuum thoroughly and inspect for remaining finish or deep scratches requiring attention
- Execute medium sanding pass (60-80 grit) to smooth and blend surface evenly
- Perform fine sanding (100-120 grit) for final surface preparation before finishing
- Fill cracks and gaps with color-matched wood filler, allow complete drying per manufacturer specs
- Apply stain if desired, working in manageable sections with even coverage and consistent penetration
- Seal with first finish coat after stain dries completely, typically 8 to 12 hours minimum
Pro Tip: Test stain color on an inconspicuous area or sample board first. Colorado’s dry air can affect stain penetration and drying rates differently than manufacturer specifications based on standard humidity levels.
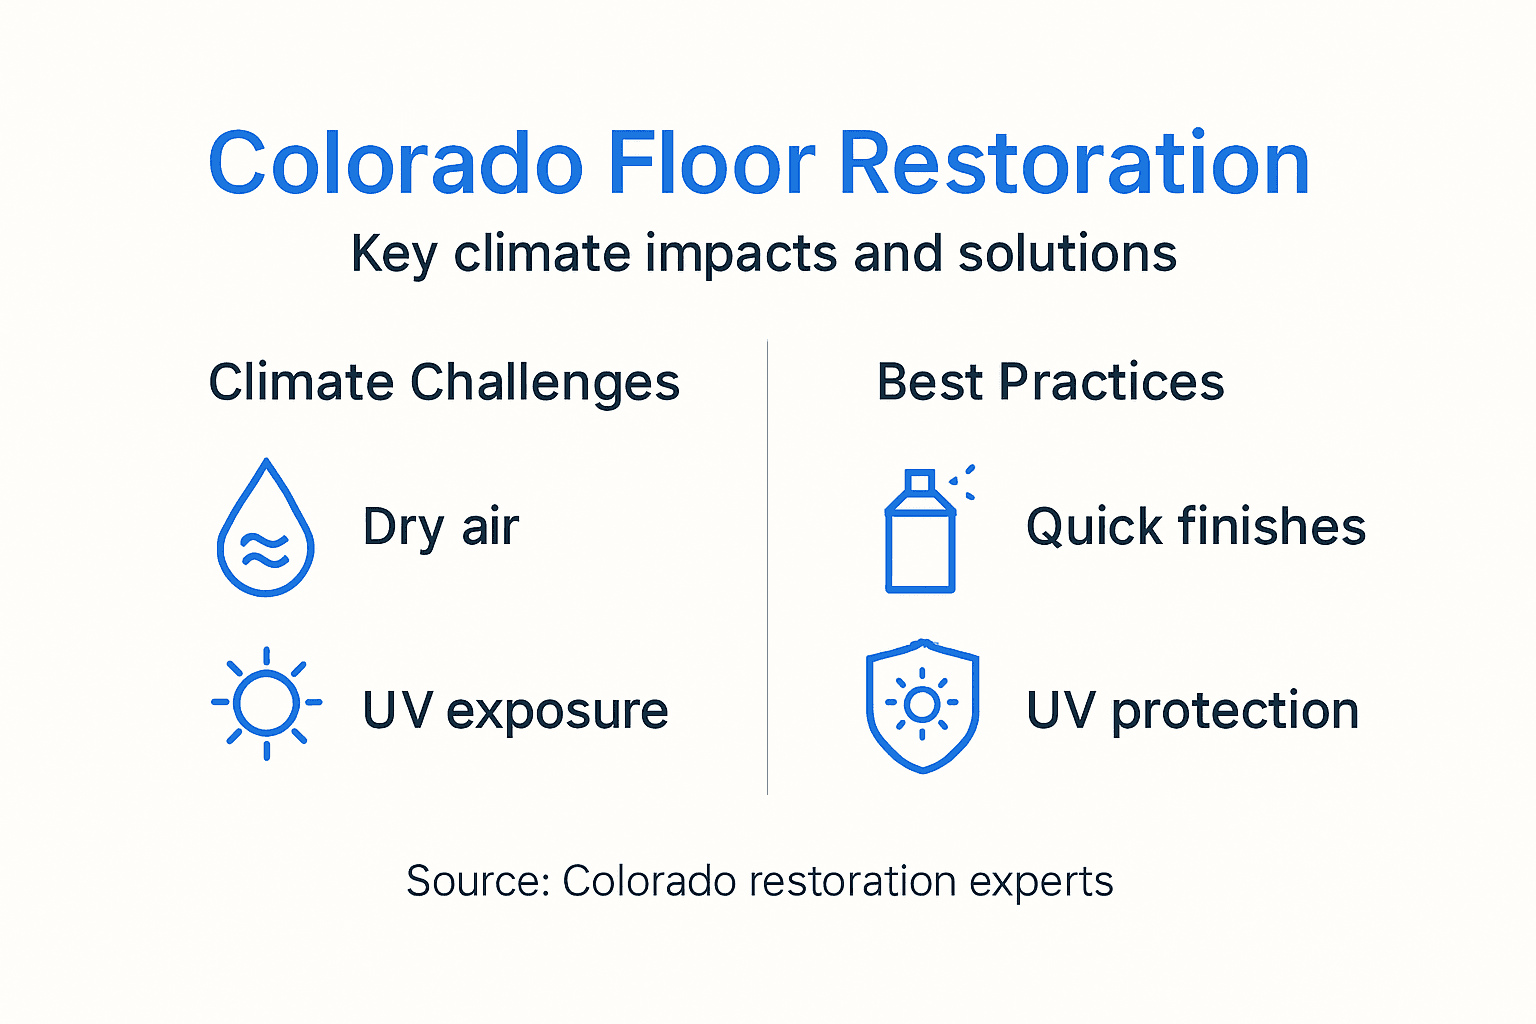
Choose finishes strategically for Colorado conditions. Water-based polyurethanes dry faster (4 to 6 hours between coats) and emit fewer VOCs, making them ideal for occupied homes. Oil-based options provide slightly deeper color enhancement but require 24-hour drying times and more ventilation. Both should include UV inhibitors to combat Colorado’s intense sunlight that accelerates finish degradation. Explore various hardwood floor sanding techniques to refine your approach.
| Finish Type | Drying Time | VOC Level | UV Protection | Best For |
|---|---|---|---|---|
| Water-Based Polyurethane | 4-6 hours | Low | Good with additives | Quick turnaround, occupied homes |
| Oil-Based Polyurethane | 24 hours | Moderate to High | Fair | Deep color enhancement, vacant properties |
| UV-Curable | 5-10 minutes | Very Low | Excellent | Professional application, fastest cure |
Finishing and Curing
Finish application demands patience and precision. Apply your first coat thinly and evenly using a high-quality brush or lamb’s wool applicator, working with the grain in smooth, overlapping strokes. Multiple polyurethane coats with appropriate dry times (24 hours for oil-based, 4-6 hours for water-based) create a durable, glossy, and protective surface. Maintain consistent room temperature between 60°F and 80°F during application and curing to ensure proper film formation.
After each coat dries to the touch, lightly screen with 220 grit abrasive to remove dust nibs and create mechanical adhesion for subsequent layers. Vacuum and tack cloth thoroughly between coats. Most projects require two to three finish coats for adequate protection, with high-traffic areas benefiting from a third layer.
Colorado’s climate affects curing significantly. The state’s low humidity accelerates surface drying but can slow deeper cure, potentially causing finish to remain soft longer than expected. Prefer eco-friendly, water-based finishes for health and environmental safety and faster curing in dry climates. Restrict all foot traffic for at least 24 hours after final coat application, and wait 5 to 7 days before replacing furniture or area rugs.
Pro Tip: Run a humidifier during finish application and curing if indoor humidity drops below 30%. This prevents finish from drying too quickly on the surface while remaining soft underneath, which causes premature wear and scuffing.
Curing best practices:
- Maintain good cross ventilation without creating dust circulation during drying periods
- Keep pets and children away from finished areas until fully cured
- Avoid placing rugs or furniture for minimum 7 days to prevent finish indentation
- Use felt pads under all furniture legs when eventually replacing items
- Wait 30 days before wet mopping or applying maintenance products
Climate Considerations and Finish Selection for Colorado
Colorado’s environmental factors demand specific restoration adaptations. The state receives approximately 300 days of sunshine annually, with UV radiation 25% more intense at higher elevations compared to sea level locations. This accelerates finish breakdown through photodegradation, causing yellowing, chalking, and loss of gloss. Select finishes explicitly containing UV absorbers and stabilizers to extend protection intervals.
Dry air presents another challenge. Indoor humidity often drops to 15% to 25% during winter months, well below the ideal 35% to 55% range for hardwood stability. This causes finish to become brittle and crack prematurely. Choose flexible finish formulations that accommodate wood movement without failing. Water-based products generally perform better in low-humidity environments due to their more elastic film properties.
Adjust your maintenance schedule to match climate stress. While floors in humid regions might last 10 to 15 years between refinishing, Colorado conditions typically require attention every 7 to 10 years even with quality finishes and proper care. Regular maintenance including periodic screening and recoating can extend this interval by refreshing the protective layer before wear penetrates to bare wood.
Colorado-specific finish recommendations:
- Prioritize products with UV inhibitors rated for high-altitude sun exposure
- Select water-based polyurethanes with flexible resin systems for dry air tolerance
- Consider aluminum oxide additives for enhanced scratch resistance in dry conditions
- Avoid pure oil finishes that dry out and require frequent reapplication
- Apply extra topcoats in south-facing rooms receiving maximum sun exposure
Common Mistakes and Troubleshooting
DIY restoration attempts frequently encounter preventable errors. Aggressive sanding mistakes occur in about 15% of DIY attempts, causing surface damage that requires professional correction. Never force a drum sander or let it sit stationary while running, as this creates dips and gouges impossible to remove without extensive correction. Maintain constant motion and let the machine’s weight do the work.
Dust control failures create finish defects. Every speck of sawdust trapped under finish coats creates a visible bump or crater. Vacuum between every sanding stage and wipe with tack cloths before each finish application. Seal your work area completely and change into clean clothing before applying finish to avoid introducing contamination.
Rushing curing times ranks among the most damaging shortcuts. Walking on incompletely cured finish leaves permanent marks. Placing furniture too early creates indentations that never fully disappear. Follow manufacturer guidelines exactly, adding extra time in Colorado’s dry climate where surface feel can be misleading about deeper cure state. Review correct sanding techniques to avoid common pitfalls.
Troubleshooting common issues:
- Sanding divots: Fill with color-matched wood putty, let dry completely, then carefully re-sand with fine grit
- Finish bubbles: Usually caused by shaking cans or applying over damp wood; lightly sand and recoat affected areas
- Uneven stain absorption: Indicates inadequate sanding or inconsistent wood density; requires re-sanding to achieve uniformity
- Finish adhesion failure: Results from contaminated surfaces or incompatible products; strip failed finish and restart with compatible system
- Visible sanding lines: Correct by re-sanding with progressively finer grits until lines disappear completely
Expected Results and Timelines
Plan realistically for project duration. Typical hardwood floor restoration ranges from 3 to 7 days from prep to final curing, with professionals generally faster due to experience and equipment. DIY projects often require extra time for learning curves, equipment rentals, and working around occupied-home constraints. A 500-square-foot room might take a skilled DIYer an entire weekend just for sanding, plus additional days for finishing and curing.
Professional refinishing typically costs $4 to $8 per square foot depending on floor condition, wood species, and finish selection. This includes all labor, materials, and equipment. DIY costs run lower at $1 to $3 per square foot but require significant tool investment or rental fees plus your labor time. Factor in your skill level and available time honestly when deciding between approaches.
Quality indicators for successful restoration include perfectly smooth surfaces free from visible scratch patterns, even stain color without blotching or streaks, and flawless finish coats without dust inclusions, bubbles, or brush marks. The floor should feel smooth and consistent underfoot with uniform sheen across all areas. Properly executed work transforms worn, dull floors into stunning features that appear nearly new.
Properly done restoration boosts floor life and appearance for 7-10 years on average. Implement good maintenance practices through gentle cleaning, controlled humidity, and periodic recoating to extend this interval further. Some floors can go 12 to 15 years between full restorations with diligent care. Check the comprehensive floor maintenance guide for ongoing care strategies.
| Project Phase | DIY Timeline | Professional Timeline | Critical Success Factors |
|---|---|---|---|
| Preparation | 1-2 days | 0.5-1 day | Complete furniture removal, thorough cleaning |
| Sanding | 2-3 days | 1 day | Proper grit progression, adequate dust extraction |
| Staining | 1 day | 0.5 day | Even application, appropriate drying time |
| Finish Application | 2-3 days | 1-2 days | Thin even coats, proper interval between layers |
| Curing | 5-7 days | 5-7 days | Controlled environment, restricted access |
Safety Considerations and Maintenance
Personal protection cannot be compromised during restoration work. Use NIOSH-approved respirators, ear protection, and eye safety equipment; ensure proper ventilation to minimize VOC inhalation. Wood dust from sanding qualifies as a respiratory hazard that can cause both immediate irritation and long-term health effects. Half-face respirators with P100 filters provide minimum adequate protection, while powered air-purifying respirators offer superior comfort for extended work sessions.
Drum sanders generate 90 to 100 decibels during operation, well above safe exposure limits. Wear foam or silicone earplugs combined with over-ear protection for adequate noise reduction. Safety glasses protect against flying debris and dust. Long sleeves, pants, and closed-toe shoes prevent skin contact with chemicals and protect against minor impacts.
Ventilation becomes critical during finish application and curing. Open multiple windows to create cross-flow ventilation that removes solvent vapors before they accumulate to hazardous concentrations. Use box fans positioned to exhaust fumes outdoors rather than circulating them within the space. Never apply finishes in sealed rooms or use open flames near drying finishes.
Post-restoration maintenance preserves your investment. Wait the full curing period before cleaning, then adopt gentle routines using pH-neutral cleaners specifically formulated for hardwood. Avoid excessive water that can penetrate finish seams and damage wood. Place mats at entries to capture grit, and maintain consistent indoor humidity between 35% and 55% year-round to minimize wood movement. Explore detailed hardwood floor maintenance tips for comprehensive care strategies.
Ongoing protection measures:
- Use felt pads under all furniture legs to prevent finish scratches and indentations
- Trim pet nails regularly to minimize surface damage from claws
- Sweep or vacuum daily in high-traffic areas to remove abrasive particles
- Apply screen and recoat maintenance every 3 to 5 years to refresh protection
- Address spills immediately to prevent moisture penetration and staining
Restore Your Floors with Professional Help
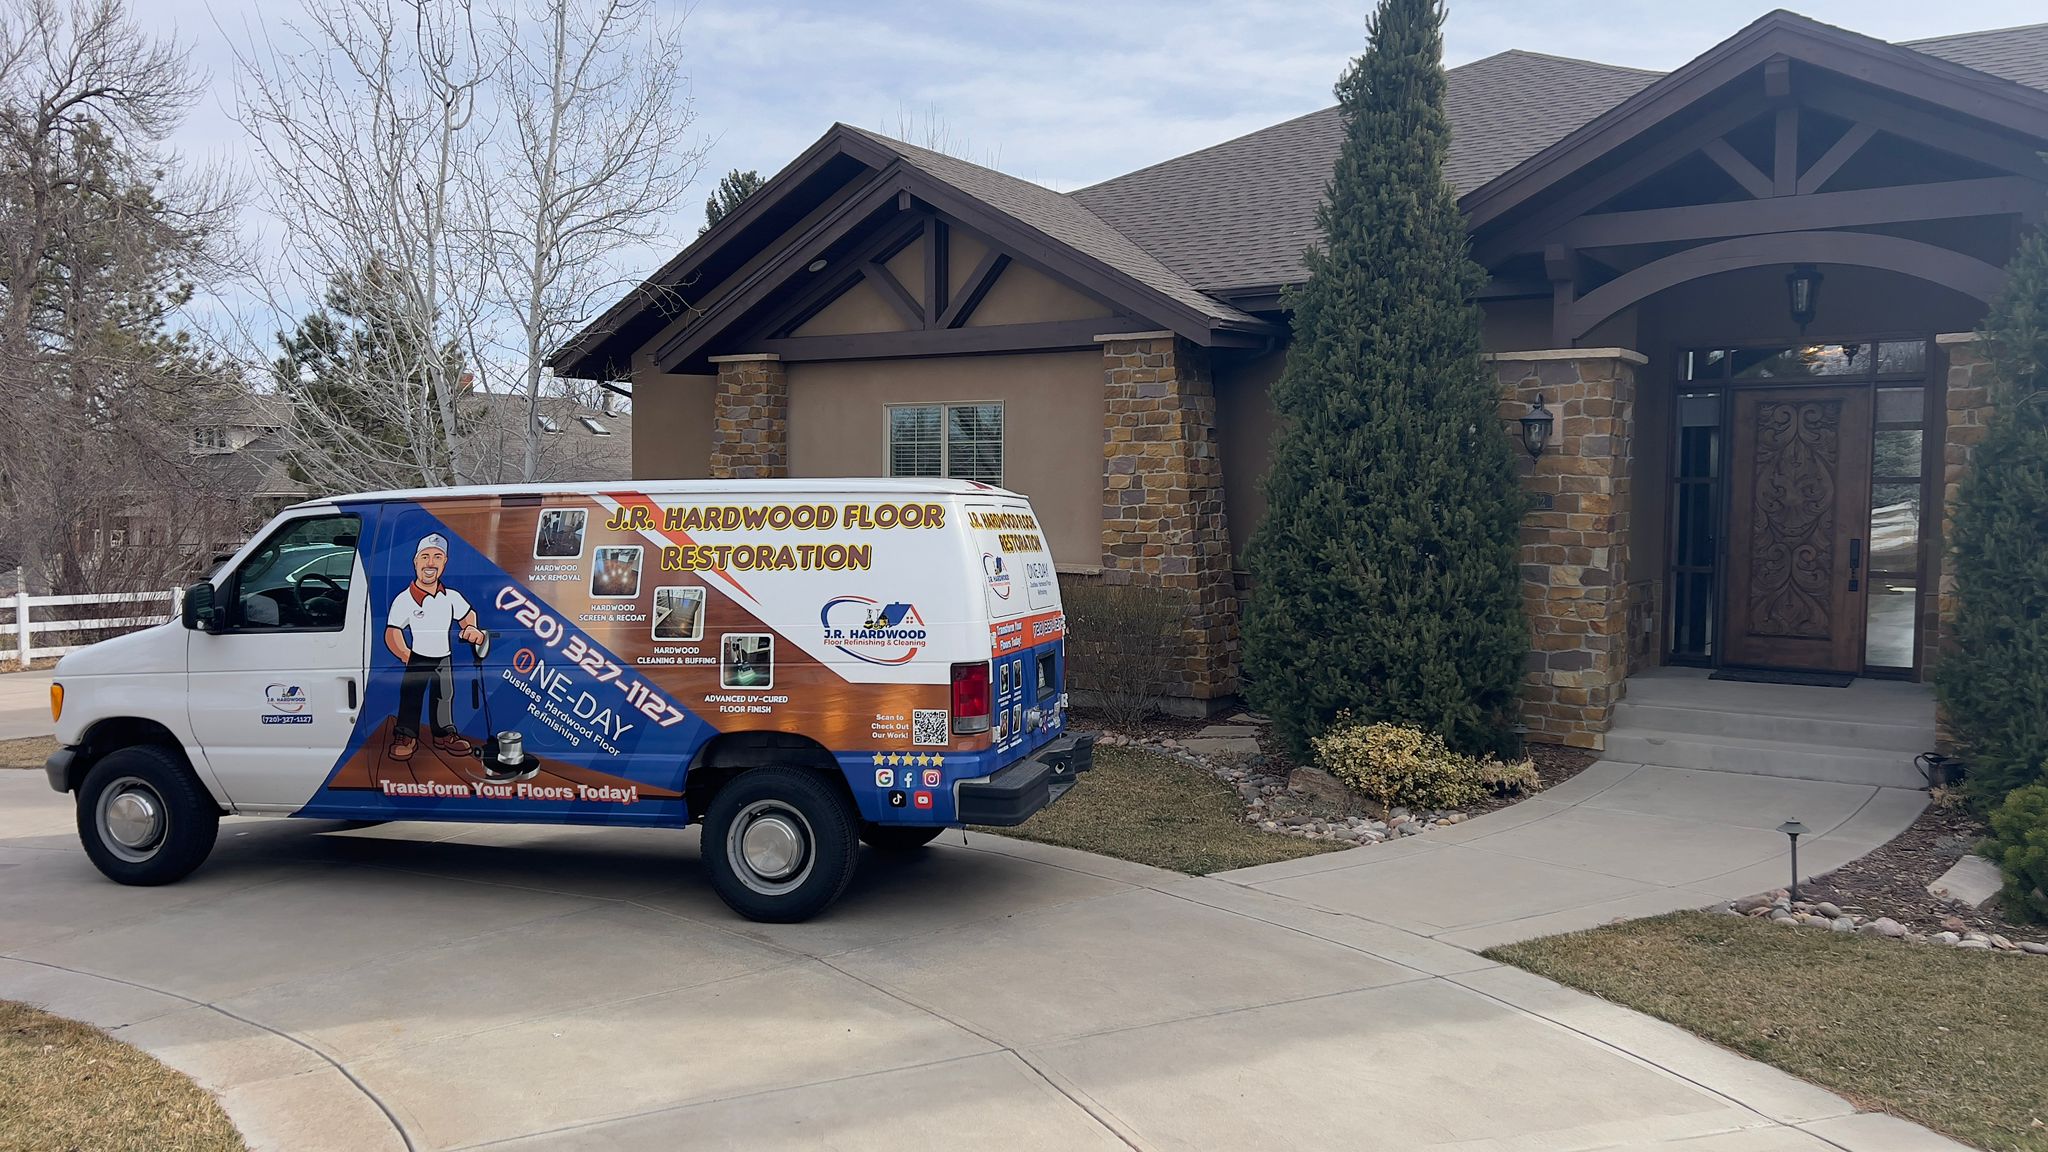
While DIY restoration offers cost savings, professional services deliver expertise, specialized equipment, and guaranteed results adapted to Colorado’s climate challenges. Experienced technicians navigate common pitfalls, complete projects faster, and provide warranties backing their work quality. They access commercial-grade equipment unavailable to homeowners and maintain dust containment systems that keep your home cleaner throughout the process.
Consider professional help especially for large areas, stairs, or floors with complex repairs. Evaluate professional vs DIY floor refinishing options to determine which approach matches your timeline, budget, and skill level. Professional services include comprehensive sanding, staining, finish application using premium products, and detailed guidance on maintenance. For complete project understanding, review this complete hardwood floor refinishing guide covering every decision point.
Local Colorado specialists understand regional challenges including altitude effects on product performance, UV protection requirements, and humidity management strategies. They recommend finish systems proven in mountain and plains environments. Contact expert hardwood floor refinishing services for detailed consultations and accurate project quotes.
Frequently Asked Questions About Hardwood Floor Restoration
How long does hardwood floor restoration take?
Complete restoration typically requires 3 to 7 days from preparation through final curing. DIY projects often extend to 7 to 10 days due to learning curves and equipment rental schedules. The actual sanding takes 1 to 2 days, while finishing and curing consume the remaining time.
What does hardwood floor restoration cost in Colorado?
Professional services range from $4 to $8 per square foot depending on floor condition and finish selection. DIY costs run $1 to $3 per square foot plus tool rental fees of $50 to $100 daily. Budget extra for specialized products like UV-resistant finishes recommended for Colorado sun exposure.
Which finish type is best for Colorado’s climate?
Water-based polyurethanes with UV inhibitors perform best in Colorado conditions. They dry quickly in low humidity, emit fewer VOCs, and maintain flexibility to accommodate wood movement in dry air. Look for products specifically formulated with UV stabilizers to combat intense sunlight at higher elevations.
How often should I refinish my hardwood floors?
Colorado conditions typically require refinishing every 7 to 10 years even with proper maintenance. High-traffic areas or floors with inadequate UV protection may need attention sooner. Screen and recoat maintenance every 3 to 5 years extends intervals between full restoration.
What safety gear is necessary during restoration?
Minimum protection includes NIOSH-approved respirator with P100 filters, hearing protection rated for 90+ decibels, and safety glasses. Add long sleeves, pants, and closed-toe shoes for complete protection. Never skip respiratory protection even for small projects, as wood dust poses serious health risks.
Can I stay in my home during floor restoration?
You can occupy other areas during sanding if rooms seal completely, but dust inevitably migrates. Plan to vacate during finish application and initial curing to avoid VOC exposure and prevent accidental contact with wet finishes. Re-occupy after 24 to 48 hours once fumes dissipate, but maintain restricted floor access.