 Skip to content
TL;DR:
- Regular cleaning and climate-specific maintenance are key to hardwood floor longevity in Denver.
- Address surface scratches and stains promptly through DIY or professional restoration to maintain shine.
- Professional guidance ensures proper care for deep damage, especially considering Denver’s unique climate challenges.
Your hardwood floors looked stunning the day they were installed. But now they look dull, scratched, and tired despite your regular cleaning routine. Sound familiar? You’re not alone. Many Denver-area homeowners and business owners face this exact frustration, unsure whether they need a simple clean, a targeted restoration, or a full refinishing job. This guide walks you through every step, from assessing your floors and gathering the right tools, to cleaning, restoring, and protecting your hardwood for the long haul. By the end, you’ll know exactly what your floors need and how to make them shine again.
Table of Contents
- Assessing your hardwood floors: What you need before you start
- Step-by-step floor care: Cleaning and maintaining hardwood
- Restoring hardwood: Addressing scratches, stains, and wear
- Final verification: How to inspect and protect your restored floors
- Why most floor care advice falls short—and the real secret to durability
- Expert help and next steps for Denver floor care
- Frequently asked questions
Key Takeaways
| Point | Details |
|---|---|
| Know your floor’s needs | Assess your hardwood floors to determine whether you need cleaning, restoration, or refinishing before beginning any care routine. |
| Clean and maintain regularly | Follow a step-by-step cleaning routine and use appropriate products to prevent damage and extend your floor’s life. |
| Restore smarter, not harder | Address scratches and stains with targeted restoration techniques to avoid unnecessary refinishing. |
| Verify and protect your results | Inspect your work and implement protection strategies so your restored floors stay beautiful and durable. |
Assessing your hardwood floors: What you need before you start
Before you grab a mop or a sander, take a few minutes to really look at your floors. Good assessment is everything. It saves you from spending money on products you don’t need and from accidentally making things worse.
Start by walking the entire floor in good lighting. Natural light from a window works best. Look for these common issues:
- Surface scratches: Light marks that catch the light but don’t cut into the wood grain
- Deep gouges: Cuts that go through the finish and into the wood itself
- Stains or discoloration: Dark spots from water, pet accidents, or spills
- Dull or hazy finish: A finish that looks flat even after cleaning
- Cupping or warping: Boards that have lifted or bowed at the edges
Knowing whether your floors need simple cleaning or extensive refinishing saves time and money. Use this quick comparison to guide your decision:
| Method | Best for | Typical cost range | Disruption level |
|---|---|---|---|
| Cleaning | Dirt, grime, dull finish | Low | Minimal |
| Restoration | Light scratches, worn areas | Moderate | Low to moderate |
| Refinishing | Deep damage, full wear | Higher | Significant |
For most homes, a thorough cleaning solves about 60% of floor problems. Restoration handles another 30%. Full refinishing guide work is reserved for floors with serious damage or heavy wear through multiple layers of finish.
Here’s your basic tools and materials checklist before starting:
- Microfiber mop and dry pads
- pH-neutral hardwood floor cleaner
- Soft-bristle broom or vacuum with a hard floor setting
- Wood filler or wax sticks for minor scratches
- Protective furniture pads
- Clean white cloths for spot treatment
Pro Tip: Take photos of problem areas with your phone before you start. This helps you track progress and gives you a reference if you need to call in a professional for advice later.
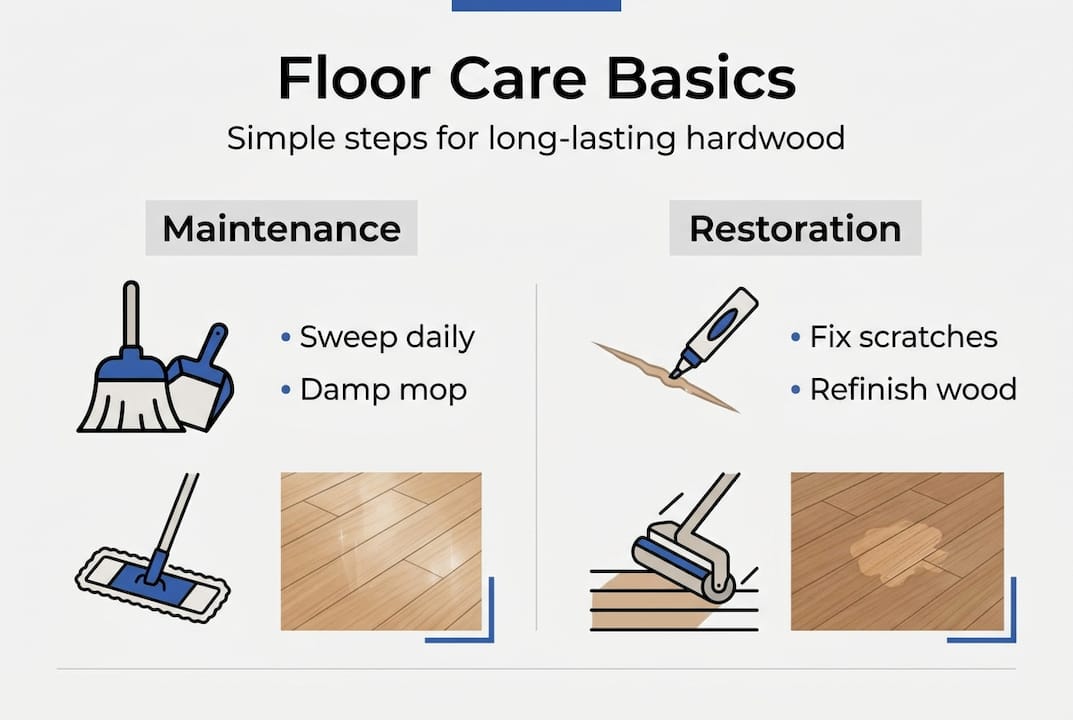
Step-by-step floor care: Cleaning and maintaining hardwood
With your tools ready and your assessment done, it’s time to get into the actual cleaning process. Think of this as your floor’s regular spa day. Consistent care is what keeps hardwood looking great between deeper restoration sessions.
Daily and weekly cleaning steps:
- Dry sweep or vacuum daily in high-traffic areas. Sand and grit act like sandpaper underfoot. In Denver, this is especially important because we track in a lot of fine grit from outdoor spaces. Use a soft-bristle broom or a vacuum set to hard floor mode. Never use a beater bar attachment on hardwood.
- Spot clean spills immediately. Water is hardwood’s biggest enemy. Blot spills with a dry white cloth right away. Don’t rub, just press and lift.
- Damp mop weekly. Use a microfiber mop lightly dampened with a pH-neutral hardwood cleaner. Wring the mop out thoroughly. The goal is barely damp, not wet. Too much moisture causes warping and staining over time.
- Clean along the grain. Always mop and wipe in the direction of the wood grain. This prevents streaking and protects the finish.
- Dry immediately after mopping. If any moisture sits on the surface, follow up with a dry microfiber pad.
Regular maintenance routines prolong the lifespan and appearance of hardwood floors significantly. For high-traffic zones like entryways, hallways, and kitchens, increase your damp mopping to twice a week.
For a complete breakdown of what to do each week and month, the maintenance checklist steps we’ve put together covers every routine in detail.
Avoid these common cleaning mistakes:
- Using steam mops (the heat and moisture damage the finish)
- Applying oil soaps or wax-based cleaners on polyurethane finishes
- Using vinegar or ammonia-based products (they strip the finish over time)
Pro Tip: Keep a small spray bottle of your pH-neutral cleaner and a microfiber cloth near the kitchen and entryway. Quick spot cleaning right after a spill takes 30 seconds and prevents stains that take hours to fix.
Restoring hardwood: Addressing scratches, stains, and wear
Once routine maintenance is mastered, restoration is the next level. This is where you bring back the shine and tackle the damage that regular cleaning can’t fix. Think of restoration as hitting the reset button on your floor’s surface without tearing everything down.
Fixing scratches:
- Minor surface scratches: Use a wood touch-up marker or wax crayon that matches your floor color. Apply, buff gently with a soft cloth, and blend.
- Moderate scratches: Wood filler works well here. Apply a small amount, let it dry fully, then sand lightly with fine-grit sandpaper (220 grit) and buff.
- Deep gouges: These often need professional attention. Restoring old hardwood with deep damage requires proper sanding technique to avoid uneven surfaces.
Stain removal strategies:
- For water stains, try rubbing with a small amount of mineral spirits on a cloth.
- For pet stains, use an enzymatic cleaner designed for hardwood. Let it sit briefly, then blot.
- For dark, set-in stains, light sanding followed by a matching stain application may be needed.
Restoration can dramatically improve appearance without the need for full refinishing. Here’s a quick reference for matching restoration methods to damage severity:

| Damage level | Recommended method | DIY friendly? |
|---|---|---|
| Light surface scratches | Touch-up marker or wax stick | Yes |
| Moderate wear or dullness | Screen and recoat | With guidance |
| Deep scratches or stains | Spot sand and refinish | Professional recommended |
| Full surface wear | Full refinishing | Professional |
For modern floor restoration solutions that go beyond basic DIY, there are options like Instant UV-curable finishes that harden in seconds and restore the surface beautifully.
Safety note: Avoid using bleach, ammonia, or harsh chemical strippers on hardwood floors. These products can permanently damage the wood fibers and finish, and they create fumes that are unsafe in enclosed spaces. Always work in a well-ventilated area and use products specifically labeled safe for hardwood.
Final verification: How to inspect and protect your restored floors
After restoration, verification is the key to lasting durability and safety. Skipping this step is like painting a room and never checking if you missed a spot. A quick, thorough inspection locks in your results and sets you up for long-term success.
Step-by-step inspection checklist:
- Check in raking light. Shine a flashlight or lamp at a low angle across the floor. This reveals any uneven spots, missed scratches, or streaks in the finish.
- Run your hand across the surface. The floor should feel smooth and consistent. Rough patches or tackiness mean the finish needs more time or another pass.
- Look for color consistency. Restored or recoated areas should blend with the surrounding floor. If a patch looks noticeably lighter or darker, it may need blending.
- Test for adhesion. Press a small piece of tape on a restored area and peel it back. If the finish lifts with the tape, adhesion is poor and the area needs to be redone.
- Check edges and corners. These spots are easy to miss during restoration. Make sure finish coverage is even all the way to the walls.
Proper inspection ensures floor care steps were effective and helps prevent future damage from going unnoticed.
Once your inspection passes, move into protection mode:
- Place felt pads under all furniture legs. Replace them every 6 months since they collect grit.
- Use area rugs in high-traffic zones, but make sure they have a non-slip, hardwood-safe backing.
- Keep indoor humidity between 35% and 55%. Denver’s dry climate can cause boards to contract and crack.
Pro Tip: Place a quality mat both outside and inside every exterior door. This two-mat system catches the majority of dirt, sand, and moisture before it ever reaches your hardwood. It’s one of the simplest and most effective protection moves you can make.
For ongoing care, revisit your screen and recoat workflows every 3 to 5 years depending on traffic. This refreshes the protective layer without the cost or disruption of full refinishing.
Why most floor care advice falls short—and the real secret to durability
Here’s something most generic floor care guides won’t tell you: the advice that works in humid climates like the Southeast can actually hurt your floors in Denver. We’ve seen it firsthand after restoring hundreds of floors across the metro area.
Denver sits at high altitude with low humidity and intense UV exposure. Generic tips that suggest frequent damp mopping or ignore humidity control are a recipe for cracked, cupped boards in our climate. The sand and grit we track in from trails, construction zones, and parking lots is also far more abrasive than typical household dirt.
What actually works here is a Denver-specific approach: dry cleaning first, always. Humidity control year-round. Protective finishes that hold up to UV and temperature swings. And knowing when to call in a professional before a small issue becomes a full replacement.
Our refinishing and cleaning expertise is built entirely around Colorado conditions. That local knowledge is what separates floors that last 30 years from ones that need replacement in 10.
Expert help and next steps for Denver floor care
Sometimes the best move is knowing when to call in a pro. If your floors have deep damage, uneven wear, or you’re unsure which restoration method fits your situation, professional guidance saves you from costly mistakes.
At J.R. Hardwood Floor Refinishing & Cleaning, we offer free over-the-phone quotes and walk you through exactly what your floors need before any work begins. Whether you’re weighing DIY vs professional floor refinishing or ready to schedule a full restoration, we’re here to help. Explore our complete refinishing guide or reach out to your local Denver floor expert today. Your floors deserve the best care, and we make it easy to get started.
Frequently asked questions
What is the difference between cleaning, restoring, and refinishing hardwood floors?
Cleaning removes surface dirt and grime, restoration repairs light scratches or worn finish areas, and refinishing involves sanding down to bare wood and applying new coats for extensive damage. Each method targets a different level of floor wear.
How often should hardwood floors be cleaned versus refinished?
High-traffic hardwood floors benefit from weekly cleaning and typically need refinishing every 5 to 10 years based on visible wear. Your maintenance schedule should adjust based on foot traffic and finish condition.
Can I restore deep scratches and stains myself?
Minor scratches and surface stains can often be handled at home with the right products, but deep gouges or widespread staining usually call for professional help. Check out this step-by-step restoration guide to know where your damage falls.
What tools are essential for hardwood floor care?
You’ll want a microfiber mop, a pH-neutral hardwood cleaner, a soft-bristle broom or hard-floor vacuum, wood filler or touch-up markers, and felt furniture pads. These basics cover daily care and minor repairs.
Does Denver’s climate affect floor maintenance?
Absolutely. Denver’s dry, high-altitude climate causes hardwood to contract and can lead to cracking or gapping if humidity isn’t managed. Tailored Denver maintenance routines that account for low humidity and UV exposure make a real difference in how long your floors last.