 Skip to content
Giving an old piece of furniture a fresh coat of paint can be incredibly satisfying. You can take something from looking tired and dated to being the star of the room, and all it takes is a little bit of work. But here’s the secret the pros know: a stunning, long-lasting finish has almost nothing to do with the final coat of paint and everything to do with the prep work.
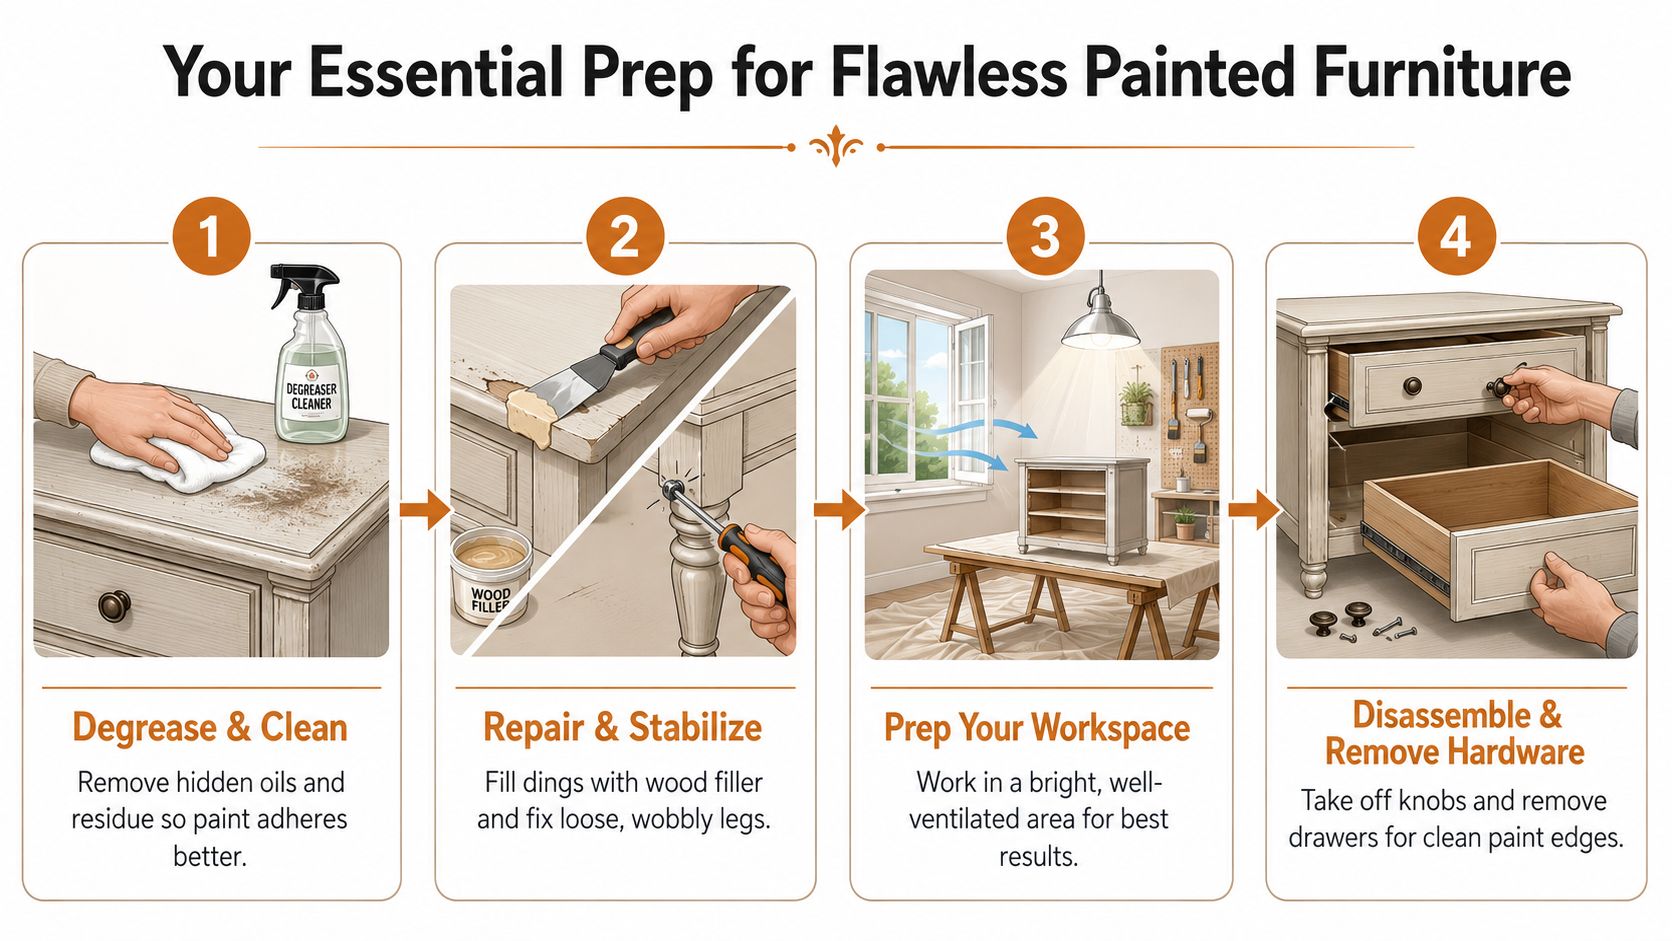
Your Essential Prep for Flawless Painted Furniture
Before you even think about popping open that paint can, let's talk about building a solid foundation. This is the part of the project that separates a DIY job from a professional-quality finish. It's not just a quick wipe-down; it's creating the perfect canvas for your new color.
First things first, you have to get rid of years of grime. All that furniture polish, finger oils, and built-up gunk will stop your paint from sticking, leading to peeling and chipping down the road. A good degreasing cleaner like a TSP substitute or even a simple mix of warm water and dish soap will do the trick. If you're tackling something that was previously stained, this guide to repainting wood stain has some great pointers for dealing with that specific challenge.
Next up, it’s time to play furniture doctor. Look for any dings, wobbly legs, or other issues that paint will only highlight.
- Fill Minor Dings: Grab a quality wood filler to patch up any small scratches, dents, or nicks.
- Stabilize Wobbly Legs: A bit of wood glue and a clamp on any loose joints will make the piece sturdy and feel like new.
Don't forget to set up a good workspace. You'll thank yourself later. Make sure you have great ventilation and plenty of light so you can spot any drips or missed spots before they dry.
Here’s a tip that makes all the difference: take it apart. Seriously. Spending a few extra minutes removing hardware, taking off doors, or pulling out drawers is the secret to getting those clean, crisp paint lines that scream “factory-finished.”
Finally, a clean start is a good start. If you’re worried about fumes or just want a more eco-friendly option for your project, it’s worth looking into modern coatings. Many of the same ideas about air quality and safety that apply to a low-VOC hardwood floor finish can be applied to furniture paints, too.
Sanding: Your Secret Weapon for a Flawless Finish
If prep is king, then sanding is the crown. This is where the real magic happens, transforming a tired, beat-up piece of furniture into a perfect canvas for its new life.
This isn’t just about making dust; it's the difference between a paint job that looks amazing for years and one that starts chipping before you've even forgotten the smell of fresh paint. A good sanding job is everything.
An orbital sander will be your best friend for big, flat surfaces like a tabletop, but don’t forget the humble sanding block. It gives you the control you need for those tricky curves and detailed spots. The goal is to scuff up that old finish, creating a uniformly dull surface that gives your new primer and paint something to really grab onto.
Choosing Your Grit: The Key to a Smooth Surface
The secret to a flawless finish isn't just sanding—it's sanding with the right sandpaper. You wouldn't use a sledgehammer to crack a nut, and you shouldn’t grab super-coarse sandpaper for a delicate piece. It’s all about starting with the right grit and working your way up.
Don't have a clue what grit to use? I've put together this quick guide to make it easy.
Sandpaper Grit Selection Guide
This table is your cheat sheet for picking the perfect sandpaper for every stage of your furniture project.
| Grit Range | Grit Name | Primary Use |
|---|---|---|
| 60-80 | Coarse | Your heavy-lifter. Strips thick varnish, old paint, or smooths out deep nicks and gouges. |
| 100-150 | Medium | The workhorse. Smooths out marks left by coarse grit and preps the surface for a finer pass. |
| 180-220 | Fine | The finishing touch. Creates that silky-smooth feel right before you prime. Essential for an even paint job. |
Starting with a coarse grit and moving methodically to a fine grit is the only way to get that professional, touchable smoothness we’re all after.
For a great visual breakdown, this guide shows exactly how cleaning, repairing, and sanding all fit together to create that ideal foundation for painting.
Honestly, this part of the process is my favorite. There’s something incredibly satisfying about taking an old, imperfect surface and making it new again. Taking the time here pays off big time. A good pre-paint sanding schedule can remove up to 95% of surface defects, ensuring your finish looks like it came from a high-end workshop, not a weekend DIY project.
Pro Tip: Got a shallow dent in the wood that’s driving you crazy? Don’t sand it away! Just place a damp cloth over the dent and press a hot iron on it for a few seconds. The steam makes the wood fibers swell right back up, often making the dent completely disappear.
If you're aiming for that ultra-sleek, almost-liquid finish you see on high-end furniture, you might want to try wet sanding. It’s an advanced technique, but these Titan Coatings wet sanding tips are a fantastic resource to get you started.
And while we're talking about sanding, remember that floors are a different beast. If you’re thinking about tackling a bigger project, you can check out our guide on selecting sandpaper grit for hardwood floors at https://jrhardwoodfloorrefinishingandcleaning.com/what-grit-sandpaper-for-hardwood-floors/ for more specific advice.
Choosing and Applying Primer and Paint Like a Pro
Alright, you’ve put in the hard work sanding, and now your piece is a perfectly smooth canvas. This is where the real transformation happens. Choosing the right primer and paint is what brings your vision to life and, more importantly, protects all that prep work you just did. This isn't just about picking a color; it's about building a finish that lasts.
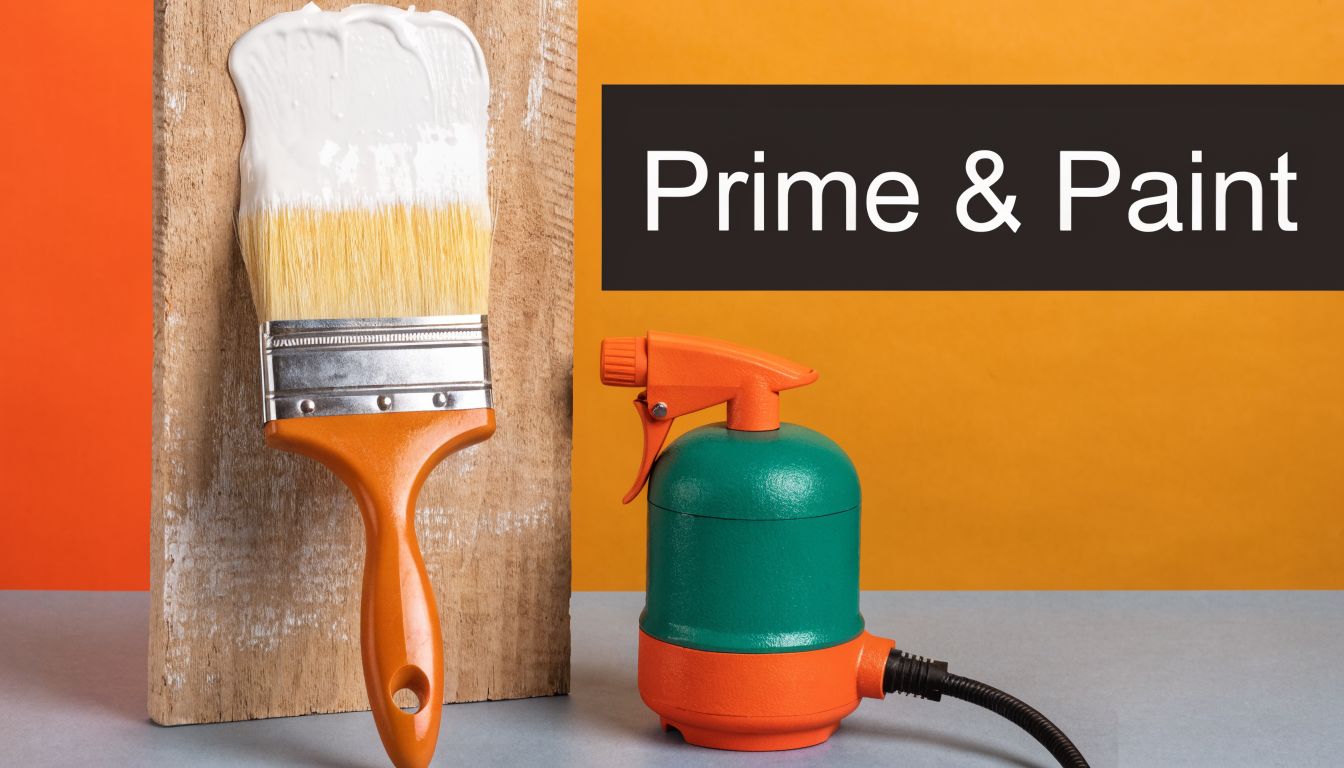
Let's talk primer. Don't even think about skipping it. Primer is the unsung hero of any great paint job. It acts like a bonding agent between the raw wood and your paint, ensuring the color sticks without peeling or chipping down the road. It also blocks nasty stains and wood tannins from bleeding through and ruining your beautiful new color.
I’ve seen it happen—someone paints directly over an old mahogany dresser, and a week later, mysterious pink splotches appear. That’s tannin bleed. Primer prevents that headache.
- Shellac-Based Primer: This is my go-to for problem pieces. If you're dealing with stubborn knots in pine, a super slick surface, or a musty smell you just can't shake, shellac is your miracle worker. It seals everything in. The trade-off? It’s smelly and requires mineral spirits for cleanup.
- Water-Based (Latex) Primer: For most everyday furniture flips, a good water-based primer is all you need. It’s low-odor, cleans up with soap and water, and stays flexible, which helps prevent the paint from cracking over time.
Application: Brushes vs. Sprayers
Once your primer is on and fully dry, it’s time for the main event. The type of paint you choose matters a ton—this All Well Property Services wood decorating guide is a fantastic resource for picking finishes like satin. But how you apply that paint is just as crucial for the final look.
Brush Application: There’s an art to brushing. Using a high-quality angled brush gives you amazing control, especially on pieces with intricate details or sharp corners. The secret to avoiding ugly brush strokes is to use thin coats, always paint toward a "wet edge" to blend your strokes, and resist the urge to go back over a semi-dry area. Let the paint do its job and self-level.
Paint Sprayer Application: If you want a flawless, factory-smooth finish with zero brush marks, a sprayer is the way to go. It’s incredibly fast, especially on large, flat surfaces like tabletops or dressers. The downside is the prep. You have to mask off everything you don’t want painted to contain the overspray, and the cleanup is a process.
No matter which tool you use, the key is patience. The goal is never to get full coverage in one go. Instead, build up the finish with at least two thin coats of paint, letting each one dry completely in between. This layered approach is what separates a DIY job from a professional-looking one. It creates a rich, durable color that will make all your effort worth it.
Adding Character with Historical Finishing Techniques
So, your piece is primed and painted with a fresh, clean coat. You could absolutely stop right here for a crisp, modern look. But what if you want to give that piece a bit of soul? A story? This is where the real artistry begins.
By looking to a few old-school decorative finishes, you can transform a simple painted table or dresser into a true one-of-a-kind conversation starter.
Embrace Faux Wood Graining
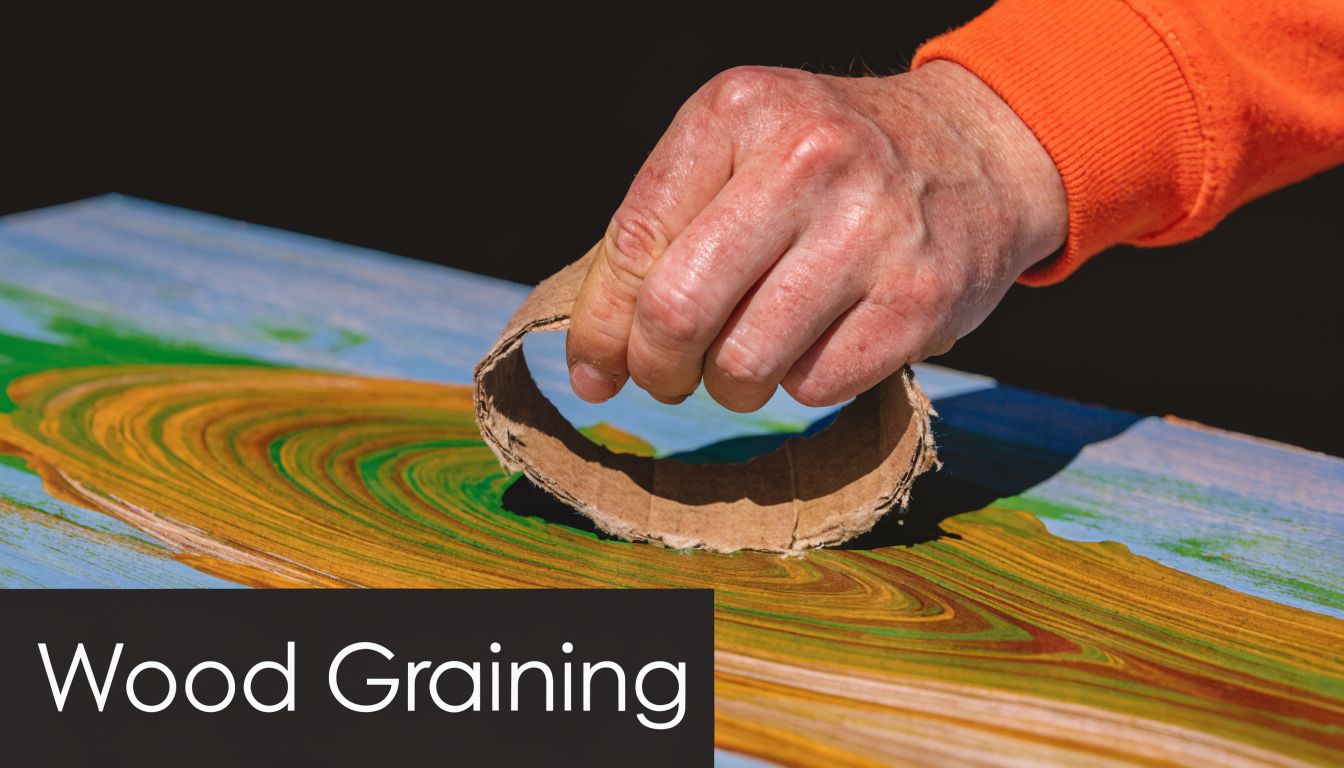
Long before you could buy furniture from a big-box store, skilled artisans had a bag of tricks to make affordable woods, like pine, look like pricey mahogany or oak. This technique, known as faux graining or faux bois (French for "fake wood"), is a fantastic way to add incredible depth after you sand and paint furniture.
This isn't just some forgotten historical craft; it was a dominant design choice. In the 18th and 19th centuries, wood graining and other faux finishes made up nearly 70% of the decorative work in some middle-class homes. The secret weapon? Glazes that could extend a paint’s drying time by up to six times, giving them plenty of freedom to create realistic effects. You can find some amazing insights on these traditional methods over at oldhouseguy.com.
The Magic of Glaze and Simple Tools
The real key to unlocking these historical techniques is glaze. A glaze is just a transparent or semi-transparent liquid that you mix with your paint. Its main job is to slow down the drying time, giving you a much longer window to manipulate the color and create cool effects.
With a glaze, your paint becomes incredibly forgiving. You can wipe away mistakes, blend colors softly, or drag tools through it to create texture without the paint getting tacky and ruined.
And you don't need a bunch of expensive, specialized gear to pull this off. In fact, the old-timers often just used whatever they had lying around.
- Torn Cardboard: Seriously. The ragged, uneven edge of a piece of torn cardboard, when dragged through a wet glaze, creates a surprisingly realistic wood grain.
- Feathers and Sponges: These were perfect for stippling, dabbing, or dragging paint to mimic textures like marble, leather, or other natural patterns.
- Specialty Graining Tools: If you really get into it, you can find modern graining combs and rockers. These tools make creating consistent, professional-looking patterns even easier.
By trying out these historical tricks, you’re doing more than just painting furniture. You’re adding a layer of craftsmanship and personality that you just can't buy off a shelf. It’s an easy way to make your project truly your own.
How to Protect Your Work with the Right Topcoat
You’ve done all the hard work sanding, painting, and perfecting your piece. It looks incredible! But before you call it a day, there's one final step that’s absolutely non-negotiable: the topcoat.
This is the invisible shield that stands between your beautiful paint job and the realities of daily life—think coffee cup rings, scuffs from sliding keys, and the slow fade from sunlight.
Choosing the right protective finish is a big deal, and your main contenders are polyurethane, polycrylic, and good old-fashioned furniture wax. Each one brings something different to the table in terms of look and durability.
Polyurethane: This is your heavy-hitter, the go-to for serious durability. Oil-based polyurethane is the toughest of the tough, making it a no-brainer for high-traffic surfaces like kitchen tables or desktops. Water-based versions are a great alternative with less odor and they won’t yellow over time. If you want to get into the nitty-gritty, you can learn all about the difference between oil-based and water-based polyurethane in our detailed guide.
Polycrylic: This is a water-based finish that dries completely clear. It's the perfect choice when you’re trying to preserve a bright white or light paint color without any risk of that dreaded yellowing effect. While it's not quite as bulletproof as polyurethane, it still offers solid protection with the huge bonus of soap-and-water cleanup.
Furniture Wax: If you're aiming for a soft, velvety matte finish on a piece that won't see a lot of action (like a decorative side table), furniture wax is a beautiful option. It feels amazing to the touch but be warned: it offers minimal water resistance and needs to be reapplied periodically to maintain its protection.
Dry Time vs. Cure Time
No matter which finish you land on, the application is everything. Always apply thin, even coats with a high-quality brush or a foam applicator. For that super-smooth, professional feel, give it a light sanding with fine-grit (400+) sandpaper between coats (after the previous one is fully dry, of course).
One of the biggest mistakes I see beginners make is confusing dry time with cure time. A topcoat might feel dry to the touch in just a few hours, but it can take days—or even weeks—to fully cure and reach its maximum hardness. Rushing this final step is a surefire way to get dings and scratches on your brand-new finish.
Seriously, be patient. Give the piece the full recommended cure time before you put it back into regular use. This final waiting game is the best insurance policy for a beautiful, durable finish that will actually stand the test of time.
Common Questions About Sanding and Painting Furniture
Even with the best plan, a few questions always pop up when you're midway through a furniture project. When it comes to getting that perfect finish, a little know-how can save you a lot of headaches. Let’s tackle some of the common hurdles I hear about all the time.
Do I Really Have to Sand Before I Paint?
I get this one a lot. The short answer is yes, you really should. Sanding creates a slightly rough surface—think microscopic peaks and valleys—that gives the new primer and paint something to grab onto. It’s the secret to a finish that won't chip or peel later on.
Even if you’re using one of those "no-sand" or "no-prep" paints, a quick scuff sanding with fine-grit paper makes a world of difference for durability. The only exception? A brand-new piece of furniture that's already perfectly prepped and primed from the factory.
What’s the Absolute Best Paint for Furniture?
There isn't one single "best" paint, but for pieces that will see a lot of action, you can't go wrong with a high-quality acrylic or enamel paint. These are workhorses known for their durability.
For high-traffic surfaces like a kitchen table or a desk, I always recommend paints specifically formulated for cabinets and furniture. Chalk paint is a fantastic choice if you're aiming for that trendy distressed, matte look, but just know it's not very tough on its own. You absolutely must seal it with a protective topcoat to make it last.
How Do I Get a Smooth Finish Without Any Brush Marks?
Ah, the age-old enemy: brush marks. To get that super-smooth, almost sprayed-on look, start with a quality synthetic brush. Don’t glob the paint on; thin, even coats are your best friend here.
The real key is to resist the urge to go back and "fix" a spot you just painted. Let it be! Let each coat dry completely, then give it a very light sanding with 220-grit (or higher) sandpaper before your next coat. This simple step knocks down any imperfections and makes the next layer go on like butter.
Painted furniture isn't just a modern trend. Early artisans painted furniture for preservation just as much as for looks. This tradition goes all the way back to medieval Europe, where specific techniques were developed to fight the decay of softwoods. Without a protective layer of paint, a piece's lifespan could be shortened by up to 50%. You can explore more about this furniture heritage at eduheart.eu.