 Skip to content
Buffing your hardwood floors is one of the smartest maintenance moves you can make as a Parker homeowner. It’s the secret to restoring that beautiful shine and erasing minor surface scratches, all without the cost and chaos of a full sanding. Think of it as a “screen and recoat” that gives the top layer of your floor’s finish a much-needed refresh. For expert Parker hardwood floor refinishing, this process, especially when combined with our advanced UV-Cure System, is the perfect fix for dullness caused by everyday life, keeping your investment looking great and well-protected.
Why Buffing Is Your Hardwood Floor’s Best Friend

For homeowners all over Parker—from the beautiful homes in Stonegate to the classic properties near downtown—hardwood floors are a huge part of a home’s character. But over time, daily life leaves its mark. You see the scuffs, the light scratches, and a general loss of luster. This is exactly where a professional Clean and Buff service comes in, acting as the smart, cost-effective solution to get your floors looking sharp again.
It’s really important to know that buffing isn’t the same thing as a full sanding. A complete Parker hardwood floor refinishing involves taking the finish all the way down to the bare wood. That’s for fixing deep gouges, water damage, or significant color fading. Buffing, on the other hand, is a much less invasive process that only deals with the top protective coat of polyurethane.
A Smart Investment in Your Floor’s Longevity
The finish on your floor is like the clear coat on your car—it’s designed to take the daily abuse. By periodically buffing and applying a new topcoat, you keep that protective layer intact and prevent wear and tear from ever reaching the actual wood.
It’s a maintenance strategy that’s catching on. The global floor buffing market hit USD 4.2 billion in 2023 and is expected to climb to USD 7.5 billion by 2030. This growth is all thanks to homeowners realizing that smart upkeep can slash potential replacement costs by as much as 70%. You can dive deeper into the numbers by checking out the full research on the floor buffing services market.
Professional Results with an Advanced UV-Cure System
Sure, you could rent a buffer and try a DIY approach, but getting that flawless, even sheen takes real skill and the right equipment. At J.R. Hardwood Floor Refinishing & Cleaning, we take things to the next level with our Instant UV-Cure System.
Unlike traditional finishes that can take hours or even days to dry, our UV-cured finishes harden instantly. This offers unmatched durability that’s perfect for busy Parker households. It means you can get back to your life right away, with a beautiful and tough finish that can handle kids, pets, and constant foot traffic. Exploring the many wood floor buffing benefits can help you see if it’s the right call for your home.
Your Practical Guide to DIY Floor Buffing
Alright, you’re ready to roll up your sleeves and buff those hardwood floors yourself. I get it! Tackling a project like this brings a ton of satisfaction. Success really comes down to two things: patient prep work and a steady hand on the machine. Let’s walk through how to bring that beautiful shine back to your floors.
First things first, and it has nothing to do with a buffer. You need a completely clean slate. That means every single piece of furniture, every rug, and all your decor has to come out of the room. Hidden grit is the number one enemy of a smooth finish, so a quick sweep just won’t cut it.
Once the room is empty, vacuum it meticulously with a soft brush attachment, paying special attention to the corners where dust loves to hide. Next up is a deep clean using a pH-neutral hardwood floor cleaner and a microfiber mop. It’s critical to avoid any products with wax, oil, or silicone—they leave behind a residue that will ruin your new finish. Make sure your mop is just damp, never soaking wet; you don’t want to risk water damage. Let it all dry completely before you even think about the next step.
Mastering the Floor Buffer
Okay, let’s talk about the main event. Operating a floor buffer for the first time feels awkward, almost like learning to ride a bike again, but you’ll get the hang of it quickly. The key is to guide the machine, not to strong-arm it. Let the buffer’s weight and rotation do the heavy lifting while you focus on a steady, controlled pace.
- Handle Control: This is the secret sauce. To move the buffer to your right, gently lower the handle. To drift left, just raise it slightly. It’s all about subtle, small adjustments.
- Consistent Motion: Think of it like mowing a lawn. You want to move across the floor in slow, overlapping passes. A good rule of thumb is to overlap each pass by about one-third of the buffing pad’s width. This ensures you don’t end up with missed spots or stripes.
- Avoid Pausing: Whatever you do, don’t let the buffer sit still in one spot while it’s running. This is the fastest way to create ugly swirl marks or even burn the finish, leaving you with a much bigger problem to fix.
A Pro Tip for Parker Homeowners: Our dry Colorado climate means dust is a constant battle. After you do your initial big vacuum, give the room about 15-20 minutes for all the airborne dust to settle. Then, do one final, quick vacuum right before you start buffing. This little extra step makes a huge difference in the quality of your final finish.
Safety and Finishing Touches
Before you flip that switch, let’s talk safety. You’re going to kick up a lot of fine dust from the old finish, so a dust mask is non-negotiable. Safety glasses are also a must-have to protect your eyes.
The machine can be loud, so ear protection is a smart idea. Most importantly, get some fresh air moving. Open up the windows to help with ventilation, which is crucial for dealing with both the dust and any fumes from the new finish you’ll apply later.
Once the main floor area is buffed, you’ll need to hand-sand the edges and corners where the machine couldn’t reach. Then, it’s time for another round of meticulous cleanup. Vacuum up every last speck of dust you can see, then go over the entire floor with a tack cloth to grab any fine particles left behind.
Only when the floor is perfectly clean are you ready to apply a thin, even coat of polyurethane. If you’re curious about less traditional methods, you can learn more about how to buff hardwood naturally in Denver in our detailed guide.
Choosing Your Tools And Materials Like A Pro
Walking into a tool rental shop can feel a bit like information overload. To get that professional-quality finish on your own, you need to walk in knowing exactly what you’re looking for. The right gear is the foundation of a successful buffing job, plain and simple.
The single most critical decision you’ll make is the machine. It might be tempting to grab a standard orbital sander, but trust me, it’s not built for this. What you need is a dedicated floor buffer, sometimes called a swing machine. There’s a reason it’s the pro’s choice: its weight and oscillating motion are specifically designed to gently abrade the finish evenly without digging into the wood. An orbital sander, on the other hand, can easily leave gouges if you’re not careful.
DIY Buffing Equipment And Material Selection Guide
Picking the right combination of tools and materials is half the battle. This table breaks down what you’ll need and why, with a few tips specifically for dealing with Parker’s unique climate and home styles.
| Item | Best For | Pro Tip for Parker Homeowners |
|---|---|---|
| Floor Buffer (Swing Machine) | Evenly abrading the existing finish without damaging the wood. It’s the essential tool for this job. | Rent a 17-inch model. It’s heavy enough for good pressure but still manageable for a first-timer. |
| 120-Grit Abrasive Screen | Floors with moderate scuffs and light scratches, typical in high-traffic areas like entryways or kitchens. | Perfect for a Parker home where the entryway sees a lot of action from boots and paws. |
| 150-180-Grit Abrasive Screen | A simple refresh on floors that are just dull but otherwise in good shape. It creates a bonding surface without being too aggressive. | Ideal for reviving the finish in a lower-traffic bedroom or formal dining room in a local home. |
| Water-Based Polyurethane | A fast-drying, low-odor finish that won’t yellow over time, preserving the wood’s natural color. | Our dry climate helps water-based finishes cure quickly and reliably. The low VOCs are a huge plus. |
| Oil-Based Polyurethane | Achieving a traditional, warm amber tone. It’s durable but has a strong odor and long dry times. | The ambering effect can look great on older oak floors, but be prepared to ventilate your home for days. |
Getting these selections right from the start will save you a ton of headaches and help you achieve that smooth, flawless look you’re after.
Selecting The Right Abrasive Screens
Once you’ve got the buffer, you need the right abrasive pads, or “screens.” These are definitely not one-size-fits-all. The grit you choose is dictated entirely by your floor’s current condition.
- For heavy traffic areas: A floor in a busy Parker entryway with a lot of minor scuffs will likely need a more aggressive 120-grit screen to effectively smooth out the surface.
- For a simple refresh: If your floors are just looking dull but are otherwise in good shape, a finer 150 or 180-grit screen is all you need to create a good bonding surface for the new finish.
This infographic breaks down the core steps of the process. It’s a great visual reminder that the buffing itself is just one part of the equation.
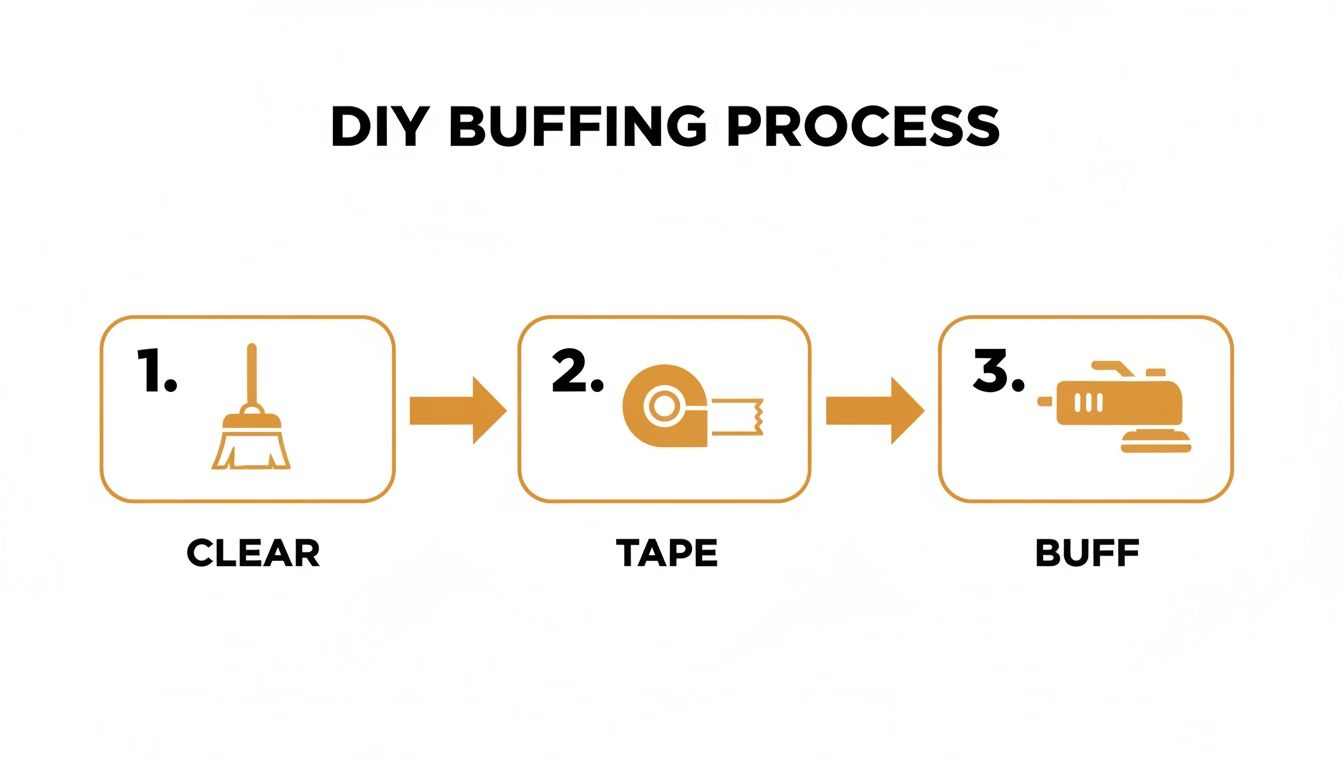
As you can see, proper prep is everything. Taking the time to clear and tape the area properly sets you up for a flawless result.
Choosing Your Polyurethane Finish
After buffing, it’s time to apply a new topcoat. Your main choice here is between oil-based and water-based polyurethane. While oil-based finishes have been the standard for decades, modern water-based options have some serious advantages. They have low VOCs (Volatile Organic Compounds), dry much faster, and won’t yellow over time—perfect for preserving the natural, beautiful color of your wood. To really get into the weeds on your options, check out our ultimate guide to hardwood floor finishes.
The demand for this kind of work is booming. The wood floor buffing industry hit USD 4.5 billion in 2024 and is projected to reach USD 6.8 billion by 2033. This growth is being driven by homeowners who want that brilliant shine, restoring gloss levels to 90-95% of new.
And it’s not just about looks. For homeowners and real estate agents in competitive markets like Parker, professionally buffed floors can help homes sell 15-20% faster. Knowing what tools the pros use empowers you to achieve a finish that truly rivals a professional job.
By the way, while our focus here is on hardwood, knowing how to care for all your surfaces is key. You might find a guide on choosing the best steam mop helpful for other flooring types in your home.
When to Call in a Parker Hardwood Floor Expert
While rolling up your sleeves for a DIY buff can feel pretty rewarding, it definitely has its limits. Knowing when to put down the rental buffer and call a professional is the key to protecting one of your home’s biggest investments.
There are a few tell-tale signs that your floors need more than just a surface-level refresh. Trying to buff out these deeper issues can actually make things worse.
Look for scratches so deep they’ve cut through the finish and hit the actual wood. A good rule of thumb: if you can catch your fingernail in a scratch, buffing isn’t going to touch it. The same goes for any graying or dark boards—those are classic signs of water damage that has soaked right into the wood grain. Another major red flag is any spot where the finish has completely worn away, leaving the bare wood exposed and vulnerable.
When Professional Parker Hardwood Floor Refinishing is a Must
Problems like these call for a much more intensive solution than a simple screen and recoat. This is where the experience of a dedicated team like ours at J.R. Hardwood Floor Refinishing & Cleaning really makes a difference.
- Deep Gouges and Scratches: We bring in our advanced dust-free sanding system to carefully take off a paper-thin layer of wood. This completely erases that deep damage, giving us a perfectly smooth canvas to work with.
- Water Damage and Stains: Sanding is the only way to truly get rid of discoloration that has penetrated the wood fibers. It restores the floor’s natural, consistent color without a trace of the old damage.
- Worn-Through Finish: When that protective topcoat is gone, we perform a full Parker hardwood floor refinishing. We build that crucial barrier back up from the bare wood, ensuring your floors have long-lasting, durable protection.
For homeowners in older Parker neighborhoods where floors have seen decades of life, a professional assessment is key. We can tell you if your beautiful, original floors just need a refresh or require a full restoration to bring them back to their former glory.
The Superiority of an Instant UV-Cure System
Trying to fix major flaws with a buffer is a common mistake that can lead to even bigger, more expensive damage. For a truly flawless and durable result, our advanced techniques are the only way to go.
Our innovative Instant UV-Cure System offers a level of durability and convenience that no DIY-applied finish can ever hope to match. The finish cures instantly—and we mean instantly. You can move your furniture back in the very same day without having to worry about lingering odors or long, frustrating drying times.
The hardwood flooring market is a huge part of the home improvement industry, projected to hit USD 73.79 billion by 2031. Here in North America, home renovations are a major driver, and we’re seeing a big shift in consumer demand towards higher-quality, safer solutions. In fact, 48% of U.S. consumers now prioritize low-VOC materials, just like the premium, eco-friendly finishes we use. It’s clear that homeowners are investing in quality, and professional services are the best way to protect that investment.
Deciding between a weekend warrior project and calling in the experts can be tough. For a little more guidance, check out our detailed comparison of hardwood floor refinishing DIY vs. professional service to help you make the best choice for your home.
Maintaining Your Newly Buffed Floors
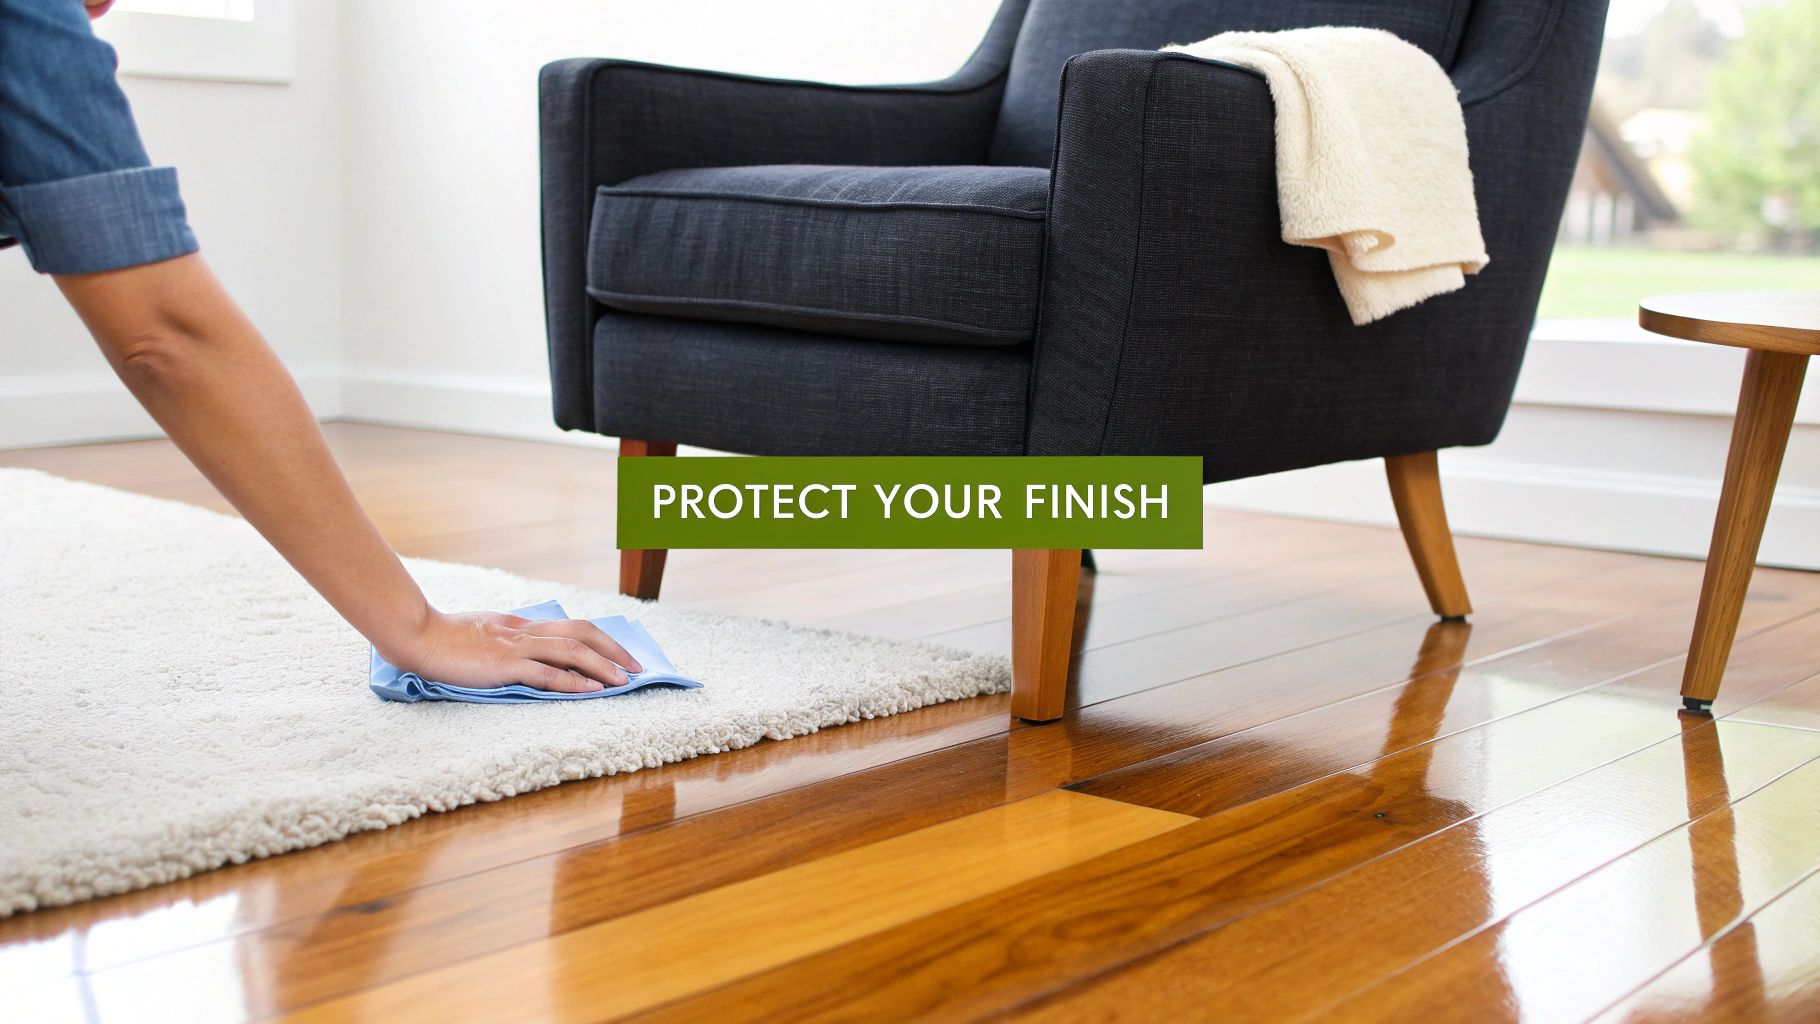
You’ve put in the work, and wow—the results are stunning. Now the big question is how to protect that beautiful, fresh sheen and make it last. The good news is, keeping your floors looking this good is all about adopting a few simple, proactive habits.
First things first, let’s talk about furniture. Scratches from chairs, tables, and sofas are public enemy number one for a new finish. Slapping some felt pads on the bottom of every furniture leg isn’t just a suggestion; it’s a non-negotiable step to prevent daily wear and tear. Also, get into the habit of wiping up spills the second they happen—moisture is not your friend here.
Your Essential Cleaning Routine
A regular cleaning schedule is your best defense against returning dullness. It’s time to ditch the old string mop and sloshing bucket. Your go-to tools should now be a microfiber dust mop for daily sweeping and a flat-head microfiber mop for weekly cleaning.
When it’s time for a deeper clean, make sure you’re using a pH-neutral hardwood floor cleaner. Seriously, what you don’t use is just as important as what you do. Stay far away from these common enemies of polyurethane finishes:
- Oil Soaps: Products like Murphy’s Oil Soap might sound nice, but they leave behind a greasy residue that builds up, dulls the finish, and can actually prevent future coats of finish from adhering properly.
- Wax-Based Cleaners: Wax creates a film that’s a nightmare to remove and will absolutely interfere with any future professional Parker hardwood floor refinishing services you might need.
- Steam Mops: That combination of high heat and moisture is a recipe for disaster. It can damage both the finish and the wood itself, leading to warping or cupping over time.
- Vinegar and Water: It’s a popular DIY cleaner, but the acidity in vinegar will slowly eat away at your polyurethane, etching it and creating a dull, lifeless appearance.
For a more in-depth look at the dos and don’ts, check out our complete guide on how to maintain hardwood floors.
A Long-Term Maintenance Timeline
A DIY buff is a fantastic refresh, but think of it as just one part of a larger maintenance cycle. To keep your floors in pristine condition for the long haul, you’ll want to schedule a professional Screen and Recoat every 3-5 years, depending on your household’s foot traffic.
This professional service, often paired with an advanced UV-Cure System, turns a one-time project into a long-term investment in your home’s value and beauty. For more tips on general care, this guide on maintaining engineered and real hardwood floors is another great resource.
Frequently Asked Questions About Floor Buffing in Parker, CO
When it comes to caring for your hardwood floors, a lot of terms get thrown around—buffing, screening, sanding—and it’s easy to get confused. As Parker’s go-to crew for hardwood floor refinishing, we’ve heard just about every question under the sun. So, let’s clear things up with some straightforward answers to what homeowners like you ask us most.
Buffing vs. Screening vs. Sanding: What’s the Real Difference?
People often use these terms interchangeably, but in the world of floor care, they mean very different things. Knowing the difference is the key to choosing the right service and not paying for something you don’t need for your Parker hardwood floor refinishing project.
- Buffing (Clean and Buff): This is the gentlest of the three. Think of it as a deep, professional-grade cleaning. We use a floor buffer with a soft pad to scrub away grime and polish the existing finish, bringing back that beautiful shine. It’s great for removing minor surface scuffs but doesn’t actually remove any of the finish.
- Screening (Screen and Recoat): This is the next level up and our most popular maintenance service. We use a floor buffer fitted with an abrasive screen to lightly scuff—or “abrade”—the very top layer of your polyurethane finish. This step is crucial because it smooths out shallow scratches and creates the perfect surface for a fresh coat of finish, often applied with our UV-Cure System, to grab onto. It’s like a reset button for your floor’s protective layer.
- Sanding: This is the big one—a full-blown restoration. We bring in heavy-duty sanding machines to take everything off: the old finish, the stain, and a paper-thin layer of the wood itself. Sanding is the only way to fix deep gouges, water damage, or if you want to completely change the color of your floors.
Can I Buff My Engineered Hardwood Floors?
Absolutely, but you have to be careful. The main thing to know about engineered hardwood is that it only has a thin top layer—or veneer—of real wood. Unlike solid hardwood, which can be sanded multiple times, you only get one or two chances with engineered floors before you risk sanding right through that veneer.
For most engineered floors, a professional Screen and Recoat is the perfect way to bring them back to life safely. It revives the finish without touching the thin wood layer. A full sanding, on the other hand, is a high-stakes game that should only be left to an experienced pro who has confirmed the veneer is thick enough to handle it.
How Often Should I Get My Floors Buffed in Parker?
This really comes down to your lifestyle. A quiet home with two adults is a world away from a busy house with three kids and a golden retriever. There’s no magic number, but here’s a guideline we’ve developed after years of experience in Parker-area homes:
- High-Traffic Zones (Kitchens, Hallways, Entryways): These areas get beat up the most. A professional Screen and Recoat every 2-4 years is a smart move to keep that protective finish strong.
- Moderate-Traffic Areas (Living Rooms, Family Rooms): For the spaces where your family hangs out, scheduling a service every 4-6 years usually does the trick.
- Low-Traffic Areas (Bedrooms, Formal Dining Rooms): Rooms that don’t see a ton of action can often go 7 years or even longer before needing a refresh.
The goal here is proactive maintenance. It’s always better—and cheaper—to address a dull finish before it wears down completely and the wood itself starts taking damage.
Is a Professional UV-Cure System Really Better Than a DIY Finish?
Honestly? It’s not even a fair comparison. While it’s tempting to grab a can of polyurethane from the hardware store, the durability and convenience of a professional UV-Cure System are on another level.
Traditional finishes need hours or even days to cure. During that time, every speck of dust, pet hair, or stray sock can get trapped in the finish, ruining the look. Plus, you can’t put your furniture back or let your family live normally.
Our Instant UV-Cure System changes all that. We use powerful ultraviolet light to harden the finish in seconds. It creates an incredibly hard, scratch-resistant surface that’s ready for furniture and foot traffic the very same day. For a busy family in Parker, it’s a no-brainer for getting superior, long-lasting protection without turning your life upside down.
Homeowners in Parker trust J.R. Hardwood Floor Refinishing & Cleaning to restore the natural beauty of their hardwood floors with our dust-free sanding system and advanced UV-curable finishes. Unlike traditional methods, our UV technology cures instantly, so you can move furniture back the same day with no lingering odor or downtime. Choose the perfect refinishing service to match your needs and home traffic. Our dust-free process ensures a clean, beautiful finish every time.
📞 Phone: 720-327-1127
🌐 Website: jrhardwoodfloorrefinishingandcleaning.com
📍 Service Area: Parker, Lone Tree, Castle Rock, Centennial, Highlands Ranch, and surrounding areas.
📺 Watch Our Work: J.R. Hardwood Flooring on YouTube