 Skip to content
Have you ever looked at your hardwood floors and just sighed? The scratches from years of life, the dull finish in the high-traffic areas, the general feeling that they’ve lost their original magic. Good news: that splendor isn’t gone forever. The hardwood floor refinishing steps are a time-tested process we’ve perfected to bring that character and beauty right back, boosting your home’s value and adding a durable finish that lasts. For homeowners in Parker, a professional hardwood floor refinishing service using an advanced UV-Cure System is the key to restoring your home's natural elegance.
Bringing Your Hardwood Floors Back to Life in Parker
For homeowners all over Parker and the Denver Metro Area, refinishing is the secret to reviving a home’s soul. We’ve worked on everything from historic bungalows in Denver to modern homes in Castle Rock, and our approach always centers on our signature dust-free sanding and our game-changing UV-Cure system. This isn't just about making floors look pretty; it's about protecting your investment with a superior hardwood floor refinishing solution. We recently restored a beautiful red oak floor in a classic Parker home near Salisbury Equestrian Park, bringing back its original warmth and character.
And it’s a smarter investment than ever. The flooring industry is booming, projected to hit an incredible $474.5 billion by 2026, with nearly 60% of wood flooring pros expecting stronger sales. For you, the homeowner, this means getting ahead of the curve. Refinishing can save you 30-50% compared to a full replacement, which can run anywhere from $8-15 per square foot. It’s a powerful, cost-effective way to get that new-floor feeling without the new-floor price tag. You can read more on these industry trends and see how restoration is leading the way.
The J.R. Hardwood Difference for Parker Hardwood Floor Refinishing
We’re all about blending old-school craftsmanship with modern technology to deliver results that truly stand out. Our whole process is designed to be clean, efficient, and as undisruptive to your life as possible. The proof is in the finish, and the photo below says it all. For any Parker hardwood floor refinishing project, our UV-Cure system provides unmatched durability and convenience.
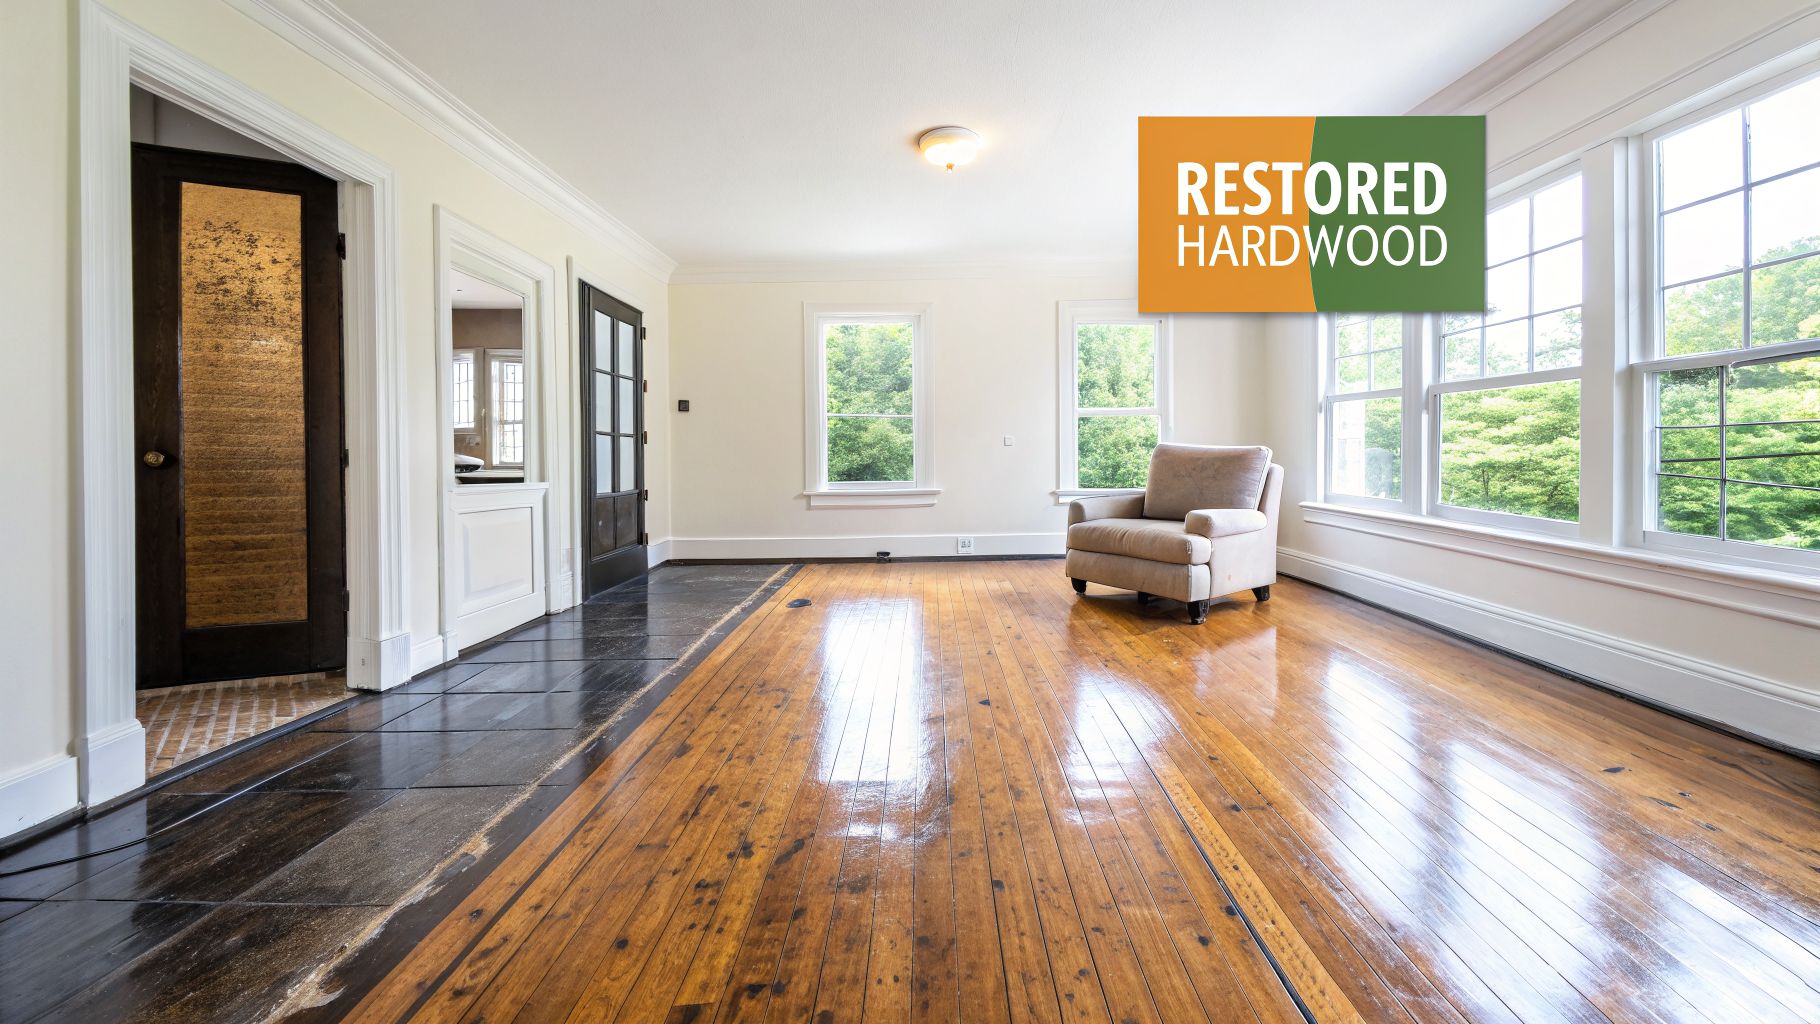
That’s the kind of dramatic, transformative power we’re talking about—turning tired, worn-out wood into a surface that radiates warmth and quality.
Refinishing vs. Replacing Your Hardwood Floors
It’s one of the first questions we get from homeowners in Parker and Aurora: should I refinish or just rip it all out and start over? The right answer really depends on how deep the damage goes, your budget, and what you’re hoping to achieve long-term.
Refinishing is almost always the more sustainable and cost-effective choice for floors with surface-level damage, scratches, and finish wear. It preserves the original character of your home, which is especially important in the many classic homes found throughout the Denver area.
Deciding between refinishing and a full replacement is a big call. Here’s a straightforward table to help you weigh the pros and cons.
Refinishing vs Replacing Your Hardwood Floors
| Factor | Hardwood Floor Refinishing | Full Floor Replacement |
|---|---|---|
| Cost | Significantly lower, typically 30-50% less than replacement. Our services in Parker start at $4.20/sq. ft. | High upfront cost for materials and intensive labor, often $8-$15+ per sq. ft. |
| Timeframe | Faster, often done in 3-5 days. With our UV-Cure system, floors are usable the same day. | Lengthy process involving demolition, subfloor prep, installation, and finishing. |
| Home Value | Excellent ROI, restoring floors to like-new condition. | High ROI, but requires a much larger initial investment. |
| Disruption | Minimal, especially with our dust-free sanding system. | Highly disruptive, creating significant dust, noise, and household chaos. |
| Sustainability | Eco-friendly; it saves existing wood from landfills. | Generates significant waste from old flooring removal. |
Ultimately, refinishing preserves the wood your home already has, saving perfectly good material from the landfill and keeping costs down. For most homes, it’s the clear winner.
Getting to Know Your Floors: The Assessment and Prep Game
Every great refinishing project starts long before a sander ever touches the wood. The first thing we do when we walk into a Parker home is a deep-dive assessment of the floors. This isn't just a quick look at scuffs and scratches; it’s about understanding your floor's story—its history, its species, and its current condition. This step is absolutely critical because it tells us exactly what your floors need, whether that's a full hardwood sanding and refinishing or a less intensive approach like a screen and recoat. This diagnostic is a key step in our Parker hardwood floor refinishing process.
We start by identifying the wood itself. Is it the classic red oak you see in so many older Denver-area homes, or something more modern like maple or hickory? We also figure out if it's solid hardwood or an engineered product. For engineered floors, this involves carefully measuring the top layer of real wood—what we call the "wear layer"—to make sure it's thick enough to be sanded safely.
Mapping Out the Damage
Once we know what we're working with, we get down on our hands and knees and map out every area of concern. We're not just looking for general wear; we’re hunting for specific clues that dictate our entire restoration plan.
Here’s what’s on our checklist:
- Deep Scratches and Gouges: The kind you get from dragging furniture, pet claws, or that time you dropped a heavy pan.
- Water Damage: This usually shows up as dark, ugly stains or cupped boards. We often find it near sliding glass doors, under kitchen sinks, and in entryways.
- Worn-Out Finish: You’ll see this most in high-traffic areas. The hallways and the main "lanes" through rooms are typically the first places to look dull and tired.
- Sun Fading: Floors in front of big, sunny windows can look bleached or lighter than the rest of the room.
Just recently, we were out at a home in Highlands Ranch with a sun-faded red oak floor. During the assessment, we found not only fading but also some pretty deep water stains near the patio door. That discovery was key—it meant a simple screen and recoat wouldn't cut it. The floors needed a full, deep sanding to get everything looking uniform and beautiful again. This is why a proper diagnosis is non-negotiable; it prevents surprises down the line.
Prepping Your Home for a Flawless, Dust-Free Job
With the plan set, we move on to preparation. This is all about protecting your home and making sure the project runs smoothly.
First things first, all furniture, area rugs, and decorations have to be moved out of the rooms we're working in. We even ask that you take down pictures and wall hangings, as the vibrations from the sanders can sometimes shake them loose. And while we use an advanced dustless sanding system that captures over 99% of airborne dust, we still take extra precautions. We’ll seal off doorways and vents to other parts of your house with plastic sheeting to keep everything as clean as possible.
A professional evaluation is the key to unlocking your floor's full potential. With today’s engineered woods featuring thicker wear layers that can rival the 4-7 refinish cycles of solid wood, a proper assessment can extend a floor’s life by 20-50 years. Proper cleaning and assessment are also vital, as hidden buildup can obscure up to 80% of visible wear, masking the true condition of the wood. Uncover more about these industry insights and how hardwood floors enhance property ROI on fcnews.net.
This thorough prep work means that when our team arrives, we can get right to the good part—the craft of bringing your hardwood floors back to life. If you're curious about your own floors' condition, check out our guide on 5 signs your hardwood floors need refinishing for some helpful tips.
Uncovering Fresh Wood: The Dustless Sanding Process
Okay, the room is clear, the assessment is done, and now for the part that feels like pure magic: sanding. This is where we strip away years of scratches, dings, and faded finish to reveal the beautiful, raw wood you fell in love with. It's a careful, deliberate process of subtraction, erasing the old to make way for the new. Our dust-free approach is a cornerstone of our Parker hardwood floor refinishing service.
Our whole approach, especially in Parker homes where families want a clean environment, is built around dust-free sanding. Forget the horror stories of dust clouds settling in your air ducts and on every surface. We hook up our professional-grade sanders to a beast of a vacuum system that captures over 99% of the dust as it’s created. This isn't just cleaner—it's healthier for you, your family, and your pets.
More Than Just Sandpaper: A Progressive Grit System
Getting a floor perfectly flat and smooth isn’t a one-and-done job. It’s a meticulous, multi-stage process where we use progressively finer grits of sandpaper. Think of it like polishing a precious stone—you start with a coarse grit to do the heavy lifting and finish with a fine grit to bring out the ultimate smoothness.
Here’s how we typically tackle it:
- The Heavy Hitter (36-40 Grit): This first pass is all business. The aggressive grit chews through old polyurethane, eliminates deeper scratches, and levels out any minor high spots between the floorboards.
- The Refinement Pass (60-80 Grit): Next, we switch to a medium grit. This pass is crucial for erasing the more aggressive scratch patterns left by the coarse paper, starting the process of smoothing out the wood grain.
- The Finishing Touch (100-120 Grit): The final pass uses a very fine-grit paper. This step buffs the wood to a buttery-smooth finish, creating the perfect canvas for the stain and finish to absorb evenly, without any blotches.
Skipping a grit is one of the most common—and costly—DIY mistakes we see. It leaves behind swirl marks and sanding lines that are often invisible until the stain goes on, and by then, it's too late. Our professional equipment and technique prevent ugly drum marks (divots) or chatter marks (wavy lines) that can permanently scar a floor.
Tackling Repairs and Detail Work
Older homes, like the gorgeous historic properties in Denver’s Capitol Hill, often have a few stories to tell. We frequently find boards that are cracked, have deep pet stains that have soaked through, or have developed gaps over the decades. Handling these issues is a core part of the sanding and prep stage.
If a board is beyond saving, we’ll surgically remove it and weave in a new one, taking care to match the species and grain as closely as possible. For smaller nail holes and gaps, we use a high-quality wood filler after the first couple of sanding passes. This ensures it bonds directly with the raw wood and sands down flush, becoming an invisible part of the floor. You can see more about our specific methods on our dustless hardwood floor sanding page.
This quick flowchart shows how we evaluate your floor's condition to map out our sanding and repair strategy from the very beginning.
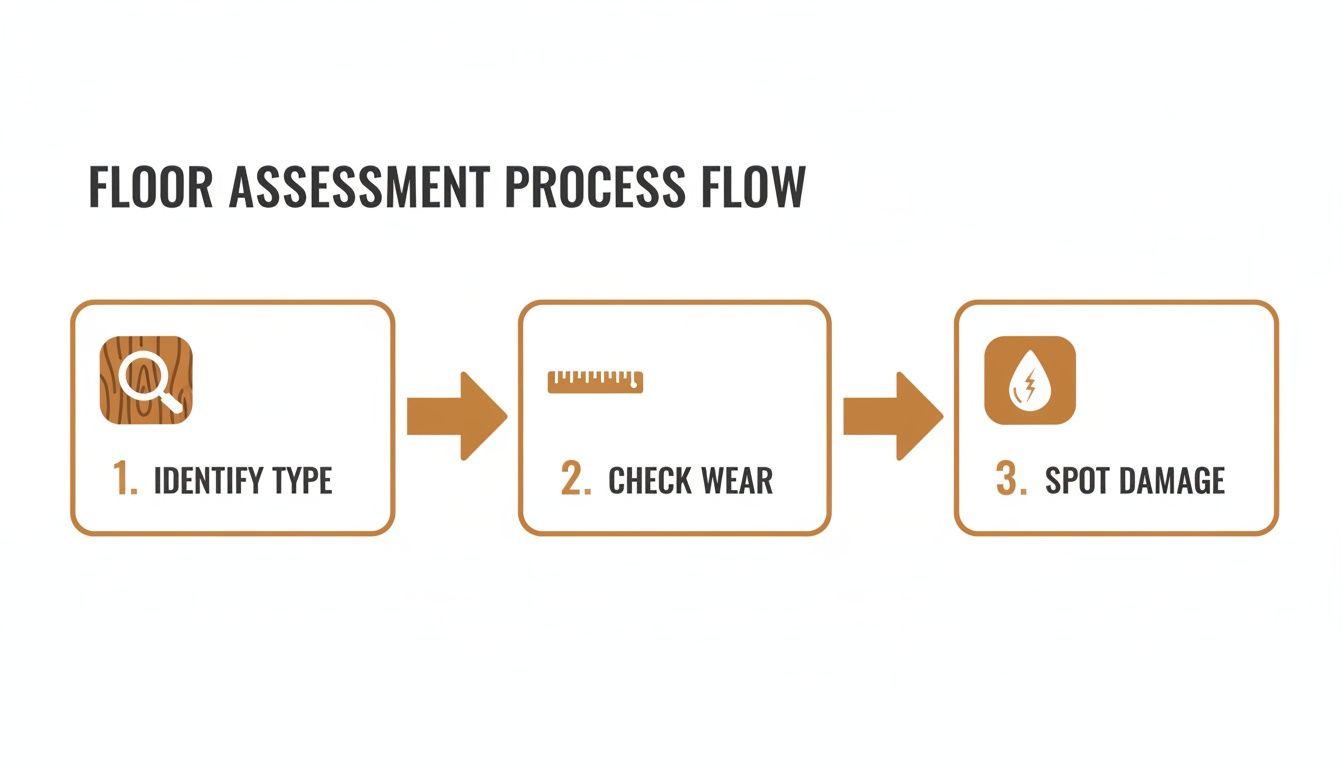
It’s all about a thorough diagnosis. Identifying the wood type, wear patterns, and any hidden damage helps us create a pristine, uniform canvas for the new finish.
Key Takeaway: The goal of sanding isn't just to remove the old finish. It’s to create a flawless, perfectly flat surface. This means using specialized edgers and detail sanders to make sure every corner, closet, and crevice matches the main floor area. No shortcuts.
A proper refinish can dramatically extend the life of your floors. Most solid hardwood can be refinished 4 to 7 times, with each cycle removing just a tiny fraction of wood (about 1/32 to 1/16 of an inch). This is especially true here in the Denver Metro area, where nearly 75% of homes were built before 2000. Giving a 50-year-old floor a new lease on life for another 10-20 years can boost your home’s resale value by up to 5-10%.
Once this painstaking prep work is done, your floors are finally ready for the most exciting part: bringing them to life with stain and a durable new finish.
Choosing the Right Stain and Finish for Your Floors
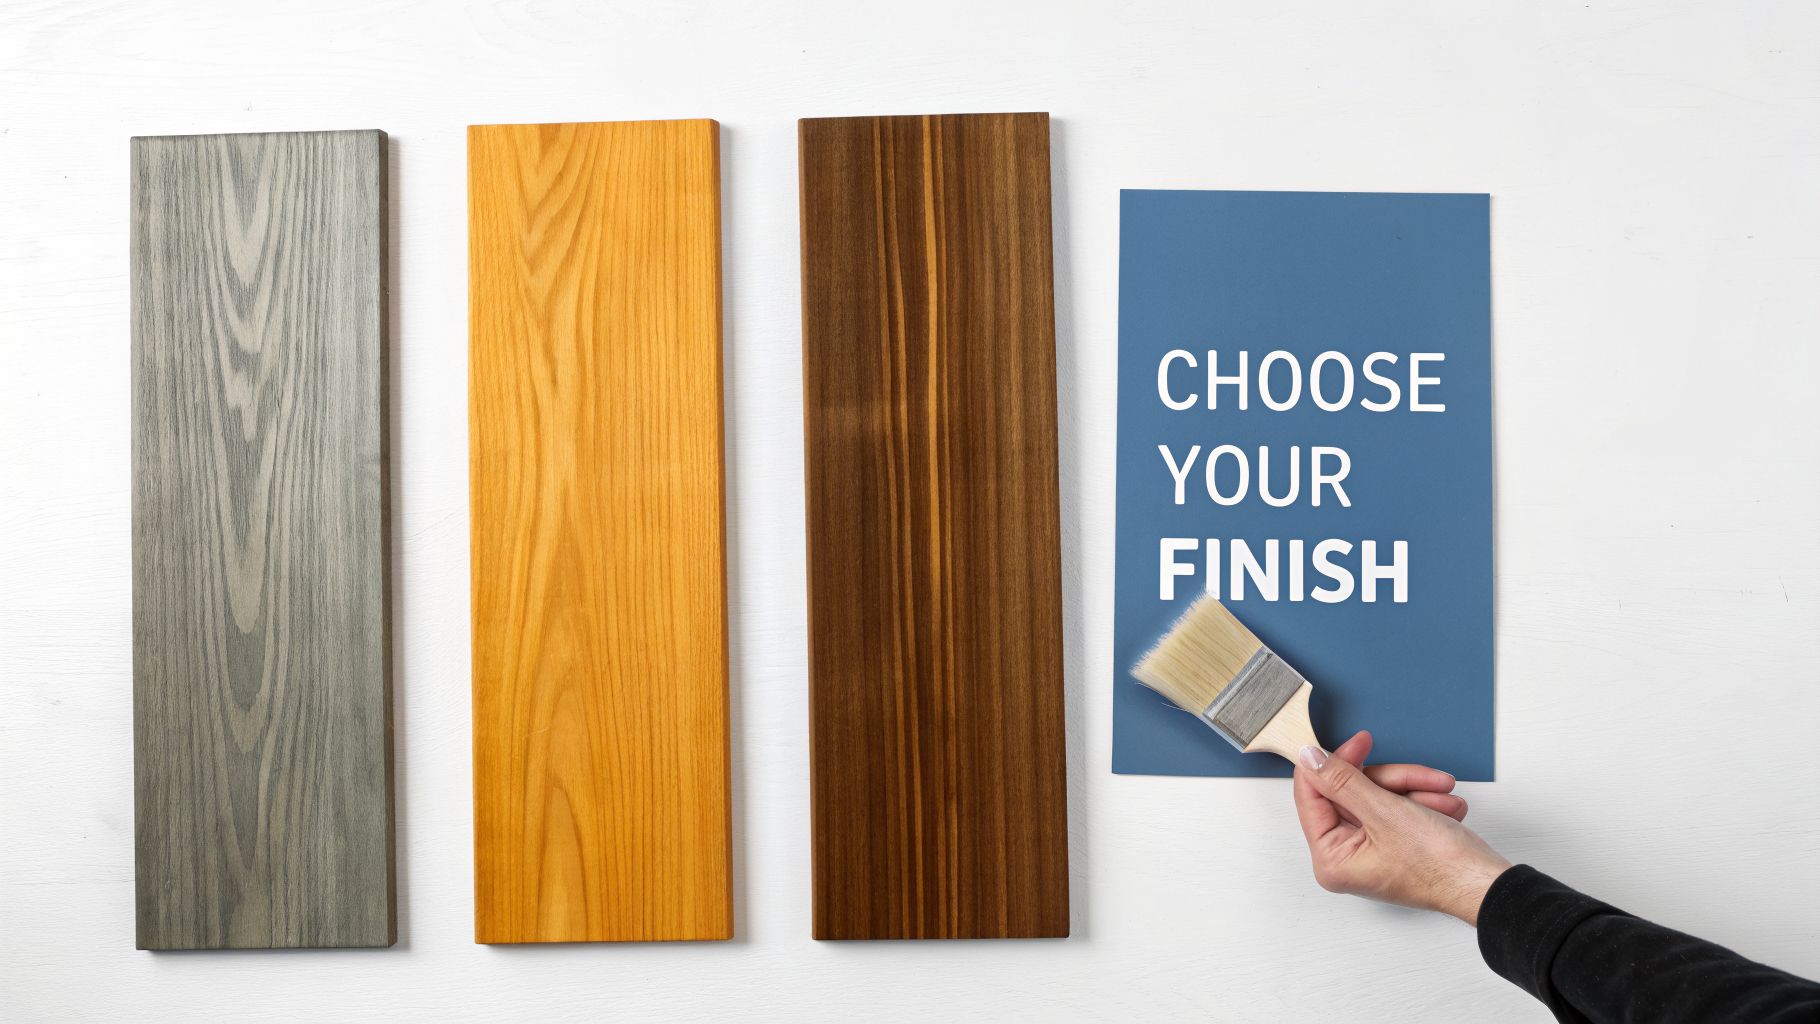
Once all the heavy sanding is done, your floors are a beautiful, blank canvas. The old, tired finish is gone, revealing the fresh, raw wood underneath. This is where the fun really begins—the moment your personal style takes center stage. Picking the right stain and finish isn't just a step in the process; it defines the final look and feel of your entire home.
The stain sets the mood. For the newer homes we often work on in Castle Pines, airy, natural stains that let the wood's own grain be the star are incredibly popular. But if you have a classic craftsman in Littleton, a rich, dark jacobean or walnut stain can add a layer of drama and timeless elegance. We always bring a variety of samples right to your door so you can see how each color plays with your home’s unique lighting, wall colors, and furniture. It’s the only way to be sure you'll love the result for years to come.
The Critical Layer of Protection: Your Finish
After you’ve landed on the perfect color, it’s time to make a decision that’s arguably more important for the health and longevity of your floors: the finish. This is the clear, protective topcoat that acts as a shield against scratches, spills, and the chaos of daily life. When picking a finish, it helps to know the differences between the products, like the pros and cons of oil-based vs. water-based stain and finish options.
For decades, traditional oil-based and water-based polyurethanes were the go-to choices. Oil-based finishes are famous for their toughness and the warm, amber glow they add, but they come with powerful odors and long cure times. Water-based finishes dry faster and stay clearer, but sometimes they just don't have the muscle for high-traffic households.
This is exactly where modern technology has created a far superior option, especially for busy families.
The Game-Changer: Our Instant UV-Cure System
For homeowners in Parker—especially those with kids, pets, and an active lifestyle—waiting days for a floor to cure is a massive headache. That’s why we are huge advocates for our Instant UV-Cure System. This isn’t just a slightly better finish; it’s a whole new ballgame for floor protection and a highlight of our Parker hardwood floor refinishing services.
With our UV-Cure technology, the moment we finish applying the final coat, we roll a specialized UV light over the floor. The finish hardens instantly—not in hours or days, but in seconds. Your floor is 100% cured and ready for life before we even pack up our tools.
What does this mean for you? You can move your furniture back in, let the kids and pets loose, and get back to your normal routine the very same day. There’s no downtime, no lingering chemical smell, and no frustrating "be gentle" period.
The benefits go way beyond convenience, too. For a deeper dive into how different finishes stack up, check out our ultimate guide to hardwood floor finishes.
UV-Cure vs. Traditional Floor Finishes
To really get why our UV-Cure system is the top choice for hardwood floor refinishing in Parker, it helps to see a side-by-side comparison. The differences are pretty stark.
UV-Cure vs Traditional Floor Finishes
| Feature | Instant UV-Curable Finish | Traditional Water-Based/Oil-Based Finish |
|---|---|---|
| Cure Time | Instant. Ready for furniture and foot traffic immediately. | 3-7 days for full cure. Requires gentle use for up to a month. |
| Durability | Exceptional. Unmatched scratch, scuff, and chemical resistance. Our Diamond package is the toughest available. | Good to very good, but less resistant to immediate wear. |
| Odor & VOCs | Zero odor and zero VOCs (Volatile Organic Compounds) after curing. | Strong chemical smell during application and curing. Emits VOCs. |
| Appearance | Crystal clear, non-yellowing finish that preserves the natural wood color. | Oil-based will amber over time; water-based stays clearer but can be less durable. |
| Household Disruption | Minimal. Your life is back to normal the same day. | Significant. You are displaced from the space for several days. |
As you can see, the advantages are clear. The application itself is a precise science. After staining, we apply the UV-activated topcoat with care. Then, we guide our portable UV light machine across the floor. As the light passes over the surface, it triggers a photochemical reaction that hardens the finish instantly. The result is a flawlessly smooth, incredibly tough surface that provides the highest level of protection available today.
For a busy Parker family, this means getting stunning, durable floors without putting your life on hold.
Final Touches and Long-Term Floor Maintenance
Alright, the final coat of finish is down, and your floors are looking incredible. If you went with our UV-Cure system, they’re already 100% cured and ready for anything you can throw at them. But our job isn't quite done just because the finish is on.
The last part of any J.R. Hardwood project is about the meticulous final touches—a professional buffing and a deep, thorough cleanup. We make sure every last speck of dust is gone, leaving your Parker home spotless and your floors gleaming. This isn't just about handing over a beautiful floor; it's about setting you up to keep it that way for years. A proper finish is the goal of every Parker hardwood floor refinishing job.
Protecting Your Investment Day After Day
Those newly refinished floors are the star of the show, but the real world is about to move back in. The biggest immediate threat? Your own furniture. To keep that perfect finish looking flawless, you’ve got to protect your floors from your furniture and prevent the everyday scratches and dents that can happen in a flash.
Felt pads on the bottom of every single chair leg, table, and sofa are an absolute must. Think of these inexpensive little things as shoes for your furniture—they create a soft buffer that stops scratches before they start. For the heavyweights like bookcases or media centers, grab some larger, non-staining furniture coasters to spread the load and prevent those ugly indentations.
Smart Cleaning for a Lasting Shine
When it comes to cleaning your new floors, the golden rule is "less is more." A simple, consistent routine is your best friend.
- Sweep Often: Grab a soft-bristle broom or a dust mop every day or two. This picks up the dirt and grit that act like sandpaper under your feet.
- Vacuum Smart: A couple of times a week, run the vacuum. But here’s the key: use a soft brush attachment and crucially, turn off the beater bar. That stiff, spinning brush is great for carpets but will dull and scratch your hardwood finish over time.
- Use the Right Stuff: Only use a pH-neutral hardwood floor cleaner designed for your type of finish. Stay far away from all-purpose cleaners, vinegar-and-water mixes, or any soap-based detergents. They'll leave behind a gross, hazy film and can even break down the finish.
One of the most common mistakes we see is using too much water. Your mop should only be slightly damp, never dripping wet. Puddles of water can seep between the boards and cause serious long-term damage, a real risk in Colorado where our dry climate already makes wood move.
Taming Humidity in Colorado’s Climate
Living in Colorado means dealing with a climate that can be tough on hardwood. Our air is incredibly dry for most of the year, causing wood to shrink and create gaps between the planks. Then, summer brings a little humidity, and the wood expands again.
Your goal is to keep your indoor humidity level stable, somewhere between 35% and 55% is the sweet spot. A whole-home humidifier in the winter and a dehumidifier during those rare muggy spells will keep your floors happy and prevent that seasonal gapping. Honestly, managing the environment is one of the most powerful things you can do for the life of your floors.
The Secret Weapon: A Professional Screen and Recoat
Even if you do everything right, the top layer of finish will eventually show minor wear after a few years. That’s totally normal. But it doesn't mean you need a full, down-to-the-wood refinishing job all over again.
Instead, you can give your floors a quick refresh with a professional screen and recoat. We recommend this every 3-5 years to keep things looking brand new.
Here’s how this quick one-day service works:
- First, we do a deep hardwood floor cleaning to get rid of any built-up grime.
- Next, we lightly abrade, or "screen," the surface of the old finish. This isn't sanding; it's a gentle buff that creates a mechanical bond for the new coat.
- Finally, we apply a fresh, tough topcoat of finish, like our awesome UV-Cure system.
A screen and recoat is way cheaper than a full refinish, takes just a day, and brings back that protective shield and beautiful sheen. It's the pro secret to making your floors in your Parker home look like they were just done, year after year.
Your Top Hardwood Refinishing Questions, Answered
Alright, let's talk about the questions we hear all the time from homeowners in Parker and across the Denver area. When it comes to refinishing, you want clear, straight-up answers. Here are the top things folks ask us, with the kind of expert advice you can count on for your Parker hardwood floor refinishing project.
How Long Does The Entire Hardwood Floor Refinishing Process Take?
This is the number one question we get, and honestly, the answer is a game-changer. For a typical sand and refinish job in an average-sized space (think around 1,000 sq. ft.), the whole process takes about 3-5 days from start to finish.
But here’s the real magic: the cure time. With traditional finishes, you’re stuck tiptoeing around for days. Not with our advanced UV-Cure System. We use a special UV light to cure the final coat instantly. That means you can walk on your floors and move furniture back the very same day we finish. No more waiting 3-7 days—your life gets back to normal immediately.
Is Dust-Free Sanding Truly 100% Dust-Free?
While no one can promise a literal 100% dust-free environment, our system is as close as it gets. We use a state-of-the-art dust containment system that captures over 99% of all airborne dust. It’s the clean, healthy way to do Parker hardwood floor refinishing.
So, how does it work? We hook our sanders directly to powerful vacuums with long hoses that run outside your home. As we sand, the dust is sucked away the instant it’s created, so it never has a chance to settle on your furniture or get into your air ducts. It’s simply the cleanest, healthiest, and most efficient method out there, especially when you’re living in the home during the project.
For homeowners in Parker, a dust-free process means minimal disruption and a healthier home environment. It's a key part of our commitment to providing a seamless, stress-free experience from start to finish.
When Should I Choose A Screen And Recoat Instead Of A Full Sanding?
This is a fantastic question because choosing the right service saves you time and money. A screen and recoat is the perfect maintenance move if your floors are just looking a little dull with light surface scratches. If the finish hasn't worn through to the bare wood and you don't have deep gouges or water stains, you're likely a great candidate.
Here’s the simple breakdown:
- Screen and Recoat: This is a one-day refresh. We lightly buff (or "screen") the top layer of finish to rough it up slightly, then apply a fresh, tough topcoat. It’s perfect for a proactive touch-up every 3-5 years to keep your floors looking great. Prices start at $2.50/sq. ft.
- Full Sanding: This is the heavy lifter. You need this if you want to change the stain color, or if you have serious damage like deep scratches, water stains, or areas where the finish is completely gone. We take the floor all the way down to raw wood and build it back up. Prices start at $4.20/sq. ft.
Picking the right path is crucial for getting the results you want and the best value for your investment.
Can You Refinish Engineered Hardwood Floors?
Yes, absolutely! Most quality engineered hardwood floors can be refinished, but there's one critical factor: the thickness of the top hardwood veneer, also known as the "wear layer." This is something we look at very closely during the hardwood floor refinishing steps for any engineered product.
A well-made engineered floor will have a thick enough wear layer to handle one to three full refinishing cycles. As part of our initial assessment for every Parker hardwood floor refinishing project, we carefully measure that veneer. This tells us definitively if a full sanding is a safe and effective option for your specific floors.
If that top layer is too thin, we won’t risk it. Sanding could go right through to the core material, ruining the board. In those cases, we might suggest a professional deep clean and buff instead—a great way to boost the floor's appearance without removing any wood.
Ready for Flawless Floors in Parker?
Homeowners in Parker trust J.R. Hardwood Floor Refinishing & Cleaning to restore the natural beauty of their hardwood floors with our dust-free sanding system and advanced UV-curable finishes. Unlike traditional methods, our UV technology cures instantly, so you can move furniture back the same day with no lingering odor or downtime. Choose the perfect refinishing service to match your needs and home traffic. Our dust-free process ensures a clean, beautiful finish every time.
📞 Phone: 720-327-1127
🌐 Website: jrhardwoodfloorrefinishingandcleaning.com
▶️ YouTube: https://www.youtube.com/channel/UCLaTAi6KxwT-g8QCKqKTQ8Q?sub_confirmation=1
📍 Service Area: Parker, Denver, Aurora, Castle Rock, Highlands Ranch, Littleton, and surrounding communities.