 Skip to content
The fastest reliable path to hardwood color matching is identifying your wood species, sanding a same-species test patch on-site, and running that patch through your actual stain and topcoat before touching the real repair. Control four variables: species, prep, stain base, and sheen. Expect this to get you a close, confident match. If you need an invisible one across old and new wood, full refinishing of both areas is usually the only way to get there.
TL;DR:
- Matching wood species accurately is crucial, as different types like oak, maple, and walnut have distinct grain, color, and aging characteristics that impact stain choice.
- On-site testing with proper sanding, cleaning, and multiple sample applications is essential to achieve a reliable color match and avoid costly rework.
- The type of stain base—oil, water, or gel—significantly influences the final color, with custom blending often necessary if shelf colors do not suffice.
- Sheen and finish, especially aging and old finish colors, impact visual match and should be verified under real lighting conditions before finalizing.
- Professionals use precise tools like colorimeters and custom formulas, making them more suitable for complex cases involving aged, species-unknown, or high-visibility areas.
Table of Contents
- What Is Hardwood Color Matching, and Why Does It Trip People Up?
- How Do You Test Stain Samples Before Committing?
- Which Stain Type Gives You the Closest Match?
- How Do You Blend New Wood Into an Existing Floor?
- How Do You Match Sheen and Finish Color?
- Why Do Some Matches Still Look Wrong? Common Pitfalls
- When Should You Call In a Professional?
- The Honest Truth About Hardwood Color Matching
- Get a Confident Color Match Without the Trial and Error
- Sources
What Is Hardwood Color Matching, and Why Does It Trip People Up?
Hardwood color matching is the process of getting new or repaired wood to read the same color, tone, and sheen as the wood around it, close enough that a visitor would not notice the seam. It sounds simple until you actually try it. That’s because color on a wood floor is not one variable. It is species, grain, sanding history, stain absorption, topcoat chemistry, and years of sun exposure all stacked together.
Most guides oversimplify this into “pick a matching stain color,” which is a bit like telling someone to “match the paint” without mentioning primer, sheen, or the fact that the wall has faded for a decade. We think about hardwood color matching the way we’d approach a spa day for tired floors: you don’t just slap on a fresh coat and hope. You assess what you’re working with first.
Step 1: Assess the Existing Floor
Before you buy a drop of stain, you need to know exactly what you’re matching. Skip this step and every sample you test later will be chasing the wrong target.
Identify the species. Red oak has a pink or reddish undertone and prominent open grain you can feel with a fingernail. White oak leans olive or gray-brown with tighter grain and less obvious flecking. Maple is pale, tight-grained, and notoriously blotchy with stain, since it drinks color unevenly. Walnut is naturally dark brown with a smoother, straighter grain pattern. If you’re not sure, sand a coin-sized spot in a closet or under a rug and compare it to a reference photo of raw wood.
Measure and inspect plank details. Grab a tape measure on width and thickness, and look closely at the cut. Plain-sawn boards show flowing, cathedral-shaped grain; rift and quarter-sawn boards show straighter, more uniform lines. Board width, cut, and grade often matter as much as the stain color itself, since a narrower replacement plank next to wide original boards will look off no matter how perfect the tone is. Note knots, mineral streaks, and grade, too. High-grade “select” wood has fewer character marks than “rustic” or “character” grade.
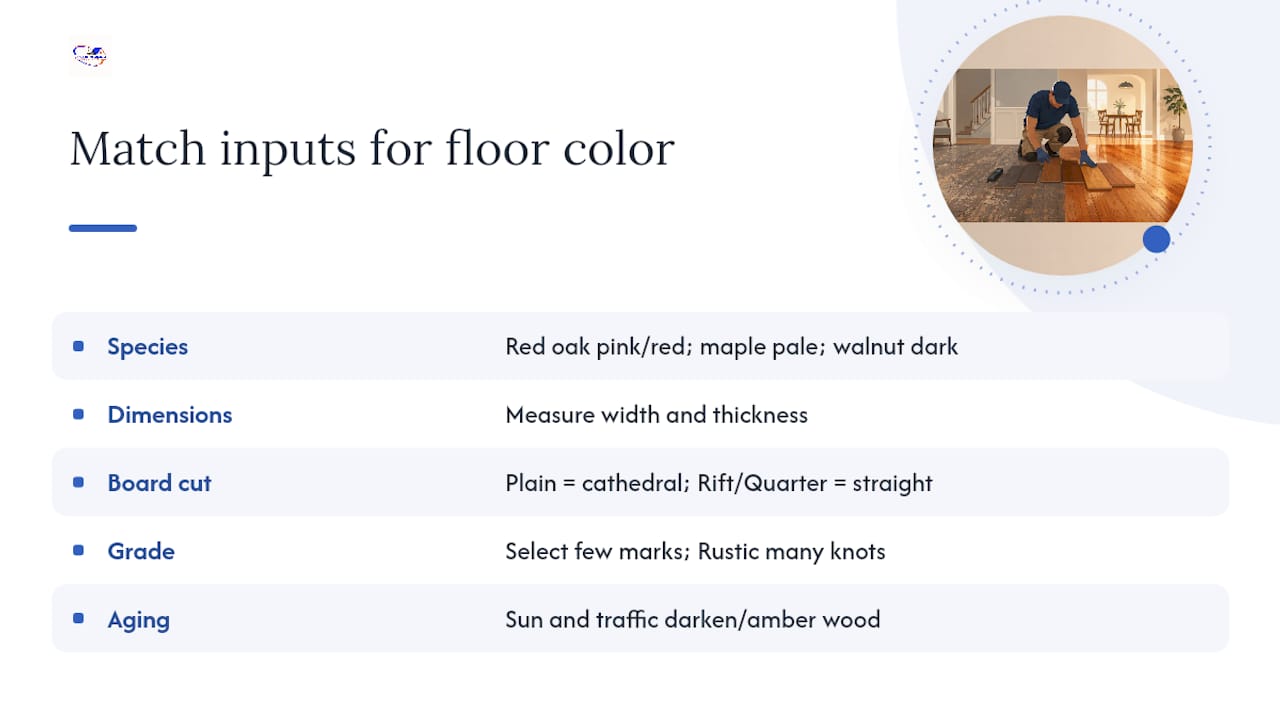
Account for aging. Sunlight oxidizes wood over years, oak in particular darkens and ambers with UV exposure. Old finishes, wax buildup, and years of foot traffic all shift the surface color too. That’s exactly why fresh, unaged replacement wood almost never matches on the first try. Understanding this now saves you from blaming your stain choice later when the real culprit is a decade of sun exposure.
How Do You Test Stain Samples Before Committing?
This is the step people skip, and it’s the one that saves the most headaches. Testing on-site, on the real wood, under your real lighting, is the single biggest predictor of a match that actually holds up.
- Sand a legitimate test area. Use a small hidden section, inside a closet, under an appliance, or scrap from the same species, and sand it to the same grit sequence you’ll use on the real repair. A quick hand-sand won’t tell you the truth; the test needs the same profile as the final job.
- Clean thoroughly. Vacuum dust, then wipe with a tack cloth or a manufacturer-recommended cleaner. Any leftover sanding dust or old finish residue will muddy your stain color and give you a false reading.
- Decide on pre-stain conditioner. Blotchy woods like maple, pine, and birch benefit enormously from a pre-stain conditioner, which evens out absorption before color goes on. Skip it on oak or walnut unless you’re specifically fighting uneven porosity.
- Shortlist with a fan deck first. Start with a printed or in-store fan deck to narrow your options to two or three candidates. Fan decks are a fine starting filter, but they’re not the finish line.
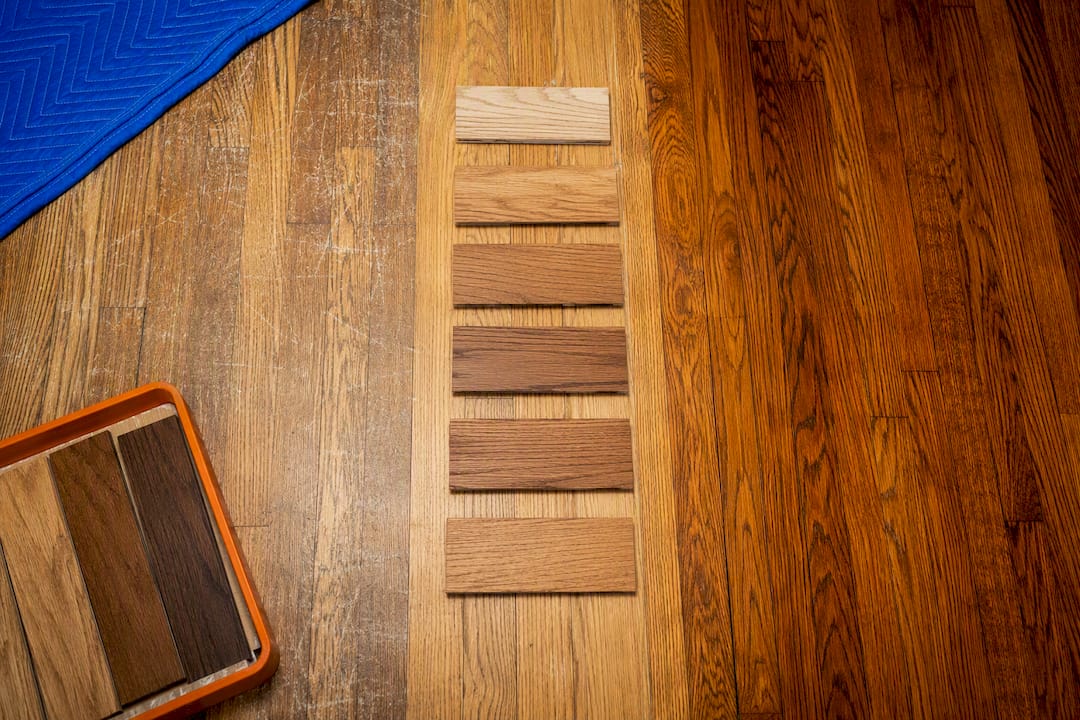
- Verify on real wood scrap. Stain your shortlisted colors onto actual scrap of the same species before ever touching the floor. This is where fan-deck promises meet reality, and colors often shift dramatically once they hit real grain.
- Apply 2 to 3 on-site sample squares. Put small stained squares directly on the floor in the actual repair area, using the same number of coats and the same water-pop step (misting the wood before staining to open the grain) if that’s part of your final process.
- Write everything down. Record the exact stain brand, color name, dilution ratio, number of coats, dry time, and application tool. If you nail the match on square two, you need to be able to repeat it exactly on the whole area.
Pro Tip: Take photos of your sample squares at three different times of day, morning, midday, and evening, before you commit. A stain that looks perfect under noon sun can look noticeably off under evening lamp light, and you want to know that before you’ve stained the whole floor.
This mirrors how experienced refinishers approach the same problem: shortlist, verify on real wood, confirm on-site. Homeowners who skip straight from a fan deck to the floor are the ones who end up redoing the work.
Which Stain Type Gives You the Closest Match?
Stain base changes everything about how color sits in the wood, and picking the wrong one is one of the most common reasons a “correct” color still looks wrong once it’s dry.
- Oil-based stains penetrate deep into the grain and produce richer, warmer tones. They dry slowly, giving you more time to wipe and adjust, but they carry a stronger odor and higher VOC content, so ventilation matters.
- Water-based stains dry fast, show less ambering over time, and tend to read a shade lighter and cooler than oil. They’re a better match if your existing floor has a water-based finish history and hasn’t ambered much with age.
- Gel stains sit more on the surface rather than soaking deep into the grain, which makes them the best choice for blotchy species like maple or pine where oil or water stains would go patchy. The tradeoff is less depth and richness compared to a properly penetrating oil stain.
Sometimes none of the shelf colors get you there, and that’s when custom blending comes in. Mix two adjacent stain colors in small batches, apply thin coats, and let each one dry before judging it. Building color gradually with thin coats gives you control that a single heavy coat never will, and you can always add another layer, but you can’t easily remove one.
Topcoat chemistry matters just as much as the stain underneath. Oil-based polyurethane ambers noticeably over the years, pulling everything toward warm amber and gold. Water-based polyurethane stays clear and true to the stain color underneath, with minimal shift over time. If your existing floor has an oil poly topcoat that’s ambered for ten years, a fresh water-based poly over your new stain will likely look too cool by comparison, even if the raw stain color was dead-on.
How Do You Blend New Wood Into an Existing Floor?
Getting the color right on a sample square is one thing. Making that color disappear into the surrounding floor without a visible line is the harder problem, and it’s where technique matters as much as product choice.
- Feathering the stain edge. Apply stain slightly past the repair boundary, then use a dry brush and progressive buffing passes to soften where the new stain meets the old finish. This takes practice on scrap wood first to learn how many passes it takes before the line disappears rather than smears.
- Lace-in or staggered insertion. Instead of butting new boards straight against old ones in a hard line, stagger the seams so replacement planks weave into the existing pattern. This works especially well in hallways, doorway transitions, and small repair patches where a straight seam would be highly visible.
- Targeted refinishing zones. When a repair area is large or highly visible, like a hallway connecting to a new addition, refinishing that entire zone (rather than just the patch) often gives a far more convincing result than fighting for an invisible spot match.
Pro Tip: Buff feathered edges with an abrasive pad, not sandpaper. Sandpaper can cut through your fresh stain unevenly, while a buffing pad blends the transition without stripping color back to bare wood.
Applicators matter here too. A foam brush gives more control for feathering than a rag, and a natural-bristle brush works better than foam for pushing stain into tight grain on oak.
How Do You Match Sheen and Finish Color?
Color is only half the equation. Sheen differences show up clearly at night and under artificial light, even when the stain underneath is a near-perfect match, so this step catches people off guard.
- Oil-based polyurethane ambers warm over years of exposure, so a freshly finished patch next to an older oil-poly floor will look cooler and less golden until it ages in.
- Water-based polyurethane stays clear and consistent over time, which makes it easier to predict long-term but harder to match against an already-ambered oil finish.
- Sheen level changes everything visually. Satin reads soft and forgiving; semi-gloss and gloss throw more reflected light and make every seam more obvious under a ceiling fixture or lamp.
Verify your sample under real conditions: check it in morning daylight, afternoon light, and again after dark under your actual lamps. Wait until the finish has fully cured, usually several days, since wet or freshly cured finish can look different than fully hardened finish. If everything but the sheen is right, you don’t need to restart. A light abrasion and recoat with the correct sheen level often fixes it without touching the stain underneath.
Why Do Some Matches Still Look Wrong? Common Pitfalls
Even careful homeowners end up with visible seams. Usually the cause traces back to one of a few repeat offenders.
- UV aging you didn’t account for. Sunlit areas near windows or glass doors age faster than shaded rooms, so a sample tested in a shaded hallway can look wrong once installed near a bay window.
- Uneven stain absorption. Blotchy species without pre-stain conditioner, or without enough conditioner, soak up color unevenly and create patchy dark spots.
- Board width and grade mismatches. Grain, cut, and plank width are common causes of a visible transition line, even when the color itself is nearly perfect.
- Chasing it with more touch-ups. Adding stain on top of stain to “fix” a slightly-off patch often creates a darker, more obvious spot rather than blending it in.
When extreme UV aging, a discontinued stain color, or a totally different species makes an invisible match unrealistic, a deliberate transition zone or a staged refinishing area often looks better than an endless chase for perfection.
When Should You Call In a Professional?
Some repairs are perfect DIY territory. Others are the kind of high-visibility, high-risk job where a wrong move costs you more than the professional visit would have. Run through this checklist honestly before you commit to doing it yourself.
- The repair sits in a main living area, entryway, or anywhere guests see first.
- You’re not fully certain of the wood species or the original stain formula.
- The existing floor shows heavy sun-oxidation or years of amber buildup from an oil finish.
- You don’t know whether the current topcoat is oil or water-based polyurethane.
- The area is large enough that a mismatch would be expensive to redo.
Professionals bring tools and experience most homeowners don’t have on hand, including colorimeters for precise tone matching, custom stain formulas mixed to hit a specific target, and spray application or Instant UV-curable finishing for faster, more even cure. Colorimetry and custom formulas paired with spray and buff technique routinely close gaps that consumer-grade sampling can’t.
| Prepare Before Your Visit | Why It Helps |
|---|---|
| Clear, well-lit photos of the area | Lets a pro assess species and finish condition remotely |
| Room dimensions and repair size | Speeds up an accurate phone quote |
| Age of the floor, if known | Helps estimate oxidation and amber buildup |
| A sample of the current stain or finish name, if available | Narrows the color-matching process significantly |
If your project checks two or more boxes above, a free over-the-phone quote based on your photos and description is the quickest way to find out whether a targeted repair or a broader refinish makes more sense.
The Honest Truth About Hardwood Color Matching
Most advice on this topic treats color matching as a paint problem, pick the right can, apply it, done. That’s backwards. Color is the last decision you make, not the first. Species identification, plank grade, and sanding profile decide what the stain even has to work with, and skipping straight to “which stain color” is why so many DIY repairs end up redone.
The on-site sample protocol, fan deck to real wood to actual floor square, is the single highest-leverage habit in this entire process. It costs an extra hour and a little scrap wood. It saves you from staining an entire room the wrong shade.
Where conventional advice falls shortest is in refusing to admit when perfect blending isn’t realistic. A floor with a decade of sun oxidation next to raw new wood is not a stain problem you can fix with a better color choice. It’s a full-refinish problem, or a deliberate transition-zone problem. Homeowners who accept that early save themselves weeks of frustrated touch-ups chasing an invisible line that was never going to happen with spot repair alone.
— J.R.
Get a Confident Color Match Without the Trial and Error
Jrhardwoodfloorrefinishingandcleaning gives Denver-area homeowners something the DIY sampling process can’t: a colorimeter-backed match verified on-site, without the wasted stain, sanding dust, and redo attempts that come with guessing at home. 
If you’ve read through the testing steps above and realized your project checks two or more boxes on the “call a pro” list, whether that’s an unknown species, an ambered oil finish, or a repair sitting in your main living space, we’re set up to solve exactly that. Our team builds custom stain formulas on real samples from your floor, applies them with spray and buff technique for even coverage, and offers Instant UV-curable finishing when you need a faster, harder cure. We serve the Denver Metro Area, Parker, Castle Rock, Boulder, and Colorado Springs, with 5-star reviews and detailed process videos showing the exact results you can expect.
Request your free over-the-phone quote today. Send us a few photos and your floor’s dimensions, and we’ll tell you honestly whether a targeted repair or a full refinish is the better path for your space.
Sources
This guide draws on established stain-matching methodology from Floor Chem Depot, sample-testing best practices from Panel Town, and grain and sheen guidance from Alpharetta Floors. For a deeper look at full refinishing procedures, see our complete refinishing guide and our breakdown of the sanding workflow that makes valid on-site samples possible.
- How to Match Hardwood Floor Stain for Seamless Repairs and Renovations – Floor Chem Depot
- Use real hardwood stain sample decks to choose floor stain colors – Panel Town
- Why Your Hardwood Floors Don’t Match After Adding New Wood – DE ARMAS WOOD FLOORS
- Matching Hardwood Flooring: Color, Grain, Sheen Tips (2026)