 Skip to content
Most homeowners should leave their baseboards in place and reinstall (or add) shoe molding once the new finish has fully cured, rather than pulling trim off the wall. The one rule that matters more than any other: shoe molding gets nailed into the baseboard or wall, never into the hardwood itself, so the floor can still expand and contract with the seasons. We’ll walk through timing, tools, and the small details that keep this simple job simple.
TL;DR:
- Most homeowners should leave their baseboards in place and add shoe molding after finishing to avoid wall damage and drywall repairs.
- Reusing existing shoe molding is cost-effective if it is in good shape, requiring careful removal, numbering, and proper storage to prevent warping.
- Reinstall shoe molding only after the finish has fully cured, following specific cure times for different products, to prevent dents and finish damage.
- Painting or staining shoe molding depends on the desired aesthetic, with paint blending into baseboards and stain extending the look of natural wood floors.
- Professionals are recommended for tricky coped corners, uneven walls, or floor shifts, while DIY is suitable for simple reinstallation with proper planning and timing.
Table of Contents
- Should you remove baseboards or just add shoe molding?
- Prepping and removing shoe molding safely for reuse
- Reinstalling or installing new shoe molding step by step
- Paint or stain: finishing shoe molding the right way
- When to reinstall trim, walk on floors, and move furniture
- Tools and materials checklist
- Troubleshooting common shoe molding problems
- Field notes on scheduling and reuse from J.R.
- Balancing cost, appearance, and longevity
- How J.R. Hardwood can help with trim and refinishing
- Sources
- FAQ
Should you remove baseboards or just add shoe molding?
Pulling baseboards off the wall gives you a clean, full reveal and lets the sander get right up to the edge. It also opens the door to drywall dings, chipped paint, and a bigger repair bill than most people expect. Pros generally reserve full baseboard removal for trim that’s already damaged, outdated, or being replaced anyway.
For everyone else, leaving the baseboard alone and adding shoe molding is the easier path. It hides the expansion gap the flooring needs, skips a round of drywall patching, and gets your project done faster. Trade guidance on baseboard removal points to this same tradeoff: removal adds scope and repair risk, so many pros default to shoe molding instead.
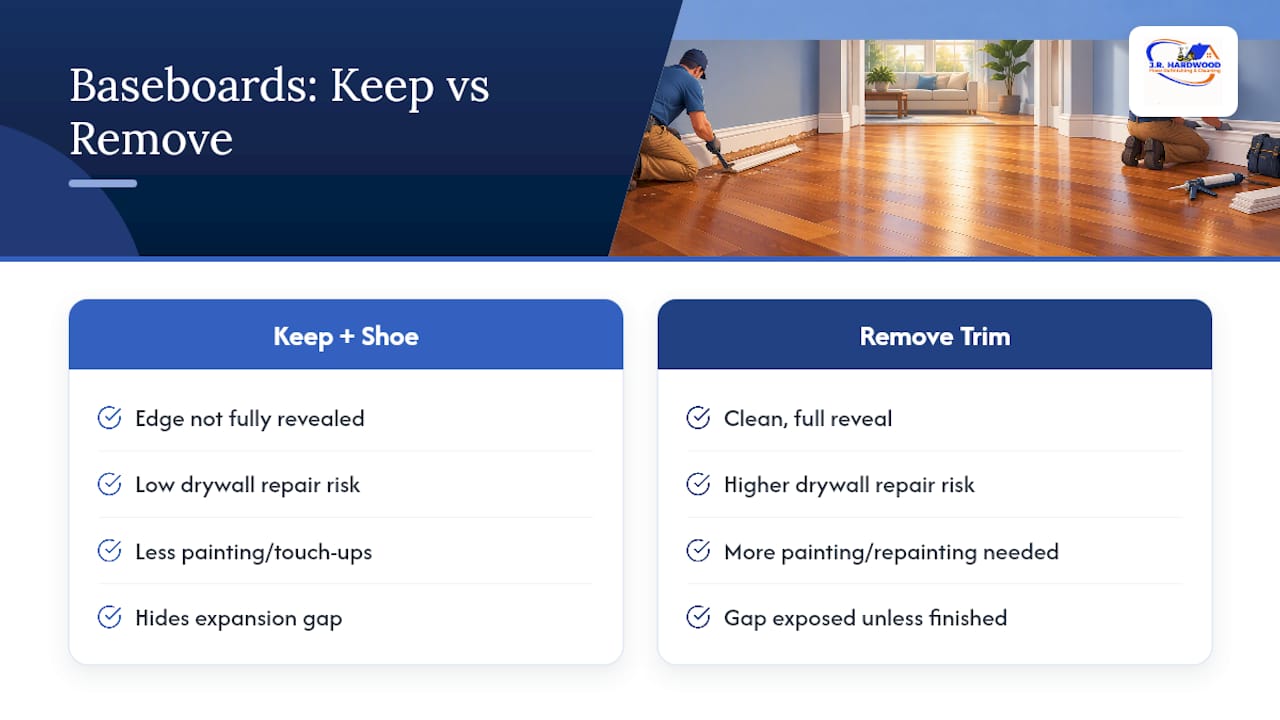
Your choice here shapes everything downstream. Keeping the baseboard means less painting and fewer touch-ups later. Removing it means budgeting time for wall repair, repainting the baseboard, and possibly replacing trim that didn’t survive the pry bar.
Prepping and removing shoe molding safely for reuse
If your existing shoe molding is in decent shape, save it. Removal done carefully costs you almost nothing and gives you trim that already matches your walls.
Start by numbering each piece on the back with a pencil, noting which wall and which direction it faced. This single habit saves the most time during reinstall and keeps you from guessing which piece goes where.
Work a thin pry bar or putty knife behind the molding at each nail location, backed by a scrap of wood or cardboard to protect the wall and paint. Pry slowly in small increments rather than yanking, since old wood molding splits easily along the grain. Once a piece is free, pull remaining nails through the back with pliers instead of hammering them out the front, and scrape off any old adhesive or caulk residue.
Store removed pieces flat, stacked with paper or cardboard between layers, in a dry spot away from direct sun or heat vents. Molding that leans against a wall for a few weeks tends to warp, and warped trim never sits flush again.

Reinstalling or installing new shoe molding step by step
Once your floor finish has cured (more on timing below), reinstalling shoe molding is a straightforward carpentry job.
- Measure each wall run and cut molding to length, using a miter saw for outside corners and a coping saw for inside corners where a tight, gap-free fit matters more.
- Dry-fit every piece before nailing anything, checking that cuts sit flush against the baseboard and floor.
- Fasten with 18-gauge brad nails or thin finish nails driven into the baseboard or wall studs, spaced roughly every 12 to 16 inches, angled slightly downward.
- Never drive a nail into the hardwood itself. NWFA installation guidelines are explicit that base shoe conceals the expansion gap and must be fastened only to the baseboard or wall, since nailing through the shoe into the floor locks the wood in place and can cause buckling as it expands.
- Skip adhesive on floating floors like laminate or LVP, which need to move freely underneath the trim; a bead of adhesive there can trap the floor and cause it to buckle.
- Fill nail holes with wood filler or caulk, let it dry, then sand lightly before painting or staining.
Run a thin bead of paintable caulk along the top edge where molding meets the baseboard for a seamless line, then wipe away excess with a damp finger before it sets.
Paint or stain: finishing shoe molding the right way
Paint shoe molding when you want it to disappear into a white or off-white baseboard. A quick coat of the same trim paint, applied with a small angled brush, blends new molding into existing baseboards almost invisibly. Primer matters more than people expect: raw wood or filled nail holes need a coat of stain-blocking primer before paint, or the filler will show through as a dull patch.
Stain shoe molding when you want it to read as part of the floor rather than the wall, which is common with natural wood trim and darker floor stains. Buy a small stain sample and test it on the underside of a scrap piece first, since the same can look lighter or darker depending on the wood species. Design guidance from Lowe’s frames this as purely an aesthetic call: paint for a seamless wall look, stain to visually extend the floor.
Small blending trick: use a foam brush to feather stain into any existing trim seams, and wipe excess immediately with a clean rag so it doesn’t pool in corners.
When to reinstall trim, walk on floors, and move furniture
Cure times vary by finish, and rushing this step is the fastest way to undo a good refinishing job. General Finishes’ guidance on water-based topcoats notes that some products allow sock-only foot traffic after about 6 hours, furniture back in the room after roughly 3 days, and rugs after about 10 days, though full cure can take weeks depending on the product. Oil-based finishes generally need longer before any trim work or furniture touches the floor.
Instant UV-curable finishes change this timeline dramatically, since the coating hardens under UV light rather than air-drying, which is part of why same-day walk-on service has become popular for households that can’t be without a room for days.
Before nailing any trim back, do a simple tack test: press a fingertip firmly on an inconspicuous spot. If it feels tacky or leaves a mark, wait longer. For a deeper dive into cure windows by finish type, see our guide to polyurethane curing times.
Tools and materials checklist
- Pry tools: a flat pry bar and a thin putty knife for gentle removal without wall damage.
- Fastening: an 18-gauge brad nailer or finish nails with a nail set for hand-driving.
- Cutting: a coping saw for inside corners, a miter saw for outside corners and straight cuts.
- Finishing supplies: paintable caulk, a caulk gun, wood filler, and fine sandpaper.
- Material choice: pine or poplar wood molding for a paintable, traditional look, or PVC composite for moisture-prone rooms since it resists rot and swelling better than wood.
- Safety: a dust mask and good ventilation when sanding or painting, especially with solvent-based products.
Troubleshooting common shoe molding problems
Split trim happens most often at nail points on old, brittle wood. Fill hairline splits with wood filler and clamp overnight, or simply replace the piece if the crack runs the full length.
Mismatched stain color is usually fixable without redoing the whole run: layer a second light coat, or use a gel stain that sits on top of the wood rather than soaking in unevenly.
If you accidentally nail into the hardwood, stop immediately and pull the nail straight out rather than wiggling it, then fill the small hole with matching wood filler.
Pro Tip: Keep a scrap piece of your shoe molding on hand as a permanent test strip for filler, stain, and paint touch-ups, so you never guess on the actual wall.
Uneven gaps at inside corners almost always trace back to a cope cut that wasn’t undercut enough. If a drywall patch from baseboard removal looks rough or a nail went through the floor into subflooring, that’s a good sign to call a professional rather than keep patching.
Field notes on scheduling and reuse from J.R.
We’ve learned that the projects that go smoothest are the ones where trim gets labeled and staged before the sander ever starts. Numbering pieces and stacking them by room, out of the work zone, means reinstall day moves fast and nobody’s re-measuring a piece that already fit perfectly once.
Some wood floor finishes cure under light rather than air, allowing for trim reinstall the same day as the final coat, which can reduce the number of separate visits and shrink the window where dust or debris could land on the wet finish.
We’ll recommend bringing in a pro when a job involves tricky coped corners on older, uneven walls, heavy drywall repair from a rough removal, or any sign the floor itself has shifted, since those issues tend to compound if handled without experience.
Balancing cost, appearance, and longevity
If your baseboards are solid and just need shoe molding refreshed, leave them alone. It’s the faster, cheaper path and it protects paint and drywall you’d otherwise have to fix. Chasing a full reveal or brand-new trim is a reasonable choice too, but budget for the extra time and consider a pro if the coping or wall repair looks tricky. Whichever path you pick, respect the cure time on your finish. Reinstalling trim too early is one of the easiest ways to dull or dent a finish you just paid to have done right.
— J.R.
How J.R. Hardwood can help with trim and refinishing
Getting your floors refinished and your trim looking sharp doesn’t have to mean juggling two separate projects or two separate messes. We handle both, and we build the schedule around your finish cure time so nothing gets rushed.

Here’s what that looks like in practice:
- Full sanding and refinishing, plus our Instant UV-Curable Finish for households that can’t lose a room for days.
- Trim reinstall and repair worked into the same visit, including touch-up painting where baseboards took a hit.
- A free over-the-phone quote based on your description and a few photos, with eco-friendly products and a clear schedule from day one.
Send us a few photos of your floors and trim and we’ll put together a quote through our hardwood flooring services page, no guesswork required on your end.
Sources
This article draws on installation standards from the National Wood Flooring Association, profile and material specs from NelsonKB, curing guidance from General Finishes, and retail product listings from Home Depot.
- WOOD FLOORING INSTALLATION GUIDELINES — NWFA (2026)
- General Finishes — Pro Image flooring topcoat
- Royal Mouldings 5109 PVC composite shoe molding — Home Depot
FAQ
How long after a floor is refinished can you walk on it?
It depends on the finish: some water-based topcoats allow sock-only foot traffic after about 6 hours, with furniture safe to bring back after a few days and rugs after about 10 days. Instant UV-curable finishes cure under light rather than air and can allow same-day walk-on, which is a different timeline entirely from standard poly.
Should you paint or stain shoe molding?
Paint it when you want the molding to blend into a painted baseboard, and stain it when you want it to visually match and extend the hardwood floor. Both are aesthetic choices rather than technical requirements, so the right pick depends on the look you’re going for.
Do you remove baseboards when refinishing hardwood floors?
Not always. Many homeowners and pros leave baseboards in place and use shoe molding to hide the expansion gap, which is faster and avoids drywall or paint repairs, while full baseboard removal is usually reserved for damaged trim or a full reveal.
Is shoe molding outdated?
Shoe molding still serves a functional purpose by concealing the expansion gap hardwood floors need, so it isn’t going away regardless of style trends. It comes in wood and PVC composite profiles that can be painted or stained to match nearly any decor, from traditional to modern.