 Skip to content

Yes, LVP works beautifully on stairs, but only when it’s fully glued down and finished with a proper stair nosing that matches your plank line. Skip either step and you’re looking at lifting edges, exposed corners, and a trip hazard within months. If your staircase has open sides, curves, or uneven treads, this is one job where hiring a pro protects both your safety and your warranty.
TL;DR:
- Fully gluing down LVP and matching stair nosing from the same dye lot are crucial to prevent lifting edges and uneven corners over time.
- Rigid-core SPC or solid LVT with a 20 mil or thicker wear layer and textured finish are best suited for stair use, while peel-and-stick products are unsuitable.
- Accurate measurement, proper adhesive application, riser-first installation, and secure nosing attachment are essential steps for a durable and safe stair conversion.
- Complex stairs with open sides, curves, or uneven treads should be installed by professionals to ensure safety and warranty coverage.
- Regular inspection, cleaning with pH-neutral products, and immediate repairs of loose nosing maximize the longevity and safety of LVP stairs.
Table of Contents
- Should You Put LVP on Stairs? Weighing the Pros and Cons
- What Materials Actually Hold Up on Stairs?
- What Do You Need Before You Start Cutting?
- How Do You Install LVP on Stairs Step by Step?
- Should You DIY Your Stairs or Call in a Pro?
- What Should You Budget for LVP Stairs?
- How Do You Keep LVP Stairs Safe and Long-Lasting?
- A Straight Answer on Stair Installations
- Get a Free Quote for Your Stair Installation
- Where to Verify Adhesive Specs and Nosing Options
- Sources
Should You Put LVP on Stairs? Weighing the Pros and Cons
Running the same LVP from your living room up the staircase creates a clean, continuous look that hardwood or carpet can’t always match. Beyond looks, luxury vinyl plank brings genuine durability advantages to a part of the house that takes constant abuse.
The upside:
- Seamless flow between your main floor and stairs, no jarring material change
- Moisture resistance that shrugs off spilled coffee or tracked-in snow
- Wear layers built to survive years of foot traffic
- Easy cleanup with basic sweeping and damp mopping
The tradeoffs:
- Stairs require glue-down installation, which is less forgiving than a floating floor
- Smooth finishes can turn slippery, especially with socks or wet shoes
- Finding stair nosing that matches your exact plank can take extra legwork
- Edge repairs on stairs are trickier than swapping a plank in the middle of a room
Households with pets, young kids, or anyone hauling laundry baskets up and down daily tend to love LVP over carpet, since spills wipe away instead of soaking in. Families with older adults or anyone unsteady on their feet should pay closer attention to traction, which we’ll cover shortly.
What Materials Actually Hold Up on Stairs?
Not every LVP product on the shelf is built for stair duty. Rigid-core SPC or solid LVT are your best bets because they’re dimensionally stable and cut cleanly with a straightedge, which matters when you’re fitting oddly sized treads. Steer clear of thin peel-and-stick vinyl tiles here. They simply don’t have the backbone stairs demand, and manufacturers strongly recommend glue-down installation over floating methods for exactly this reason.
- Choose a wear layer of 20 mils or thicker for stairs, since this is the highest-traffic surface in most homes
- Pick an embossed or textured finish over a glossy smooth one for better grip
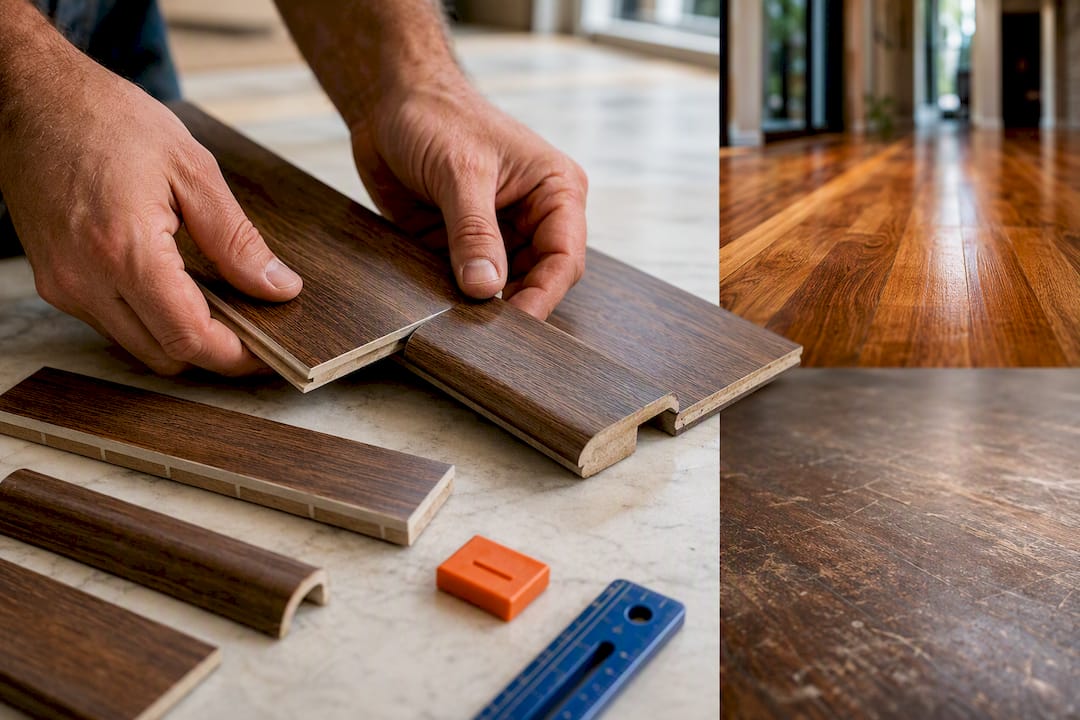
- Order your stair nosing at the same time as your flooring, from the same product line and dye lot
- Compare aluminum nosing, vinyl-wrapped nosing, and factory-finished bullnose treads before you commit
Rigid-core SPC and solid LVT are the top picks for stair applications because they hold their shape under the flex and pressure a staircase puts on every seam. Curious about the broader category before you shop? Our complete homeowner’s guide to luxury vinyl plank breaks down core types in plain language.
Pro Tip: Order 10 to 15 percent extra material and nosing pieces from the same batch. Dye lots vary between production runs, and running short mid-project means waiting on a shade that might not match.
What Do You Need Before You Start Cutting?
Gather your tools before you touch a single plank. You’ll need a utility knife, a jigsaw for irregular cuts, a circular or miter saw for long straight rips, a J-roller, a tape measure, a straightedge, and a caulk gun for seams.
- Pick your adhesive based on manufacturer specs. Moisture-cure urethane, Mapei Ultrabond ECO 360, and Bostik GreenForce are all stair-rated options worth asking your supplier about.
- Strip the old stair covering completely, whether that’s carpet, laminate, or worn vinyl.
- Tighten any loose or squeaky treads and fill gaps or low spots with a leveling compound, then sand smooth.
- Vacuum thoroughly. Grit left behind under the adhesive shows up as bumps later.
- Prime the substrate if your adhesive calls for it. Skipping this step is a common reason bonds fail early.
- Measure every single tread and riser individually, since almost no staircase has identical dimensions top to bottom, then label each cut piece before you move to installation.
How Do You Install LVP on Stairs Step by Step?
Once your pieces are cut and labeled, the sequence matters as much as the materials. Rushing this part is where most DIY stair projects go sideways.
- Dry-fit every cut piece on its matching stair before applying any adhesive, and confirm nothing binds against the wall or adjacent trim.
- Install the riser piece first. Working riser-first creates a stronger, cleaner seam where the tread later overlaps it, which also makes nosing placement far more forgiving.
- Spread your adhesive across the tread using the trowel notch size your manufacturer specifies, then set the tread piece and press firmly into place.
- Skim-coat the back of the plank if your adhesive instructions recommend it for better contact.
- Set the stair nosing last, snugging it against the tread’s front edge.
- Run a J-roller across the entire surface to force out air bubbles and lock in full contact, then clamp or weight the nosing until the adhesive sets.
- If your nosing manufacturer specifies mechanical fasteners in addition to adhesive, drive them now rather than skipping this step to save time.
- Caulk any visible seams between the nosing and tread for a finished look and added water resistance.
- Check every tread for level and confirm no edge sits proud enough to catch a shoe or bare foot.
- Keep the stairs off-limits for 24 to 48 hours depending on your adhesive’s cure schedule, and allow the LVP to acclimate for at least 48 hours before installation begins to avoid movement after the glue sets. Test traction with regular shoes before opening the stairs to daily foot traffic.
Should You DIY Your Stairs or Call in a Pro?
Straight staircases with consistent tread depth and a bit of patience are genuinely doable for a confident DIYer who understands adhesive coverage and nosing requirements. Complexity changes the math fast, though.
- Call a professional if your staircase has open sides, winders, curves, or treads that vary noticeably in size
- Get a pro involved if matching stair nosing isn’t readily available for your chosen plank
- Choose professional installation when you want a warranty backing the work, not just the materials
- DIY only if you’re comfortable measuring and cutting each piece individually rather than relying on a single template
We offer professional hardwood and LVP installation across the Denver Metro Area. We quote most stair jobs over the phone using photos you send us, with no in-person walkthrough required just to get a number.
What Should You Budget for LVP Stairs?
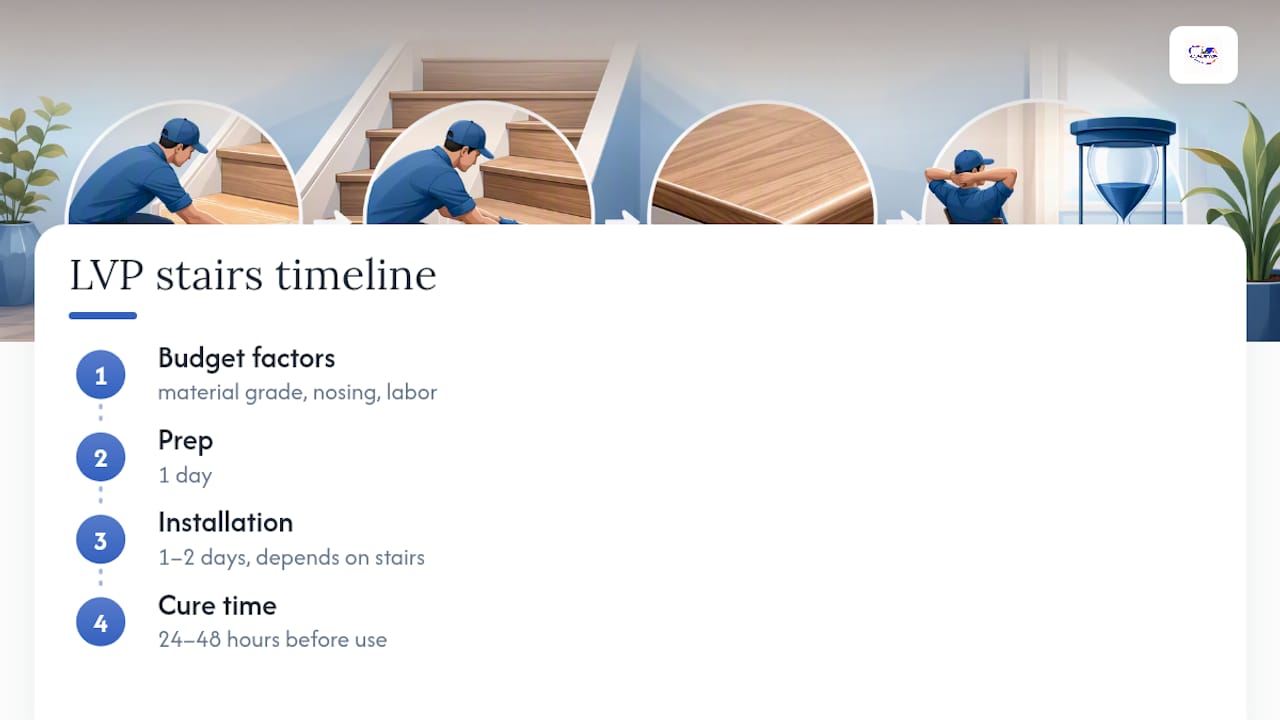
Costs swing based on material grade, nosing type, and whether you’re paying for labor. Here’s how the pieces typically break down.
Plan on one day for prep, one to two days for installation depending on stair count and complexity, and then a full 24 to 48 hours of cure time before anyone uses the stairs. Skipping the cure window to save a day is the fastest way to undo a good install.
How Do You Keep LVP Stairs Safe and Long-Lasting?
Traction is the number one concern once your stairs are installed, especially in homes with kids, pets, or older family members. Textured plank surfaces help, but you can add extra grip with adhesive anti-slip strips, grooved nosings, or a runner down the center of the flight.
- Test the finished stairs yourself in socks and again with wet feet before calling the project done
- Do a monthly visual check of every nosing edge and seam, since a lifting nose is the first sign of trouble
- Re-bond a lifting nose early by injecting adhesive underneath, then weighting it until it sets rather than waiting for it to worsen
- Clean with pH-neutral products only, and skip steam cleaners and wax entirely, since both can degrade the wear layer
- Sweep or vacuum often. Grit tracked in on shoes acts like sandpaper on vinyl over time
Pro Tip: If a stair nose ever feels the slightest bit loose underfoot, treat it as an emergency repair, not a someday project. A lifting nose is the single most common trip hazard on vinyl stairs.
A Straight Answer on Stair Installations
Too many guides treat stairs like an afterthought, the same install as a flat floor with a few extra cuts. That’s backwards, and it’s how homeowners end up with lifting nosing six months after a weekend project. Stairs take more abuse per square foot than any other surface in your house, and they’re the one place where a shortcut becomes a safety issue instead of just a cosmetic one.
Match your nosing to the same dye lot as your planks, always. Test traction with your own feet before you call the job finished. And if your staircase has any complexity at all, open sides, winders, uneven risers, send us photos before you buy a single plank. A quick assessment upfront saves you from ordering the wrong materials.
— J.R.
Get a Free Quote for Your Stair Installation
Between sourcing matching nosing, calculating adhesive coverage, and cutting each tread to its own exact measurement, LVP stairs eat up a weekend fast, if you get through it on the first try at all. We handle the entire process, from hardwood and LVP stair installation to sourcing nosing that actually matches your plank line, using eco-friendly adhesives and finishes throughout.

Getting a quote is simple. Call us with your step count, send a few photos of the staircase, and note anything unusual, open sides, a landing, curved treads, and we’ll give you a free estimate over the phone, no in-person visit required just to get a number. If you’re still weighing whether this is a DIY weekend or a job to hand off, our breakdown of DIY versus professional installation costs lays out the real tradeoffs. When you’re ready, reach out to schedule your stair installation and get it done right the first time.
Where to Verify Adhesive Specs and Nosing Options
Before you buy, check your adhesive’s technical data sheet and your nosing manufacturer’s installation instructions directly. Product lines vary, and cure times listed on packaging always override general guidance. If you’re also updating trim or doors near the staircase, this interior finishes guide is worth a look for coordinating the overall look.
Sources
- Vinyl plank flooring on stairs: does it work? | Flooring Clarity
- How to install vinyl plank flooring on stairs | FlooringInc blog