 Skip to content
Proper surface preparation is the single most important factor in whether a coating, finish, or adhesive lasts or fails. Before any brush, roller, or sprayer touches a surface, three things must happen: remove every contaminant, create the right surface profile, and verify cleanliness before coating begins. Skip any one of those steps and you’re not cutting corners — you’re setting a timer on failure. A coatings-industry supplement found that roughly 75% of coating failures trace back to poor surface preparation, with inadequate profile and contamination cited as the leading causes.
- Remove contaminants: oil, grease, salts, dust, loose coatings, rust, and mill scale
- Create the right profile: mechanical or abrasive methods matched to the substrate and coating system
- Verify before you coat: water-break test, soluble-salt testing, profile measurement, and environmental checks
Whether you’re planning a hardwood floor refinish, an industrial coating job, or a concrete overlay, the prep work determines the outcome.
Key Takeaways
| Point | Details |
|---|---|
| Prep drives coating life | Roughly 75% of coating failures link to poor surface preparation, not the coating itself. |
| Three non-negotiable steps | Remove contaminants, create the correct surface profile, and verify cleanliness before coating. |
| Document every inspection | Record profile readings, salt test results, and environmental conditions to protect warranties. |
| Invest in prep to save long-term | Higher upfront prep reduces recoat frequency and total lifecycle costs over time. |
| Jrhardwoodfloorrefinishingandcleaning | Provides documented surface inspection, eco-friendly finishes, and UV-curable options for Denver-area floors. |
Table of Contents
- What surface preparation actually includes
- Why surface preparation matters more than the coating itself
- What contaminants do to a coating — and how to spot them
- Which surface preparation method fits your project?
- How surface profile affects adhesion and coating life
- A step-by-step surface preparation workflow
- Standards and inspection tests you should know
- Common surface prep mistakes and how to avoid them
- When should you hire a professional for floor prep?
- A flooring specialist’s perspective on prep
- Get professional floor prep and refinishing in Denver
- Sources
What surface preparation actually includes
Surface preparation covers every activity performed on a substrate before a coating, adhesive, or finish is applied. Think of it as giving the surface a thorough spa day before the real treatment begins. The goal is a clean, correctly profiled, dry, and structurally sound base that lets the coating bond and perform as the manufacturer intended.
The term applies across a wide range of substrates:
- Steel and metal: removing mill scale, rust, and weld spatter before protective coatings
- Concrete: opening the pore structure and removing laitance before overlays, sealers, or coatings
- Wood and hardwood floors: sanding away old finish, stains, and surface damage before refinishing
- Masonry: removing efflorescence, old paint, and biological growth before waterproofing or paint
The activities that fall under surface preparation include solvent cleaning and degreasing, abrasive blasting, mechanical sanding and grinding, shot blasting, acid etching for concrete, filling cracks and voids, and final drying and inspection. For hardwood floors specifically, the process centers on sanding to bare wood, removing old wax or finish residue, and cleaning the surface before a new finish coat goes down. The same logic applies whether the substrate is oak flooring or a steel bridge girder: a coating can only perform as well as the surface beneath it.
Why surface preparation matters more than the coating itself
Here’s a perspective that surprises a lot of people: the coating you choose matters far less than how well you prepared the surface it goes on. Sherwin-Williams states plainly that improperly prepared surfaces reduce coating integrity and service life, and that a large share of failures trace directly to inadequate preparation. The coating is only as good as its foundation.
Two mechanisms drive adhesion. The first is mechanical interlock: a properly profiled surface has peaks and valleys that the coating flows into and grips as it cures. The second is chemical adhesion: a clean, contaminant-free surface allows the coating’s chemistry to bond directly to the substrate. Oil, salts, and dust break both mechanisms simultaneously.
The lifecycle economics are equally compelling. Industry analysis describes an “80% rule” — roughly 80% of premature coating failures are attributable to inadequate surface preparation — and shows that higher upfront prep grades reduce total 20-year costs through fewer recoats. A surface prepped to a higher standard may cost more on day one, but it pays back through extended service intervals and avoided emergency repairs.
For floors, the contrast is vivid. A hardwood floor sanded to bare wood, cleaned of all wax and residue, and finished with a properly bonded UV or polyurethane coat can last 10–15 years before the next refinish. The same floor coated over old wax or a dusty surface may start peeling within a year or two.
What contaminants do to a coating — and how to spot them
Contaminants are the enemy of adhesion, and the tricky part is that many of the worst ones are invisible. Hempel’s technical guidance identifies the core cleanliness requirements: low salt levels, no oil or grease, and freedom from dust, rust, and mill scale. Each contaminant type produces a distinct failure pattern.
Common contaminants and the failures they cause:
- Oil and grease: prevent chemical bonding; cause widespread delamination and fisheye defects
- Soluble salts (chlorides, sulfates, nitrates): draw moisture through the coating film; cause osmotic blistering and cathodic disbondment
- Dust and abrasive residue: create a weak boundary layer; cause adhesion loss and pinholing
- Mill scale: expands and contracts differently from steel; causes delamination at the steel interface
- Old loose coatings: provide a weak anchor for new coats; cause inter-coat delamination
- Rust: continues to oxidize under the film; causes premature corrosion and film lifting
- Moisture: prevents cure and bonding; causes blistering and adhesion failure
Soluble-salt contamination deserves special attention because it’s often completely invisible. Industry analysis confirms that salt testing should be standard practice for marine, coastal, and high-corrosion-risk projects. On floors, the equivalent invisible threat is wax residue or cleaning product buildup — you can’t always see it, but a new finish coat will tell you it’s there by peeling within weeks.
Pro Tip: Run a solvent wipe test on a small area before committing to a prep method. Wipe the surface with a clean white cloth dampened with mineral spirits or acetone. If the cloth picks up color, oil, or residue, you have contamination that needs addressing before any abrasive work begins. For suspected salt contamination on metal or concrete, use a Bresle patch kit or equivalent salt-testing method.
Which surface preparation method fits your project?
Choosing the right method comes down to the substrate, the level of contamination, the coating system’s requirements, and the environment where the work happens. No single method does everything.
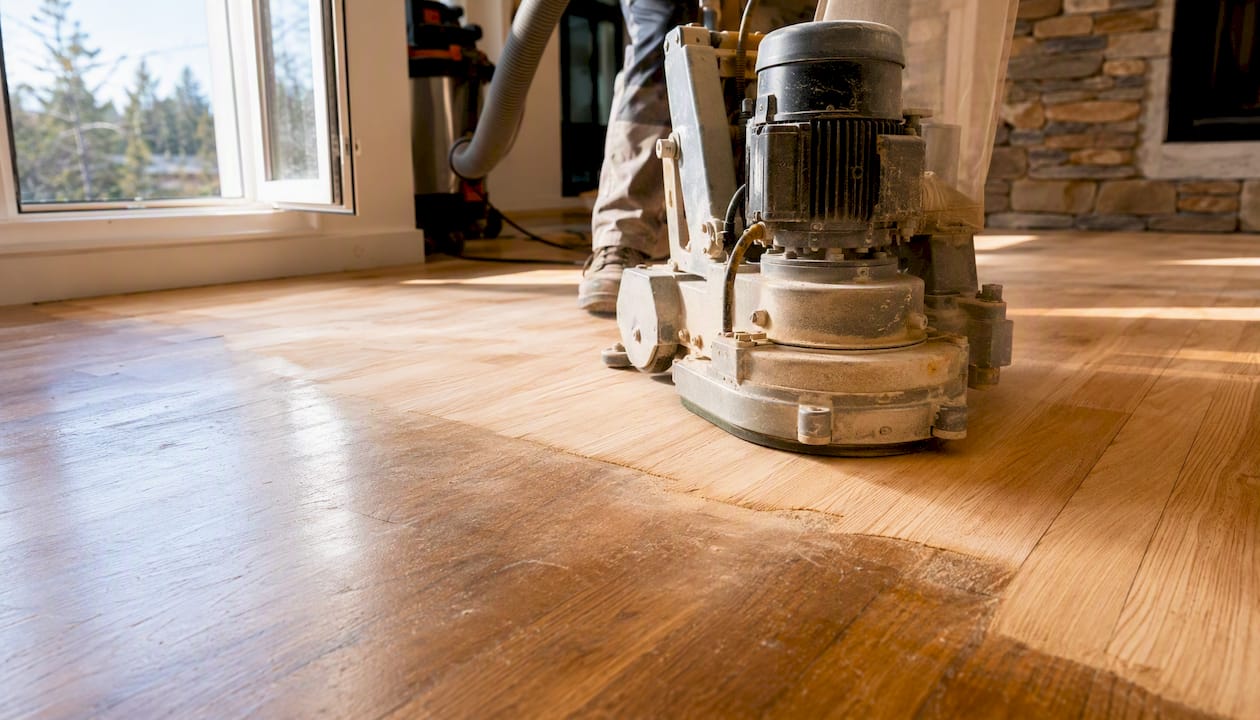
Mechanical methods (sanding, grinding, hand and power tool cleaning) work well for light-scale work, spot repairs, and interior floor preparation. For hardwood floors, drum sanding and edge sanding are the standard mechanical approach. They remove old finish, level the surface, and create a fresh wood profile ready for a new coat. Our detailed hardwood floor sanding workflow walks through equipment selection and sequencing for floors specifically.
Abrasive and shot blasting are the heavy hitters for steel and industrial concrete. Blast grades follow SSPC/NACE standards (now maintained by AMPP): Sa 2 (commercial blast), Sa 2½ (near-white blast), and Sa 3 (white metal blast). Each grade specifies how much mill scale, rust, and contamination must be removed. Blasting also generates the anchor profile the coating needs. One important follow-up: blasting always produces dust that must be removed before coating, or that dust becomes a new adhesion problem.
Chemical methods include solvent cleaning (SSPC-SP 1) for oil and grease removal, and acid etching for concrete to open the pore structure. Acid etching with muriatic or phosphoric acid is common before concrete sealers and coatings, though it requires neutralization, thorough rinsing, and complete drying before any coating goes down. ICRI guidance covers concrete-specific method selection in detail.
Combining methods is often the right call. A solvent wipe before abrasive blasting removes oil that would otherwise contaminate the blast media and get redistributed across the surface. High Performance Coatings Association guidance reinforces that prep must be matched to the coating manufacturer’s requirements to achieve the intended performance.
| Method | Best Use | Contaminants Removed | Safety Note |
|---|---|---|---|
| Sanding / grinding | Wood floors, light metal, spot work | Old finish, rust, loose coatings | Dust control; lead paint testing for older surfaces |
| Abrasive blasting | Steel, heavy concrete, industrial floors | Mill scale, rust, old coatings, profile creation | Respiratory protection; blast media disposal |
| Shot blasting | Concrete floors, large steel areas | Laitance, old coatings, surface hardening | Hearing protection; contained dust collection |
| Solvent cleaning | Pre-cleaning before mechanical prep | Oil, grease, wax, light contamination | Ventilation; flammable solvent handling |
| Acid etching | Concrete before sealers/coatings | Laitance, surface hardening, carbonation | Eye and skin protection; neutralization and rinse required |
How surface profile affects adhesion and coating life
Surface profile is the measured roughness of a prepared surface, expressed in mils (thousandths of an inch) or micrometers. Think of it like Velcro: a smooth surface gives the coating almost nothing to grip, while a properly profiled surface creates thousands of tiny peaks and valleys the coating flows into and locks onto as it cures.
Coating manufacturers specify a profile range in their product data sheets. Applying a coating over a profile that’s too smooth means weak mechanical adhesion. Going too rough creates a different problem: the peaks can punch through thin coatings, causing pinholing and increased coating consumption without a proportional adhesion benefit.
Measurement methods:
- Replica tape (Testex Press-O-Film): the most common field method; the tape conforms to the surface profile and the resulting thickness is measured with a spring micrometer
- Comparator cards (SSPC-VIS 1 / ISO 8503): visual reference cards for quick field assessment; less precise but fast
- Digital profile gauges: electronic stylus instruments for precise laboratory or quality-control measurements
Before coating begins, verify and record:
- Profile measurement at multiple locations (not just one spot)
- Cleanliness grade against the applicable visual standard (SSPC-VIS or ISO 8501)
- Soluble-salt reading if the environment or substrate warrants it
- Ambient conditions: temperature, relative humidity, dew point, and substrate temperature
- Time elapsed since blasting (to catch flash rust before it forms)
Pro Tip: Flash rust on blasted steel can appear within hours in humid conditions. Coordinate blasting and coating so the window between them is as short as possible — ideally the same day. If you can’t coat the same day, apply a wash primer as a holding coat.
A step-by-step surface preparation workflow
Following a consistent sequence prevents the most common prep failures. Here’s the order we recommend for any coating or floor-finishing project:
- Assess the substrate. Identify the material (steel, concrete, wood), existing coatings, visible contamination, and any structural issues like cracks, pitting, or rot. Note environmental constraints (indoor/outdoor, humidity, temperature range).
- Pre-clean with solvents. Wipe down with an appropriate solvent (mineral spirits, acetone, or a commercial degreaser) to remove oil, grease, and wax before any abrasive work. This prevents contamination from being ground into the surface.
- Remove loose material. Scrape, wire-brush, or hand-tool away loose coatings, rust, and debris. This step reduces the load on the primary prep method.
- Perform primary surface preparation. Apply the selected mechanical, abrasive, or chemical method to achieve the target cleanliness grade and profile. For floors, this is drum sanding to bare wood. For steel, this is abrasive blasting to the specified grade.
- Post-prep cleaning. Vacuum thoroughly, then tack-wipe or blow off with clean, dry compressed air. Run a water-break test: clean surfaces sheet water evenly; contaminated surfaces bead or break.
- Test for soluble salts when the substrate or environment warrants it (marine exposure, coastal location, or prior corrosion history).
- Measure and record the profile. Use replica tape or a gauge at multiple points. Compare against the coating manufacturer’s specified range.
- Check environmental conditions. Confirm substrate temperature is at least 5°F above the dew point, relative humidity is within the coating’s specified range, and ambient temperature is within limits.
- Apply a test patch for critical projects or unfamiliar coating systems. Let it cure and check adhesion before full application.
- Document everything. Record profile readings, salt test results, cleanliness grades, environmental conditions, and the time of prep completion. This documentation protects warranties and gives the owner a record of compliance.
For floors specifically, our floor cleaning checklist covers the pre-contractor steps homeowners can take to speed up the process and reduce prep time on the job.
Standards and inspection tests you should know
Industry standards exist so that “clean” and “profiled” mean the same thing to everyone on a project. Referencing them in contracts and specifications protects both the owner and the contractor.
Key standards to reference:
- AMPP SC 05: the committee that develops and maintains surface preparation standards for metal and concrete; their documents cover blast cleaning, power tool cleaning, and surface cleanliness grades. AMPP SC 05 is the primary source for current standards.
- SSPC/NACE standards (now AMPP): SSPC-SP 1 (solvent cleaning), SSPC-SP 6/NACE 3 (commercial blast), SSPC-SP 10/NACE 2 (near-white blast), and SSPC-SP 5/NACE 1 (white metal blast) define cleanliness grades for steel.
- ISO 8501: international visual cleanliness standard for steel; widely referenced alongside SSPC grades.
- ICRI guidelines: concrete-specific surface preparation and repair guidance; essential for floor coatings, overlays, and sealers.
- ASTM D7234: pull-off adhesion test for coatings on concrete; measures the force required to separate a coating from the substrate.
Common inspection tests:
- Water-break test: water sheeting evenly indicates a clean surface; beading or breaking indicates contamination
- Soluble-salt testing: Bresle patch or equivalent method; measures chloride, sulfate, and nitrate levels
- Visual cleanliness grades: compare the prepared surface against ISO 8501 or SSPC-VIS reference photographs
- Pull-off adhesion test (ASTM D7234): dolly-and-glue method that quantifies adhesion strength; used for quality assurance on critical projects
- Replica tape profile check: field measurement of surface roughness against the specified range
Verification steps — documenting profile, salt levels, and test-patch adhesion — protect warranties and owner interests. A photo record paired with written test results gives you evidence of compliance if a coating failure is ever disputed.
Common surface prep mistakes and how to avoid them
Most coating failures are predictable. They follow the same shortcuts, and they show up in the same ways.
Mistakes that lead to failure:
- Coating over contamination (oil, wax, or dust) without a solvent pre-clean
- Skipping salt testing on metal or concrete in corrosive environments
- Achieving insufficient profile because the blast grade or grit was too fine
- Coating when the substrate temperature is within 5°F of the dew point (moisture condenses on the surface)
- Failing to document inspection steps, leaving no record for warranty claims
- Waiting too long between blasting and coating, allowing flash rust to form on steel
Prevention steps that actually work:
- Always solvent-clean before any abrasive work; it’s a 15-minute step that prevents hours of rework
- Build salt testing and profile measurement into the scope of work as required inspection gates, not optional extras
- Specify the prep standard and profile range in writing before the job starts
- Use a test patch on unfamiliar coating systems or substrates before full application
- Coordinate blasting and coating schedules to minimize the open window
Pro Tip: If you’re hiring a contractor, ask for the inspection documentation before the coating goes down, not after. Request the profile readings, salt test results, and environmental log as a condition of payment. A contractor who pushes back on documentation is a contractor who isn’t verifying the work.
For a broader look at what can go wrong after the coating is applied, our floor care mistakes guide covers the maintenance side of the equation.
When should you hire a professional for floor prep?
Some prep work is genuinely DIY-friendly. A light scuff-sand before a fresh coat of paint on a wall? Manageable. A full hardwood floor refinish on 800 square feet of oak with old wax buildup, pet stains, and a previous coating that’s peeling? That’s a different conversation.
Hire a professional when:
- The floor area is large or the substrate condition is unknown (hidden moisture, subfloor damage, or deep pitting)
- The existing coating is peeling, bubbling, or showing signs of adhesion failure that need diagnosis
- The project requires compliance with specific standards or manufacturer warranties
- Hazardous materials may be present (lead paint in older homes, asbestos-containing adhesives)
- You need a UV-curable or specialty finish that requires precise prep and application conditions
- Previous DIY attempts have already failed, suggesting a contamination or profile issue that needs professional assessment
A Denver homeowner came to Jrhardwoodfloorrefinishingandcleaning with oak floors that had been coated twice by previous owners, with each new coat applied over the last without proper sanding. The surface was cloudy, peeling in high-traffic areas, and had visible wax residue from years of cleaning products. A DIY re-coat would have added another failing layer. Instead, the team sanded to bare wood, removed all wax and residue, tested the surface for cleanliness, and applied an Instant UV-curable finish that bonded directly to the prepared wood.
The difference between a floor that lasts a decade and one that peels in a year isn’t the finish you choose — it’s whether the surface beneath it was truly ready to receive it.
Jrhardwoodfloorrefinishingandcleaning offers free over-the-phone quotes, photo-based assessments, eco-friendly products, and documented prep steps including surface inspection before any finish goes down. For homeowners weighing the DIY vs. professional refinishing question, the prep complexity is usually the deciding factor.
A flooring specialist’s perspective on prep
We’ve seen it hundreds of times: a homeowner invests in a beautiful new finish, and six months later it’s peeling at the edges or clouding in the middle. Nine times out of ten, the culprit isn’t the finish. It’s what was left on the floor before the finish went down.
When we assess a floor, the first question isn’t “what finish do you want?” It’s “what’s actually on this surface right now?” Wax buildup, old cleaning product residue, a previous coat that never bonded properly — these are the things that determine whether the new finish will last. We communicate that scope clearly to every client before work begins, because a homeowner who understands why prep matters is a homeowner who doesn’t cut the budget on the step that matters most.
Before any contractor starts on your floors, ask these questions: What prep method will you use, and to what standard? How will you verify the surface is clean before the finish goes down? Will you provide documentation of the inspection steps? A contractor who can answer those questions confidently is one worth hiring.
Get professional floor prep and refinishing in Denver
Your floors deserve prep that’s done right the first time. Jrhardwoodfloorrefinishingandcleaning serves the Denver Metro Area and surrounding Colorado communities, including Parker, Castle Rock, Boulder, and Colorado Springs, with hardwood refinishing, full sanding and restoration, screen and recoat, and Instant UV-curable finishing for residential and commercial spaces.

Getting started is simple: call for a free over-the-phone quote based on your floor’s condition and photos. We assess the substrate, identify what prep is needed, and walk you through the process before a single piece of equipment arrives. Our eco-friendly products and documented inspection steps mean you get a finish that bonds correctly and lasts. For a full picture of what professional refinishing involves, our complete hardwood floor refinishing guide covers every stage from prep to final coat. Ready to see what properly prepared floors look like? Request your free quote and let’s talk about your floors.
Sources
These sources are the ones professionals reference when specifying, inspecting, and verifying surface preparation work.
- Surface Preparation: The Key to Coatings Success — CoatingsPro (AMPP content)
- Surface preparation — Sherwin-Williams
- AMPP SC 05 – Surface Preparation — AMPP
For paint adhesion basics that translate well to homeowner projects, the DIY guide to paint adhesion offers a clear, accessible overview of why surface condition controls how well any finish bonds.