 Skip to content
TL;DR:
- Buff and recoatrefreshes floors with a light surface treatment without sanding down to bare wood.
- Proper prep, cleaning, and dust control are crucial for successful recoat results.
- It is ideal for dull, scratched floors but not for deep damage or structural issues.
Your hardwood floors used to gleam. Now they look tired, scuffed, and a little sad. Before you start budgeting for a full refinishing job, take a breath. There’s a good chance your floors just need a surface renewal treatment called buff and recoat, not a full overhaul. This guide walks you through every step of the process, from pre-check to final coat, so you know exactly what’s involved, what to expect, and when to call in the pros.
Table of Contents
- What is buff and recoat? Defining the process and benefits
- What you need: Tools, products, and prerequisites
- Step-by-step: The complete buff and recoat process
- Troubleshooting and what to expect: Results, risks, and next steps
- Expert insights: Why timing and preparation matter most
- Ready for flawless floors? Explore your professional options
- Frequently asked questions
Key Takeaways
| Point | Details |
|---|---|
| Quick surface renewal | Buff and recoat restores floor shine without full sanding or multi-day disruption. |
| Preparation is crucial | Proper cleaning and ensuring no contaminants are present are essential for the new coat to bond. |
| Buff and recoat is maintenance | This process saves money and prevents major repairs when done before deep damage sets in. |
| Know the limits | Severe stains, damage, or warping require full refinishing, not just a buff and recoat. |
| Professional help available | Expert services ensure flawless results and address issues not fixable by buff and recoat alone. |
What is buff and recoat? Defining the process and benefits
Think of buff and recoat as a spa day for your floors. You’re not stripping them down to bare wood. You’re refreshing and protecting the finish that’s already there. According to floor care specialists, buff and recoat lightly abrades the existing polyurethane surface, then adds a fresh topcoat. That’s it. No sanding. No exposing the raw wood underneath.
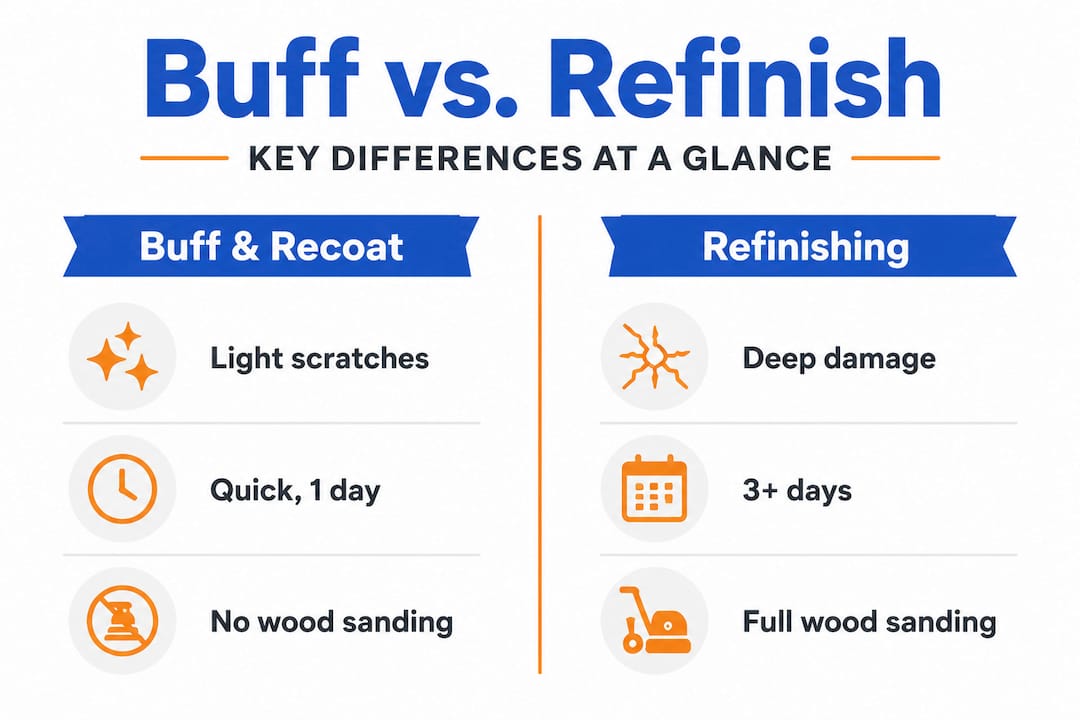
This is very different from full refinishing, which involves sanding all the way down to bare wood before applying a new finish. Refinishing is powerful, but it’s also more invasive, more expensive, and more disruptive. You’re looking at multiple days out of your living space, a lot of dust, and a higher price tag. Buff and recoat, on the other hand, is a much lighter lift. Many recoat jobs wrap up in a day, meaning you can often get your floors back the same day they were serviced.
Here’s a quick look at how these three options compare:
| Method | Sanding required | Time to complete | Cost level | Best for |
|---|---|---|---|---|
| Basic cleaning | No | Hours | Low | Dirt and grime |
| Buff and recoat | Light scuff only | 1 day | Moderate | Dullness, light scratches |
| Full refinishing | Yes, to bare wood | 2 to 4+ days | High | Deep damage, stains, warping |
The main benefits of choosing buff and recoat include:
- Speed: You’re usually back to normal life by the next morning.
- Cost savings: It’s significantly less expensive than full refinishing.
- Less disruption: No heavy equipment, minimal dust.
- Lifespan extension: A fresh coat of polyurethane adds years to your floor’s life.
- Better appearance: You get that warm, glowing shine back without a major project.
If you’re curious about the screen and recoat workflow from start to finish, or want to understand when to buff your floors, we cover both topics in depth on our website.
What you need: Tools, products, and prerequisites
Now that you know what buff and recoat can do, it’s crucial to gather the right tools and verify your floor is suitable for this method. Showing up unprepared is one of the most common ways a DIY recoat goes sideways. The good news is the tool list is manageable.
Essential tools and supplies:
- Floor buffer or low-speed polisher (often rentable from hardware stores)
- Abrasive screen (typically 120 to 150 grit for scuffing the existing finish)
- Shop vacuum with a fine-dust filter
- Tack cloth or microfiber pad for dust pickup
- Waterborne polyurethane finish (compatible with your existing finish type)
- Applicator pad or T-bar with a lamb’s wool or microfiber cover
- Painter’s tape and plastic sheeting to protect baseboards and adjacent surfaces
Surface compatibility check:
Not every floor is a candidate for buff and recoat. Before you go further, run through this checklist:
- Is the current finish polyurethane? Good.
- Has the floor been treated with wax or oil-based soap? Stop here.
- Are there deep gouges, dark pet stains, or warped boards? Stop here too.
- Is the existing finish still mostly intact, just dull or lightly scratched? You’re a strong candidate.
Here’s why this matters so much: wax, oil-based soaps, or other residues can prevent new polyurethane from bonding properly. If the new coat can’t grip the old surface, it will peel, bubble, or flake. That’s a much bigger problem to fix than dull floors. If you’ve been using Murphy’s Oil Soap or any product with a waxy residue, your floor likely needs a thorough stripping and cleaning before any recoating can happen.
| Condition | Buff and recoat ready? |
|---|---|
| Light dullness and scuffs | Yes |
| Waxed or oil-treated finish | No, strip first |
| Deep scratches or gouges | No, refinish needed |
| Pet or water stains in wood | No, refinish needed |
| Warped or cupped boards | No, repair needed |
Pro Tip: Do a quick adhesion test before committing. Buff a small hidden area, apply a tiny bit of polyurethane, and let it dry. Try peeling it up with tape after 24 hours. If it peels cleanly, you likely have a contamination issue. If it holds firm, you’re good to go.
For more guidance on the prep side, check out our breakdown of how to buff hardwood for best surface prep in the Denver climate.
Step-by-step: The complete buff and recoat process
After gathering your supplies and pre-checking your floor, follow these expert-driven steps for lasting results. We’ll walk through each stage clearly so you know exactly what’s happening and why it matters.
The full process, from inspection to final coat, includes:
-
Thorough inspection. Walk the entire floor in good lighting. Look for deep scratches, stains that have soaked into the wood, lifting boards, or uneven spots. Mark anything questionable with painter’s tape. If you find serious damage, buff and recoat won’t fix it and you’ll need to talk about refinishing instead.
-
Deep clean the floor. Sweep, vacuum, and then clean with a hardwood-safe cleaner. This step is not optional. Any dirt, grease, or residue left on the surface will get locked under the new coat. Give the floor plenty of time to dry completely before moving on.
-
Buff or screen the existing finish. Attach the abrasive screen to your buffer. Work in long, overlapping passes with the grain of the wood. The goal is to lightly scuff the surface, not remove the finish entirely. You’re creating tiny scratches so the new polyurethane has something to grip. Keep the buffer moving. Stopping in one spot too long creates uneven abrasion.
-
Vacuum thoroughly. Then vacuum again. This is where a lot of DIYers get lazy, and it costs them dearly. Buffing creates fine dust that settles everywhere. Any dust left on the floor before you apply the new coat will show up as bumps and specks in your finish. Use your shop vac first, then follow up with a tack cloth or slightly damp microfiber pad to catch anything the vacuum missed.
-
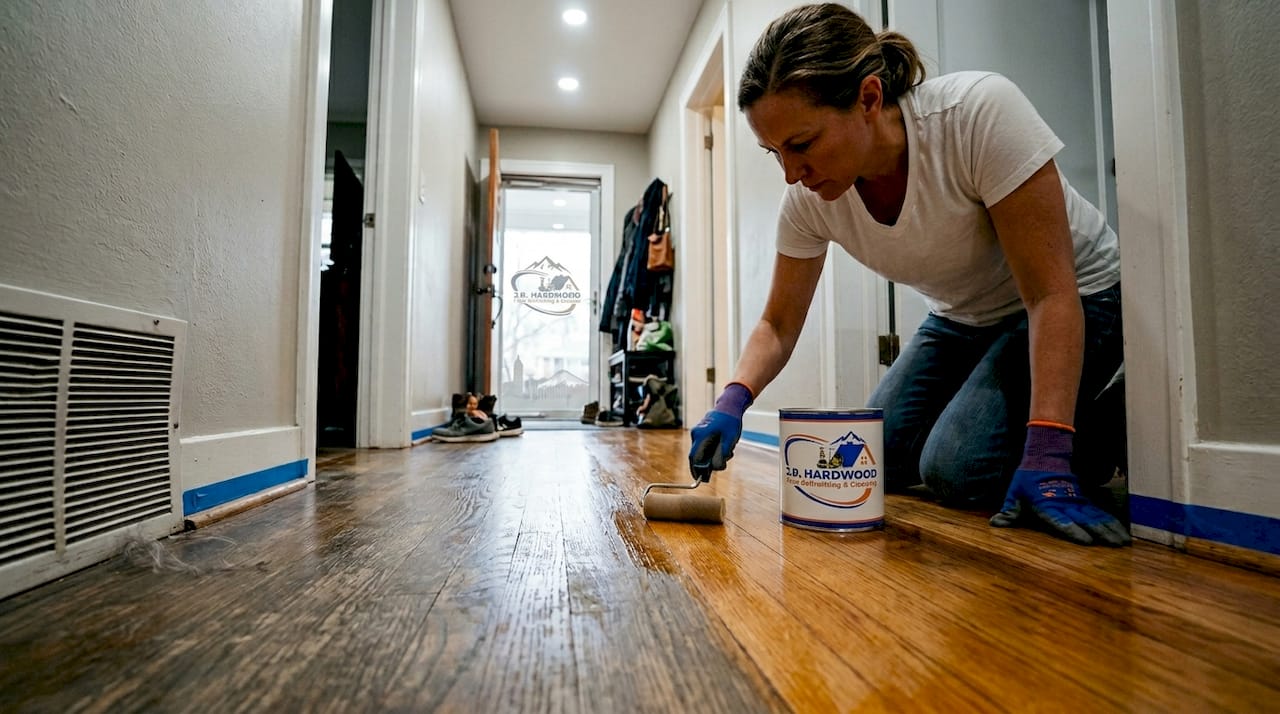
Apply the first coat of waterborne polyurethane. Pour a manageable amount at the far end of the room, away from the door you’ll exit through. Use your T-bar applicator to spread it in smooth, even strokes following the grain. Thin, even coats are better than thick ones. Thick coats can bubble, dry unevenly, or take much longer to cure.
-
Let it dry and apply the second coat. Most waterborne polyurethane coats dry to the touch in 2 to 4 hours. Lightly screen or scuff again between coats, vacuum, and then apply your second coat the same way as the first. Two coats are standard, but your floor’s condition may guide that decision.
-
Cure time before use. Walking on the floor after just a few hours is tempting, but curing and drying are not the same thing. The finish may feel dry but it’s still chemically hardening. Wait at least 24 hours before walking on it in socks. Hold off on replacing furniture for 48 to 72 hours, and avoid heavy furniture or rugs for up to two weeks.
“Rushing the cure time is one of the fastest ways to scratch a brand-new finish. Patience here pays off for years.”
For a deeper look at the technical side, our step-by-step refinishing details page covers what goes into each stage of floor care. You can also explore our definition of buffing if you want clarity on what that step is actually doing to your floors.
Pro Tip: Always work your way toward the exit. Plan your path before you apply a single drop of finish. Getting painted into a corner is a real risk, and walking across wet polyurethane is a rookie move that ruins hours of work.
Troubleshooting and what to expect: Results, risks, and next steps
Understanding the process is crucial, but knowing when buff and recoat works versus when deeper repairs are needed can save you time and money.
Buff and recoat is a maintenance tool, not a rescue operation. It works beautifully when your finish is still mostly intact and the damage is surface-level. But it has real limits, and pushing past those limits leads to wasted money and frustration.
Common mistakes that sink a buff and recoat:
- Skipping the adhesion test and recoating over a waxed or contaminated floor
- Not cleaning deeply enough before buffing
- Poor dust control between the buff and finish application
- Using oil-based polyurethane over a water-based finish (or vice versa) without checking compatibility
- Applying coats that are too thick, leading to bubbling or uneven texture
Warning signs that you need something more:
- Dark stains that have soaked into the wood fibers themselves
- Boards that are cupped, warped, or bouncy underfoot
- Deep gouges that you can feel with your fingernail
- Bare wood patches where the finish has worn completely through
As floor care specialists point out, screening and recoating cannot fix problems that have penetrated the wood itself. Pet urine staining, water damage, and structural issues all require full refinishing or board replacement.
| Symptom | Buff and recoat? | Full refinishing? |
|---|---|---|
| Dull, lackluster finish | Yes | No |
| Light surface scratches | Yes | No |
| Pet stains in wood fibers | No | Yes |
| Deep gouges or cracks | No | Yes |
| Warped or cupped boards | No | Yes, plus repairs |
| Finish worn to bare wood | No | Yes |
“Think of buff and recoat as a proactive tune-up, not a last resort. Schedule it when the finish is still intact to extend lifespan and avoid the need for sanding to bare wood later.”
When buff and recoat is done right, you can expect a noticeably brighter, more even surface. The floors won’t look brand new if there are pre-existing imperfections, but they will look significantly refreshed. Most homeowners are genuinely surprised by how much of a glow-up a single recoat delivers.
For homeowners dealing with older or more damaged floors, our hardwood floor restoration guide and restoring old hardwood step by step resources walk through your options in detail.
Expert insights: Why timing and preparation matter most
Here’s something we’ve learned after working on floors across the Denver Metro Area, Parker, Castle Rock, and beyond: the homeowners who get the best results from buff and recoat are the ones who treat it as a scheduled maintenance task, not a last-minute fix.
Most DIY attempts we’ve seen fail because of two things: contamination they didn’t know was there, and waiting too long to act. By the time a floor looks truly bad, the finish may already be worn through to bare wood in high-traffic spots. At that point, buff and recoat simply can’t deliver the result you’re hoping for. Full refinishing becomes the only real path forward.
Surface prep is the great equalizer. We can’t say it enough. A perfectly executed buff with mediocre prep will give you a mediocre result. A modest buff with exceptional prep, a deep clean, a contamination check, and obsessive dust removal will give you something that looks genuinely impressive. The finish is only as good as the surface it’s applied to.
Colorado adds another layer to this. Our climate is notably dry, and it fluctuates. Winters are cold and dry indoors, and summers can swing between humidity and intense sun. That kind of environment accelerates finish dullness. Floors in Colorado homes often look worn faster than the same species would in a humid climate simply because the finish dries out and loses its protective oils more quickly. That makes regular recoating, roughly every three to five years in most homes, an especially smart investment here.
Our expert recoat workflow reflects exactly this kind of proactive, climate-aware approach. We’ve built our process around getting the prep right every single time, because that’s what separates a finish that lasts two years from one that lasts five or more.
Ready for flawless floors? Explore your professional options
If this guide has you feeling confident about the process, that’s exactly what we hoped for. But we also know that buff and recoat, done wrong, can create more work than it solves. Sometimes the smarter move is letting pros handle the heavy lifting so you get a result that’s truly flawless.
At J.R. Hardwood Floor Refinishing & Cleaning, we serve homeowners across the Denver Metro Area and surrounding communities with free over-the-phone quotes, clear scheduling, and eco-friendly products that protect your floors for the long haul. Whether you’re weighing the DIY vs. professional service question, ready to dive into our complete refinishing guide, or just want honest answers to your specific situation, our refinishing Q&A for homeowners is a great place to start. Reach out today and let’s talk about what your floors really need.
Frequently asked questions
What is the difference between buff and recoat and refinishing?
Buff and recoat renews the existing finish without sanding to bare wood, while refinishing involves sanding the wood surface completely before applying a new finish. Buff and recoat is faster, less costly, and less disruptive.
How long does a buff and recoat usually take?
Most buff and recoat jobs wrap up in a single day, which is significantly faster than full refinishing, which typically takes two to four or more days depending on the floor’s size and condition.
When should buff and recoat NOT be used?
Avoid buff and recoat on floors treated with wax or oil-based cleaners, floors with pet or water stains penetrating the wood, deep gouges, or structural issues like warping. These situations require full refinishing or repairs.
How often should I buff and recoat my hardwood floors?
For most Colorado homes, every three to five years is a good rhythm. High-traffic areas like hallways and kitchens may need attention sooner, while low-traffic bedrooms can often go longer between coats.
Will buff and recoat remove deep scratches, stains, or warping?
No. Buff and recoat is a surface-level treatment. Deep scratches, embedded stains, and warping require full refinishing or board-level repairs to properly address the underlying damage.