 Skip to content
You can refinish hardwood in winter, and in many homes it actually cures better than a humid summer job. The catch is control, not calendar: indoor temperature within a moderate range suitable for curing, with relative humidity maintained in a stable band (https://hardwoodfloorsmag.com/2019/06/03/seasonal-changes-can-affect-drying-conditions/), and wood moisture content confirmed before a coat ever goes down. Get those three right and cold weather stops being a threat and starts being an advantage.
TL;DR:
- Maintaining stable temperature between 60°F and 80°F and relative humidity from 30% to 50% is essential for effective winter hardwood floor finishing.
- Using a thermo-hygrometer and measuring wood moisture content over several days ensures optimal conditions before starting sanding or coating.
- Waterborne finishes cure faster and produce less odor in winter, while oil-modified and hardwax oils require careful climate control for proper curing.
- Cold substrates near exterior walls or unconditioned spaces can cause adhesion issues and finish failures if not identified and addressed beforehand.
- Proper staging of heat, stage ventilation, and delaying the start of finishing until the room stabilizes helps prevent uneven curing and recoat problems.
Table of Contents
- Why winter can be a good time to refinish floors
- What temperature and humidity should you target?
- Which finishes work best in cold weather?
- Why do finish failures show up more in winter?
- How should you apply and dry coats in cold weather?
- What does winter refinishing cost, and can you stay home?
- When should you delay or call in a pro?
- What we see most often in winter refinishing jobs
- Get a winter-ready quote before the next cold snap
- Sources
Why winter can be a good time to refinish floors
Furnace season does something summer humidity never lets happen: it dries the air out for you. Forced-air heat pulls relative humidity down, and lower indoor humidity often makes finishing more predictable because coats cure on a steadier timeline instead of fighting muggy air that slows evaporation. That predictability is the whole reason pros like winter jobs when the conditions cooperate.
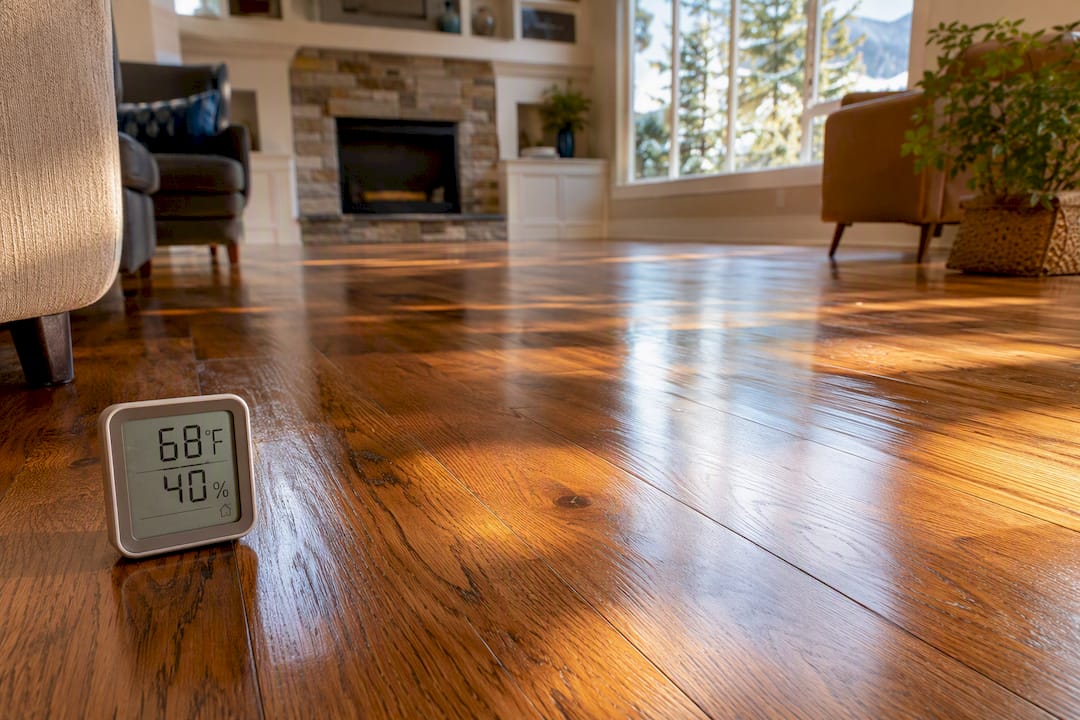
There’s a practical side too. Winter is typically the slow season for flooring crews, which means better scheduling flexibility and equipment availability than during the spring and summer rush. Windows stay shut, so less outdoor pollen and construction dust drifts into a curing finish.
None of that comes free. You trade summer’s humidity problems for two winter-specific risks:
- Odor lingers longer indoors when you can’t crack every window
- Cold substrates near exterior walls or over unconditioned crawlspaces can undermine adhesion even when room-center readings look fine
What temperature and humidity should you target?
The National Wood Flooring Association’s benchmark is simple to remember and easy to check: interior conditions between 60°F and 80°F, with relative humidity held in a stable 30 to 50 percent range. Stray below that RH floor and finishes can dry too fast, trapping solvents and creating a brittle film. Run humidity too high and cure times stretch out, leaving a soft surface vulnerable to marking.
Here’s how to actually check a room before committing to a schedule:
- Place a thermo-hygrometer at mid-room height, away from vents, registers, or exterior doors, and let it sit for a full day before trusting the reading.
- Test wood moisture content in several boards, not just one, since boards near walls or under windows often read differently than boards in the center of the room.
- Compare readings across a few days, not a single afternoon, because a furnace cycling on and off can swing RH more than people expect.
- Confirm the room clears NWFA’s range on both temperature and RH before any sanding or coating begins.
Pro Tip: Don’t trust a single moisture reading taken the morning of the job. Log temperature, RH, and wood moisture over two or three days first. A room that looks fine at 9 a.m. can shift once the furnace kicks on for the afternoon, and that shift is exactly what causes uneven cure later.
Which finishes work best in cold weather?
Not every finish behaves the same way once the thermostat drops. Waterborne polyurethanes cure fast in dry winter air and carry noticeably less odor, which matters if you’re staying in the house during the job. Oil-modified polyurethanes cure slower and smell stronger, but they build a warmer amber tone many homeowners still prefer. Hardwax oils sit in between: low odor, simpler spot repair later, though they demand very tight climate control to cure evenly.
For an occupied home, low-odor waterborne systems or hardwax oils paired with staged ventilation tend to be the most livable choice. Ventilation itself needs a wintertime adjustment, because cracking a window at floor level chills the substrate right where you need it stable:
- Gap windows high, not low, so warm air near the ceiling exits and cold air doesn’t roll across the floor
- Run exhaust fans in adjacent rooms rather than blowing air directly across wet coats
- Stage the heat, keeping the room warm before and during application instead of cranking it up afterward
Homeowners weighing air-sealing upgrades alongside a refinishing project might also look at how to winterize doors to cut down on the drafts that make RH control harder in the first place.
Why do finish failures show up more in winter?
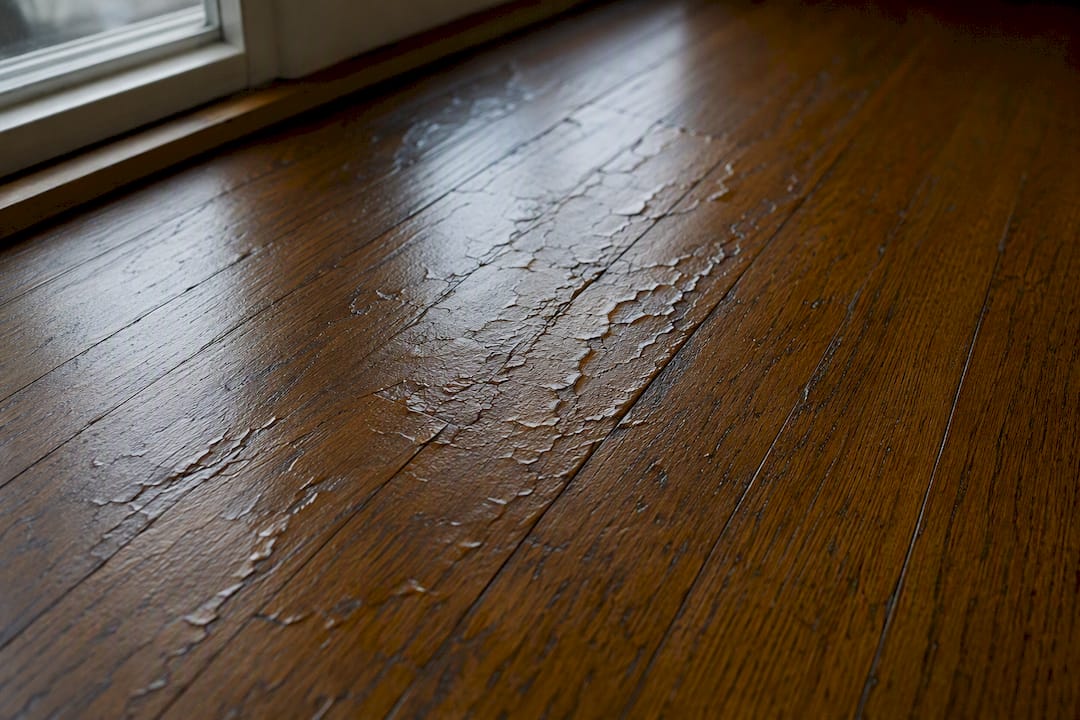
Most winter adhesion problems trace back to the substrate, not the finish itself. A cold floor near an exterior wall, static dust, or leftover contamination can all cause peeling or flaking weeks after the crew has left, and swapping finish brands afterward almost never fixes the real cause.
Dry winter air can also expose adhesion weaknesses that humid air was masking all along, which is why diagnosis matters more than a quick recoat. Watch for these warning signs before you finish:
- Cold zones near exterior walls or over unconditioned crawlspaces, where the substrate reads several degrees below the rest of the room
- Elevated moisture readings in a slab or subfloor that hasn’t been addressed
- Visible contamination like old wax, oil, or cleaning residue that a light sanding hasn’t fully removed
In humid regional climates, winter refinishing can still be risky if outdoor humidity keeps creeping indoors, which is exactly why moisture content gets measured on-site instead of assumed from the season alone. When a reading comes back marginal, remediation or a short delay beats pushing ahead and risking a callback.
How should you apply and dry coats in cold weather?
Sequencing matters more in winter than any other season. A room that’s been cold all week needs time to warm and stabilize before sanding starts, not just before the first coat goes on.
- Warm the space for at least 24 to 48 hours before work begins, giving the wood time to acclimate rather than reacting mid-job.
- Hold the room in a stable window throughout sanding and coating, avoiding big thermostat swings between visits.
- Extend dry time between coats since dry heated air can fool you into thinking a coat is ready when it’s only surface-dry.
- Keep fans off fresh coats directly, since airflow across a wet finish can cause uneven leveling and visible lap marks.
- Set a shoe-off policy and entry mats at every access point to stop grit and de-icer residue from getting tracked into curing finish.
Pro Tip: Fresh finish and winter foot traffic don’t mix. Salt and sand from driveways are abrasive enough to scuff a curing coat, so block off the work area completely, not just discourage walking through it.
What does winter refinishing cost, and can you stay home?
For a typical house needing sanding plus two to three coats, expect the same general timeline you’d see in any season, just with a wider buffer for acclimation and dry time between coats. Cost depends less on the season and more on:
- Square footage and prep condition, including whether boards need heavy sanding or just a light screen
- Any moisture remediation required before work can start
- Finish choice, since hardwax oils and premium waterborne systems price differently than standard oil-modified polyurethane
Whether you can stay in the house comes down to odor tolerance and cure timeline. Low-odor waterborne finishes let many families remain home with some rooms closed off. Oil-modified finishes, with their stronger smell, are often more comfortable to wait out elsewhere for a night or two.
When should you delay or call in a pro?
Some conditions are hard stops, not judgment calls. If wood moisture content reads above the safe range, or if you can’t get relative humidity into a stable band no matter how the thermostat is set, hold off on refinishing until conditions improve.
- Stop if moisture readings are inconsistent across multiple boards or rooms; that inconsistency usually points to an unresolved source.
- Bring in a professional moisture audit when a slab, crawlspace, or exterior wall is suspected of feeding moisture into the subfloor.
- Run your own quick check first: thermostat holding steady, hygrometer reading in range for several consecutive days, and no visible cold spots near exterior walls.
If you’re still weighing whether this is a DIY winter or a hire-it-out winter, our breakdown of DIY versus professional refinishing walks through exactly where the line usually falls.
What we see most often in winter refinishing jobs
Most of the winter failures we get called to fix didn’t start with the finish. They started with someone skipping the moisture check because the floor “looked dry.” We build every cold-weather quote around verbal details and photos first, then confirm conditions on-site with a moisture meter before committing to a schedule. Eco-friendly finish options come into that conversation too, since a lot of homeowners want low odor without giving up durability.
— J.R.
Get a winter-ready quote before the next cold snap
Waiting until spring isn’t the only option, and it isn’t always the better one. Jrhardwoodfloorrefinishingandcleaning runs winter jobs on a workflow built around this exact issue: verified moisture readings before any sanding starts, low-odor eco-friendly finishes for homes that need to stay occupied, and scheduling that isn’t competing with the spring rush every other homeowner is chasing.

If you’re in the Denver Metro Area or anywhere across our Colorado service area, call in for a free over-the-phone quote based on your photos and a quick description of the floor’s condition. No in-home visit required just to get a number to work with. Want the fuller picture first? Our guide to hardwood floor finishes breaks down which finish fits an occupied winter home best, and our complete refinishing guide covers the process end to end. Reach out and get your winter timeline locked in before the coldest months fill every crew’s calendar.
Sources
- How Seasonal Changes Can Affect Drying Conditions – Hardwood Floors Magazine
- Finish adhesion failures in winter — NYC Wood Floors (Huggins)
- Four good reasons to refinish hardwood floors in winter • Pete’s
- Best Time to Refinish Hardwood Floors Seattle | 2026 Guide