 Skip to content
If the stain is light gray or brown, a full sand-and-refinish usually erases it. If it’s gone black and the board feels soft underfoot, you’re looking at board replacement and subfloor odor sealing, not sanding. That’s the honest split, and it’s worth knowing before you spend a weekend scrubbing something that was never coming out.
Here’s the quick sort:
- Fresh spots and light gray/brown staining — prompt cleanup plus a professional sand-and-refinish typically resolves them.
- Dark or black stains — these usually mean the ammonia in the urine reacted with tannins in the wood, penetrating deep enough that sanding alone won’t reach it. Plan for board replacement.
- Lingering odor or soft, warped boards — that’s a subfloor problem now, and it needs a professional inspection, not another bottle of cleaner.
Most homeowners can handle the first category themselves. The second and third almost always need a pro.
TL;DR:
- Light gray and brown stains can usually be removed through prompt cleaning and full sanding and refinishing, while black stains often require board replacement due to deep penetration.
- Testing stain depth with a small test-sand and a moisture meter before committing to repairs helps prevent unnecessary work and more costly outcomes.
- Immediate blotting and enzyme cleaning are effective for fresh accidents, but bleach, ammonia, or steam mops can worsen discoloration and moisture problems.
- Repairing black or warped boards involves precise removal, replacement, and subfloor odor sealing to prevent odor reemergence caused by humidity fluctuations.
- Preventative measures such as choosing durable finishes, using rugs, grooming pets, and sealing high-risk areas significantly reduce long-term urine damage risks.
Table of Contents
- How Do You Assess Pet Urine Hardwood Repair Needs?
- What Should You Do Right After a Fresh Accident?
- Which Pet Urine Damage Repair Method Actually Works?
- What Does Professional Pet Urine Damage Repair Look Like?
- How Can You Prevent Repeat Pet Urine Damage?
- Does Humidity Change How Urine Stains Absorb Into Wood?
- What Tools and Materials Do You Need for This Repair?
- Key Takeaways
- Why Test Sanding Beats Guesswork Every Time
- Get a Straight Answer on Your Floors, Not Just a Guess
- Sources
How Do You Assess Pet Urine Hardwood Repair Needs?
Before you touch a sander, spend five minutes actually reading the damage. It tells you more than guessing ever will.
Look at the color first. Gray or light brown discoloration usually sits closer to the surface, meaning a refinish has a real shot at lifting it out. Black staining is a different animal entirely. Black usually means the urine has soaked deep enough to require board replacement and a weaving-in repair rather than sanding it away.
Run through these checks in order:
- Press test. Push firmly on the stained area with your thumb. Give, softness, or a spongy feel means moisture has broken down the wood fibers, not just the surface color.
- Blacklight scan. Old accidents fluoresce under UV light even after the visible stain fades, so this catches spots you’d otherwise miss entirely.
- Test-sand. A small hand-sanded patch tells you fast whether the discoloration lifts or sits stubbornly at the same depth no matter how much material you remove.
- Veneer check. If you have engineered hardwood, look at a floor vent or a transition strip to see the veneer’s thickness. Engineered floors with a thin wear layer often can’t be sanded deep enough to remove a real stain, which changes your entire repair plan.
If odor returns after cleaning, or the subfloor still feels damp days later, the saturation has gone past the boards.
Pro Tip: A small test-sand costs you almost nothing and tells you more than a dozen photos ever could. Professionals use this exact trick before quoting a repair, because guessing at depth from the surface alone leads to bad estimates.
What Should You Do Right After a Fresh Accident?
Speed matters more than intensity here. A urine spot caught within minutes behaves completely differently than one left to sit overnight.
Work through this sequence:
- Blot immediately with clean, absorbent paper towels or a cloth. Press straight down, don’t rub, and don’t scrub in circles.
- Apply an enzyme cleaner made for hardwood, following the label’s dwell time exactly. Enzymes break down uric acid at the molecular level, which is why they outperform basic soap-and-water cleaning on fresh spots.
- Rinse lightly with a barely damp cloth to lift cleaner residue, then dry the area fast with a fan, an open window, or a dehumidifier running nearby.
- Repeat if needed for a spot that soaked in before you got to it, but don’t flood the area hoping more product means more cleaning power.
Enzyme cleaners are genuinely good at neutralizing fresh uric acid and the odor that comes with it, but they’re not a time machine. They won’t touch a black stain that’s already set into the wood grain.
Skip the bleach, skip the ammonia-based sprays, and leave the steam mop in the closet. Household bleach and ammonia cleaners can strip or cloud the finish, intensify the smell instead of removing it, and worsen the discoloration you’re trying to fix — turning a one-board problem into a whole-room refinish. Steam mops push moisture into seams between boards, which is exactly the kind of hidden saturation that leads to cupping weeks later.
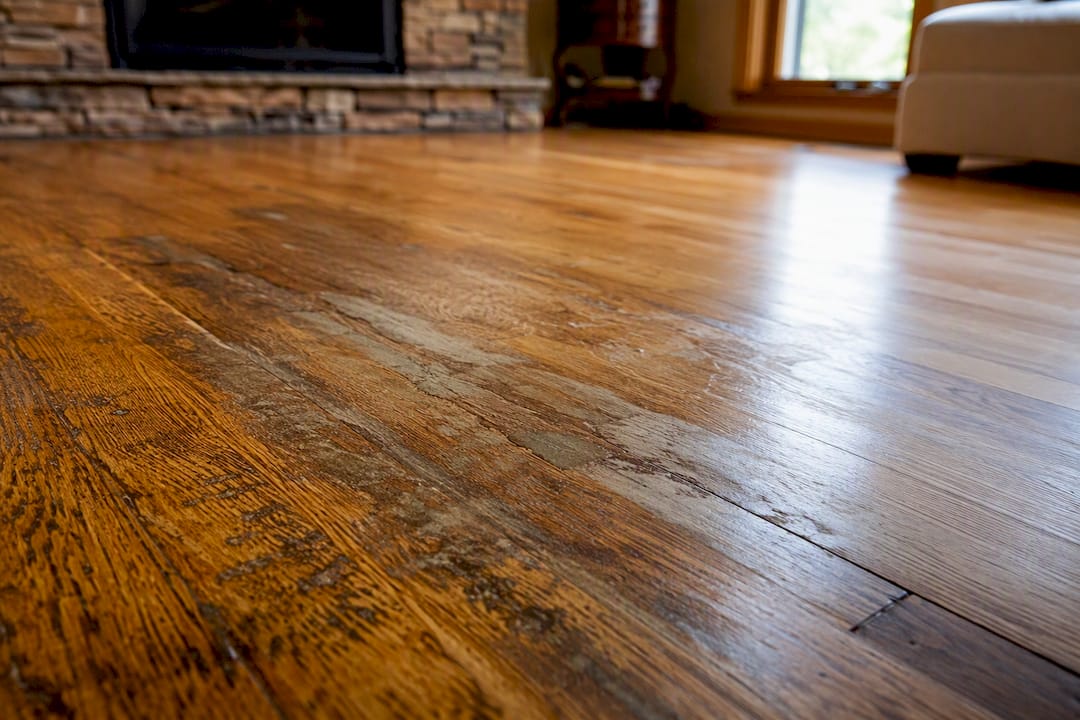
Peroxide and oxalic acid wood bleach carry a real risk of haloing, a lighter ring around the treated spot that stands out worse than the original stain. Test it on a hidden corner first, and if you’re not seeing a clean result within one application, stop and call a professional before you make it worse. Our guide on the best hardwood floor cleaner for pet urine walks through which products are actually safe for this.
Which Pet Urine Damage Repair Method Actually Works?
Not every stain needs the same fix, and picking the wrong one wastes money without solving the problem.
Surface-only cleaning and spot treatment work for accidents caught within hours, where the color hasn’t had time to travel below the finish layer. This is the cheapest fix and the one most homeowners can genuinely handle solo.
Full sand-and-refinish is the workhorse for gray and light brown staining. Sanding removes the finish and a thin layer of wood, taking the discoloration with it in most cases. Light stains commonly sand out entirely during a full refinish, which is why this is usually the first recommendation for anything beyond a fresh spot. Expect a temporary spike in smell during the sanding itself, since opening the wood grain releases whatever was trapped inside.
Wood bleach (oxalic acid) and hydrogen peroxide have a place, but a narrow one. These work on certain surface discolorations but frequently leave blotchy, uneven color that doesn’t match the surrounding boards. Specialist sources note that achieving an even look often requires bleaching the entire floor rather than just the stained patch, which adds cost and time most homeowners don’t expect going in.
Board removal and weaving-in becomes necessary once a stain has gone black, or once boards feel soft or have started to cup and warp. A skilled contractor pulls the damaged boards, sources matching stock, and weaves the new pieces into the existing pattern so the repair doesn’t stand out as an obvious patch. This is precision work. Get it wrong and you end up with a visible seam that bothers you every time you walk past it.
- If sanding leaves several scattered spots that still show faint discoloration, staining the whole floor a shade darker is often the most practical finishing move, blending remaining imperfections into an intentional new color rather than chasing each spot individually.
What Does Professional Pet Urine Damage Repair Look Like?
A reputable contractor doesn’t start sanding on day one. There’s a sequence, and skipping steps in it is how homeowners end up paying for the same repair twice.
- Mapping and diagnosis. A blacklight scan finds every affected spot, including ones invisible in daylight. A moisture meter checks how deep the saturation runs, and a test-sand on the worst area confirms whether standard sanding will clear it.
- Board replacement where needed. Any board that’s black, soft, or warped gets pulled and replaced, with new stock woven into the surrounding pattern so it reads as original flooring.
- Subfloor treatment. When urine has soaked through to the subfloor, the affected area gets treated with an odor-blocking primer, typically shellac-based, sealing in odor-causing compounds before new boards go down.
- Sanding and finishing. The full area gets sanded to a uniform level, then finished. Sanding can temporarily intensify smell because it opens the wood fibers; HEPA-filtered equipment keeps dust and odor under control while the crew works.
- Finish selection. For households with pets, many pros lean toward two-component finishes over single-component ones, since the harder cured surface stands up better to repeated cleaning and chemical exposure over years of use.
Skipping the subfloor step is the single most common reason odor comes back months later. Boards can look and smell fine the day they’re installed, but if the subfloor underneath wasn’t sealed properly, humidity swings can reactivate that smell right through the new wood.
Timelines vary by project size, but a full room with board replacement typically runs longer than a straightforward refinish. Ask any contractor you’re vetting how they handle each of these five steps. A vague answer is a red flag. You can see our own process laid out in detail on the hardwood floor repair and refinishing page.
How Can You Prevent Repeat Pet Urine Damage?
The best repair is the one you never have to make twice. A few changes go a long way toward keeping your floors out of trouble.
- Choose a harder finish. A durable, pet-friendly finish resists the chemical exposure and repeated cleaning cycles that wear down softer coatings over time. Our pet-friendly floor finish guide breaks down which options hold up best.
- Use rugs and pads strategically. Place washable rugs in spots where accidents happen most, near doors, feeding stations, and favorite napping corners, and use protective pads under furniture to reduce scratching.
- Keep training and grooming current. Regular potty breaks and trimmed nails reduce both accidents and surface scratches, which is half the battle with older or anxious pets.
- Consider LVP or tile in high-risk zones. Mudrooms, laundry areas, and spots near a dog door are reasonable places to swap hardwood for a moisture-resistant material, transitioned with a matching threshold so it still looks intentional.
- Keep enzyme cleaner on hand and inspect regularly. A ready bottle means faster response next time, and a periodic walk-through of high-traffic pet zones catches small problems before they become board-replacement problems.
Does Humidity Change How Urine Stains Absorb Into Wood?
Humidity has a real effect on both how deep a stain goes and how well it responds to treatment later. Wood is porous and hygroscopic, meaning it absorbs and releases moisture depending on the air around it. In a humid room, the wood’s cells are already swollen with moisture, so urine has an easier path into the grain and tends to spread wider before it dries.
This matters most in basements, bathrooms-adjacent hallways, and homes without central air conditioning during summer months. A spot that might have stayed a small, shallow discoloration in a dry Colorado winter can spread further and penetrate deeper in a humid stretch of August.
Humidity also affects repair outcomes after the fact. Wood that’s expanded from ambient moisture sands less predictably, and finish applied over boards that haven’t fully equalized to normal humidity levels can trap moisture underneath, leading to bubbling or premature wear. This is part of why the subfloor sealing step matters so much in a full remediation: skipping proper sealing and cure time risks the odor returning once humidity rises again, even on boards that looked perfectly clean at installation.
If your home runs humid, a dehumidifier in the affected room during the drying phase of cleanup isn’t optional. It’s the difference between a stain that stays contained and one that creeps further into surrounding boards while you’re not looking.
What Tools and Materials Do You Need for This Repair?
You don’t need a contractor’s truck to handle a fresh accident, but you do need the right basics on hand before it happens, not after.
For cleanup, keep a hardwood-safe enzyme cleaner, clean absorbent towels, a soft-bristle brush for tight seams, and a small fan or dehumidifier for fast drying. A blacklight flashlight is a cheap, genuinely useful tool for finding old stains you didn’t know were there, especially in a home you’ve just moved into.
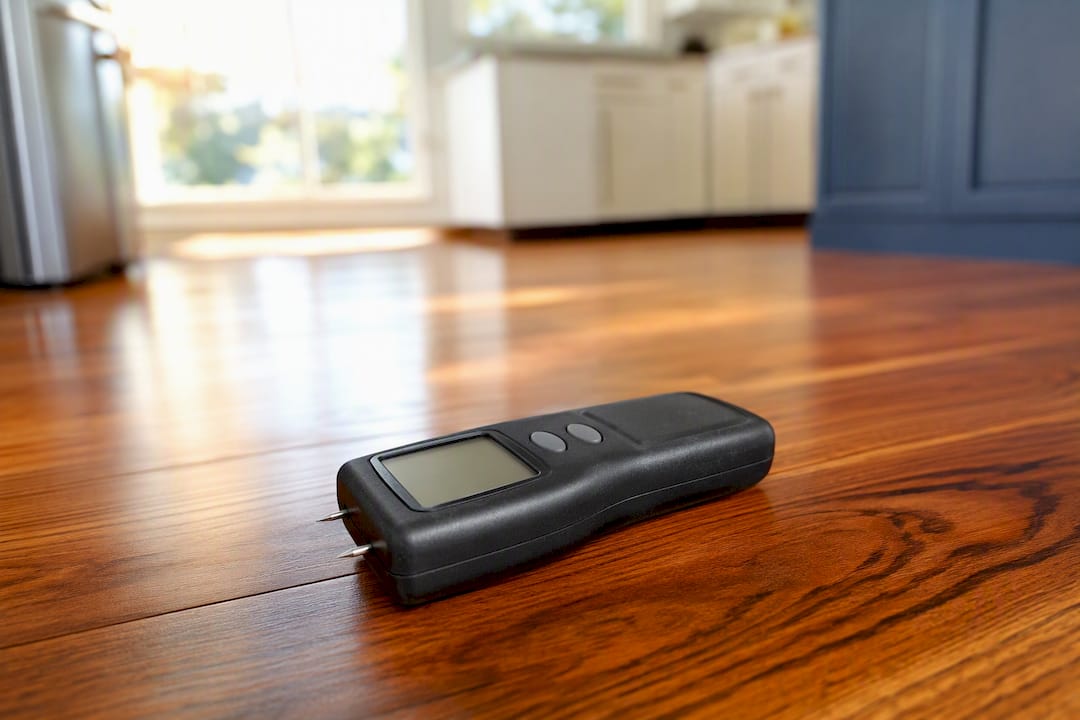
For assessment, a basic pin-type or pinless moisture meter helps you catch saturation before it becomes a visible problem, and it’s worth the modest investment if you have multiple pets or an older dog prone to accidents. Fine sandpaper in a couple of grits lets you run a legitimate test-sand on a small patch before deciding whether a full refinish is realistic.
Keep them on hand only if you’re comfortable patch-testing first, since both carry haloing risk on visible wood. Beyond that point, sanders, edgers, replacement boards, and shellac-based sealing primers are professional-grade tools. Renting them without experience usually costs more in mistakes than hiring the job out.
Key Takeaways
Gray and light stains typically respond to prompt cleanup and a full sand-and-refinish, while black stains and soft or warped boards call for board replacement and subfloor odor sealing.
| Point | Details |
|---|---|
| Color predicts fixability | Gray or light brown stains often sand out; black stains usually mean the wood has to come out. |
| Test before you commit | A small test-sand and a moisture-meter reading tell you more than guessing from a photo ever will. |
| Speed beats strength | Blotting fast and using an enzyme cleaner matters more than scrubbing hard or using stronger chemicals. |
| Subfloor sealing prevents comebacks | Skipping the odor-blocking primer step on saturated subfloor risks the smell returning once humidity rises. |
| Professional sequencing matters | Jrhardwoodfloorrefinishingandcleaning follows mapping, test-sanding, board replacement, subfloor sealing, and finishing, in that order, for lasting results. |
Why Test Sanding Beats Guesswork Every Time
Most articles on this topic tell you to “assess the damage” and leave it there. That’s not advice, that’s a shrug. The one thing that actually separates a homeowner who saves money from one who overpays is willingness to do a real test, not an eyeball guess.
Here’s what the evidence actually supports: color is a decent first filter, but it’s not the final word. We’ve seen boards that looked merely gray on top but had gone soft underneath from a slow leak nobody noticed for weeks. A five-minute test-sand and a moisture reading would have caught that before a single dollar got spent on a refinish that was doomed from the start.
The conventional wisdom oversells DIY bleach treatments and undersells subfloor sealing. Bleaching gets attention because it feels like a fix you can do yourself. Sealing the subfloor properly is boring, invisible once it’s done, and the actual reason your odor problem doesn’t come back next August.
— J.R.
Get a Straight Answer on Your Floors, Not Just a Guess
If you’ve read this far, you already know the honest answer to “can this be fixed” depends on depth, not just color, and that’s exactly the kind of judgment call better made over the phone with someone who’s seen a thousand of these stains than by trial and error with a rented sander. Jrhardwoodfloorrefinishingandcleaning gives Denver Metro homeowners a free over-the-phone quote based on a quick description and a few photos, no site visit required just to find out whether you’re looking at a straightforward refinish or a board-replacement job.
We use eco-friendly products and premium finishes suited to pet households, and our team walks you through the real trade-offs, sand-and-refinish, board weaving, or subfloor sealing, before any work starts. If you’re weighing whether to tackle this yourself or bring in a pro, our breakdown of hardwood floor refinishing DIY versus professional service is a useful next stop. When you’re ready, call or send photos of the affected area and we’ll give you a clear quote and a realistic timeline, no pressure, no guesswork on our end either.
Sources
- Pet Stains on Hardwood Floors: Can They Be Refinished Away?
- Pet Urine Stains on Hardwood — Can Refinishing Fix Them? | OC Flooring
- Preventing And Treating Urine Damage To Hardwood Floors: Complete Guide For Homeowners
- How To Get Pet Stains Out of Oak – Fine Homebuilding