 Skip to content
Most parquet floors can be restored. The real question is which route your floor needs: a screen-and-recoat, which is little more than a light buff and a fresh topcoat, or a full sand-and-refinish that strips the surface down and starts over. If your blocks lie flat, feel tight underfoot, and the only real problem is a dull, scratched finish, screen-and-recoat is your answer. If tiles rock, sound hollow when tapped, show water staining, or the wear layer is too thin to sand safely, you’re looking at full restoration, possible block replacement, and likely a professional.
- Screen-and-recoat: low cost, often a one-day turnaround, no structural fixes.
- Full sand-and-refinish: higher cost, multiple days, fixes deep damage and resets the finish completely.
Screen-and-recoat runs roughly $1.80 to $3 per square foot, while a full sand-and-refinish with oil-modified polyurethane lands closer to $5 to $7 per square foot, with water-based finishes running $6.50 to $9. That gap is exactly why the inspection step below matters before you commit to either one.
Key Takeaways
Screen-and-recoat suits stable, finish-worn parquet, while loose tiles, thin veneers, or water damage call for a full sand-and-refinish or professional help.
| Point | Details |
|---|---|
| Inspect before you decide | Check wear-layer depth, tap for hollow spots, and walk the floor before choosing a method. |
| Match the tool to parquet | Use planetary or random-orbit sanders, never drum sanders, and sand diagonal to the pattern. |
| Follow the full grit progression | Move from 36 to 120 grit in steps, vacuuming between passes to avoid scratch-through. |
| Budget realistically | Screen-and-recoat runs $1.80 to $3 per square foot; full refinishing runs $5 to $9. |
| Call a pro for complex cases | Jrhardwoodfloorrefinishingandcleaning handles thin veneers, loose tiles, and UV-curable finishing across Colorado. |
Table of Contents
- How to Inspect Your Parquet Before Refinishing
- Screen-and-Recoat vs. Full Sand-and-Refinish: Which Do You Need?
- How to Sand and Refinish Parquet Floors, Step by Step
- How Do You Screen and Recoat a Parquet Floor?
- Common Parquet Refinishing Mistakes to Avoid
- When Should You Hire a Professional for Parquet Refinishing?
- What Actually Matters Most in Parquet Refinishing
- Get a Professional Parquet Refinish from Jrhardwoodfloorrefinishingandcleaning
- Frequently Asked Questions
- Sources
How to Inspect Your Parquet Before Refinishing
Before you buy a single sheet of sandpaper, spend twenty minutes crawling around your floor. What you find here decides everything that follows.
- Identify the floor type. Pull a heat register cover or check under a threshold. Solid parquet blocks are wood all the way through; engineered parquet shows a thin veneer over plywood layers; parquet-look vinyl has a uniform printed pattern and a foam or felt backing.
- Check the wear layer. In a closet or under trim, look at how much finished wood sits above the tongue-and-groove or veneer line. This single check tells you whether sanding is even possible, since engineered veneers thinner than about 2 millimeters usually can’t be sanded safely without cutting straight through to the substrate.
- Tap and walk the floor. Tap several tiles with a knuckle. A hollow, drummy sound means the adhesive has failed underneath. Walk slowly across the whole room and note any spot that flexes, squeaks, or feels soft.
- Look for water stains and dark rings. These often mean adhesive breakdown or moisture damage below the surface, not just a cosmetic mark.
- Flat, tight, finish-only wear → screen-and-recoat
- A handful of loose tiles, otherwise sound → localized repair plus recoat or refinish
- Widespread hollow sound, water damage, or a wear layer too thin to sand → full restoration, often with a professional
Screen-and-Recoat vs. Full Sand-and-Refinish: Which Do You Need?
Screen-and-recoat means mechanically abrading the existing finish with a fine screen or pad, cleaning it thoroughly, and applying fresh topcoats so the new finish bonds to the old one. It’s the floor equivalent of a light exfoliation rather than a deep peel, and it works well when blocks are stable and the damage is limited to the finish itself. A full sand-and-refinish strips wood down past scratches, stains, and old finish layers entirely, which is the only way to fix deep gouges, cupping, or years of accumulated grime baked into the grain.
Cost and downtime track that difference closely. Screen-and-recoat often wraps in a single day at $1.80 to $3 per square foot. Full refinishing stretches across several days and $5 to $9 per square foot, and that range can climb fast once repairs surface mid-project. Loose or damaged tiles discovered once sanding begins are one of the biggest drivers of surprise cost on parquet jobs specifically.
- Choose screen-and-recoat if: blocks are tight, no hollow spots, finish is dull or lightly scratched.
- Choose full sand-and-refinish if: you find gouges, deep stains, uneven color, or a mix of loose tiles alongside worn finish.
- Choose replacement or a pro consult if: more than a small percentage of tiles are loose, hollow, or water-damaged.
How to Sand and Refinish Parquet Floors, Step by Step
A full refinish rewards patience and punishes shortcuts, especially on parquet, where the grain direction flips every few inches.
1. Prep the room. Clear furniture, tape off doorways with plastic sheeting, and cover HVAC vents and returns so dust doesn’t spread through the house. Wear a proper respirator, not a paper dust mask. Old finishes and adhesives can carry fine particulates you don’t want in your lungs.
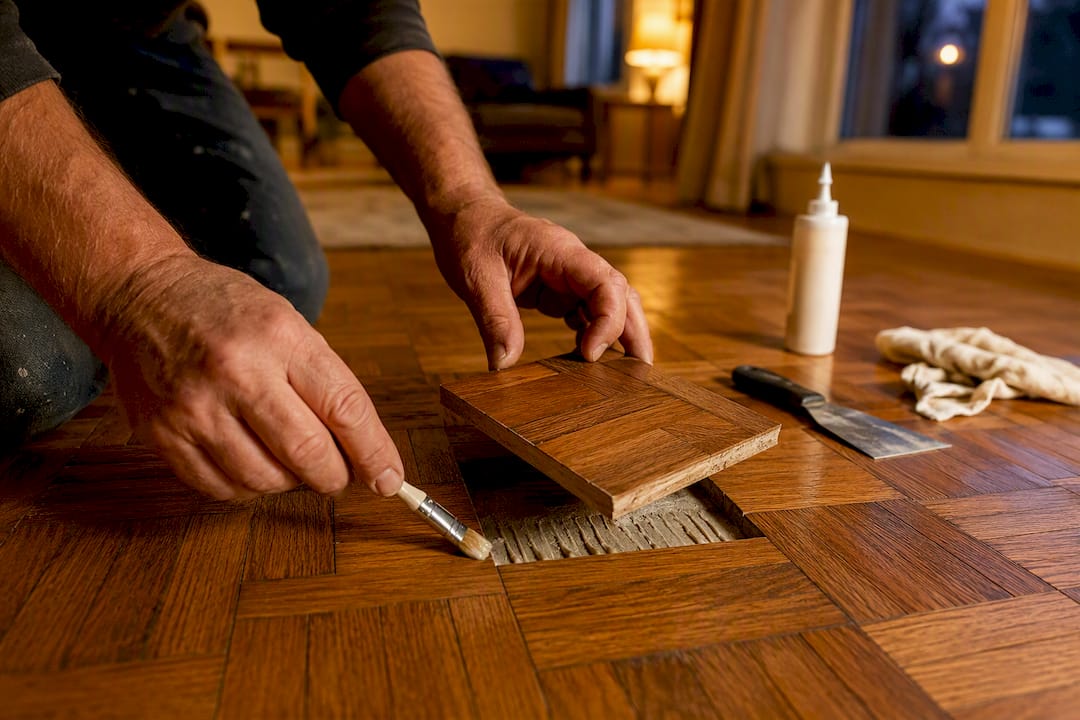
2. Handle repairs before you sand. Re-glue any loose blocks and let the adhesive cure fully. If you find crumbling black mastic under a lifted tile, stop and treat it with caution. Older bitumen-based adhesives sometimes contain materials that need professional handling. Source replacement blocks ahead of time if any tiles are cracked beyond saving.
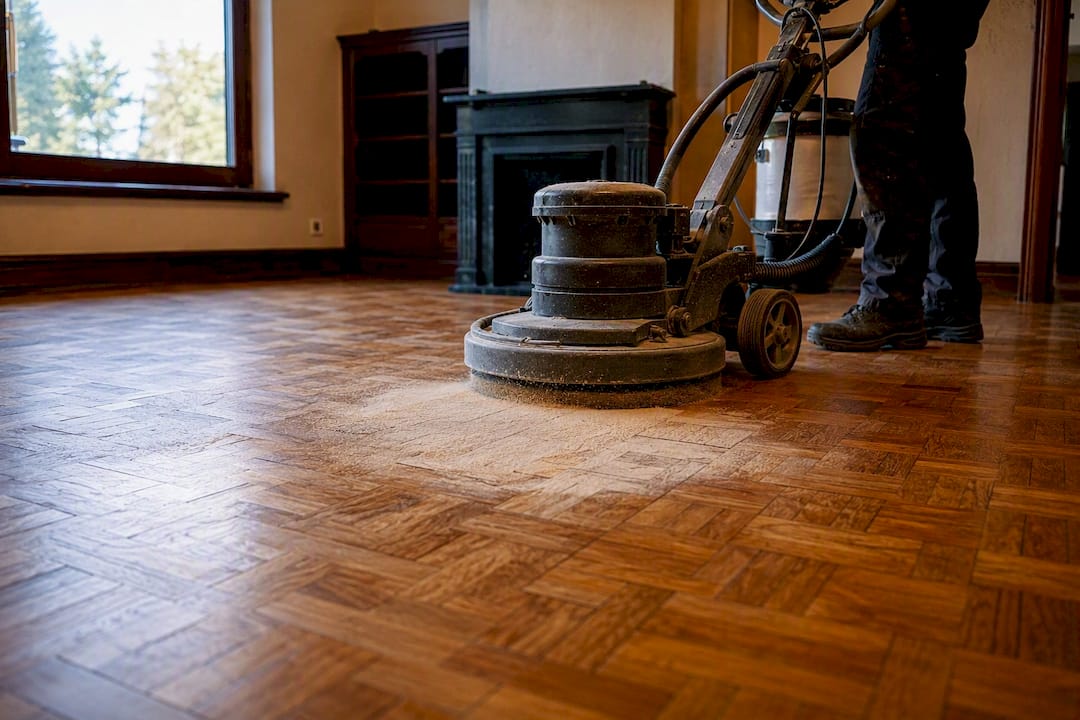
3. Sand with the right tool. Planetary or random-orbit sanders are the standard for parquet; drum sanders are built for long-grain plank flooring and will tear out fibers the moment the grain direction changes under a parquet block. Work on a slight diagonal to the tile pattern rather than dead straight, which reduces cross-grain scratching.
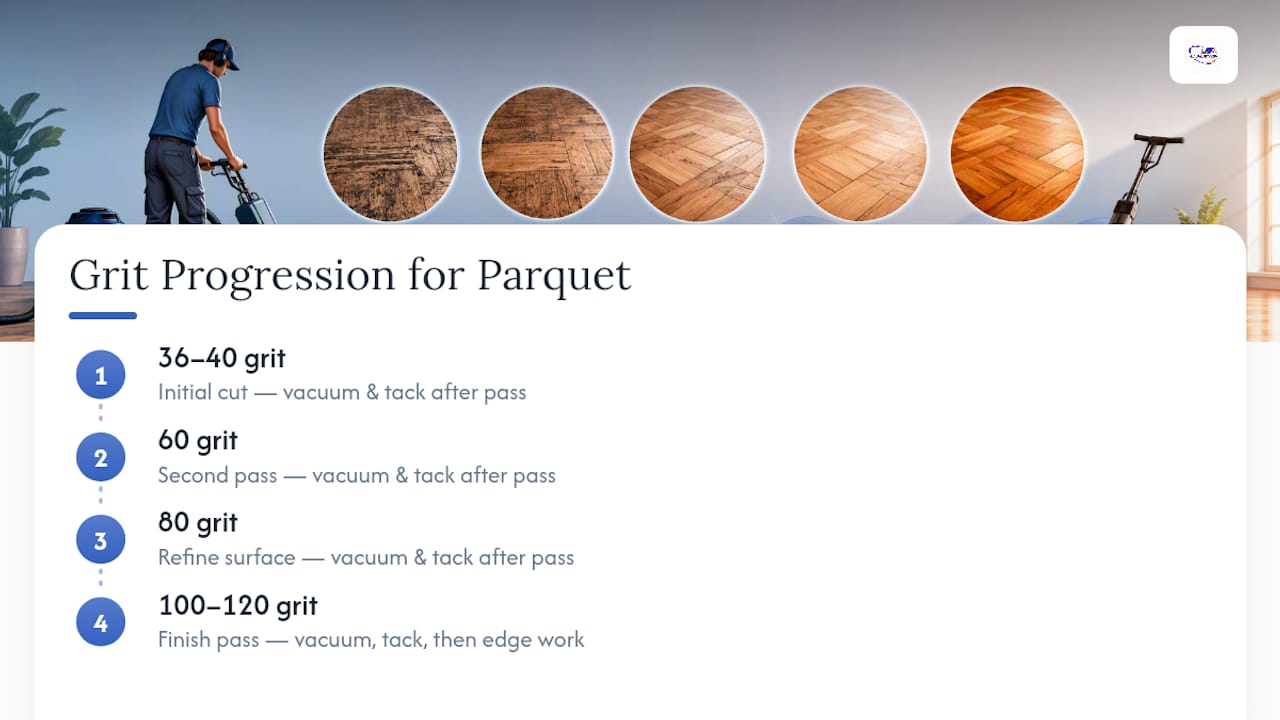
4. Follow a real grit progression. Start around 36 to 40 grit for the initial cut, move to 60, then 80, then finish at 100 to 120. Vacuum and tack the floor between every pass, since leftover grit from a coarser pass will scratch straight through your finer work.
5. Handle edges separately. Use an edger along the perimeter and hand-sand tight corners. Blend edger passes carefully into the field to avoid visible lap marks where the two meet.
6. Choose and apply your finish. Water-based two-component polyurethane dries fast and stays clear, which suits busy parquet patterns well. Oil-modified polyurethane ambers over time and adds warmth. Hard-wax oil penetrates rather than sitting on top, giving a more natural look with easier spot repairs later. Most finishes need two to three coats with light screening between them.
Pro Tip: Test your finish choice on a scrap block or a hidden closet section first. Parquet’s small repeating pattern can look busier or darker than you expect once a full coat of amber-toned poly goes on.
Plan for two to four days from first sand to final cure on an average room, and expect full-size projects in the mid-thousands of dollars once repairs are factored in.
How Do You Screen and Recoat a Parquet Floor?
When your inspection says the blocks are sound and the finish is just tired, this is the faster, cheaper path, and it’s a genuinely good maintenance habit you can repeat over the years without eating into your floor’s sanding allowance.
- Deep clean first. Strip away wax, oil, and grime with a cleaner made for your finish type. Anything left behind will show up as a cloudy patch under the new coat.
- Screen the surface. Run a buffer with a maroon or similar abrasive pad across the entire floor to scuff the old finish and give the new coat something to grip.
- Vacuum and tack thoroughly. Dust left in the room settles right back into wet finish.
- Apply an adhesion promoter if the old finish is uncertain. This step matters more on parquet than plank, since older parquet finishes vary block to block.
- Apply one to three coats of topcoat, letting each cure per the manufacturer’s guidance before the next.
Screening won’t fix deep scratches, discoloration, or a block that’s already lifting. If you screen and the topcoat still shows shadows or texture through it, that’s your sign the floor needs a full sand instead.
Common Parquet Refinishing Mistakes to Avoid
Parquet punishes shortcuts more than plank flooring does, and some of these mistakes can’t be undone without buying new wood.
- Renting a drum sander. Drum sanders and skipped grit steps are the most common causes of visible tear-out and swirl marks on parquet specifically.
- Sanding an engineered floor without checking the veneer. Sand through a 1.5mm wear layer and you’ve exposed plywood, permanently.
- Finishing in high humidity. Keep relative humidity under 65% while applying and curing finish, or you risk a hazy, slow-curing coat.
- Rushing between grits. Each skipped step leaves scratches the next grit can’t fully erase.
Pro Tip: Lap marks from uneven finish application usually buff out with a light screening pass and a fresh, evenly applied coat. Deep gouges and adhesive failure won’t. If you’re staring at either, that’s the moment to call a professional rather than reach for more sandpaper.
When Should You Hire a Professional for Parquet Refinishing?
Some parquet jobs are genuinely DIY-friendly. Others aren’t, and knowing the difference upfront saves you from an expensive mistake. Hire a pro when you’re dealing with a thin engineered veneer, suspected old bitumen adhesive, more than a few loose or hollow tiles, a tight deadline, or a desire for a same-day, UV-curable finish that a homeowner setup simply can’t apply.
Jrhardwoodfloorrefinishingandcleaning brings dust-contained equipment, Instant UV-curable finishing, eco-friendly products, and free over-the-phone quotes built from your photos and description, serving homes and businesses across the Denver Metro Area and nearby Colorado communities.
Before hiring anyone for a parquet job, ask:
- Have you refinished parquet specifically, not just plank flooring?
- What sanding equipment do you use, and how do you contain dust?
- Are you insured for on-site work?
- What finish options do you offer, and what’s the realistic timeline?
- Do you provide a warranty on the finished work?
What Actually Matters Most in Parquet Refinishing
The advice you’ll find most often treats parquet like plank flooring with a fancier pattern, and that’s where a lot of DIY jobs go sideways. Plank flooring forgives a drum sander running slightly off true. Parquet doesn’t, because the grain direction changes every few inches, and a machine built for long, straight runs will tear right through it.
What gets underweighted in most guides is the inspection step. Homeowners want to jump straight to sanding technique, but the wear-layer check and the tap test decide whether sanding should happen at all. Skip that, and you can do everything else perfectly and still ruin a thin engineered floor.
My honest read: grit progression and the right sander matter, but they’re the second decision, not the first. Get the assessment right, be honest about what a screen-and-recoat can and can’t fix, and don’t treat a rental drum sander as a budget shortcut on a floor pattern it was never designed for. When the inspection turns up loose adhesive, hollow tiles, or a veneer you can’t confidently measure, that’s the point to bring in someone who does this daily rather than push forward on hope.
Get a Professional Parquet Refinish from Jrhardwoodfloorrefinishingandcleaning
If your inspection turned up loose tiles, a thin veneer, or old adhesive you’re not confident handling, Jrhardwoodfloorrefinishingandcleaning gives you a faster, more predictable path than tackling it solo with rented gear. We serve homeowners across the Denver Metro Area and nearby Colorado communities with full sanding and restoration, screen-and-recoat, and Instant UV-curable finishing that cures in hours instead of days.

Every quote starts with a free over-the-phone estimate based on your description and photos, so you know your options before committing to either a light refresh or a full sand-and-refinish. Our team uses eco-friendly products and premium finishes, and we’re transparent about which jobs genuinely need a DIY vs. professional approach. If your parquet matches any of the warning signs above, call us for a quote and we’ll walk you through the right fix for your floor.
Frequently Asked Questions
Can all parquet floors be refinished?
Most solid parquet can be refinished multiple times if the wood above the tongue is thick enough. Engineered parquet with a wear layer under roughly 2 millimeters usually can’t be sanded safely and needs screening or replacement instead.
How much does parquet floor refinishing cost?
Screen-and-recoat typically runs $1.80 to $3 per square foot. A full sand-and-refinish with oil-modified poly runs $5 to $7, while water-based finishes run $6.50 to $9, according to industry pricing data. Repairs found mid-project can push totals higher.
What sander should I use on parquet?
Planetary or random-orbit sanders. Drum sanders are built for plank flooring and commonly tear parquet fibers where the grain direction changes between blocks.
Can I refinish pine floors after removing carpet?
Yes, in most cases. Pull staples and tack strips first, check for water stains or soft spots, then follow the same grit progression used for other softwoods, starting coarser than you would on oak since pine sands faster and shows swirl marks more easily.
How long does a full parquet refinish take?
Plan for two to four days for an average room, covering prep, repairs, sanding, and multiple finish coats with cure time between them.
What’s the difference between screen-and-recoat and full refinishing?
Screen-and-recoat abrades the existing finish and adds new topcoats without removing wood. It restores shine and adhesion but won’t fix deep gouges or loose tiles, which require a full sand-and-refinish.
Sources
Technical grit progressions, wear-layer thresholds, and cost figures throughout this guide draw on trade write-ups covering parquet refinishing methods, no-sand restoration, and engineered veneer limits. For sanding-tool depth, see this grit sandpaper guide.
- How to restore hardwood floors without sanding – Homes & Gardens
- Can parquet flooring be refinished – 7braci