 Skip to content
Yes, you can refinish hardwood stairs, and most homeowners with solid wood treads are good candidates for a DIY project. If your stairs are engineered hardwood with a thin veneer, though, sanding could wear straight through the top layer, and replacement or a professional overlay is the safer route.
A full sand-and-refinish job demands patience more than skill. You’ll need a random-orbit sander, an edger for the corners, a shop vacuum with a HEPA filter, stain (optional), polyurethane, and real respiratory protection. The two big decisions up front: are you sanding down to bare wood, or is a screen-and-recoat or chemical stripper enough?
Quick DIY cost snapshot:
- Materials only, basic refinish: roughly $25–$75 per step, including sandpaper, stain, and finish
- Professional job, 12 to 17 steps: $325 to $1,265, with a broader market average near $795
Refinishing isn’t an option when the wear layer is sanded past its limit, treads are cracked or rotted through, or the staircase has already been sanded two or three times before. In those cases, replacement or a tread overlay is the honest answer, not another round of sanding.
Key Takeaways
Solid hardwood stairs can almost always be refinished successfully with the right prep, grit progression, and cure time, while engineered treads with a thin veneer often need replacement instead.
| Point | Details |
|---|---|
| Check thickness before sanding | Solid wood with at least 3/16 inch above the tongue and groove is a good refinishing candidate. |
| Fix structural issues first | Tighten treads, chase squeaks, and replace rot before any sanding begins. |
| Budget realistically | DIY materials run about $25 to $75 per step, professional jobs average around $795. |
| Contain the dust | Stairwells pull sanding dust through the whole house, so seal doorways and use a HEPA vacuum. |
| Call a pro for complexity | Jrhardwoodfloorrefinishingandcleaning handles curved staircases, dustless sanding, and finish-type conversions that go beyond typical DIY scope. |
Table of Contents
- When Should You Refinish Wood Stairs Instead of Replacing Them?
- What Repairs Should You Make Before Refinishing Stairs?
- How Do You Refinish Hardwood Stairs Step by Step?
- Can You Refinish Stairs Without Sanding?
- Which Stain and Finish Should You Use on Stairs?
- How Much Does It Cost to Refinish Hardwood Stairs?
- Should You DIY Your Stairs or Hire a Professional?
- Ready to Skip the Sawdust? Here’s How J.R. Hardwood Can Help
- Frequently Asked Questions
- Sources
When Should You Refinish Wood Stairs Instead of Replacing Them?
Solid hardwood treads with surface-level damage are almost always worth refinishing. Look for scuffed finish, shallow scratches, fading from sunlight, or a general dull, tired look with no cracking or soft spots underfoot. If the wood still has at least 3/16 of an inch of usable material above the tongue and groove, a sander can bring it back to life more than once over the years.
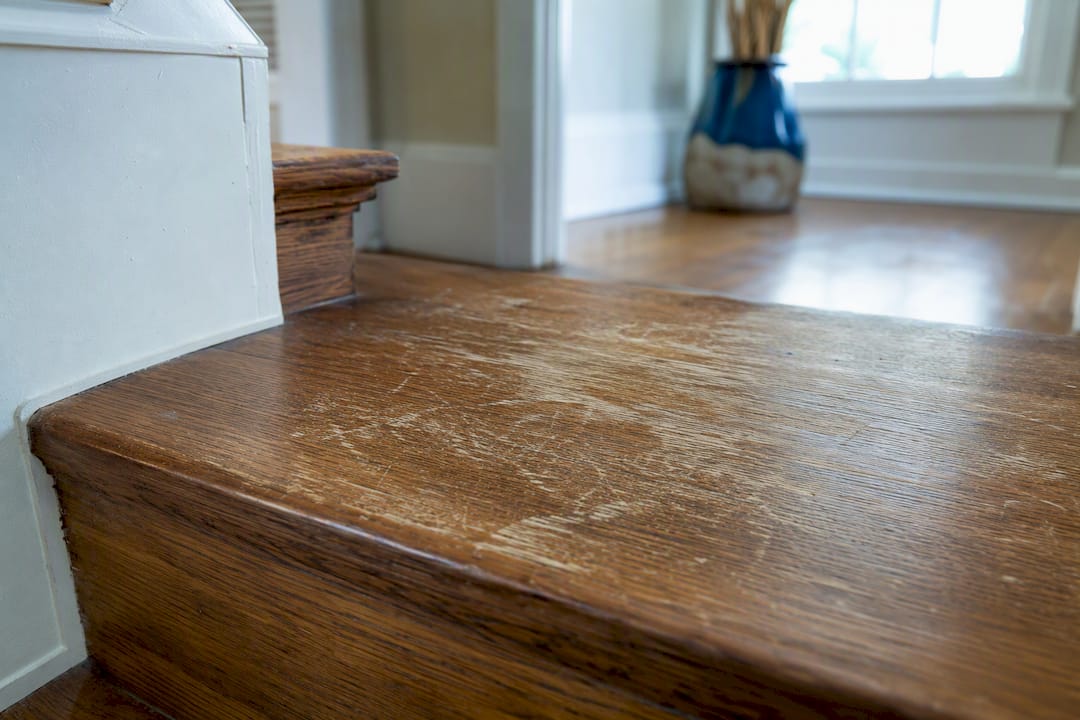
Replacement becomes the smarter call when treads show delamination (layers separating, common in engineered wood), deep cracks running with the grain, water staining that’s turned the wood gray or spongy, or any give when you press down near the nosing. Structural movement, not cosmetic wear, is the deciding factor.
Run this three-minute check before committing to a plan:
- Tap test: knock on a few treads. A hollow or loose sound suggests movement underneath that needs repair first.
- Thickness check: peek at the tread edge where it meets the riser, or check an exposed spot in a closet. Anything under 3/16 inch of solid wood above the groove is a poor sanding candidate.
- Visual scan: cracks, cupping, or dark water stains mean you’re looking at repair or replacement, not a simple refinish.
Pro Tip: Can’t tell if you have solid or engineered hardwood without pulling up trim? Check the edge grain at a stair nosing. Solid wood shows one continuous grain pattern through the whole thickness, while engineered treads reveal thin, stacked layers, almost like plywood, when you look closely at the cut edge.
What Repairs Should You Make Before Refinishing Stairs?
Skipping repairs before you sand is the single most common mistake we see, and it’s the reason so many DIY refinishes look great for six months and then start squeaking or showing finish failure at the seams.
Work through this checklist first:
- Tighten loose treads. Drive trim-head screws through the tread into the stringer, or use construction adhesive with clamps overnight if a tread has visible gap or play.
- Chase down squeaks. Squeaks usually come from a tread rubbing against a riser or stringer. Access from underneath if you have an open staircase or basement stairwell, and add screws or shims to close the gap. Expect an afternoon of work for a typical flight.
- Replace anything rotted. Water damage near an exterior door or a leaky window above the stairs sometimes rots a tread edge. If a carpenter needs to fabricate a matching replacement piece, that’s the point to call one in rather than improvising with filler.
- Pull carpet, runners, and staples. Every staple needs to come out before sanding, since one missed staple can shred a sanding belt or fling metal at your face.
- Mask and seal the stairwell. Stairwells pull dust upward through the whole house like a chimney, so seal off doorways with plastic sheeting and tape, and protect handrails and walls with drop cloths.
You’ll want a detail or palm sander for tight spots, a pry bar and screwdrivers for repairs, plastic sheeting for dust barriers, and a shop vacuum with a HEPA filter.
Pro Tip: Working on stairs means working at odd angles on a surface with a fall hazard built in. Wear non-slip shoes, keep a helper nearby if you’re using power tools near the edge of a landing, and if you’re using a chemical stripper, crack a window and run a fan. Solvent fumes concentrate fast in an enclosed stairwell.
How Do You Refinish Hardwood Stairs Step by Step?
Once repairs are done and the space is sealed off, the process follows a clear sequence: strip old coverings, sand in stages from coarse to fine, hand-detail the tight spots, clean thoroughly, stain if you want a color change, then build up your topcoat. Here’s how each stage actually plays out.
Tools and materials you’ll need
- Floor edger (rental from most hardware stores) for tread edges and riser corners
- Random-orbit or palm sander for the open tread surfaces
- Detail sanding blocks or an oscillating multi-tool for balusters and nosing profiles
- HEPA-filter shop vacuum and tack cloths for cleanup between every stage
- Foam applicators, natural-bristle brushes, or a small roller for stain and topcoat
- Respirator rated for fine dust (and organic vapors if using an oil-based product), safety glasses, and hearing protection
The sanding sequence
Stairs need a coarse-to-fine grit progression just like floors, but the grit you start with depends on what’s already on the wood.
Run the sander with the grain on tread surfaces, and never let it sit in one spot; a stalled orbital sander can gouge a divot you’ll be fighting to hide for the rest of the project. The edger handles the strip along the riser and the front edge of each tread, but the nosing itself, that rounded front lip, has to be hand-sanded. Power tools tend to flatten or round over that profile in ways that look wrong once you step back.
- Machine-sand the flat centers of each tread with your coarse grit, then repeat with mid and fine grits.
- Run the edger along riser bases and tread edges at each grit stage.
- Hand-sand around every baluster, the underside of the handrail return, and the nosing curve using a sanding block or folded sandpaper.
- Vacuum thoroughly with the HEPA vacuum, then wipe every surface with a tack cloth before moving to the next grit.
- After the final grit, vacuum and tack-cloth again, this time doing a second pass to catch dust hiding in corners.
Skipping the vacuum-and-tack step between grits is how scratches from a coarser grit end up trapped under your finish coat.
Staining and topcoat application
If you’re staining, test it on a hidden step first, like the bottom tread against the wall, since stair treads often see more foot traffic and light exposure than the rest of your floor, and color can read differently. Blotch-prone species like maple and birch benefit from a pre-stain conditioner; skip it and you’ll likely get uneven, splotchy color. Wipe stain on with a rag or applicator, let it sit two to five minutes depending on the product, then wipe off the excess with the grain.
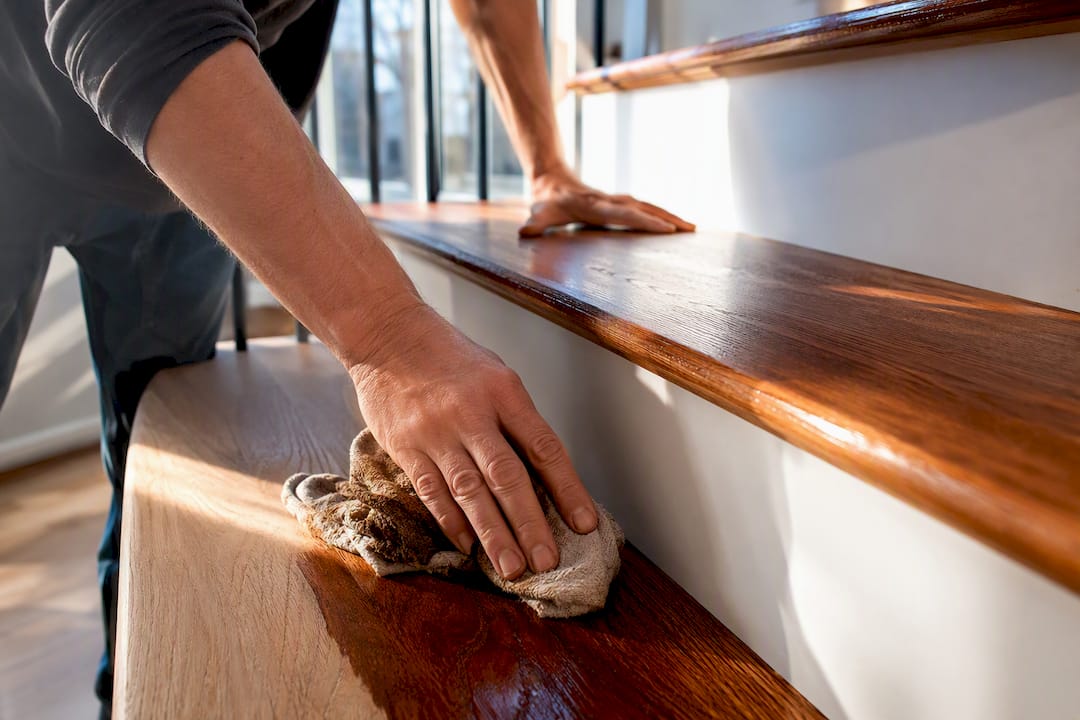
Polyurethane goes on in two to three coats, lightly scuffing with fine sandpaper (220 grit or higher) between coats and tack-clothing again before each new layer. Oil-based polyurethane typically needs overnight drying between coats and adds a warm amber tone as it ages, while water-based poly dries to the touch in a couple of hours and stays clear. Conversion varnish and UV-curable systems cure faster and harder still, which is part of why professional crews favor them on high-traffic commercial stairs, though they typically require specialized application equipment.
For timing on a single flight, plan on staggering work so you can still use the stairs at night if needed: sand one day, stain and apply the first coat the next, then let subsequent coats and cure time run over three to five more days depending on the product; for advice on choosing the right finish and sheen, see What is the Best Sheen for Interior Doors? | One Day Doors & Closets. A full DIY project, repairs through final cure, usually spans five to seven calendar days even though the hands-on labor is closer to two full days of work.
Can You Refinish Stairs Without Sanding?
Full sanding isn’t always necessary. Three alternatives work in specific situations, though each comes with trade-offs worth understanding before you skip the sander.
Screen-and-recoat buffs the existing finish lightly and adds a fresh topcoat without removing the old finish. It’s fast, low-odor, and inexpensive, but it only works if the existing finish is in good shape and free of wax buildup, and it won’t fix color unevenness or deep scratches.
Chemical stripping with a product like Hi-Speed Ready Strip dissolves old finish layers without a sander, which is useful for detailed millwork or when dust containment isn’t practical. The trade-off is fumes and ventilation requirements, plus the mess of scraping softened finish off dozens of small surfaces.
Bonding primer and paint covers stairs entirely rather than restoring the wood grain look, a reasonable choice for stairs headed toward a painted finish anyway.
Tread overlays (retreads) cap existing treads with new material, which sidesteps sanding altogether and works well when the substrate below is structurally sound but cosmetically far gone.
| Method | Best for | Watch out for |
|---|---|---|
| Screen and recoat | Sound finish, minor dulling | Won’t fix scratches or color issues |
| Chemical stripper | Detailed trim, dust-sensitive homes | Fumes, ventilation, disposal rules |
| Bonding primer + paint | Stairs you plan to paint, not stain | Permanent look change |
| Tread overlay | Structurally sound but heavily worn treads | Adds height, may need transition work |
Call a professional when you’re dealing with old multiple-coat finishes of unknown composition (possible lead paint in pre-1978 homes), curved staircases or complex landings, or when you want to switch from an oil-based to a water-based system, since that conversion needs specific prep to avoid adhesion failure. As a rule, only reach for an alternative to full sanding when the substrate is sound, there’s no deep damage, and the current finish is firmly bonded rather than flaking. Our screen and recoat service covers exactly this scenario for Denver-area homeowners who don’t need a full strip-down.
Which Stain and Finish Should You Use on Stairs?
Your topcoat choice affects durability, color, and how soon you can walk on the stairs again, so it’s worth understanding the four main families before you buy anything.
Water-based polyurethane dries fast, has low odor, and stays crystal clear over time instead of yellowing, which matters if you have a light or gray-toned stain. Oil-based polyurethane takes longer to cure but builds a warm amber tone that many homeowners love on traditional oak stairs, and it’s historically been the more affordable choice per gallon. Conversion varnish is a two-part, industrial-strength finish that resists scuffs and chemicals better than either standard poly, a common pick for busy stairwells in multi-family buildings. UV-curable finishes cure almost instantly under UV light rather than air-drying, which is why professional crews use them to get a staircase back in service the same day.
Brands like Minwax and Varathane dominate the DIY shelf for both stain and oil-based poly, while Bona is a favorite for water-based systems that need to match an adjacent floor finished with the same product. For sheen, satin hides everyday scuffs better than gloss on a high-traffic stairway, and adding a traction additive or a stair runner on the treads cuts slip risk considerably, something worth weighing carefully if you have young kids or aging family members in the house.
How Much Does It Cost to Refinish Hardwood Stairs?
Professional stair refinishing for a standard flight runs $325 to $1,265 nationally, with a broader average landing around $795 once you factor in complexity, home age, and wood condition. On a per-square-foot basis, Homewyse puts a basic mid-range job at roughly $10.94 to $13.32 per square foot, though that figure shifts with region and any request for premium finishes.
These DIY figures come from the $25 to $75 per step range for materials and basic labor on smaller local projects. To budget your own job, multiply your step count by that range for a materials-only estimate, then compare it against a pro quote that folds in labor, prep, dust containment, and cleanup, which is where most of the professional price gap actually lives.
Expect 12 to 16 hours of active hands-on work for a DIY flight, spread across five to seven calendar days once you account for dry and cure time between coats. A professional crew often completes the same flight in two to three working days total, largely because stairs are far more labor-intensive per square foot than open floor space, thanks to nosing, risers, and spindles that all need hand attention.
Costs climb with wider treads, multiple landings, banister and rail refinishing added to the scope, structural repairs discovered mid-project, complex stain matching to an adjacent room, or a request for dustless sanding equipment.
Should You DIY Your Stairs or Hire a Professional?
Hire a professional when your staircase has curved sections, multiple landings, ornate balusters, or when you need the job done on a tight timeline without living in a construction zone for a week. Dustless sanding equipment, historic stain matching, and finish-type conversions (oil to water-based) are also strong signals to bring in a pro rather than experiment on stairs you use every day.
Ask any refinisher you’re considering these questions before signing anything:
- What dust containment equipment do you use, and is it truly dustless?
- What edger and sander brands do you run, and how do you handle tight corners?
- Which finish brands do you use, and do you offer both oil and water-based options?
- What warranty or guarantee comes with the finish?
- Can you provide references or photos from a similar staircase project?
- What’s included in cleanup, and is it itemized in the quote?
Watch for red flags: a bid given with no site visit, no proof of insurance, reluctance to share references, pressure to sign before you’ve seen a written scope, or a warranty that’s vague about what it actually covers.
A solid contract should spell out the exact scope of work, start and end dates, a clear payment schedule tied to milestones, cleanup responsibilities, and what happens if you’re unhappy with the result. Our DIY vs. professional comparison walks through these trade-offs in more depth if you’re still on the fence.
Why Trust This Guide? How J.R. Hardwood Approaches Stair Refinishing
We’re a locally owned floor care specialist serving the Denver Metro Area, Parker, Castle Rock, Boulder, and Colorado Springs, with hands-on experience across full sanding and restoration, screen and recoat, wax removal, and Instant UV-curable finishing on staircases just like the one you’re standing on right now.
Here’s how we work with homeowners:
- Free over-the-phone quotes based on your description and a few photos, no obligation
- Clear scheduling so you know exactly when the crew arrives and when you’ll get your stairs back
- Eco-friendly products and premium finishes that protect the wood while keeping your home livable during the job
- Documented process videos on our YouTube channel and 5-star reviews across multiple platforms from real Colorado homeowners
We’d rather walk you through what your specific stairs need than push a one-size-fits-all package.
A Practical Tip From J.R.
Every flight we’ve refinished taught us something, and the biggest lesson is this: stagger your topcoat schedule so you can still use half the staircase at night. Finish one side of alternating treads first, let it cure, then do the rest, using painter’s tape to mark safe steps. It adds a day, but it keeps a household functional instead of trapped upstairs.
Ready to Skip the Sawdust? Here’s How J.R. Hardwood Can Help
If reading through the grit charts, cure times, and dust containment steps above has you leaning toward hiring a pro instead of renting an edger for a weekend, that’s a completely reasonable call, especially on a staircase with landings, curves, or a finish you want matched to the rest of your home.

Jrhardwoodfloorrefinishingandcleaning handles the parts of stair refinishing that give DIYers the most trouble: full sanding and restoration, Instant UV-curable finishing that gets your stairs back in service fast, screen and recoat for finishes that just need a refresh, and complete installation if replacement turns out to be the better call. Every quote starts as a free, photo-based estimate over the phone, so you’ll know your realistic cost range and timeline before committing to anything. We use eco-friendly products throughout, which matters on a staircase everyone in the house touches and breathes around daily. If you’re ready to compare the DIY math against a real number for your home, our DIY vs. professional guide is a solid next stop, or just call us with a few photos and we’ll get you scheduled.
Frequently Asked Questions
How long does it take to refinish hardwood stairs?
A single flight typically takes five to seven calendar days from repairs through final cure, though the hands-on labor is closer to two full days. Professional crews often finish in two to three working days.
Can I refinish stairs without removing the carpet myself?
No, carpet, padding, and every staple need to come out before sanding. Staples left behind can shred a sanding belt or become a projectile hazard.
Do I need to stain my stairs, or can I just apply a clear finish?
Staining is optional. If your existing color still looks good and the wood isn’t discolored, a clear topcoat over sanded bare wood works fine and saves you a step.
What’s the cheapest way to refinish stairs?
Screen-and-recoat is typically the least expensive option, but it only works if your existing finish is sound and free of wax buildup. A full DIY sand-and-refinish with materials from Minwax or Varathane is the next most affordable route.
Is it safe to live in the house while refinishing stairs?
Yes, with proper dust containment and ventilation. Seal the stairwell with plastic sheeting, keep windows cracked if using solvent-based products, and stagger your topcoat schedule so part of the staircase stays usable.
Sources
The cost ranges in this guide come from Angi’s stair refinishing data and Homewyse’s per-square-foot calculator, both used to build the professional and DIY cost tables above. Process steps and drying times draw on the American Hardwood Information Center’s staircase guide, while labor-intensity and dust-containment guidance comes from Thumbtack’s refinishing cost breakdown. Per-step DIY math is sourced from D&G Flooring’s homeowner guide.
- How Much Does It Cost to Refinish Stairs? 2026 Data — Angi
- Cost to Refinish Stairs – 2026 Cost Calculator — Homewyse
- Reviving Hardwood Staircases — American Hardwood Information Center
- Hardwood Stairs: Complete Guide for Homeowners — D & G Flooring
Recommended
- Hardwood Floor Refinishing: DIY vs. Professional Service – J.R. Hardwood Floor Refinishing & Cleaning
- A Complete Guide to Hardwood Floor Refinishing – J.R. Hardwood Floor Refinishing & Cleaning
- How to Refinish Hardwood Floors: A DIY Guide for a Pro Finish
- A DIY Guide on How to Refinish Hardwood Floors Yourself in Parker