 Skip to content
Refinish your hardwood floors before cabinet installation. That’s the verdict for the vast majority of kitchen remodels, and it’s the sequence we recommend to almost every homeowner who calls us. The one big exception: floating floors like LVP or laminate, which should almost always go in after cabinets are set.
Here’s the quick logic. Solid hardwood installed and finished before cabinets gives you a clean, uniform edge and lets your flooring crew sand right up to the walls without dodging cabinet boxes. Floating floors work the opposite way, because cabinets pinning down a floating field can restrict the natural expansion and contraction the flooring needs, leading to buckling down the road.
- Choose floors-first for solid or engineered hardwood, tile, or any nailed-down material.
- Choose cabinets-first for floating LVP, laminate, or click-lock flooring.
Most contractors default to cabinets-first for general remodels, but solid hardwood and tile are the standing exceptions where floors-first wins. Getting the order wrong can trigger rework running roughly $2,000 to $10,000, depending on materials and how far along the job gets before someone catches the mistake.
Key Takeaways
Refinishing solid hardwood before cabinet installation produces a cleaner finish and more flexibility, while floating floors need cabinets installed first to avoid buckling.
| Point | Details |
|---|---|
| Sequence by material | Install and finish solid hardwood before cabinets; install floating floors like LVP after cabinets. |
| Coat schedule matters | Apply two coats before cabinets and a final coat after all trades finish for a uniform, protected result. |
| Protection is not optional | Use rosin paper, Masonite, and HEPA dust containment throughout cabinet installation. |
| Wrong order gets expensive | Sequencing mistakes can trigger $2,000 to $10,000 in rework depending on materials and timing. |
| Get professional coordination | Jrhardwoodfloorrefinishingandcleaning coordinates sanding, finishing, and cabinet timing across Colorado remodels to prevent costly sequencing errors. |
Table of Contents
- Pros and Cons of Refinishing Floors Before or After Cabinets
- The Recommended Timeline for Refinishing Floors With Cabinets
- How to Protect Floors During Cabinet Installation
- Prefinished vs. Site-Finished Hardwood: Why It Changes the Order
- Should You Run Flooring Under the Cabinets?
- How Sequencing Affects Cost and Other Trades
- When You Should Not Refinish Before or After Cabinets
- Contractor Checklist: Questions to Ask Before the Job Starts
- What a Professional Refinisher Does Differently
- What I’ve Learned From Kitchen Remodels Gone Right (and Wrong)
- Let Us Coordinate the Flooring Side of Your Remodel
- Frequently Asked Questions
- Sources
Pros and Cons of Refinishing Floors Before or After Cabinets
Every kitchen remodel forces this trade-off, and there’s no version where you get all the upsides with none of the downsides. Let’s break down what you’re actually weighing.
Floors-first pros:
- A cleaner, more uniform finish line since your sanding crew can work wall to wall without cutting around cabinet toe kicks.
- Future flexibility. If you ever move a cabinet run or add an island, there’s finished floor underneath instead of a bare plywood gap.
- Easier access for drum sanders and edgers, which means faster work and fewer missed spots.
Floors-first cons:
- Your gorgeous new finish is exposed to scuffs, dropped tools, and dolly wheels while cabinet installers work around it.
- You’ll need serious floor protection for the duration of the cabinet install, which adds a small cost and a step nobody loves.
Cabinets-first pros:
- You save a little material and labor because you’re not finishing square footage that ends up hidden under cabinet boxes.
- It’s the required approach for floating floors, so there’s no debate there.
- Your finish stays pristine since cabinets go in before the final coats ever touch the room.
Cabinets-first cons:
- Flooring crews have to cut and fit boards around cabinet legs and toe kicks, which is fussier work and takes longer.
- If you ever reconfigure the kitchen layout, you’re staring at an unfinished gap where the old cabinets used to sit.
Finishing before cabinets typically produces a more uniform result and cuts down on masking labor, while finishing after cabinets means more tape, more plastic, and more time babysitting edges near cabinet faces.
Pro Tip: If your schedule forces you to apply the final coat after cabinets are in, tape a strip of rosin paper along the base of every cabinet run before the crew starts finishing. It catches drips and overspray without leaving adhesive residue on your new cabinet finish.
The Recommended Timeline for Refinishing Floors With Cabinets
Coordinating flooring and cabinetry isn’t complicated once you see the sequence laid out. Here’s the schedule we walk homeowners through on almost every kitchen job.
- Demo and subfloor prep. Remove old flooring, cabinets, and appliances. Check the subfloor for level and moisture issues before anything else happens.
- Rough plumbing and electrical. Get lines run to where new appliances and fixtures will sit.
- Install and sand the hardwood. Lay solid hardwood across the full kitchen footprint, then sand it smooth.
- Apply the first coats of finish. Two coats of polyurethane is a commonly recommended starting point before any cabinet work begins.
- Install cabinets and countertops. With the base coats cured, cabinet crews can work on the floor without damaging bare wood.
- Touch up and apply the final coat. After cabinets, countertops, and appliances are set, sand lightly if needed and apply the final coat(s) to erase any incidental scuffs.
That two-coats-before, one-coat-after approach is a compromise plenty of homeowners and pros use to balance protection against a finished look.
Cure time is where schedules get derailed if you don’t plan for it. Here’s a rough breakdown of what to expect by finish type.
| Finish Type | Recommended Coats | Walk-On / Cabinet-Install Window |
|---|---|---|
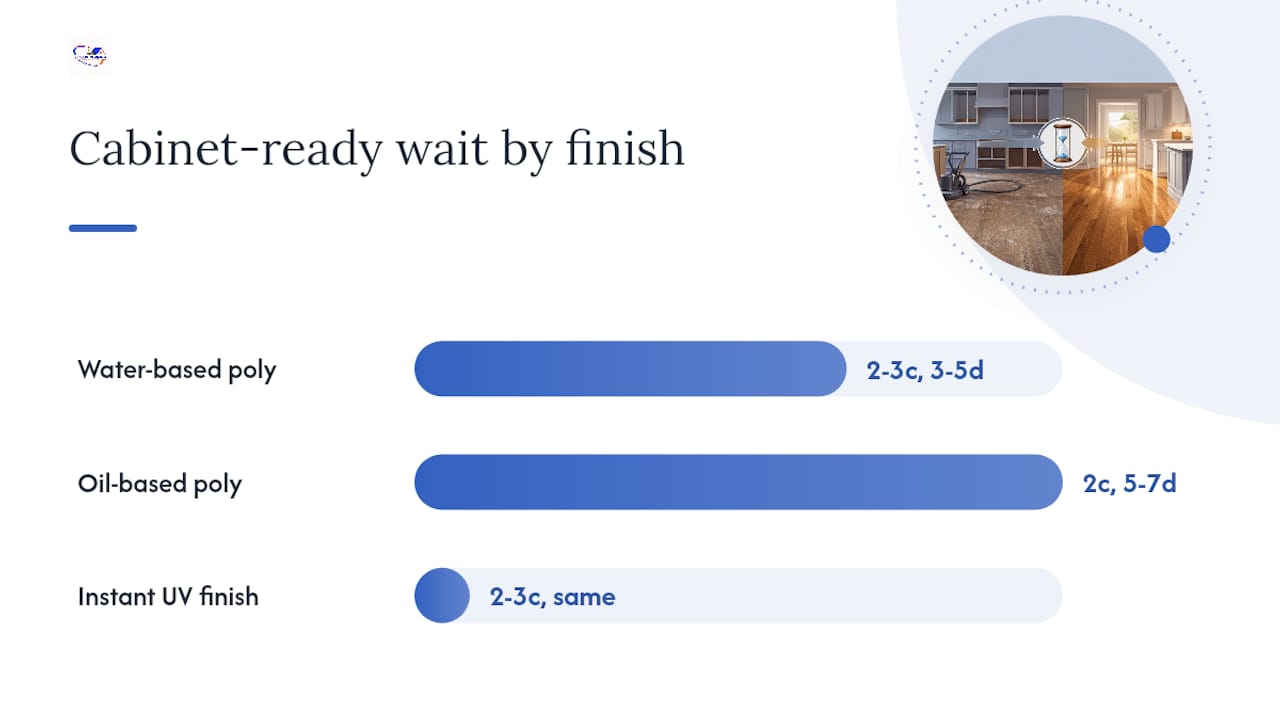
| Water-based polyurethane | 2 to 3 coats before cabinets, final coat after | Light foot traffic in 24 hours; cabinet work typically safe after 3 to 5 days |
| Oil-based polyurethane | 2 coats before cabinets, final coat after | Light foot traffic in 24 hours; cabinet work typically safe after 5 to 7 days |
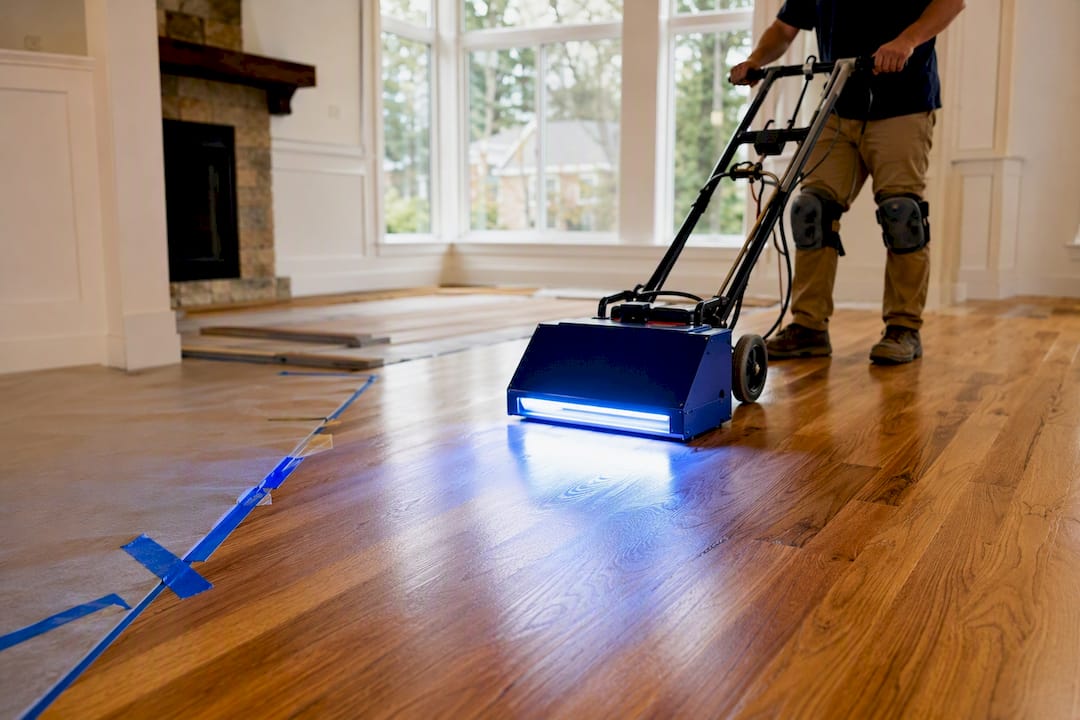
| Instant UV-curable finish | 2 to 3 coats | Cured instantly under UV light; cabinet work can often start the same day |
For high-traffic kitchens specifically, applying a minimum of four total coats of urethane holds up far better long term than stopping at two, with routine recoats scheduled every 18 months or so instead of waiting for the finish to wear through completely. If your project timeline is tight, ask about UV-curable systems. Because they cure on contact rather than through slow evaporation, they can shave days off a schedule that a traditional oil-based poly simply can’t match.
How to Protect Floors During Cabinet Installation
A freshly refinished floor is basically wide open to damage the moment cabinet crews start moving boxes, ladders, and tool bags across it. Good protection isn’t optional, it’s part of the job.
- Rosin paper taped down in overlapping sheets is the go-to first layer. It’s breathable, cheap, and won’t trap moisture against a curing finish.
- Masonite or hardboard sheets go on top of the rosin paper in high-traffic zones, especially where cabinets get carried in and set down.
- Carpet runners or moving blankets work well along walkways where crews will be back and forth all day.
- Corner guards protect exposed edges and thresholds where cabinets get maneuvered into tight spots.
Dust is the other threat, and it’s sneakier than scuffs because it settles into a curing finish and dulls the sheen. Sanding dust travels far beyond the room where it’s generated, which is why containment barriers and HEPA-filtered vacuums matter so much during any sanding phase that overlaps with cabinet work. We run dustless sanding equipment on every job specifically to keep sawdust out of cabinet hinges, drawer slides, and fresh paint.
Pro Tip: Ask your flooring contractor whether they can apply a “scratch coat,” a single early coat of finish that seals the wood enough to prevent staining but is thin enough to sand out later. It’s a smart middle ground when cabinet installers absolutely must be on the floor before your final coats go down.
Prefinished vs. Site-Finished Hardwood: Why It Changes the Order
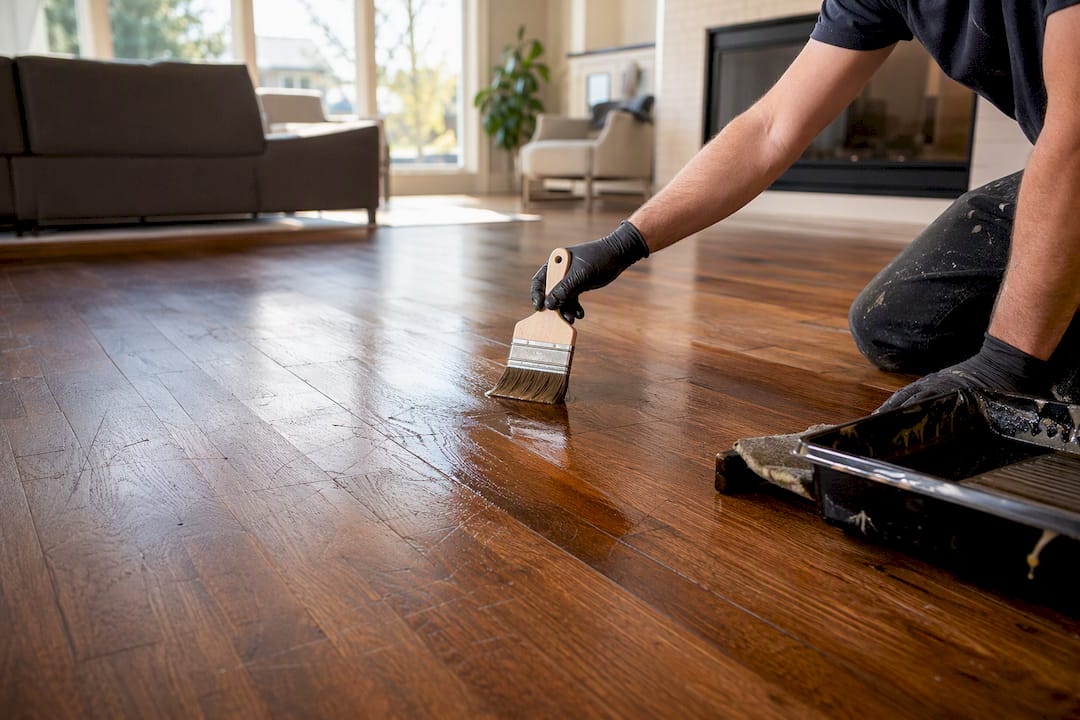
Prefinished hardwood arrives from the factory with the finish already cured, hard, and ready for traffic the moment it’s nailed down. Site-finished hardwood, by contrast, gets sanded and coated on location after installation, which means the finish is still relatively soft and vulnerable during the early days of a remodel.
That difference matters more than most homeowners expect. A factory finish is tough, but it’s also final. Any dent or scratch from a dropped cabinet or a dragged countertop slab has to be repaired with touch-up products rather than sanded and re-coated seamlessly. Site-finished floors, on the other hand, can absorb some incidental damage during cabinet installation because you’re planning to sand and recoat anyway.
- Choose prefinished hardwood if you want cabinets-first sequencing or a faster overall project, since there’s no on-site cure time to schedule around.
- Choose site-finished hardwood if you’re going floors-first, since it lets your crew apply that final coat after cabinets to erase any scuffing that happens along the way.
Should You Run Flooring Under the Cabinets?
Running hardwood under your cabinets instead of stopping the floor at the cabinet’s edge costs a little more material, but it buys serious flexibility. If you ever swap out a cabinet run, add an island, or sell the house to a buyer who wants a different layout, finished flooring underneath means no ugly plywood gap and no scramble to match old wood to new.
Running the full floor under cabinets is generally worth the modest incremental cost if you plan to stay in the home long enough to consider a future layout change, or if resale flexibility matters to you.
- Apply two coats of finish to the flooring under cabinet footprints before installation, matching the coats applied everywhere else.
- Save the final coat for after cabinets and countertops are set, so the visible floor gets a uniform sheen edge to edge.
- Under toe kicks specifically, boards are often glued rather than face-nailed since access for future repairs is limited once cabinets are anchored.
Pro Tip: Have your flooring crew photograph the subfloor layout before cabinets go in. If a board under a toe kick ever needs replacing, that photo saves hours of guesswork about where seams and nail lines actually are.
How Sequencing Affects Cost and Other Trades
Get the sequence wrong and the damage isn’t limited to the floor. Countertop templating depends on cabinets being set in their final position, so if cabinets shift after templating because a flooring crew had to come back and finish edges, you’re paying for a second template visit. Appliance installers need finished floor height locked in before they can confirm slide-in ranges and dishwashers will sit flush, and plumbing and electrical rough-ins often assume a specific finished floor thickness that changes if you switch from tile to hardwood mid-project.
- Lock your flooring material decision before cabinets are ordered, since floor thickness affects toe kick height and appliance clearances.
- Confirm your countertop template date only after cabinets are permanently set, not just temporarily placed.
- Ask your electrician and plumber to rough in based on final floor height, not subfloor height.
Wrong-order mistakes are not cheap to unwind. Rework costs for sequencing errors commonly land between $2,000 and $10,000, depending on whether it’s a floating floor pinned under cabinets or tile cut awkwardly around cabinet legs. That’s real money to lose over a scheduling call that a five-minute conversation with your contractor could have settled up front.
When You Should Not Refinish Before or After Cabinets
The floors-first recommendation isn’t universal, and a few situations call for a different plan entirely.
- Thin engineered hardwood with a wear layer under about 2mm often can’t handle a full sand-and-refinish at all, regardless of sequencing. Check the wear layer thickness before committing to any sanding plan.
- Severe subfloor damage like rot, major squeaks, or moisture problems needs to be fixed before either floors or cabinets go in. Sequencing questions are irrelevant if the substrate underneath isn’t sound.
- Floating floors under cabinets should never happen. Pinning an LVP or laminate field restricts the expansion gap it needs, which is a near-guaranteed path to buckling.
- Phased remodels where budget is tight sometimes call for installing cabinets now and refinishing floors later. That’s a legitimate choice, just plan on extra floor protection during the interim since cabinets will already be in place when refinishing finally happens.
Contractor Checklist: Questions to Ask Before the Job Starts
A few sharp questions during your contractor calls can prevent nearly every sequencing headache we see on the job site. Read through this list before you sign anything.
- Will you run the hardwood under the cabinet footprint, or stop it at the cabinet edge?
- How many coats of finish go down before cabinets, and how many after?
- Who supplies floor protection materials, rosin paper, Masonite, and corner guards, and is that cost included in the estimate?
- What’s the walk-on time before cabinet crews can safely be on the floor?
- Who is financially responsible if the floor gets damaged during cabinet installation?
- Will dust containment and a HEPA vacuum be used during any sanding that overlaps with cabinet work?
- What’s the expected date range for the final coat, and does that fit around countertop templating?
Read this list aloud on your first call with any flooring or cabinet contractor. Their answers tell you more about their experience than any glossy brochure will.
What a Professional Refinisher Does Differently
We treat every kitchen remodel as a coordination job first and a sanding job second. That means confirming the cabinet installer’s schedule before we ever plug in a sander, using dustless equipment so cabinet hardware and drawer slides don’t end up gritty, and timing our coats so cabinets and countertops land exactly when the finish is cured enough to handle them.
On most jobs, we apply the base coats before cabinets go in, protect the floor heavily during install, then come back for a final coat and a full inspection once every other trade has cleared out. That last visit catches the small scuffs before they become a homeowner’s first disappointment with a brand-new kitchen.
We also document the coat count, finish type, and cure schedule in writing, so if a warranty question comes up months later, there’s a clear record of exactly what went down and when. Our screen and recoat process plays a role here too, since a light screen before the final coat often resolves any drag marks or dolly scuffs left behind by cabinet crews.
What I’ve Learned From Kitchen Remodels Gone Right (and Wrong)
The single biggest mistake we see isn’t a sequencing error. It’s a communication gap between the flooring crew and the cabinet installer, where neither side knows what the other one is planning until they’re both standing in the kitchen at the same time. The most reliable fix isn’t a fancier product, it’s a five-minute call before either crew shows up.
Jobs where floors went in first, got two coats, then waited for cabinets before the final coat almost always finish clean. Jobs where a floating floor got installed before cabinets, on the other hand, tend to show buckling near the cabinet toe kicks within a year or two, and by then it’s a much bigger repair than it would have been to just sequence it correctly the first time.
Certifications, case studies, and additional field examples to be added.
Let Us Coordinate the Flooring Side of Your Remodel
If you’ve read this far, you already know that getting floors and cabinets sequenced correctly takes more than good intentions, it takes a crew that’s done it enough times to catch problems before they happen. Jrhardwoodfloorrefinishingandcleaning has spent years coordinating exactly this kind of timing across the Denver Metro Area, so your cabinet installer never shows up to a floor that isn’t ready for them.

Our team handles full sanding and restoration, dustless sanding, Instant UV-curable finishing for tight timelines, screen and recoat work, and full hardwood, LVP, or laminate installation, all under one roof so you’re not managing three separate schedules. We serve Parker, Castle Rock, Denver, Boulder, Colorado Springs, and the surrounding Colorado communities.
Getting a quote is simple. Call us with a few photos of your kitchen, your rough room dimensions, and your target remodel timeline, and we’ll walk you through a free over-the-phone estimate tailored to your floor’s condition. If you’re ready to see what a coordinated, damage-free remodel looks like, request your free quote today and we’ll help you map out the right sequence from demo day to final coat.
Frequently Asked Questions
Should I refinish floors before or after cabinets go in?
Refinish solid hardwood before cabinets in almost every case. The main exception is floating floors like LVP or laminate, which should go in after cabinets to avoid pinning the floor and blocking natural expansion.
How many coats of finish do I need in a kitchen?
Kitchens see heavy traffic, so a minimum of four total coats of polyurethane holds up better than stopping at two or three, with two coats commonly applied before cabinets and the remainder after.
Can I install flooring under my cabinets instead of stopping at the edge?
Yes, and it’s often worth the modest extra material cost if you want flexibility for future layout changes or plan to stay in the home long term.
How long do I need to wait before cabinet installers can walk on refinished floors?
Water-based finishes typically allow light traffic within 24 hours but need 3 to 5 days before cabinet work; oil-based finishes usually need 5 to 7 days. UV-curable finishes cure almost immediately, which can let cabinet work start the same day.
What’s the biggest risk of refinishing after cabinets are already installed?
You’ll need extensive masking and protection around cabinet bases, which adds labor and time, and any damage to cabinet finishes during floor sanding is far more expensive to fix than floor touch-ups would have been.
Sources
- Hardwood Flooring and Cabinetry Installation
- Is it better to install hardwood floors before or after the cabinets? – The Flooring Girl
- Refinish Floors Before or After Cabinets: A Practical Guide for Kitchens and Living Spaces