 Skip to content
For light wax buildup, the best immediate action is a mineral spirits test followed by careful solvent work in small sections. Dampen a cotton ball with odorless mineral spirits and rub a hidden spot — a closet corner or behind a door works perfectly. A tan or yellowish smudge on the cotton means you have wax; if nothing transfers, the problem is likely finish wear, not wax, and aggressive stripping will only cause damage. Stop the test immediately if the finish looks dull, feels soft, or you see plastic-like residue lifting.
That single test tells you everything. Light, isolated wax? You can likely handle it yourself with the steps below. If there is wall-to-wall haze, unknown finish history, or a finish that reacted to the test, that’s the moment to call a professional like J.R. Hardwood Floor Refinishing & Cleaning rather than risk cupping or over-stripping your floors.
- Run the mineral spirits test in a hidden spot before touching the main floor.
- Yellow or tan residue on the cotton = wax present; proceed with the tutorial below.
- No residue, dull finish, or plastic-like film = stop and consult a pro.
- Large areas, unknown treatments, or pre-sale timelines = skip DIY entirely.
Pro Tip: Always test in a closet or behind a door. If the finish dulls or you see color transfer, put the cap back on the mineral spirits and pick up the phone instead.
Key Takeaways
The safest and most cost-effective approach to floor wax removal starts with a mineral spirits test and scales up to professional service when the buildup, floor type, or finish history is beyond DIY limits.
| Point | Details |
|---|---|
| Test before you treat | Rub a cotton ball with mineral spirits in a hidden spot; yellow residue confirms wax, no residue means stop. |
| Use the right solvent | Odorless mineral spirits with 0000 steel wool handles light to moderate wax; avoid acetone and lacquer thinner. |
| Work small, ventilate always | Tackle 4 ft x 4 ft sections, change rags often, and spread used rags flat outside to dry safely. |
| DIY damage costs more | Cupping and over-stripping repairs often exceed the cost of professional service from the start. |
| Jrhardwoodfloorrefinishingandcleaning for Denver jobs | Free phone quotes from photos, eco-friendly products, and full-service wax removal across the Denver metro area. |
Table of Contents
- What tools and supplies do you need for wax removal?
- How to remove wax buildup step by step
- Does the method change for hardwood, engineered wood, LVP, or laminate?
- What should you do when solvent and steel wool aren’t working?
- How long does wax removal take, and what does it cost?
- When should you call a professional floor care specialist?
- Our honest take on DIY vs. professional wax removal
- Ready for a free quote on your Denver-area floors?
- Sources
What tools and supplies do you need for wax removal?
You don’t need a truck full of gear, but the right supplies make a real difference between a clean result and a damaged floor.
Gather these before you start:
- Odorless mineral spirits (contractor grade, not hardware-store paint thinner)
- Clean white cotton rags or lint-free microfiber cloths
- 0000 extra-fine steel wool for stubborn patches
- Plastic putty scraper or an old credit card
- Rubber gloves and safety glasses
- NIOSH-rated respirator if you’re sensitive to VOCs
- Box fan or open windows for cross-ventilation
- Knee pads for comfort on longer jobs
Keep these away from your floors entirely:
Acetone, lacquer thinner, steam mops, and ammonia-heavy cleaners will strip your finish along with the wax. Water-based strippers used without industry guidance can raise the grain and cause swelling. The goal is to dissolve the wax, not attack the finish underneath.
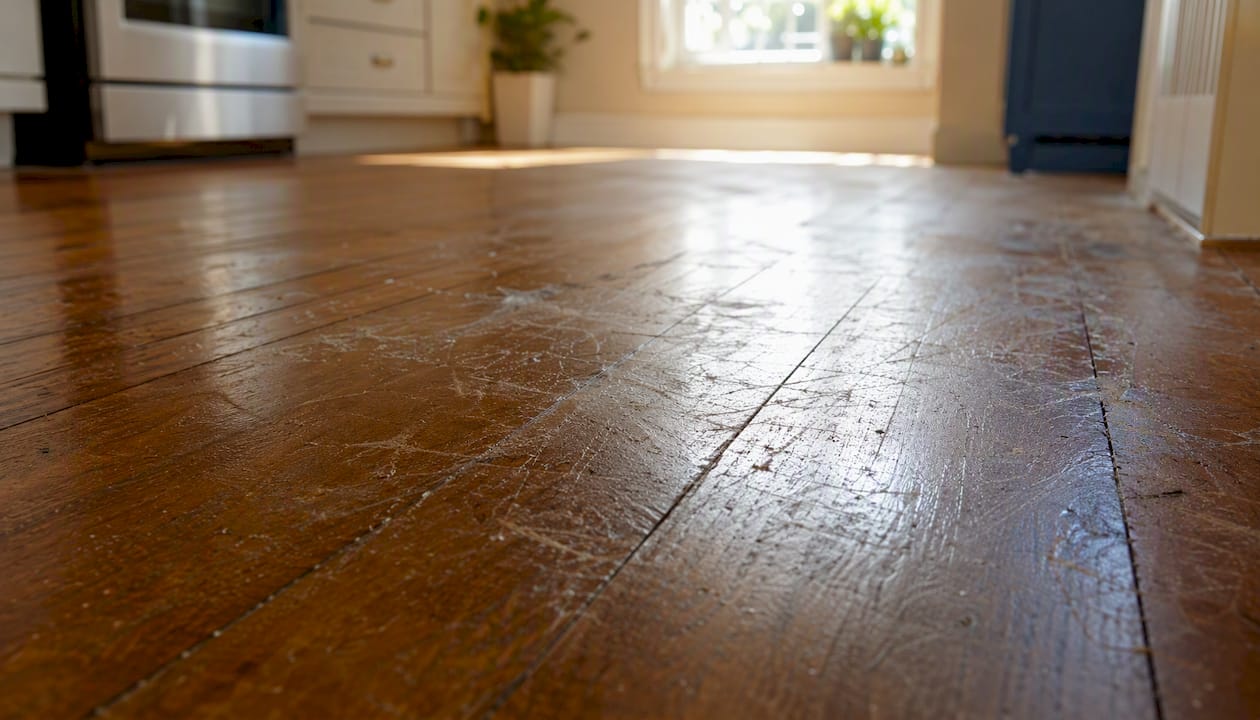
Safety notes worth reading: Mineral spirits produce VOCs, so ventilate the room and remove open flames before you start. Used rags soaked in solvent can self-heat — spread them flat outside on a non-combustible surface to dry before disposal. Check with your local Denver-area household hazardous waste program for proper solvent disposal; many Colorado counties offer drop-off days.
How to remove wax buildup step by step
Think of this as giving your floor a thorough spa day, one small section at a time. Work in roughly 4 ft x 4 ft sections so dissolved wax doesn’t re-deposit before you wipe it up.
-
Prep the room. Clear all furniture, sweep or vacuum thoroughly, and identify your hidden test spot. Open windows and set up a box fan pointing outward.
-
Run the test spot. Dampen a cotton ball with mineral spirits and rub a small area with the grain. Yellow or tan residue confirms wax. No residue means finish wear — stop here and reassess.
-
Work in small sections. Dampen a clean white rag with mineral spirits (damp, not dripping) and rub with the grain. Change rags frequently; a rag that’s saturated with dissolved wax just moves the problem around. Avoid letting solvent pool in seams or gaps between boards.
-
Tackle stubborn patches. For heavier buildup, use 0000 steel wool lightly dampened with mineral spirits, always rubbing with the grain. Coarser steel wool will scratch the finish and leave marks that show under a new coat. After each pass, collect and remove steel fibers with a vacuum or damp cloth.
-
Final wipe and clean. Follow up with a barely damp microfiber mop, then a pH-neutral hardwood floor cleaner to remove any solvent residue. Dry the area fully with fans before moving on.
-
Verify and wait. Inspect for streaks, uneven sheen, or finish changes under good lighting. If the floor looks uneven or the finish has changed texture, stop and consider professional assessment before applying any new coat.
For a 200–300 sq ft room with light buildup, budget 1–4 hours. Heavier, layered wax can stretch that across multiple sessions or days.
Does the method change for hardwood, engineered wood, LVP, or laminate?
Yes, and getting this wrong is one of the most common ways DIY wax removal turns into an expensive repair.
Solid hardwood is the most forgiving. It can handle light solvent work, but it’s still vulnerable to cupping if moisture gets into the seams. Keep your rag damp, not wet, and never let solvent sit.
Engineered hardwood has a thinner wear layer. Avoid aggressive mechanical abrasion — even 0000 steel wool used too firmly can cut through to the core layer. Be conservative, test frequently, and stop at the first sign of finish change.
LVP and laminate often carry a factory topcoat that wax rarely penetrates deeply. The more common culprit here is acrylic polish or “mop and shine” spray products, which form a plastic-like film that mineral spirits won’t dissolve. If your solvent test shows no response, check the product history and look for a manufacturer-recommended acrylic stripper. Avoid any solvent that could strip the plastic wear layer itself.
Common DIY mistakes to avoid on any floor type:
- Over-wetting boards or letting solvent pool in seams
- Using metal scrapers that gouge the surface
- Reaching for lacquer thinner or acetone when mineral spirits don’t work fast enough
- Running a steam mop to “loosen” the wax
- Sanding without confirming the finish type first
If the finish reacts — goes dull, feels soft, or lifts color — that’s your signal to stop. You may be dealing with finish failure, not just wax buildup, and the right fix is a professional assessment rather than more solvent.
What should you do when solvent and steel wool aren’t working?
When mineral spirits produce no change at all, you’re likely not dealing with traditional carnauba or paste wax. Acrylic polish films, finish failure, or years of layered product buildup require a different approach.
- Plastic-like residue with no solvent response: You may have an acrylic film from spray polishes. A commercial acrylic stripper may help, but only after a test spot confirms the film type. Follow manufacturer instructions carefully.
- Finish failure across multiple boards: Dull patches, soft spots, or peeling that appears after solvent work means the finish itself has broken down. More stripping won’t fix this — the floor needs a screen and recoat or full sanding.
- Deep black stains or cupping: These point to moisture damage that predates the wax. Solvent work won’t reverse structural changes; a full sand and refinish is the appropriate path.
- Persistent haze after multiple solvent passes: Run the test in several rooms. If the haze is consistent and widespread, professional stripping with matched compounds and mechanical extraction will produce a cleaner, safer result than repeated DIY attempts.
A screen and recoat (buff and coat) is sufficient when the finish is intact but dull or lightly contaminated. Full sanding down to bare wood is necessary when the finish has failed, staining is deep, or the floor has structural issues. When in doubt, a professional opinion costs far less than fixing a sanding mistake.
How long does wax removal take, and what does it cost?
DIY time estimates:
Professional pricing (U.S. regional guidance): Wax removal and buffing typically runs roughly $1.50–$3.50 per sq ft, depending on buildup thickness and floor condition. Full sand-and-refinish jobs run higher. These are planning ranges; get a local quote for your specific floor.
The cost-of-damage math matters here. Industry experts note that DIY mistakes — cupping from over-wetting, finish removal from wrong solvents — often cost more to repair than the professional service would have cost upfront. For large or older floors, the calculus usually favors calling a pro early.
Denver-specific drying notes: After wax removal, allow 24–48 hours for drying before recoating. Colorado’s low indoor humidity in winter can speed that timeline; summer monsoon months can slow it. Use a moisture meter before applying any new finish — this step is standard practice for professional contractors and worth doing yourself too.
When should you call a professional floor care specialist?
Some jobs are simply better handled by someone with the right equipment and experience. Here’s a quick checklist:
- Wall-to-wall haze or buildup you can’t isolate to one area
- Unknown finish history (especially in older homes or rental properties)
- Engineered floors with a thin wear layer
- Visible finish failure, soft spots, or peeling
- Deep discoloration or black staining
- Pre-sale or pre-lease deadline where you can’t afford a mistake
- Large commercial spaces where DIY timelines aren’t practical
What to tell your contractor: square footage, photos of the affected areas, floor age, any known treatments or products used, and visible symptoms (tacky feel, yellow residue, plastic film).
Questions worth asking: What stripping agents do they use? Do they perform neutralization and moisture checks after removal? How do they handle solvent disposal? Do they offer dust-free sanding or UV-cure recoating options?
For Denver-area homeowners and property managers, Jrhardwoodfloorrefinishingandcleaning offers free over-the-phone estimates based on photos — a fast, no-pressure way to find out whether your floor needs a pro touch.
Our honest take on DIY vs. professional wax removal
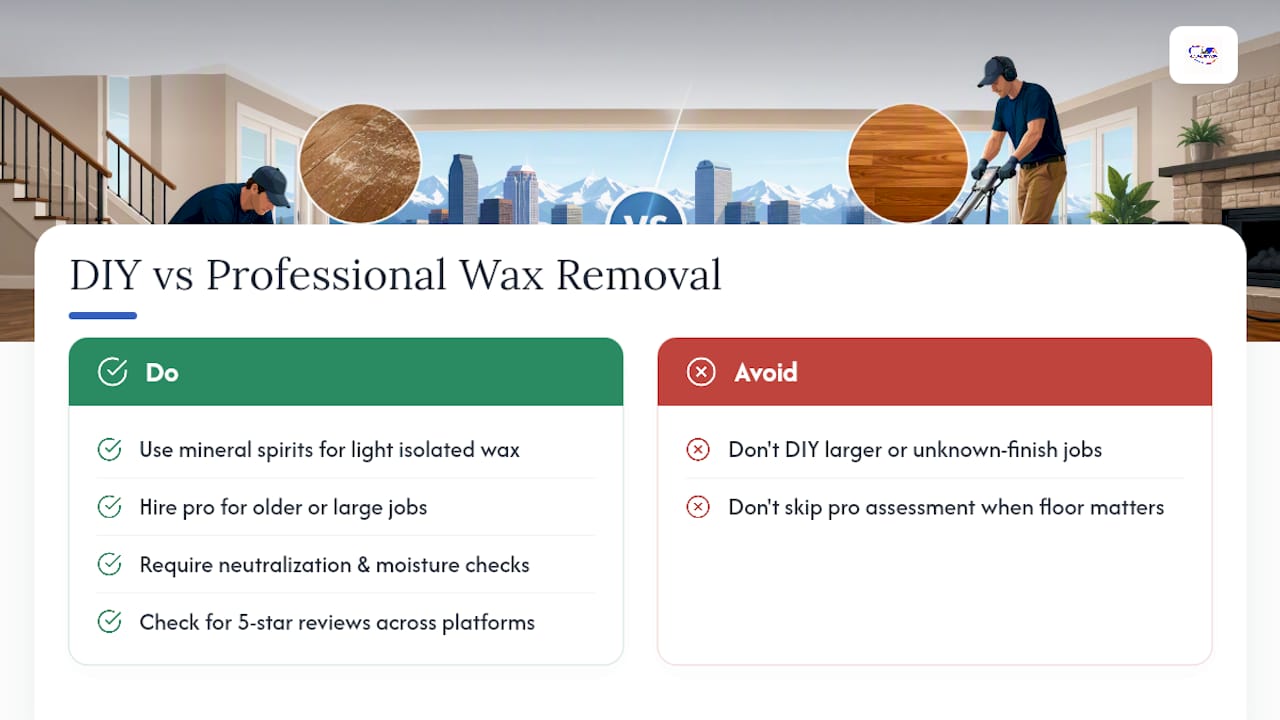
We see a lot of floors where a well-intentioned DIY attempt made the job harder and more expensive. That’s not a knock on homeowners — it’s just the reality of working with floors that have years of unknown product history. For light, isolated wax on a floor you know well, conservative DIY with mineral spirits is a reasonable first step. But for older floors, unknown finishes, or anything larger than a single room, a professional assessment is the smarter investment.
The ROI argument is straightforward: preventing cupping or over-stripping saves more than the initial service cost in most cases. Jrhardwoodfloorrefinishingandcleaning uses eco-friendly products, follows up every job with neutralization and moisture checks, and documents the process on YouTube so you can see exactly what the work looks like before you commit. Our 5-star reviews across multiple platforms reflect that consistency. When the floor matters — whether it’s a home you’re selling, a rental you’re turning over, or a commercial space that needs to look right — professional service is the lower-risk path.
Ready for a free quote on your Denver-area floors?
Wax removal is just one piece of what Jrhardwoodfloorrefinishingandcleaning handles for homeowners, property managers, and commercial clients across the Denver metro area and surrounding Colorado communities. The full service menu covers everything your floor might need after the wax comes off: clean and buff, screen and recoat, full sanding and restoration, Instant UV-curable finishing, and LVP/laminate care and installation.

Getting a quote is easy. Send photos and a quick description of your floor, and we’ll give you an honest, no-obligation estimate over the phone. No guessing, no surprises. Whether you’re in Parker, Castle Rock, Boulder, or Denver proper, we’re ready to help you figure out the right next step. Request your free estimate and get your floors back to looking their best.
Sources
These resources back the tutorial steps, solvent guidance, and professional service recommendations in this article. Always follow manufacturer instructions for any commercial stripper you use.
- 6 Steps to Remove Wax From Hardwood Floors
- How to Remove Wax From Hardwood Floor Safely
- Wax Removal from Hardwood Floors: A Richmond Guide
- The Definitive 2026 Guide to Removing Wax Buildup From Wood Floors in the Pacific Northwest