 Skip to content
Start with a clean, fully prepped surface; apply thin, even coats; verify your lamp dose with a radiometer; run a test patch first. That single workflow separates a glass-smooth, durable UV finish from a tacky, peeling mess. UV-curable finishes harden through photopolymerization — a light-triggered chain reaction that turns liquid coating into a hard film in seconds, compared to hours for solvent or waterborne systems. This UV finish application guide walks you through every step, from sanding grit to cure verification, so you get it right the first time.
Quick-Start Checklist
- Moisture check wood to within a suitable moisture content for the species (species-specific ranges apply)
- Sand through the correct grit sequence; vacuum and tack clean
- Gather PPE: UV-rated goggles, nitrile gloves, respirator
- Confirm UV lamp type, distance, and energy dose before coating
- Apply a test patch and verify tack-free cure before full coverage
- Apply thin, even coats; maintain a wet edge to avoid lap marks — for advice on choosing the right gloss and finish, see what is the best sheen for interior doors.
- B-stage or fully cure between coats per your product data sheet (PDS)
- Inspect for tack, adhesion, and gloss uniformity after each cure pass
- Clean tools immediately; dispose of uncured waste per the SDS
Quick Dos and Don’ts
- Do run a test patch every time you change lamps, coatings, or substrates
- Do consult the manufacturer PDS and SDS before you open the can
- Don’t overbuild coats — thin films cure more reliably than thick ones
- Don’t skip PPE, even for a small touch-up job
Pro Tip: Keep a laminated copy of this checklist in your finishing kit. Skipping even one step — especially the test patch — is the most common reason a UV job has to be redone.
Key Takeaways
Proper UV finish application comes down to five non-negotiable steps: prep the surface correctly, run a test patch, apply thin even coats, verify lamp dose with a radiometer, and consult your product data sheet for every cure and recoat parameter.
| Point | Details |
|---|---|
| Test patch first | Always cure a small representative area and verify tack, adhesion, and gloss before full application. |
| Measure lamp dose | Use a radiometer to confirm irradiance and energy dose; lamp output degrades over time without visible warning. |
| Apply thin, even coats | Thin films cure more reliably and avoid orange peel; use a wet-film gauge to stay in the PDS target range. |
| B-stage between coats | Partial cure leaves reactive sites for intercoat bonding; abrade lightly before the next coat when fully cured. |
| Jrhardwoodfloorrefinishingandcleaning | Offers calibrated instant UV-curable finishing with radiometer-verified cure across the Denver Metro Area. |
Table of Contents
- What tools and materials do you need for UV finishing?
- How should you prep the surface before applying UV finish?
- How do you apply UV finish with a brush, roller, or sprayer?
- How does UV curing actually work, and what should you measure?
- How do you choose the right UV coating for your substrate?
- What temperature and humidity conditions does UV finishing need?
- What PPE and safety steps do you need for UV finishing?
- How do you troubleshoot orange peel, tacky finish, and other common UV problems?
- When and how should you recoat a UV-finished floor?
- How do you clean up and dispose of UV coating materials safely?
- How do you run a test patch before full UV finish application?
- When should you hire a professional for UV finishing?
- What we have learned from real UV finishing jobs
- Ready to skip the guesswork? J.R. Hardwood handles UV finishing right
- Sources
What tools and materials do you need for UV finishing?
Getting the right gear together before you start saves you from mid-job scrambles. Here is what a competent DIY setup and a professional kit each look like.
Minimum DIY kit
- Moisture meter (pin or pinless)
- Sandpaper: 60, 80, 100, 120, and 150-grit sheets or discs
- Vacuum with fine-dust filter, tack cloths
- Isopropyl alcohol (IPA) or acetone for degreasing oily species
- Lint-free foam roller or quality brush; small HVLP spray gun for larger areas
- UV LED curing lamp (handheld or panel) matched to your coating’s photoinitiator
- Nitrile gloves, UV-rated safety glasses, N95 or half-face respirator
- Manufacturer PDS and SDS printed and on hand
Professional-grade additions
- UV-LED curing station or conveyor system with adjustable belt speed
- Radiometer or UV energy meter to measure irradiance (mW/cm²) and dose (mJ/cm²)
- Viscosity cup (Zahn or Ford) for spray-grade coatings
- Wet-film thickness gauge
- Particle-free spray booth or clean-room tent for large flat stock
Pro Tip: For jobs covering more than a few hundred square feet, renting conveyor curing equipment or hiring a professional with a calibrated UV line is often more cost-effective than buying a station outright. Match your coating’s application viscosity to the method — rollcoat and curtain systems need lower viscosity than brush or HVLP setups.
How should you prep the surface before applying UV finish?
Surface prep is where most UV finish failures actually start. Think of it as the foundation of the whole job — get this wrong and no amount of perfect curing will save you.
Moisture check
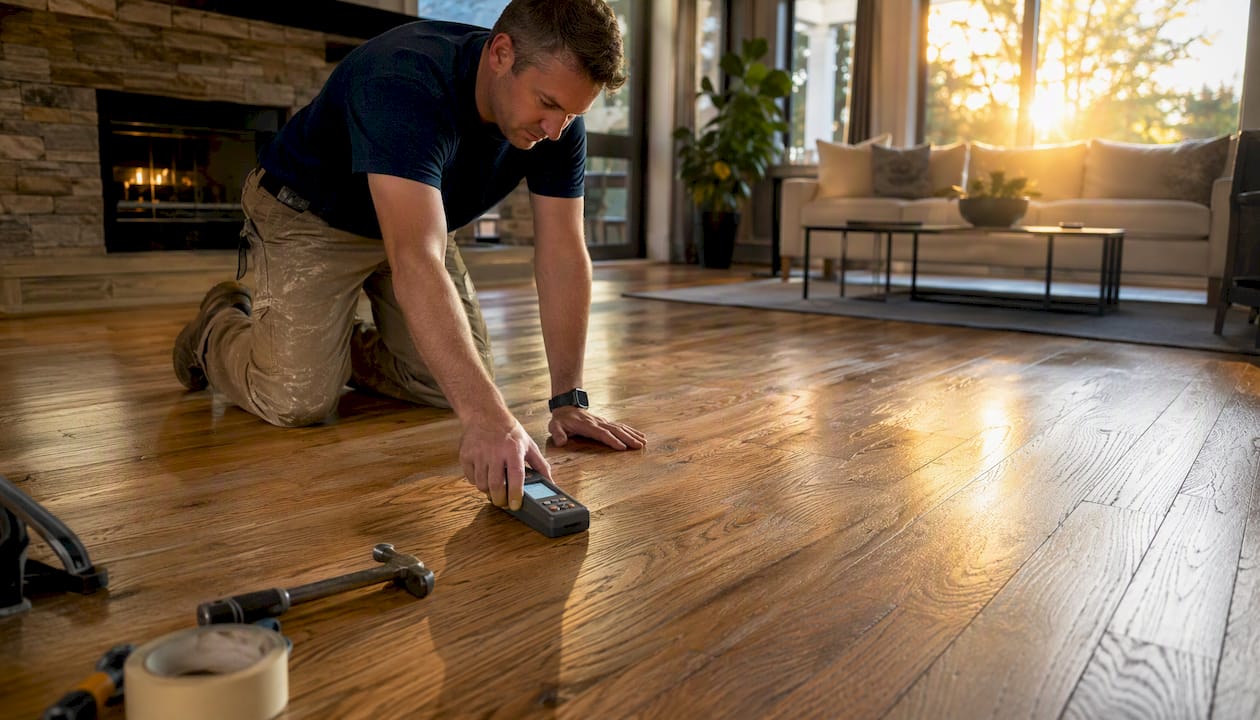
Wood must be at equilibrium moisture content before you coat. Coating over wet wood traps moisture under the film, which leads to bubbling and adhesion loss. Use a calibrated pin or pinless moisture meter and take readings at multiple spots across the floor.
Sanding sequence
| Task | Grit Sequence | Purpose |
|---|---|---|
| Full refinish (bare wood) | 60 → 80 → 100 → 120 | Remove old finish, level surface, open grain |
| Intermediate smoothing | 100 → 120 | Reduce scratch depth before sealer coat |
| Screen-and-recoat | 120 → 150 (screen) | Scuff existing finish for mechanical adhesion |
| Final prep before topcoat | 150 → 180 | Minimize grain raise, smooth surface |
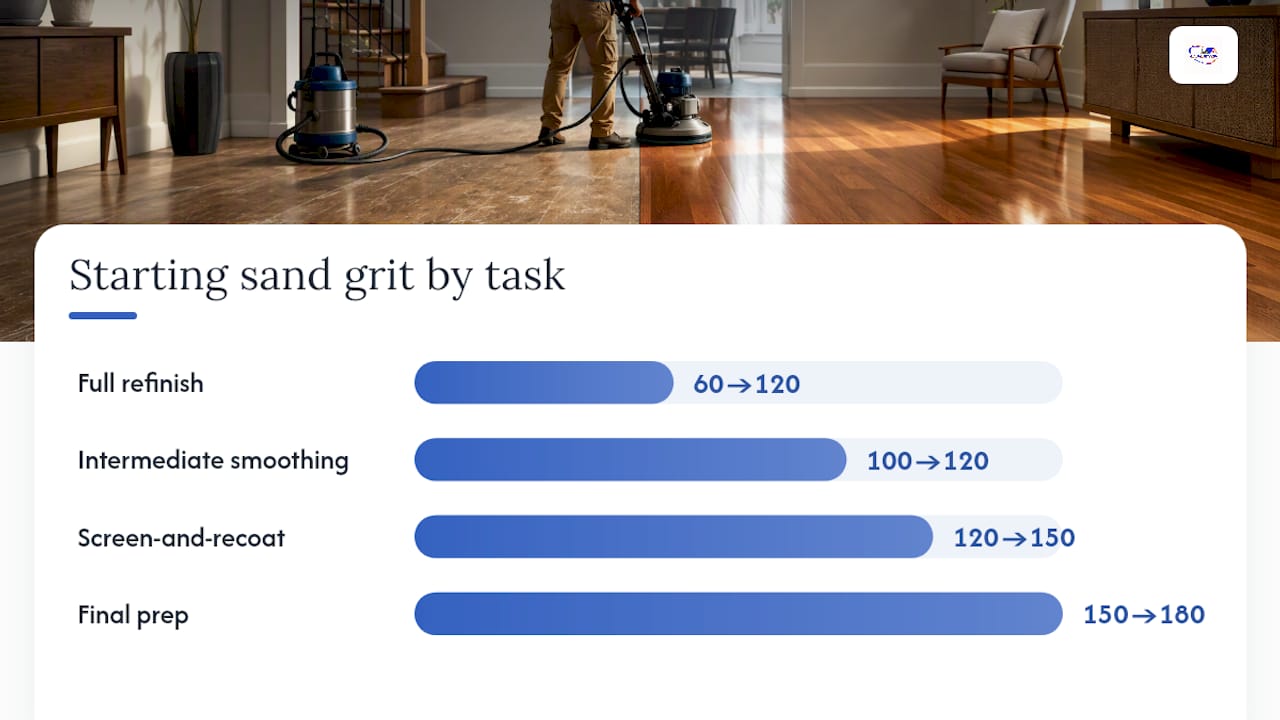
For a full refinish, follow our step-by-step sanding guide for detailed dust-control and grit-progression guidance. Never skip grits — jumping from 60 to 150 leaves deep scratches that show through the finish.
Cleaning and degreasing
- Vacuum the entire surface with a fine-dust attachment, working with the grain.
- Wipe down with a tack cloth to lift residual particles.
- For oily species (teak, ipe, or Brazilian cherry), wipe with IPA or acetone on a lint-free cloth and allow full evaporation before coating.
- Do a final visual check under a raking light — any dust nibs or raised grain will telegraph through the UV film.
B-staging between coats
B-staging means partially curing a coat so it still has reactive surface sites available for the next layer to bond to. Professionals use it when applying multiple UV coats to prevent delamination. After a B-stage pass, lightly abrade with a 180–220 screen or pad before the next coat. Your PDS will specify whether the system requires B-staging or allows full cure between coats.
Pro Tip: After degreasing an oily species, let the surface sit for at least 30 minutes before coating. IPA evaporates fast, but residual oil can migrate back to the surface within minutes on dense tropical hardwoods.
How do you apply UV finish with a brush, roller, or sprayer?
Choosing the right application method comes down to the shape of your substrate and how much finish you need to move. Rollcoat, curtain, vacuum, and spray methods each have a best-fit segment — flat floors suit rollers well, while complex profiles or edges often need spray.
Roller or brush application (step-by-step)
- Pour a manageable amount of UV coating into a clean tray; never work from the original container.
- Load the roller evenly — avoid overloading, which causes drips and uneven film build.
- Apply in long, overlapping passes parallel to the wood grain, maintaining a wet edge throughout.
- Backroll immediately after each pass to level the film and release trapped air bubbles.
- Keep each coat thin. A wet-film thickness gauge helps you stay in the manufacturer’s recommended range — typically 3–5 mils wet for most floor-grade UV coatings.
- Move to the UV lamp within the open-time window specified on the PDS; do not let the coating skin over before curing.
Spray application
HVLP guns work well for edges, stair treads, and smaller areas. Airless sprayers move more volume for large open floors but require careful pressure and tip-size matching to the coating viscosity. Electrostatic spray improves transfer efficiency on shaped profiles. Spray in a clean environment — airborne dust is the enemy of a smooth UV film.
Key spray tips:
- Thin only with reactive diluents approved by the coating manufacturer — never water or standard solvents in a 100% solids system
- Maintain consistent gun distance (typically 8–12 inches) and speed
- Spray a test card first to confirm atomization before coating the floor
Avoiding lap marks
Lap marks happen when a wet edge dries before you overlap it. Keep your pace steady, work in manageable sections, and never stop mid-pass. On wide floors, two people — one applying, one backrolling — dramatically reduce lap-mark risk.
Pro Tip: To minimize grain raise on the first coat, apply an ultra-thin sealer pass and cure it fully before the build coats. That first pass locks down the fibers so subsequent coats go on smoother.
How does UV curing actually work, and what should you measure?
UV curing is essentially sunscreen in reverse. Instead of blocking UV light, the coating absorbs it — and that absorption triggers a chain reaction that locks the liquid into a hard, cross-linked film. The technical term is photopolymerization, and it is why a UV finish can go from wet to walk-on-ready in seconds rather than hours.
What drives a reliable cure:
- Irradiance (mW/cm²): the intensity of UV light hitting the surface at any instant
- Energy dose (mJ/cm²): total UV energy delivered (irradiance × dwell time); this is what actually determines through-cure
- Lamp distance: moving the lamp closer increases irradiance but can cause heat stress; always follow the manufacturer’s recommended working distance
- Conveyor speed or dwell time: slower passes deliver more dose; faster passes deliver less
- Oxygen inhibition: surface oxygen can prevent full cure in thin films; higher peak irradiance or an inert atmosphere (nitrogen blanketing) overcomes this
Always verify your setup with a radiometer before the first production pass. A handheld UV energy meter takes seconds and tells you whether your lamp is actually delivering the dose the PDS requires.
LED vs. mercury lamps
UV-LED lamps run substantially cooler than traditional mercury-vapor (arc) lamps, which matters enormously on heat-sensitive substrates. Tests confirm that UV-LED systems keep workpiece and conveyor surfaces significantly cooler, making them the better choice for glued veneers, thin engineered boards, and resinous species prone to bleed. Mercury lamps offer broader spectral output, which suits a wider range of photoinitiator chemistries. LED systems require formulations with photoinitiators that absorb in the UV-A range — confirm compatibility before switching lamp types.
Pro Tip: Log your radiometer readings every session. Lamp output degrades over time, and a lamp that delivered the right dose six months ago may now be under-curing your finish without any visible warning sign.
How do you choose the right UV coating for your substrate?
Not all UV coatings are created equal, and picking the wrong chemistry for your substrate is a fast track to adhesion failure or yellowing. Think of it like choosing the right sunscreen for your skin type — the formula matters as much as the SPF.
Main coating classes:
- 100% solids UV: no solvents, no water — what goes on stays on. High build, excellent durability, but requires precise film-thickness control and is unforgiving of application errors.
- Waterborne UV (WB UV): lower VOCs, easier cleanup, and strong chemical and scratch resistance with immediate block-resistant stacking after cure. A practical choice for residential floors and interior wood where low odor matters.
- Hybrid systems: combine waterborne carriers with UV-cure crosslinking for a balance of application ease and performance. Good for finishers transitioning from conventional systems.
Compatibility checklist before you coat:
- Confirm stain is fully dry and compatible with UV topcoats (some oil-based stains inhibit cure)
- Test adhesion on oily species with a tie-coat or adhesion-promoting primer
- For pigmented or opaque systems, verify the photoinitiator package penetrates through the pigment layer — LED-specific formulations are often needed here
- Check whether the undercoat requires B-staging before topcoating; a fully cured 100% solids undercoat may need mechanical abrasion to accept the next layer
Urethane acrylates offer the best outdoor weathering and abrasion resistance. Epoxy acrylates cure fast and suit certain substrate profiles. Polyester acrylates hit a cost-performance balance for high-volume interior work. Matching the resin class to your end-use is as important as matching the lamp to the photoinitiator.
Pro Tip: When switching from a mercury-lamp system to UV-LED, do not assume your existing coating will cure correctly. Request an LED-compatible reformulation from your supplier and confirm photoinitiator absorption peaks match your lamp’s output wavelength.
What temperature and humidity conditions does UV finishing need?
UV coatings are less forgiving of environmental swings than most people expect. Getting the conditions wrong is like trying to bake a cake with the oven door open — the chemistry just does not work right.
Recommended application conditions:
- Temperature: 65–80°F (18–27°C) for most UV coating systems; check your PDS for the exact window
- Relative humidity: 40–60% RH during application and cure
- Substrate temperature: at least 5°F above the dew point to prevent condensation on the surface
- Avoid coating if rain, snow, or temperatures below 50°F are expected within 24 hours for systems that require extended ambient conditioning
Weather-related warnings:
- High humidity slows solvent flash-off in waterborne UV systems, which can cause adhesion issues if the film is not fully dry before curing
- Cold substrates increase coating viscosity, leading to uneven film build and poor leveling
- Direct sunlight on the work area can partially cure the coating before you intend — work in shaded or controlled conditions
Sample timeline for a small residential job:
- Day 1 (prep): sand, clean, degrease, moisture check; allow surface to acclimate overnight
- Day 2 (morning): run test patch; verify cure; apply first coat and B-stage or full-cure per PDS
- Day 2 (afternoon): lightly abrade if required; apply second coat; full cure
- Day 3: final inspection, adhesion check, and light traffic clearance per PDS
Waterborne UV systems often allow same-day recoat windows because cure is near-instant. Always confirm the recoat window in your specific product’s data sheet — it is the final authority.
What PPE and safety steps do you need for UV finishing?
UV finishing is not dangerous when you treat it with the same respect you would give any industrial coating process. The hazards are real: uncured UV coatings contain photoinitiators and reactive monomers that can sensitize skin, and UV lamps produce ozone and intense radiation that can damage eyes in seconds.
PPE checklist:
- UV-rated safety glasses or goggles (standard clear safety glasses do not block UV-A/UV-B adequately)
- Full skin coverage — long sleeves and gloves; nitrile gloves for handling uncured coating
- Half-face respirator with organic vapor cartridges when spraying; N95 minimum for dust during sanding
- Closed-toe shoes; avoid synthetic fabrics that can melt near hot mercury lamps
Ventilation and ozone:
- Mercury-vapor UV lamps generate ozone as a byproduct; provide active exhaust ventilation directed away from the work area
- UV-LED lamps produce little to no ozone, but ventilation is still required when spraying aerosols
- Always consult the coating SDS for the specific hazard controls and exposure limits for the photoinitiators in your product
Lamp and electrical safety:
- Never bypass lamp interlocks or safety shields — they exist to prevent accidental UV exposure
- Keep bystanders, children, and pets out of the curing area
- Allow mercury lamps to cool fully before handling or replacing bulbs
- Inspect lamp housings and power cables before each use
Pro Tip: Tape a copy of the SDS to the outside of your coating container. If a spill or skin contact happens, you want the first-aid section immediately visible — not buried in a filing cabinet.
How do you troubleshoot orange peel, tacky finish, and other common UV problems?
Even experienced finishers run into problems. The good news is that most UV defects trace back to a small set of root causes, and fixing them is straightforward once you know what to look for.
| Symptom | Probable Cause | Corrective Action |
|---|---|---|
| Tacky or soft surface | Under-cure: insufficient dose, degraded lamp, or wrong PI for lamp type | Increase dwell time or lamp power; verify with radiometer; confirm coating/lamp compatibility |
| Orange peel texture | Coating too viscous, spray pressure too low, or film too thick | Thin with approved reactive diluent; adjust spray pressure; apply thinner coats |
| Fisheyes or cratering | Surface contamination (oil, silicone, wax) | Strip, degrease thoroughly with IPA or acetone, reapply |
| Adhesion loss / delamination | Incompatible stain, skipped abrasion between coats, or over-cured undercoat | Abrade fully cured layer; apply adhesion primer; confirm stain compatibility |
| Yellowing | Wrong photoinitiator package, over-cure, or UV-reactive pigment interaction | Switch to aliphatic urethane acrylate; reduce dose; confirm pigment compatibility |
| Gloss inconsistency | Uneven film thickness or inconsistent lamp distance | Use wet-film gauge; maintain consistent lamp height and speed |
Common varnish problems like tacky cure and adhesion loss usually trace to incorrect UV power or incompatible substrates — the fix is almost always adjusting lamp settings or cleaning the substrate, not changing the coating entirely.
When to rework vs. strip: if the defect is surface-level (orange peel, minor gloss variation), abrade and recoat. If adhesion has failed or the film is lifting, strip back to bare wood and start the prep sequence over.
Pro Tip: Record your lamp readings, coating batch number, and test-patch results for every job. When a problem repeats, that log tells you exactly where the variable changed — and saves you from repeating the same mistake twice.
When and how should you recoat a UV-finished floor?
Recoating a UV finish is not complicated, but timing it wrong — or skipping the abrasion step — is how you end up with a floor that looks great for six months and then starts peeling.
- Check the recoat window. Most UV systems allow recoating within a specific window after cure. B-staged surfaces can often accept the next coat within minutes. Fully cured surfaces need mechanical abrasion first.
- Abrade between coats. Use a 180–220 screen or maroon abrasive pad to scuff the cured surface. You want a uniform haze across the entire area — shiny spots mean the abrasion missed, and those spots will not bond.
- Vacuum and tack clean after abrading. Any dust left behind becomes a defect in the next coat.
- Apply the next coat using the same technique as the first, maintaining thin, even film build.
- Cure and verify tack-free surface before allowing foot traffic.
Homeowner maintenance plan:
- Clean with a pH-neutral hardwood floor cleaner — avoid vinegar, bleach, or oil-based soaps, which degrade UV finishes over time
- Place felt pads under furniture legs and use entry mats to reduce abrasive grit
- Avoid wet-mopping; UV finishes are durable but prolonged water exposure at seams can cause edge swelling
- Schedule a professional screen-and-recoat every 3–5 years for high-traffic areas, or when the finish shows visible wear through to the wood
How do you clean up and dispose of UV coating materials safely?
Cleanup is where a lot of people get sloppy, and that is exactly when UV materials become a hazard. Uncured UV coating is reactive — it can cure on skin, in drains, or in rags left in sunlight.
Tool cleaning:
- Waterborne UV coatings: rinse tools with warm water immediately after use; do not let the coating dry on rollers or brushes
- 100% solids UV coatings: flush with the solvent specified in the PDS (often acetone or a proprietary cleaner); mechanical removal with a scraper works for dried material on metal tools
- Never expose uncured coating or solvent-soaked tools to ambient UV light during cleanup — partial cure on a brush or roller makes it unusable
Disposal of uncured waste:
- Collect uncured coating, contaminated rags, and empty containers in sealed, labeled containers
- Do not pour uncured UV coating down drains — it can cure in pipes or contaminate water systems
- Contaminated rags are a fire and skin-sensitization hazard; store in a sealed metal container and dispose of per your local hazardous waste regulations
- Consult the coating SDS for the specific disposal classification and any state or local requirements that apply in Colorado or your jurisdiction
Flood CWF-UV, a widely used exterior wood finish, follows similar SDS-guided disposal protocols — always treat any UV-reactive product with the same care regardless of brand or application type.
Pro Tip: Set up a dedicated “dirty zone” away from your coating area for tool cleaning. Keeping cleanup chemicals and uncured waste physically separated from your work surface prevents accidental contamination of fresh coats.
How do you run a test patch before full UV finish application?
A test patch is the single best insurance policy in UV finishing. It costs you 20 minutes and a small amount of coating. Skipping it can cost you the entire floor.
Test patch protocol:
- Select a low-visibility area (inside a closet or behind a door) that represents the actual substrate condition.
- Prep the test area exactly as you would the full floor: same sanding grit, same cleaning steps.
- Apply the intended wet-film thickness using your chosen application method.
- Cure at your planned lamp distance, speed, and dose.
- Wait the full cure time specified in the PDS before testing.
Quality checklist after the test patch:
- Tack test: press a clean fingertip firmly on the surface. A properly cured UV finish leaves no fingerprint and feels hard, not rubbery.
- Adhesion test: use a cross-hatch cutter or a firm fingernail scrape at 45°. The film should not flake or lift cleanly.
- Gloss and uniformity: check under a raking light for orange peel, fisheyes, or uneven sheen.
- Color shift: compare the cured patch to an uncured sample. Some photoinitiator packages cause slight yellowing — confirm it is within acceptable range before full application.
- Film thickness: if you have a dry-film gauge, measure and compare to the PDS target.
If the test patch fails any check, adjust lamp power, coating viscosity, or application technique before proceeding. Iterating on a 1-square-foot patch is infinitely better than reworking 500 square feet.
When should you hire a professional for UV finishing?
Some UV finishing jobs are genuinely DIY-friendly. Others are not, and knowing the difference saves you from an expensive rework. Here is an honest look at where the line falls.
Signs you should call a pro:
- The area exceeds a few hundred square feet and requires conveyor-speed curing for consistent dose
- You are working with pigmented or opaque UV systems, which need precise photoinitiator matching and often higher energy doses
- The substrate is a heat-sensitive glued veneer or thin engineered board where mercury-lamp heat could cause delamination
- You need a documented warranty on the finish system
- You do not have access to a radiometer and cannot verify lamp dose
Jrhardwoodfloorrefinishingandcleaning uses calibrated UV-LED equipment, radiometer-verified cure passes, and documented test patches on every job. The team’s instant UV-curable finishing service covers residential and commercial floors across the Denver Metro Area and surrounding Colorado communities, using eco-friendly products and a predictable scheduling process that homeowners consistently rate five stars.
For a clear breakdown of when DIY makes sense versus when professional equipment and expertise pay for themselves, the DIY vs. professional refinishing guide lays out the decision honestly.
Pro Tip: Ask any UV finishing contractor to show you their radiometer log from a recent job. A professional who measures and records lamp dose is one who can guarantee the cure — and stand behind the result.
What we have learned from real UV finishing jobs
The thing that surprises most people the first time they work with UV coatings is how unforgiving the chemistry is at the edges of the process window. Everything in the middle works beautifully. Push one variable — film thickness, lamp distance, substrate moisture — and the result degrades fast.
Resinous pine is a good example. The resin bleeds to the surface within minutes of sanding, even on a dry day. We have seen finishers degrease, wait 15 minutes, and coat — only to find fisheyes across the entire first coat. The fix is a longer wait (45–60 minutes minimum on resinous species) and a second IPA wipe just before coating. Not on any product sheet we have read, but it works every time.
Tacky finishes are almost always a lamp problem, not a coating problem. When a floor comes out soft after what looked like a correct cure pass, the first thing to check is the radiometer reading, not the coating batch.
For small rooms, sequencing your passes to minimize the time between application and cure is the single biggest quality lever. Apply one section, cure it, move to the next — rather than coating the whole room and then curing. The open-time window on most UV coatings is short, and ambient light (even indirect sunlight through a window) can start partial curing before you intend.
Ready to skip the guesswork? J.R. Hardwood handles UV finishing right
If you have read this far and realized the lamp calibration, radiometer checks, and B-staging logistics are more than you want to manage, that is a completely reasonable conclusion. UV finishing done right requires equipment that most homeowners do not own and a process that takes real practice to dial in.

Jrhardwoodfloorrefinishingandcleaning offers instant UV-curable hardwood floor finishing for residential and commercial properties across the Denver Metro Area and surrounding Colorado communities. Every job includes a documented test patch, calibrated cure verification, eco-friendly coating products, and a clear scheduling process with free over-the-phone quotes based on your floor’s condition and photos. You get a walk-on-ready floor the same day, without the fumes or the three-day wait. Call or reach out online to get your free quote and find out what your floors could look like after a professional UV treatment.
Sources
The following references were used to build this guide. For any UV finishing project, the manufacturer’s product data sheet (PDS) and safety data sheet (SDS) for your specific coating are the final authority on cure parameters, wet-film targets, PPE requirements, and disposal rules.
- UV-Curable Wood Coatings: Answering the Industry’s Questions – UV+EB Technology
- UV Curable – Minnesota Technical Assistance Program
- Waterborne UV-Curable Resins for Industrial Wood Applications – PCI