 Skip to content
TL;DR:
- Restoring engineered hardwood floors depends on knowing the wear layer thickness and selecting the appropriate method.
- Screen-and-recoat suits thin or lightly worn floors, while full sanding is reserved for deep damage and color changes.
Restoring engineered hardwood floors is achievable for most homeowners, but success depends entirely on two things: knowing your floor’s wear layer thickness and choosing the right restoration method. Engineered hardwood is a layered product, with a real wood veneer bonded over a plywood core. That veneer is what gets refinished, and it has limits. The two main restoration methods are screen-and-recoat and full sanding. Each one suits different damage levels and veneer depths. Get the match right, and your floors can look brand new. Get it wrong, and you risk sanding through to the core.
How to assess your engineered hardwood floor for restoration
The single most important number in any restoration project is your wear layer thickness. Most engineered floors carry a veneer between 1mm and 6mm thick. Floors thinner than 2mm are not candidates for full sanding. That threshold matters because each professional sanding pass removes roughly 0.75–1mm of material. Sand once on a thin floor, and you may be dangerously close to the plywood core.
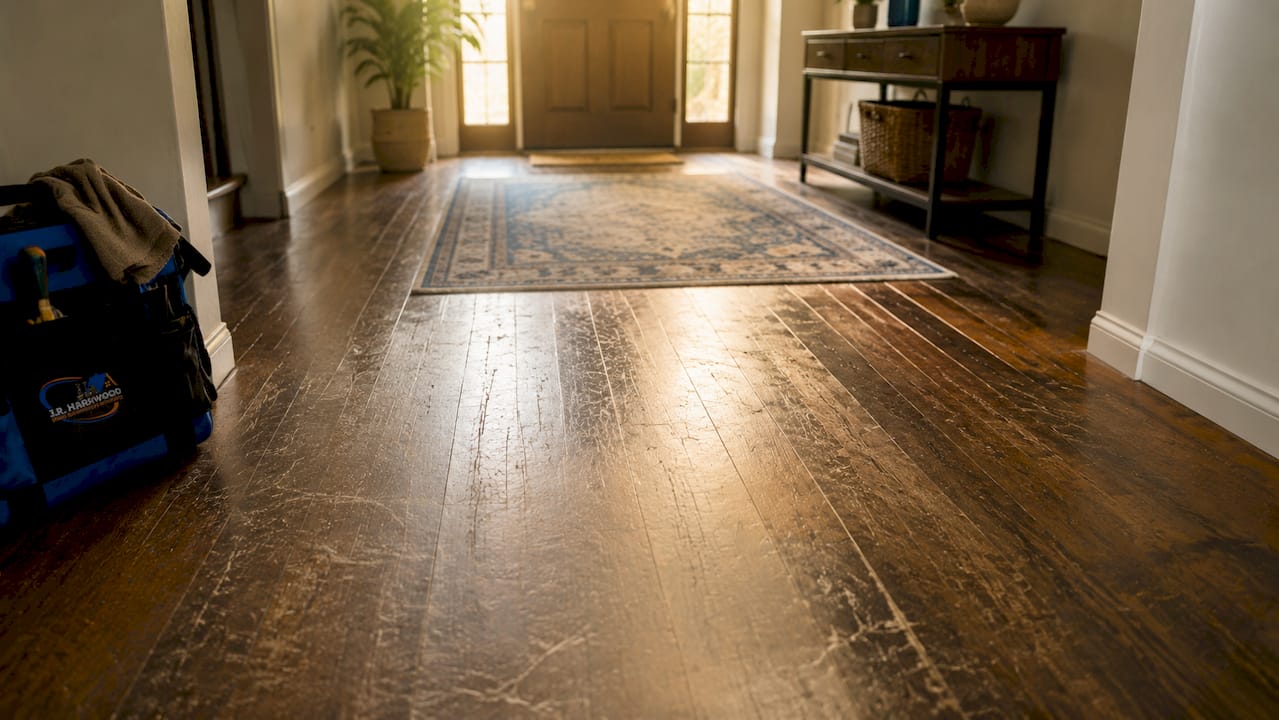
Start your assessment by checking the manufacturer’s spec sheet or pulling up a floor vent to measure the veneer edge directly. A sharp eye and a good light source reveal a lot. Surface scratches, light scuffs, and dull finish are cosmetic issues that screen-and-recoat handles well. Deep gouges, water stains that have darkened the wood fibers, or boards that flex underfoot point to more serious problems.
Delamination is a disqualifier. If boards are separating from the core, bubbling, or feel spongy, refinishing will not fix the structural issue. Those boards need replacement before any surface work begins. Similarly, moisture testing before restoration prevents finish failures after the job is done. Unexpected reactions between moisture in the wood and a new coating cause peeling and delamination.
Finish chemistry is the other hidden variable. Many prefinished engineered floors use aluminum oxide finishes, which are extremely hard. Applying a new coat directly over aluminum oxide without proper bonding agents causes adhesion failure. A simple water-bead test tells you whether the existing finish is still intact. If water beads up, the finish is sealed. If it soaks in, the finish is worn through.
- Check veneer thickness at a floor vent or doorway threshold before anything else.
- Look for structural issues like soft spots, bubbling, or board separation. These need repair, not refinishing.
- Test finish adhesion with a water-bead test to understand what you are working with.
- Assess damage depth. Light scratches and dullness are surface issues. Dark water stains or deep gouges may require full sanding.
- Call a professional if you are unsure about veneer depth or finish chemistry. A wrong call costs more than the consultation.
Pro Tip: Bring a bright flashlight and hold it at a low angle across the floor. This raking light technique reveals scratches, finish wear, and surface irregularities that are invisible under normal overhead lighting.
Screen-and-recoat vs. full sanding: which method fits your floor?
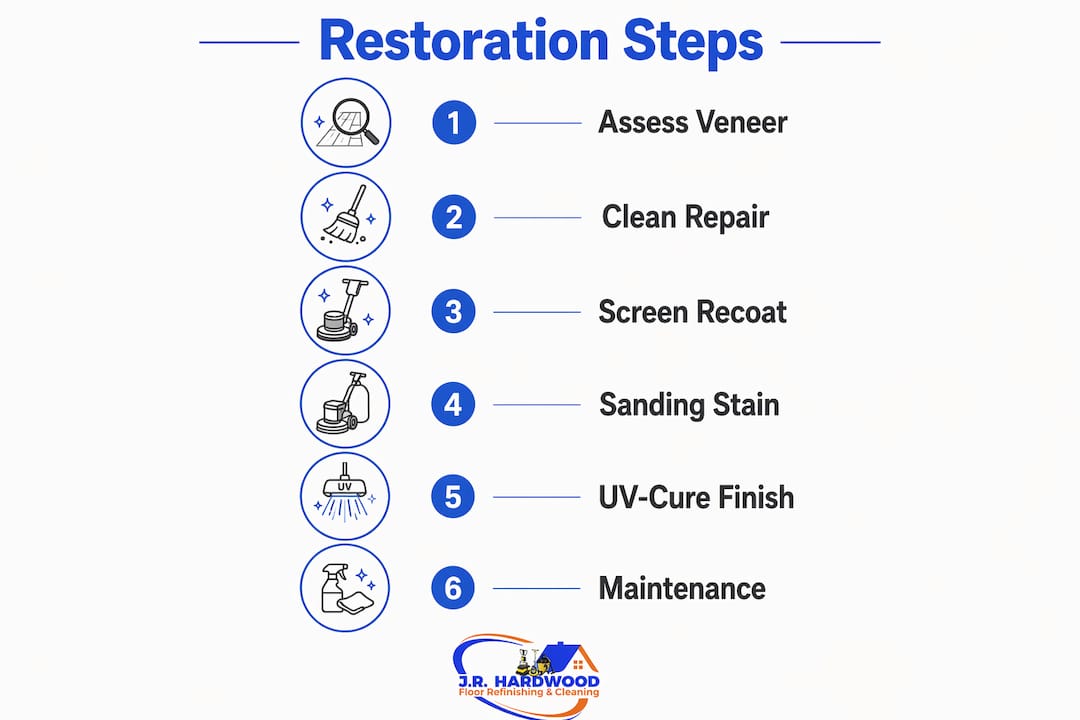
Choosing the right restoration method is like choosing between a spa day and surgery. Screen-and-recoat is the gentle refresh. Full sanding is the complete reset. Both work, but only when applied to the right floor.
Screen-and-recoat lightly abrades the existing polyurethane finish with a mesh screen, then bonds a fresh coat of finish on top. No wood is removed. This makes it the go-to method for engineered floors with thin veneers, cosmetic wear, or floors that simply look dull and lifeless. The process takes about one day and costs significantly less than full sanding.
Full sanding removes the old finish and a layer of wood entirely. It allows you to change the stain color, remove deep scratches, and address sun fading that has penetrated the wood fibers. The tradeoff is time, cost, and wear layer consumption. Professional refinishing costs $3–$8 per square foot, which is roughly 50–60% cheaper than full floor replacement. That savings is real, but full sanding on a thin veneer floor can eliminate your ability to refinish again in the future.
| Factor | Screen-and-recoat | Full sanding |
|---|---|---|
| Wear layer removed | None | 0.75–1mm per session |
| Best for | Light wear, dull finish, thin veneers | Deep scratches, stains, color change |
| Typical timeline | 1 day | 3–5 days |
| Color change possible | No | Yes |
| Cost range | Lower | $3–$8 per sq ft |
| Veneer minimum | Any thickness | 2mm or more |
Pro Tip: If your floor looks tired but has no deep damage, always try screen-and-recoat first. Restraint in restoration extends engineered floor life far more than aggressive sanding does. Save your sanding passes for when you truly need them.
Step-by-step guide to restoring engineered hardwood floors
Think of this process as giving your floors a full glow-up, one careful step at a time. Rushing any stage creates problems that show up in the final finish.
Prepare the space
- Clear all furniture from the room completely. Even small items left behind create obstacles and safety risks.
- Seal HVAC vents with plastic sheeting and tape. Dust from sanding travels through ductwork and settles everywhere.
- Put on safety gear. A dust mask rated N95 or better, safety glasses, and ear protection are non-negotiable for sanding work.
- Check for protruding nails or staples. Any nail head above the surface will tear sanding belts and create gouges.
Clean and repair before sanding
Sweep and vacuum the floor thoroughly. Use a hardwood-safe cleaner to remove wax, grease, or residue. If you have aluminum oxide finishes, apply a bonding agent or mechanical keying process before adding any new finish. Skipping this step is the most common cause of peeling finish on prefinished engineered floors.
Fill small gouges with a color-matched wood filler and let it cure fully. Do not sand over wet filler. Patience here saves you from redoing the work.
Sand with a proper grit progression
For full sanding, start with a coarser grit (36 or 40) to remove the old finish, then move through 60-grit and 80-grit passes to smooth the surface. Edge sanders handle the perimeter, but they leave a different scratch pattern than the drum sander in the center. Use 120-grit transition passes where the drum and edge sanding zones meet. This prevents the “halo effect,” which is a visible ring of uneven finish absorption that shows up after staining.
- Always sand with the grain, never across it.
- Overlap each pass by about one-third of the machine width for even coverage.
- Vacuum between every grit change to remove dust that would scratch the next pass.
Apply stain and finish
If you are changing color, apply stain evenly with a lambswool applicator or brush, working with the grain. Let it dry fully before finishing. For the protective topcoat, water-based polyurethane dries faster and has lower odor. Oil-based polyurethane is more durable and amber in tone.
Apply at least two coats of finish, lightly buffing between coats with a fine abrasive pad. Full-service refinishing takes 3–5 days when you account for drying time between coats. Screen-and-recoat wraps up in a single day. Plan your schedule around the finish, not the other way around.
Pro Tip: Keep the room temperature between 65°F and 75°F during finish application and drying. Extreme cold slows curing. Extreme heat causes bubbling. Colorado’s dry climate can also speed evaporation, so work in manageable sections.
Maintaining restored floors for long-lasting beauty
A freshly restored floor is like a new paint job on a car. The work you put in afterward determines how long it stays looking great. Engineered hardwood floor maintenance is straightforward when you build a few habits.
Daily and weekly care keeps grit from acting like sandpaper underfoot. Sweep or vacuum with a soft-bristle attachment regularly. Avoid wet mopping. Engineered wood and standing water are a bad combination. Use a barely damp microfiber mop with a pH-neutral hardwood cleaner for deeper cleaning.
UV fading is a slow, invisible threat. Protective window films block up to 99% of UV rays and are one of the most effective tools for restoring sun damaged hardwood floors and preventing future fading. Rotate area rugs every six months so sun exposure stays even across the floor. Uneven fading is much harder to fix than uniform aging.
- Use felt pads under all furniture legs. Chairs and tables without pads scratch finish within weeks.
- Place mats at entryways to catch grit and moisture before it reaches the floor.
- Schedule a clean-and-buff every 12–18 months to refresh the finish before it wears through completely.
- Watch for early warning signs: dull patches that do not respond to cleaning, fine scratches that catch light, or finish that feels rough underfoot. These signal it is time for a recoat.
Pro Tip: Think of your finish as sunscreen for your floors. Reapplying it before it wears out completely is far cheaper than sanding down to bare wood again.
Key Takeaways
Restoring engineered hardwood floors requires matching the restoration method to your veneer thickness, with screen-and-recoat for thin or lightly worn floors and full sanding reserved for deep damage and color changes.
| Point | Details |
|---|---|
| Veneer thickness is the deciding factor | Floors with less than 2mm of wear layer should use screen-and-recoat, not full sanding. |
| Screen-and-recoat saves wear layer | This method removes no wood and extends the total lifespan of your engineered floor. |
| Moisture and finish testing prevent failures | Test for moisture and identify finish chemistry before applying any new coating. |
| UV protection extends restoration results | Window films blocking up to 99% of UV rays prevent fading and protect your investment. |
| Regular maintenance delays the next restoration | Clean-and-buff cycles every 12–18 months keep finish intact and push back full refinishing. |
What I have learned after years on these floors
After working on hundreds of engineered hardwood floors across Denver, Parker, and Castle Rock, the lesson that sticks with me most is this: restraint wins. Homeowners often come to us convinced they need a full sand because their floors look bad. Half the time, a screen-and-recoat and a good cleaning make those floors look like they were just installed.
The floors that end up in trouble are the ones that got over-sanded by someone who did not measure the veneer first. Once you sand through to the plywood core, the floor is done. There is no coming back from that. I have seen beautiful floors turned into replacement jobs because someone skipped a five-minute thickness check.
The other thing I tell every homeowner: do not ignore the finish chemistry conversation. If your floor has an aluminum oxide factory finish, that is a hard coating designed to last decades. Putting a new finish on top without mechanical keying or a bonding agent is like painting over a greasy surface. It looks fine for a week, then it peels. A professional who skips that step is not saving you time. They are setting you up for a callback.
My honest advice is to get a professional assessment before committing to any method. The hardwood floor restoration guide we put together walks through exactly what that assessment covers. A good specialist will measure your veneer, test your finish, check moisture levels, and give you a clear recommendation. That conversation costs nothing and saves a lot.
— J.R.
Professional floor restoration services in Denver and beyond
Jrhardwoodfloorrefinishingandcleaning works with homeowners and property managers across the Denver Metro Area, from Parker and Castle Rock to Boulder and Colorado Springs. We assess every floor before recommending a method, and we use eco-friendly products and premium finishes to protect your investment.
Whether your floors need a light screen-and-recoat or a full sanding and restain, our team handles the assessment, the prep, and the execution. We offer free over-the-phone quotes based on your description and photos. Learn more about your options on our DIY vs. professional refinishing page, or read through our complete refinishing guide to go deeper on the process. Call us, send photos, and we will tell you exactly what your floor needs.
FAQ
Can engineered hardwood floors be fully refinished?
Yes, but only if the wear layer is at least 2mm thick. Thinner veneers require screen-and-recoat instead of full sanding to avoid damaging the plywood core.
How long does engineered hardwood floor restoration take?
Screen-and-recoat takes about one day. Full sanding and refinishing typically takes 3–5 days, including drying time between finish coats.
How do I fix sun-faded engineered hardwood floors?
Surface fading responds well to screen-and-recoat with a fresh finish. Deep UV damage that has penetrated the wood fibers requires full sanding to restore even color.
How often should engineered hardwood floors be recoated?
A clean-and-buff or recoat every 12–18 months keeps the finish protective and delays the need for full sanding. High-traffic areas may need attention sooner.
What causes finish to peel after refinishing engineered hardwood?
Adhesion failure is the most common cause. It happens when new finish is applied over wax, aluminum oxide coatings, or a surface that was not properly cleaned and mechanically keyed before the new coat was added.