 Skip to content
TL;DR:
- Proper subfloor prep and thorough acclimation are essential for a successful floor installation. Planning carefully, staggering joints, and leaving expansion gaps prevent future problems and ensure a professional finish. Skipping these steps often leads to issues like buckling, gaps, or squeaks that require costly repairs later.
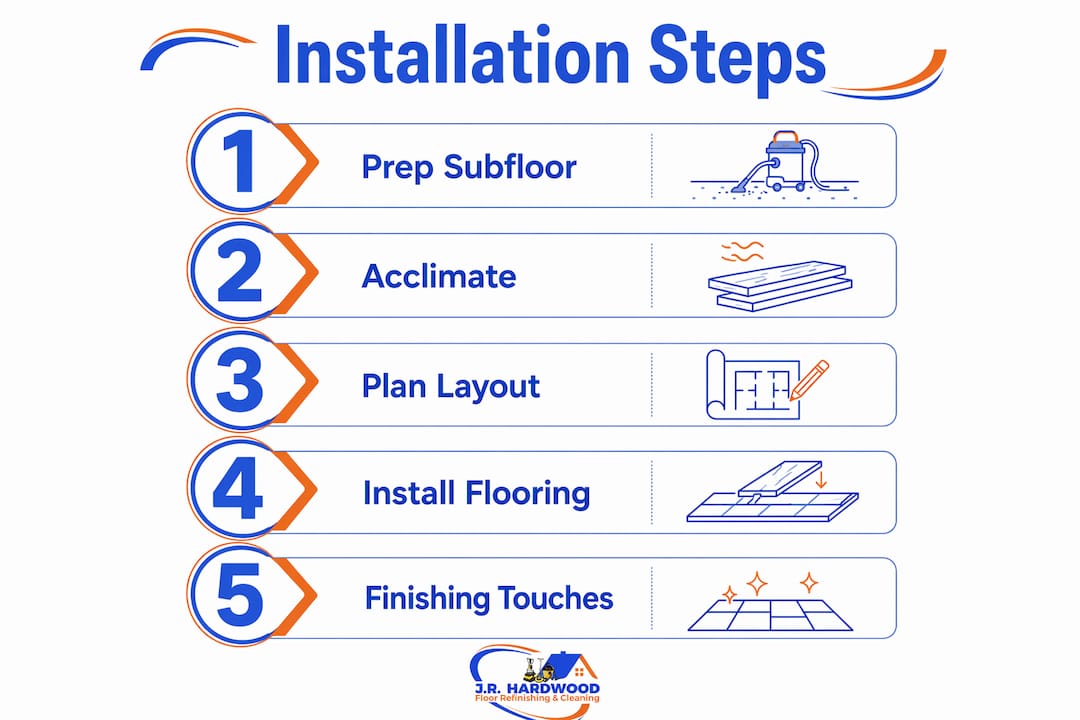
Floor installation is a sequential process that moves through five distinct phases: subfloor preparation, material acclimation, layout planning, plank installation, and finishing touches. Each phase builds on the one before it, and skipping any step creates problems that compound over time. Whether you are tackling hardwood, laminate, or luxury vinyl plank (LVP), the core floor installation process follows the same logical order. This guide walks you through every stage with clarity, practical tips, and the current 2026 industry standards you need to get it right the first time.
How do you prepare for floor installation?
Preparation is the foundation of a successful install. Think of it like prepping a wall before painting. If the surface underneath is rough, uneven, or dirty, everything you put on top will show it.

Start by inspecting your subfloor carefully. Look for squeaks, soft spots, protruding nails, and uneven areas. Grit, debris, or low spots in the subfloor cause permanent issues like squeaks, rocking, or visible telegraphing through the finished floor. That means problems you ignore today become problems you live with for years.
If you are working over concrete, pay close attention to leveling compounds. Leveling compound cure time is a full 7 days before you lay any flooring. Installing too early voids manufacturer warranties and causes floor failures. Patience here pays off.
Once the subfloor is clean and level, remove baseboards and any old flooring. Then comes one of the most overlooked steps in the entire floor installation process: acclimation.
- Acclimate your flooring materials for a minimum of 48–72 hours before installation.
- Keep the room between 64°F and 86°F during acclimation.
- Maintain humidity between 25% and 75%.
- In extreme climates, extend acclimation to 72 hours, especially starting in Q2 2026.
- Stack planks loosely so air circulates around them.
Acclimation lets the flooring adjust to your home’s temperature and humidity. Without it, planks expand or contract after installation, causing gaps, buckling, or warping.
Pro Tip: Lay a few planks flat on the subfloor during acclimation and check them with a level. If they cup or bow, the room conditions need adjustment before you proceed.
What are the best practices for planning and laying out your new floor?
Layout planning is where a good floor becomes a great floor. Rushing this step is the number one reason DIY floors end up looking crooked or awkward, even when the installation itself is technically correct.
Start with a dry layout. Place a few rows of planks without locking them together to see how they fall across the room. Snap a chalk line parallel to your longest wall to give yourself a straight reference line. Check the room for square by measuring diagonally from corner to corner. If both diagonal measurements match, the room is square. If not, you need to adjust your starting row.
Choosing the right direction
Run planks parallel to the longest wall or toward the main light source. This makes the room feel larger and hides seams more effectively. In narrow hallways, always run planks lengthwise.
Staggering joints and planning gaps
Stagger end joints at least 6–12 inches between rows for structural strength and a natural appearance. This is especially critical for click-lock flooring. A floor with poorly staggered joints looks patchy and weakens over time.
Expansion gaps are non-negotiable. A perimeter expansion gap of 3/8 to 1/2 inch is required for all floating floors to handle seasonal movement. Use plastic spacers around the entire perimeter to hold this gap consistently while you work.
For long continuous runs, T-molding transitions are required for runs over 40 feet. This prevents the floor from buckling as it expands.
| Layout element | Guideline |
|---|---|
| Expansion gap | 3/8–1/2 inch around the entire perimeter |
| Joint stagger | Minimum 6–12 inches between row end joints |
| T-molding threshold | Required for continuous runs over 40 feet |
| Starting row alignment | Snap a chalk line; check room for square |
| Plank direction | Parallel to longest wall or main light source |
Pro Tip: Cut the last plank in your first row and use that offcut to start the second row. This automatically creates the right stagger and wastes less material.
What are the step-by-step techniques to install various flooring types?
The step-by-step floor installation process varies slightly depending on your flooring type. Here is how to handle the most common options.
Floating floors (laminate and LVP)
- Roll out underlayment progressively. Roll underlayment only as you install planks, not all at once. Laying it all out ahead of time risks displacement or damage before the flooring goes down.
- Start at the straightest wall. Place your first row with the tongue side facing the wall. Insert spacers against the wall.
- Click and lock each plank. Angle the plank at roughly 45 degrees, press it into the groove of the previous row, and push down until it clicks. Use a tapping block and rubber mallet to close any gaps. Never hit planks directly with a hammer.
- Cut end pieces to fit. Measure twice, cut once. Use a miter saw or a scoring knife for LVP. Score the plank firmly, then snap it cleanly along the line.
- Stagger each new row. Use the offcut from the previous row to start the next one, keeping joints at least 6–12 inches apart.
- Work toward the exit. Plan your rows so you finish at the door and do not trap yourself in a corner.
Vinyl plank flooring
Vinyl plank (LVP) is one of the most forgiving options for DIY homeowners. DIY vinyl plank materials cost about $3 per square foot, making it a budget-friendly choice. LVP does not require underlayment in most cases since it has a built-in backing layer. Check your specific product before adding extra padding, as too much cushion causes click joints to fail.
For a deeper look at LVP installation specifics, including how to handle transitions and doorways in Denver-area homes, the process follows the same floating floor sequence above.
Hardwood flooring
Solid hardwood installation is more demanding. It typically requires nail-down or glue-down methods rather than floating. Engineered hardwood costs about $5 per square foot for materials, while solid hardwood runs around $7 per square foot. If you are new to flooring, engineered hardwood is a more forgiving starting point. For solid hardwood, we recommend reading through what to know before installing hardwood before picking up a nail gun.
Pro Tip: After each row, press down on the planks with your foot. Any rocking means the subfloor has a low spot. Address it immediately rather than covering it up.
Troubleshooting common issues
- Plank rocking: Grind down high spots or shim low spots in the subfloor before continuing.
- Gaps between planks: Use a pull bar to close gaps at row ends. Gaps mid-row mean the click joint did not fully engage.
- Planks not lying flat: Check for debris under the underlayment or a high spot in the subfloor.
How to complete the floor with finishing touches
The finishing phase is what separates a floor that looks good from one that looks professional. These steps protect your work and give the room a polished, complete appearance.
- Install baseboards and quarter-round molding. Always nail trim into wall studs, never into the floor itself. Nailing into the floor pins it down and prevents expansion, which causes buckling. The gap you left at the perimeter must stay free.
- Add transition strips. Install T-molding or reducer strips at doorways and wherever your new floor meets a different flooring type. These protect plank edges and create a clean visual break.
- Clean up thoroughly. Sweep or vacuum the entire floor to remove dust and debris. Wipe down with a damp mop appropriate for your floor type.
- Protect the floor before moving furniture back. Place felt pads under all furniture legs. Use a moving dolly for heavy pieces rather than dragging them.
- Wait before heavy use. Give adhesives and any finishing products their full cure time before placing rugs or heavy furniture.
The barefoot test is the best final check. Walk the entire floor in bare feet. Any plank that rocks or feels uneven needs attention right away. Catching it now costs minutes. Ignoring it costs a repair bill.
Key takeaways
A successful floor installation depends on thorough subfloor prep, proper acclimation, careful layout planning, and correct finishing techniques applied in the right order.
| Point | Details |
|---|---|
| Acclimate before installing | Let materials sit 48–72 hours at 64–86°F and 25–75% humidity before laying any planks. |
| Prep the subfloor first | Fix all squeaks, low spots, and debris before installation to prevent permanent defects. |
| Plan your layout carefully | Stagger joints 6–12 inches and leave a 3/8–1/2 inch expansion gap at every wall. |
| Roll underlayment progressively | Lay underlayment only as you install to prevent displacement or damage. |
| Nail trim into walls, not floors | Fastening baseboards to the floor blocks expansion and causes buckling over time. |
What I have learned from watching homeowners install floors
After years of working on floors across the Denver Metro Area, one pattern stands out clearly. Homeowners who struggle with their installs almost always cut corners on two things: subfloor prep and acclimation. They are eager to see the finished result, and those two steps feel like waiting around doing nothing. They are not.
A floor that rocks, squeaks, or gaps within the first year almost always traces back to a subfloor that was not level or materials that were not acclimated. The fix is never cheap. I have seen beautiful new LVP buckle in a single Colorado winter because the installer skipped the expansion gap. Seasonal humidity swings here are real, and your floor needs room to breathe.
Layout planning is the other place where patience pays off. The first row sets the angle for every row that follows. If it is even slightly off, the error multiplies across the room. Spending an extra 30 minutes snapping chalk lines and checking for square saves hours of frustration later.
My honest advice: treat the prep and planning phases as the actual installation. The plank-laying part is almost mechanical once the groundwork is solid. Slow down at the start, and the rest goes smoothly.
— J.R.
Thinking about professional help for your floors?
Sometimes a project reveals more than you bargained for: a subfloor that needs serious repair, hardwood that needs refinishing before new flooring goes down, or a space where getting it wrong is simply not an option.
Jrhardwoodfloorrefinishingandcleaning serves homeowners across the Denver Metro Area, Parker, Castle Rock, Boulder, and Colorado Springs with full floor installation, sanding, refinishing, and restoration. We use eco-friendly products and premium finishes to protect your floors and make them last. Whether you need a complete professional installation or want to weigh your options between DIY and professional refinishing, we offer free over-the-phone quotes based on your description and photos. Reach out and we will help you figure out the right path for your floor.
FAQ
How long does flooring need to acclimate before installation?
Flooring materials need a minimum of 48–72 hours to acclimate, kept between 64°F and 86°F with humidity between 25% and 75%. Extreme climates may require the full 72-hour window.
What size expansion gap do floating floors need?
A perimeter expansion gap of 3/8 to 1/2 inch is required for all floating floors to allow for seasonal movement. Runs longer than 40 feet also need a T-molding transition.
Can I install flooring directly over concrete?
Yes, but only after the concrete is clean, level, and fully cured. If you apply a leveling compound, wait the full 7-day cure time before laying any flooring to protect your warranty.
Why should I stagger the joints in my floor?
Staggering end joints at least 6–12 inches between rows adds structural strength and creates a natural, visually appealing pattern. Poorly staggered joints weaken the floor and look patchy.
How do I know if my floor installation is even after I finish?
Walk the entire floor in bare feet. Any plank that rocks or feels uneven needs to be addressed immediately by grinding down high spots or shimming low spots in the subfloor beneath it.